Waytec's 95 XJ

Waytec

Adventurer
I welded them directly to the sub frame and the pinch seam. Very strong, have done lots of trail testing on them. They are custom made from a fab shop in Edmonton.
Caution when you mount your tanks. Make sure that they are far enough back that you can flip the seat back up. I have to move mine towards the back more, my eye was out by about an inch when mounting.
 

Waytec

Adventurer
It has been some time since I have updated my build.
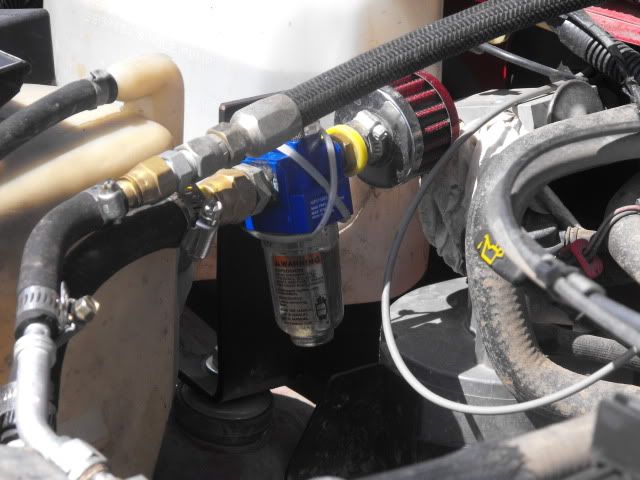
I finished the bracket that holds the oilier of the OBA. After trying different clamps I found the best way to hold it on was Zip Ties.
swingtankskid006.jpg

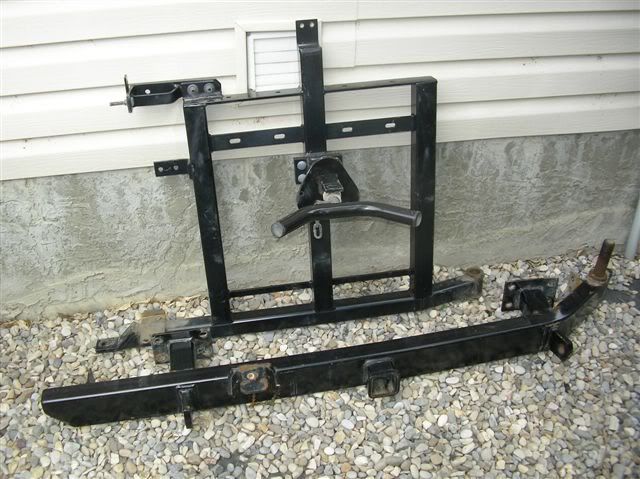
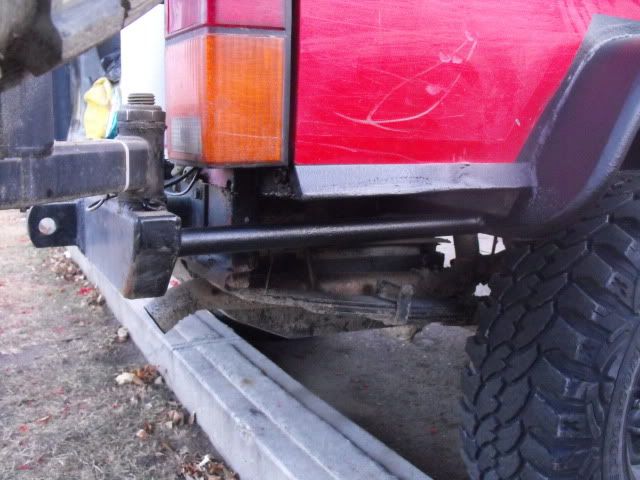
I picked up a damaged Garvin Industries swing out.
Swingbefor.jpg

After some help from a friend and $30 of end cut material you have to look hard to find the new metal. I did not like the way it mounted only using four bolts per side to the sheet metal. I modified the mounting system so a piece of 1 1/5 inch plat goes back into the sub-frame and bolts to it, the same way a trailer hitch dose. Now I can pull on it as much as I want and it will not move.
swingtankskid015-1.jpg

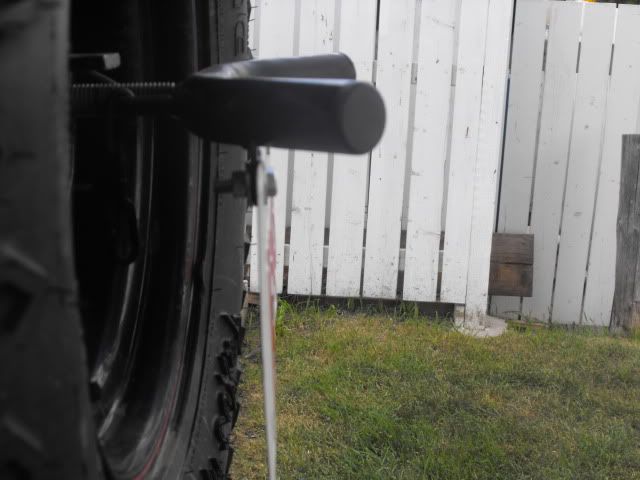
Due to the accident that damaged the bumper the bolt and handle that held the swing out closed was broken off and not usable. We used some artistic flare and what we could find around the shop to make a new handle.
swingtankskid018.jpg

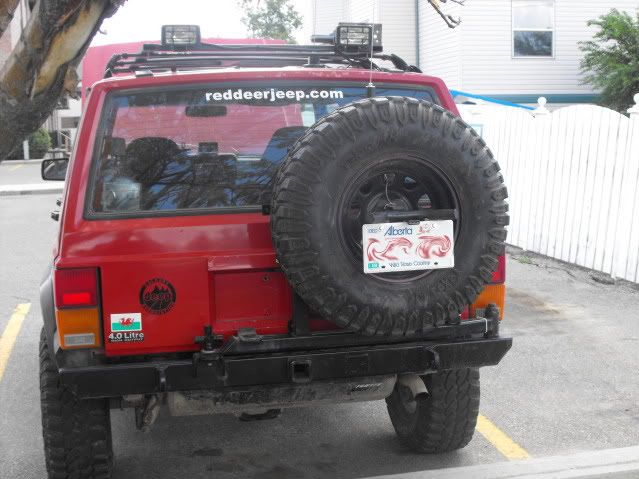
The tire blocked the stock plat location so I mounted on the handle that secures the tier.
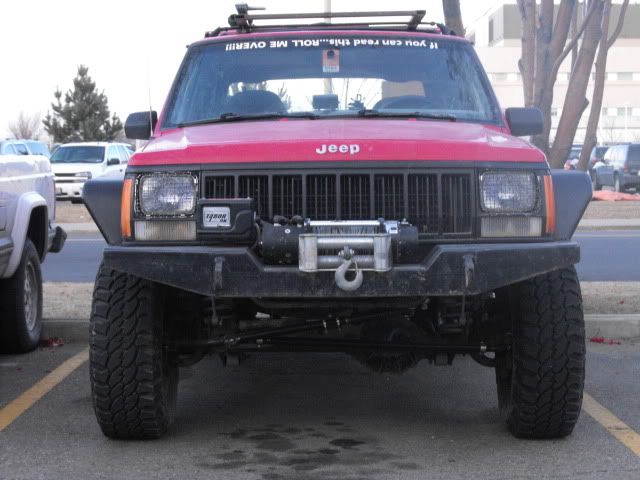
After being informed by the RCMP one night on the way home from work that a plat light is required I mounted a LightPlate LED light.
swingtankskid016.jpg

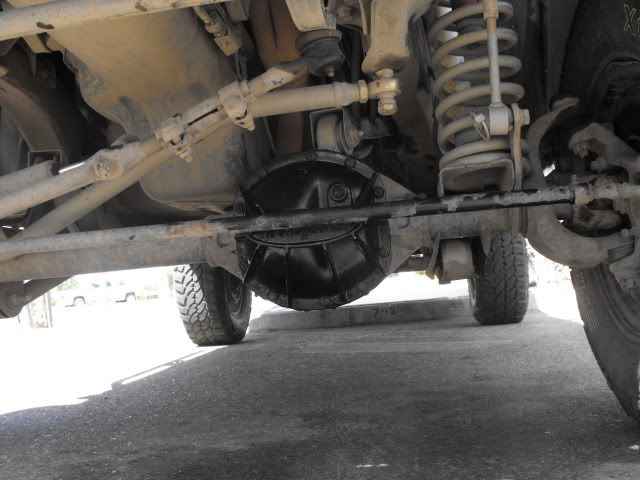
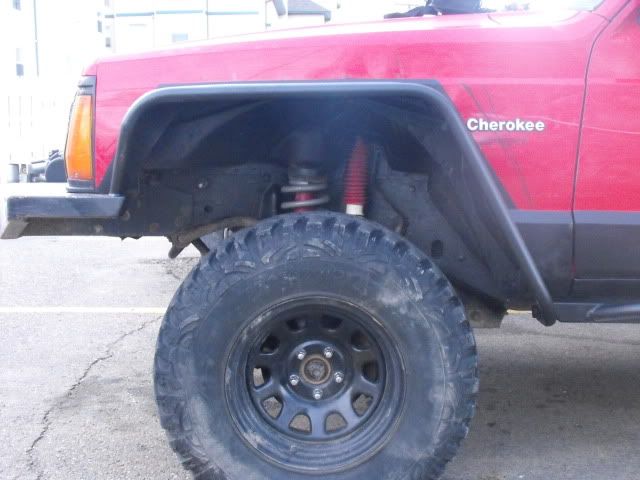
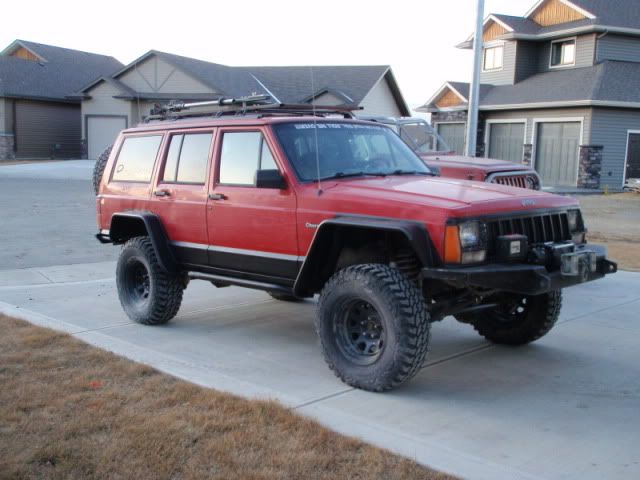
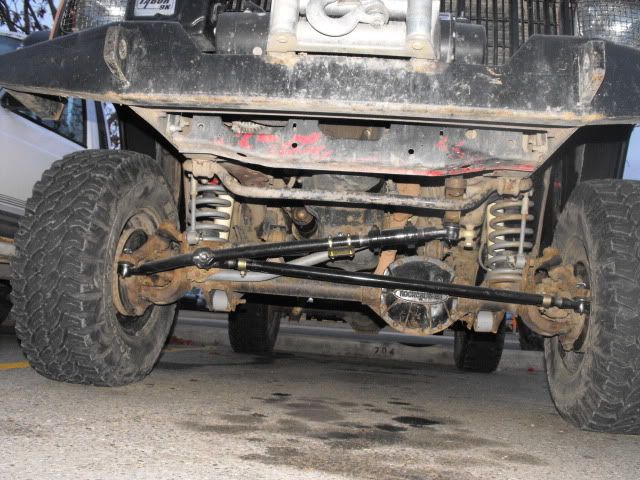
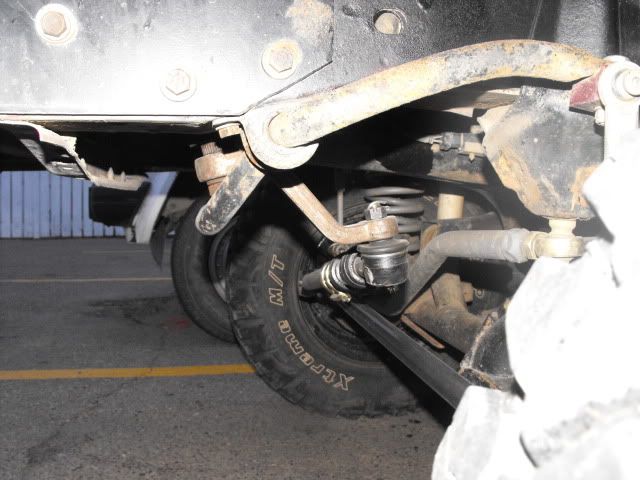
I tend to drag my diff in the mud and scag and I am surprised that I have not found a rock yet. So being proactive a Rock Crusher diff cove in sported up front now. Over winter I will be building a new rear axel and it will get armored out as well.
swingtankskid002.jpg

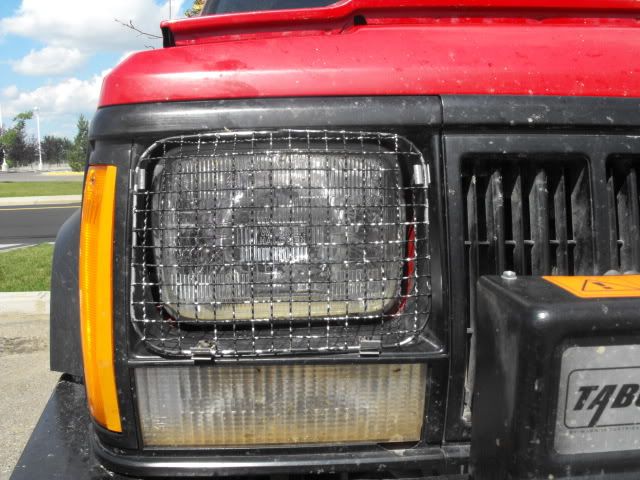
Last fall a stone was thrown from a trucks rear tire completely smashing my head light. The rock was still in the bezel when I stopped. So I picked up a set of YJ light covers and modified the mounting to work for me. I kind of has the Defender look to it now.
swingtankskid004.jpg

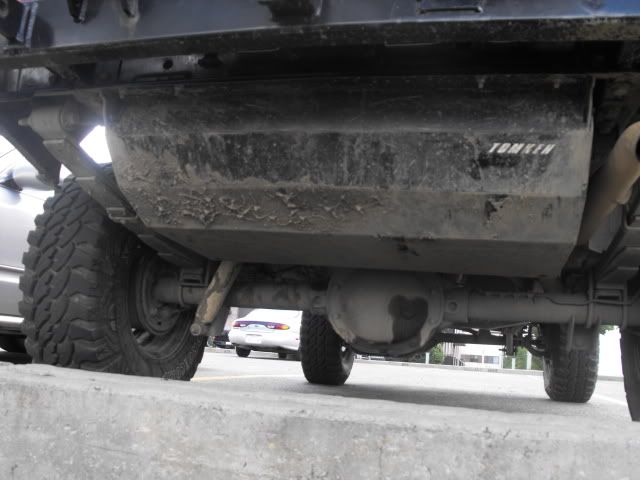
And finally a fuel tank skid to protect agents trail rash. TOMKEN it one of the only companies that is still making parts for the XJs that I can easily get shipped to Canada.
This skid has now been well field tested by me.
swingtankskid020.jpg
 

Waytec

Adventurer
I have planning the next step of the build for some time now. I did lots of research because not to many XJs have flares made to take a hit. Most people use plastic and the first tree you come to rips them off. So I decided to make mine tree and rock proof. In the end you cannot really call them flares but more lower armour.
Front Before
PB130003.jpg

Front After
Dec012009082.jpg

Rear Before
PB130001.jpg

Rear After
Dec012009081.jpg

Because the XJs are long. I tend to hit the rear quarter panel when departing rock ledges. So I cut the panel and folded it up to increase the departure angel a little. I tied the fender and rear bumper together for added strength and if I am going drop down onto something slider will take the brunt of the hit and not the sheet metal.
Dec012009086.jpg

The up grad completely changed the look of the rig. I will be able to run 33's with no issues at all, 35s with no up travel.
PB230001.jpg

Dec012009090.jpg

33's on a XJ with a RE3.5" lift. I don't think you will find that one on a chart anywhere. :smiley_drive:

During the summer I bent a few of my steering links. After having to bend them back to get off the trail and swapping used set I had on I decided to upgrade to a set that I wouldn't bend to easily.
Currie Heavy Duty Tie Rod
Dec012009091.jpg

I also put on a drop pitman arm that I have had for some time but never put on.
Dec012009094.jpg

Next is gears, locker, and bigger rubber.
 

crosbike

New member
Your jeep looks great. Not too sure about those flares tho. Maybe if you throw some 35s under that thing itll fill out better.
 
I like the flares, definitely won't be ripping them off. I second cros though, you need some more tire for sure. It looks like 35s should clear pretty nicely.
 

Waytec

Adventurer
As of right now I will be going with 33`s, I am also buying them off a friend so it is a deal of a life time.

The places I go all around Alberta and into BC having a flex suspension is very nice.
I know 35s will fit but I don't know how much up travel I will have. Also a XJ short arm suspension and 35s is not the nicest ride. Long arms are on the list for next winter, so once they are on I will be looking at 35`s.

I still can't get over:Wow1: how much room there is in the fenders.

RE 3.5ince lift + (sawz all and welder) = 35`s can fit :wings:
 

Waytec

Adventurer
So I have been very busy and have not been up dating this thread. I am cut an pasting from another sites build thread. I am going to cover a lot of ground in a hurry.

I won the lights last year at the Calgary Jeep Associations show and shin, thank you Modern Motors for donating them.
To control the lights I needed a switch. I did not like the IPF one. So I went to Bear TraX out of Edmonton and we found something that I liked. Instead of ordering 1 I got 12. Switches for all the lights and ones that are to come, the winch, compressor, and lockers and some extras.
I was able to get the compressor switch in, but I needed to make mounting plats for the rest. I did get some material and my buddy Trevor started to build them but we ran out of time and making the square holes is a pain in the arss. So a talked to friends and am now going to have them laser cut.
007.jpg

I got all the holes cut into the dash and consol panels and most of the wiring pulled but now I have to wait for the panels and I am back in business.
the location for the lockers
010.jpg

location of all the light switches

009.jpg

location of the winch controls
008.jpg

I still need to figure out the winch cab controls. I found some diagrams on the net but when we pined them out the winch did nothing. I has to be something simple that we are missing because it is only to weirs that control the winch. The Warn controller has 5 wirers and the switch I have has 3 power in and two power outs.
 

Waytec

Adventurer
I picked up my 33s yesterday in Calgary and today went out and put them on Grumpy.
013.jpg


Also see what showed up for me.

014.jpg
 

Waytec

Adventurer
I got the laser cut switch panels this week, mounted the switches and pre wired as much as possible.
Now I am hoping for good weather this weekend so I can get them mounted.
DSCF1003.jpg

DSCF1001.jpg

DSCF1006.jpg
 

Waytec

Adventurer
So after all day Saturday and most of Sunday the switches are in and all working. This was a project that started then snow balled into fixing other issues at the same time with 4 trips to Canadian Tire .
012.jpg

013-1.jpg

014-1.jpg
 

Waytec

Adventurer
I got the XJ back yesterday from the shop with the gears and locker installed.
Today I fixed all the air leaks and started to install the Auto Meter air gage for the front. I will finish it tomorrow an get some pics of everything.
I still have to hard weir the winch controller. Pending on time that should get tackled tomorrow.

I am also looking to get a roof rake for the top that will take some hits form the rocky mountains.
I am thinking a Kargo Master or Graven industries. I would like to call Baja but I am thinking the shipping will kill me.
 

Black Dog

Makin' Beer.
Thats one thing I miss about all my old '95 is the flat spaces to mount stuff, there's not as many of them in the later model XJ's. And I miss my old rear windshield washer, seeing the switch for yours brings back memories. The squirter was messed up and instead of spraying up at the window it shot straight out backwards. So whenever anyone would stop real close behind me at a red light I'd give 'em a squirt. Mostly people laughed at it, lots of people just stared at it like "what the.....". Nobody ever got real mad though, thankfully.
 

Forum statistics

Threads
189,798
Messages
2,920,961
Members
232,931
Latest member
Northandfree

Members online

Top