You are using an out of date browser. It may not display this or other websites correctly.
You should upgrade or use an alternative browser.
You should upgrade or use an alternative browser.
Morticon's '00 XJ Limited "SuperStock" Build
- Thread starter Morticon
- Start date
So 215/85r16 is about a 30.5 inch tire. I have seen guys run 30's stock so I don't see why you wouldn't be able to run those with 2" lift. Especially because those tires are so skinny. Did you see if a tire shop would test fit them for you?
Thanks for the reply! Has pushed me over the edge. As soon as I need new tires I will be getting 215/85r16s Duratracs, and after that wil decide wether I need to push the rims out a bit with spacers. I'd prefer not too but if it they are way to I. From the fender, it will bug me too much.
I haven't thought of that, but I don't think a lot of stores would have 215/85/r16 in stock. Seems like a fairly rare tire size
reece146
Automotive Artist
Re: the stop light issue.
I'm guessing you are long in the body so that your head is closer to the roof than others. The other possibility is that your seat sits high in combination with a long body. The leather electric seats are taller from what I recall. I sold my XJ with power seats a number of years ago so I may be mis-remembering.
FWIW, I'm 6' but all legs and I don't have any problems seeing the lights. In my old S2000 I had the same problem though as I just barely fit in that car with the seats pushed back as far as they would go. I didn't have the problem with the power seated XJ I had though.
Do you know anyone local with cloth manual seats that you could drive to a stop light to see if there is a difference?
Roof rack.
So late last night I was bored and perusing flyers when I noticed Canadian tire had a sale on their cargo baskets for 25% off. Which brought it down to 175. This intrigued me but was still rather high. Now I know Princess Auto usually has similar sales in stuff so I quickly went to their web page and searched. Low and behold they had theirs on, for 50% off! It's all aluminum, has a 250lb load rating. Aaaaand it only weighs 21lbs and change.
So I headed in today, and there it was front and centre for 69.99! The guy told me that some stores will have it for less if they think they can still make money on it or something. Sweet deal! It was dark by the time I installed it please accept my apology for the low res dark cell phone photos. I will do my best to provide more low res day time pictures tomorrow!:sombrero:
Here is the link:
http://xxx.princessauto.com/pal/en/Roof-Tops/250-lb-Aluminum-Roof-Mount-Cargo-Carrier/8304958.p
Not sure about the rules of links. Replace the x's with w's.
Ps: some assembly required, all parts and tools provided. If some of the screws feel like they're cross threading just try it in a different hole and it should work no problem.
So I didn't like the way the instructions suggested mounting the basket.. This would mount the rack about 1" on top of my stock cross bars. And the the bottom of the cross bars is close to 3 inches or so above the roof of my jeep anyway. I wanted it more low profile. Here is what I did( got way to caught up in installing and didn't take a single picture)
First on the stock cross bars there are 3 screws on each end. Two torx head small ones (leave these alone) and one larger Philips head screw. Remove this from one end on each crossbar. ( Make sure you remove them both from the same side )
After you have removed these screws. The cross bars still won't pop out. The stock cross bars can be slid up and down the side rails for adjustability. If you slide one of them as far as you can in one direction while leaving the attached side in place it is a lot easier to pop them out.
Now slide the cross bars through the side of your roof rack.
Now that they are slid through the roof rack your obviously cant slide the attachment point up and down to reattached it as the crossbars aren't going anywhere while between the prongs of the rack. You must now loosen all of the torx bolts holding the rail. The side attachment point is connected to this allows you to bend it back further and give you more room to pop the ends in. Simply retighten the torx bolts in the rail after this.
The last step now is to simply use the supplied attachments to attach to the cross bar. But remember because you have slid the crossbars through the sides of the basket the cross bars are now above the bottom of the basket. Just simply flip the provided bracketry upside down and install as intended.
Now for the part you've all been waiting for! Pictures!
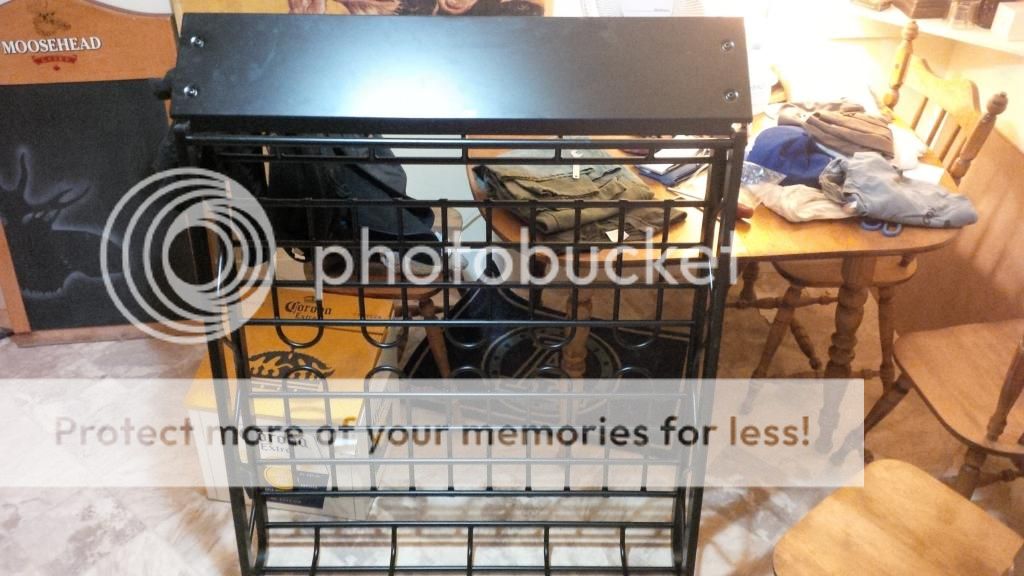
Here's the rack. Post assembly.
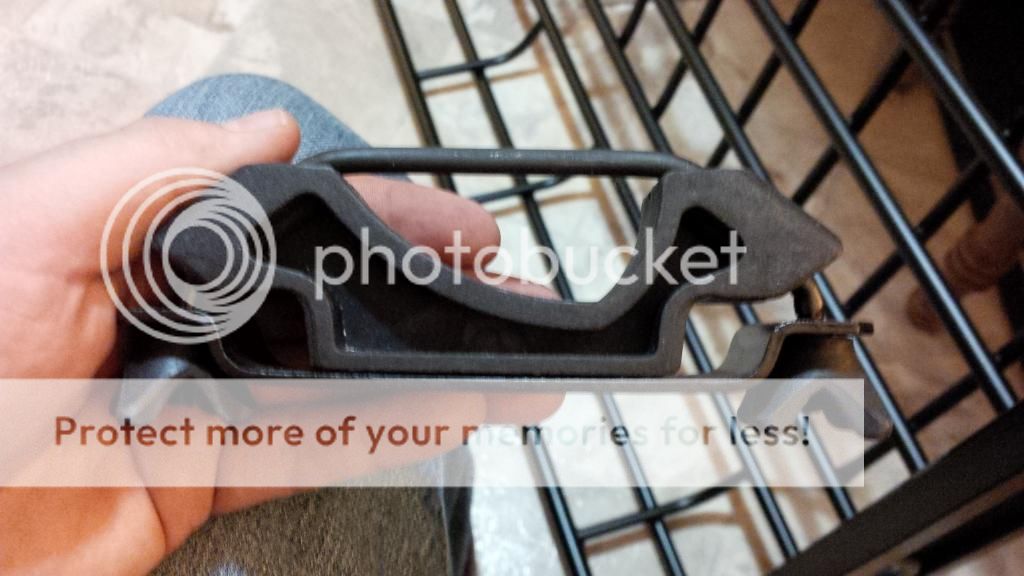
Here is the mounting hardware.
And here is a photo of it just sitting on the cross bars. This is where I decided it sat to high and the attachment method needed to be modified.

And here are some dark night shots! Haha.
As you can seen there are some raised parts to the roof of the XJ. It pretty much sits on these plastic strips.
Front

Back

Top view
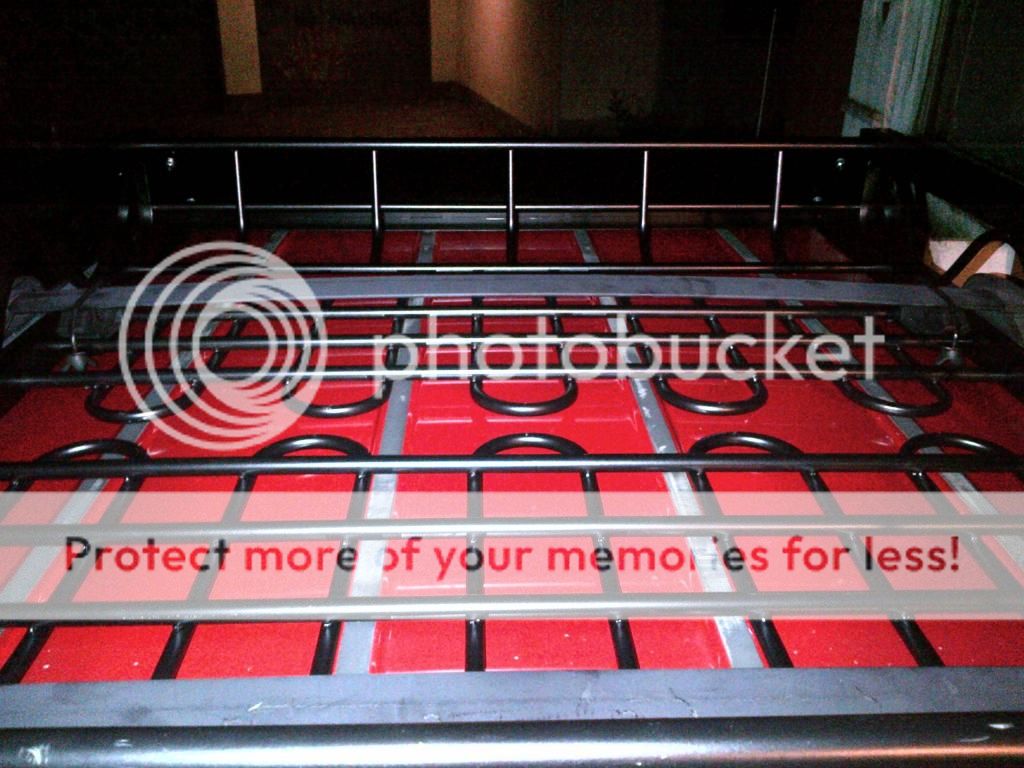
This just shows the cross bar going through the rack. It doesn't take up much space or effect putting stuff in the basket.

Me installing


Side shots


Pretty stoked about this as, I can't weld metal, let alone aluminum, it's light as heck, so sturdy I can shake the whole vehicle by shaking this basket, and I have a large dog who takes up all of my cargo space, so if I have a few extra people in the vehicle I can now throw stuff up top. Also I took it out for a little trip. Hit 110 kph which is about as fast as I go on the highway for mpg reasons, and I heard nothing really. I thought I heard something but I think that's just because my mind was expecting some large noise issues like some people have reported.
One happy customer here!
So late last night I was bored and perusing flyers when I noticed Canadian tire had a sale on their cargo baskets for 25% off. Which brought it down to 175. This intrigued me but was still rather high. Now I know Princess Auto usually has similar sales in stuff so I quickly went to their web page and searched. Low and behold they had theirs on, for 50% off! It's all aluminum, has a 250lb load rating. Aaaaand it only weighs 21lbs and change.
So I headed in today, and there it was front and centre for 69.99! The guy told me that some stores will have it for less if they think they can still make money on it or something. Sweet deal! It was dark by the time I installed it please accept my apology for the low res dark cell phone photos. I will do my best to provide more low res day time pictures tomorrow!:sombrero:
Here is the link:
http://xxx.princessauto.com/pal/en/Roof-Tops/250-lb-Aluminum-Roof-Mount-Cargo-Carrier/8304958.p
Not sure about the rules of links. Replace the x's with w's.
Ps: some assembly required, all parts and tools provided. If some of the screws feel like they're cross threading just try it in a different hole and it should work no problem.
So I didn't like the way the instructions suggested mounting the basket.. This would mount the rack about 1" on top of my stock cross bars. And the the bottom of the cross bars is close to 3 inches or so above the roof of my jeep anyway. I wanted it more low profile. Here is what I did( got way to caught up in installing and didn't take a single picture)
First on the stock cross bars there are 3 screws on each end. Two torx head small ones (leave these alone) and one larger Philips head screw. Remove this from one end on each crossbar. ( Make sure you remove them both from the same side )
After you have removed these screws. The cross bars still won't pop out. The stock cross bars can be slid up and down the side rails for adjustability. If you slide one of them as far as you can in one direction while leaving the attached side in place it is a lot easier to pop them out.
Now slide the cross bars through the side of your roof rack.
Now that they are slid through the roof rack your obviously cant slide the attachment point up and down to reattached it as the crossbars aren't going anywhere while between the prongs of the rack. You must now loosen all of the torx bolts holding the rail. The side attachment point is connected to this allows you to bend it back further and give you more room to pop the ends in. Simply retighten the torx bolts in the rail after this.
The last step now is to simply use the supplied attachments to attach to the cross bar. But remember because you have slid the crossbars through the sides of the basket the cross bars are now above the bottom of the basket. Just simply flip the provided bracketry upside down and install as intended.
Now for the part you've all been waiting for! Pictures!
Here's the rack. Post assembly.

Here is the mounting hardware.

And here is a photo of it just sitting on the cross bars. This is where I decided it sat to high and the attachment method needed to be modified.

And here are some dark night shots! Haha.
As you can seen there are some raised parts to the roof of the XJ. It pretty much sits on these plastic strips.
Front

Back

Top view

This just shows the cross bar going through the rack. It doesn't take up much space or effect putting stuff in the basket.

Me installing


Side shots


Pretty stoked about this as, I can't weld metal, let alone aluminum, it's light as heck, so sturdy I can shake the whole vehicle by shaking this basket, and I have a large dog who takes up all of my cargo space, so if I have a few extra people in the vehicle I can now throw stuff up top. Also I took it out for a little trip. Hit 110 kph which is about as fast as I go on the highway for mpg reasons, and I heard nothing really. I thought I heard something but I think that's just because my mind was expecting some large noise issues like some people have reported.
One happy customer here!
Last edited:
BlackClassic
If Not Now When?
Rack looks good, Kind of reminds me of mine. Should serve you well! I also like how its low profile and sits close to the roof.
Rack looks good, Kind of reminds me of mine. Should serve you well! I also like how its low profile and sits close to the roof.
I would have to say, how low profile it is, is one of the best aspects about it.


BlackClassic
If Not Now When?
I would have to say, how low profile it is, is one of the best aspects about it.
True that, Mine sits up a bit higher than I want it but that's because when I built it I screwed up the measurements a bit, woops, anyway I like what you have thus far.
Hey BlackClassic, my brother and I are thinking about hitting up Maine for some exploring next year for a week(late september-early october)
This year we hit up Pennsylvania, with just my brothers truck. But next year our plan is to get soem buddies and bring two trucks down.
Here is the report from this year:
http://www.expeditionportal.com/for...s-Allegheny-NF-Bald-Eagle-SF-Pine-Creek-Gorge
Any ideas and cool stuff we can check out? I think we are going to get a Delorme Atlas Map Book. Is there any other map sources we should look into?
BlackClassic
If Not Now When?
Yes perfect, I may be up to something like that. Yeah there are some cool runs you can do. I believe MtnClimber messaged you, something similar but there is a run some of my buddies have done for a few years now, I have not yet gone, that goes up through the North Maine Woods. A trip I did was exploring around the Eustis Stratton area http://northeastoverland.forumotion.com/t283-kennebego-june-7-9-chronicles-of-the-black-brew-vol-1 which was a three day trip. There are so many places to explore in western/northern ME.
BlackClassic
If Not Now When?
Oh there are a number of neat sights to see some far off the beaten path and others right off the main road either way these places never cease to amze me. Some cool attractions that a fairly easy to get to include the height of land in rangely, small falls, and coos canyon too. Awesome places to visit!
Teaser photos
So guys.
A have a few teaser photos. But first a little back story.
When I bought this it needed new tires bad. I had my stock tires (225/75r16 P rated Goodyear Wrangler SR-whatevers) from my JK.
They were slightly taller than the 225/70r16s that were on it which was a slight bonus. I threw them on there because they were free, but never was really satisfied with them. The rubber is so soft anytime you take a hard corner they squeal like a stuck pig.
Anyway, I've been looking for deals all over the place for a mild AT. At a cheap price none the less. I found these tires at Canadian Tire, which is nice because anywhere in Canada I can get them replaced. They usually pop up for 25% off which is a great deal. But yesterday the flyer came out stating 30% off! And if you know CT that's about the most you'll ever see a tire on sale for so I decide to jump for it. That plus I have a guy willing to buy my tires I am using now for 300 dollars. Which is pretty much 33% of the cost of the new tires. I am not complaining!
The tire you ask? Motomaster Total Terrain AT2, pretty much the same gig as the Mastercraft Courser ATX( I think that's what it's called) down in the states. The tires are made by Cooper.
So I was again looking for a slight upgrade in size as I have since installed a 2" OME lift.
The two sizes I was interested in were 215/85r16 and 245/75r16.
Which one did I pick? Well you'll just have to wait and see what I went with when I post up the installed pictures.
For now here are some side by side comparison shots of the two sizes.

You can see here how much skinnier the 215 is compared to the 245!
Height difference: the 215 edges out by a mm or 3 on the 245

And one last shot with a closer look at the tread pattern.
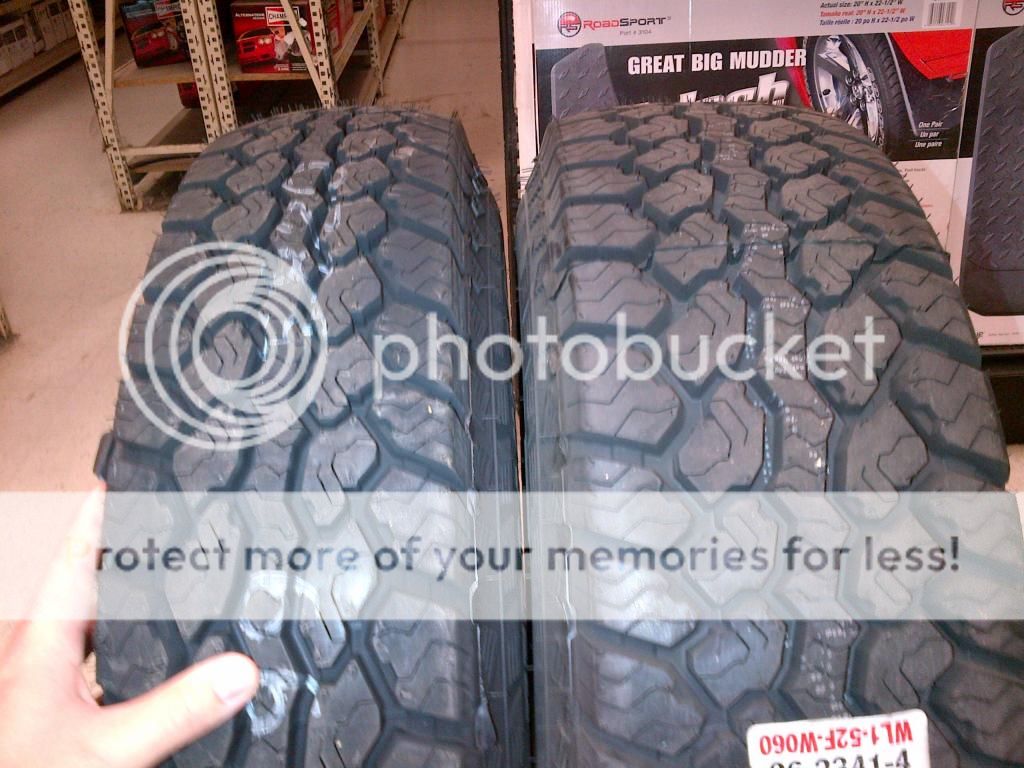
Sorry if it's a little fuzzy.
So let's here some guesses and opinions on what tire I went with and what one you think I should go with.