FAW3
Adventurer
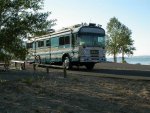
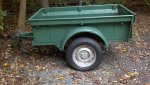
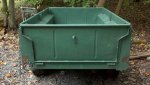
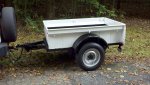
New to this section of Expo...mainly because until today I did not have a trailer. I stumbled across a oddly worded listing on Craigslist for an "old army trailer" earlier this week...and well...now I have one. Got it home and cleaned it up a bit. Title and name plate indicate a Bantam civilian model 3, serial in 4100 range, made in 1946. Has from what I've researched in last week: OEM Fulton hitch, split 16" wheels, no lights (or wires) - just a left side hole for a light. Looks like on either side are 4" spaced small holes for reflectors.
It towed nice today bringing it home...which leads me to a couple of questions, just to get me going safe and legal:
Tires if I read right are dated 2002; 6.00-16, 6 ply tube type. Minor exterior cracks...but they held air today. I was thinking an empty load air pressure of 25 pounds would be a good starting point? No markings on tire give an inflation recommendation. Help! I found nothing on the net as to local sources for this size tire...is this going to be a hard to find tire & tube when I go to replacements?
In towing behind my full size P/U and later "staged" behind our JK jeep...I am thinking the one tail light will be OK, as the tow vehicle taillights and center mount stop lights are fully visable due to low/narrow size. Also, I would be likely never towing at night. VA. law provides an exemption for old vehicles to just have a red brake light. Any thoughts on just use the one light?
I had about a 70 mile run bringing it home...speeds up to 60, stopping often to check hub temps, tires, and hitch. No issues at all...little thing tows like its not there (empty of course today), backing up is tricky because of the short hitch and small size...
My wife loves it! Says we need to get some hay for Halloween and drive the kids around the neighborhood in it!


")