08 Dodge Ram 2500 megacab - slow build

KSL22

Adventurer
Nice build write up... I have a 08 3500 4x4 that I need to replace the ball joints. ..Either gonna go with Carli's lifetime or dynatrac rebuild able ones..anyways here is a pic

Good call. I wish I had spent the money on higher quality. I never want to do that job ever again.
 

cc93cruiser

Observer
whoops here's my rig:
ose5ud.jpg


1z1gsh3.jpg
 

KSL22

Adventurer
Your shell looks like it would have been a whole lot more warmer to sleep in than mine. My shell and tailgate have giant gaps.
 

chilliwak

Expedition Leader
I love your rig :drool:and the cool places you get to KSL. And you also know how to make a guy hungry with those pics of a great breakfast!:)
 

KSL22

Adventurer
Thank you
You should see my breakfasts when I am trailer camping and I have my Camp Chef three burner with its 16"x24" griddle. Breakfast is my favorite meal of the day.
 

KSL22

Adventurer
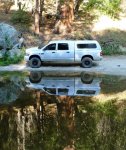
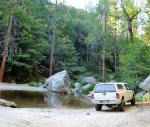
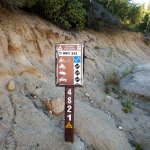
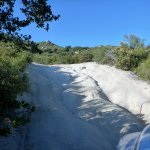
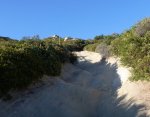
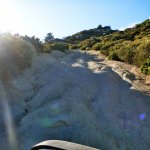
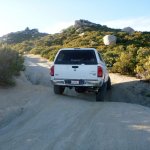
Our cabin in Pine Cove / Idyllwild is right above the San Jacento truck trail which goes down to a cool little water hole. Past that on the way down to Bee Canyon is a 4x trail that goes back up to highway 243. It says it is a black diamond but we had done it before in my dad's Disco II, and I didn't remember it being that bad. Well that was dumb. A Discovery is alot shorter wheel base and has traction control. There were only 5 or 6 places I had difficulty, but they were bad. I really need to get smarter about my trail choices or get lockers. The factory rear limited slip is worthless. As much as I dislike the electronic traction control on the Discovery, I would have loved to have it on my truck today. I thought I made it through relatively free of damage other than pin stripes. I got back to the cabin and saw where my passenger door had made some contact with something a little more solid.

I have a few pictures but wont be able to post them until I get home after the 4th.
 

KSL22

Adventurer
A few pictures of the trip.

P1050925.jpgP1050922.jpg
The creek crossing down the road from the cabin. We went down a little late in the day so we missed the sun.

P1050928.jpg
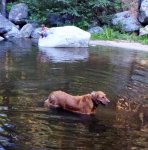
Shane and Rusty still got a little wet.

P1050929.jpgP1050930.jpg
P1050931.jpgP1050932.jpg
The start of the trail and a few of the easier rough sections. I didn't get pictures of the more difficult sections as I was just trying to figure out how to get through them.

P1050935.jpg
A little crossed up. I had this problem quite a bit. Going uphill without lockers made it not so fun. I had to re-try multiple lines in some sections to get through. A few I just had to carry enough speed for my front to get to the other side. Going down the trail would have been a much better choice. Or choosing a vehicle that matched the trail difficulty better.

P1050936.jpg
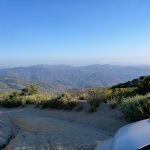
There were a bunch of view spots along the way.

P1050938.jpg
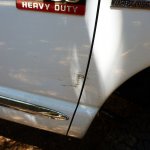
Body damage... I think I know where I got this mark. The trail went off camber with a rut on the downhill side. The trail above the rut was too narrow and off camber for me to try and stick it. I was afraid of sliding off line and falling into the rut or worse. There was a Manzanita on the down hill side right against the trail edge so I couldn't go wide that way either to straddle the rut. So i put the passenger tires in the rut crawled forward. Just past the bush was a rock / ledge the passenger tire had to climb. I think trying to get the right line on getting up the ledge is were I must have contacted the bank. At points of this section I could look out the passenger window and see the top of the bank just above the door frame and way to close for comfort.
 

Regcabguy

Oil eater.
My friend has a similar setup to mine and just scored a really tricked out Jeep CJ5. I'm looking forward to the fall when it cools off in Anza Borrego and doing some wheeling with that thing.
These truck really feel oversized down there.
 

KSL22

Adventurer
I have been doing a lot more time on Craigslist lately. I don't think I could convince the wife, but I would really like to get my hands on a LJ. It would fit the type of trails I end up on more. I would like to get down to Anza before next summer as well. I spent some time at Truckhaven in my Bronco so I could see where I could get myself in trouble down there in the Dodge.
 

KSL22

Adventurer
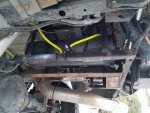
i started to get serious on my on-board air set up. Since I lost my stock spare location I moved where i would be placing it there from where I had originally planed. Friday I played with the wiring to make sure I knew what I was doing before getting serious with the welder. Sunday I dug through the scrap metal pile and dug out some of my favorite pieces to work with, bed frame. Bed frame angle iron is made out of some crazy metal which can't be cut with sawzall blades, so it must be bad ***. And it is free...people are always donating to my scrap metal pile by leaving their bed frame at curb side.

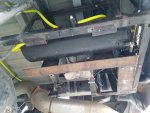
Here is the version one layout. The two top bars rest against the cross members on either side of the spare tire winch facing front to back. The air tank sits against the drivers side of the U shaped bracket. The pump sits horizontal right behind the hitch.
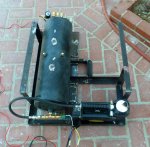
P1050960.jpg

This is the exit manifold. The barbed exit will have the hose permanently attached to the truck with exits on the left, right, and back of the truck. The other three give room for expansion. The right side is a air solenoid and a one way valve I will have routed to the air bags. The left side has a gauge for system diagnostics. I might re-route this around to the side of the tank as it looks to be close to the diff cover when under the truck. I have not bolted it in so I will decide what to do with it then.
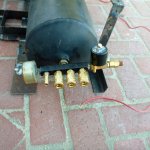
P1050958.jpg

The entrance manifold with a pressure switch and a Japanese style quick connect to match the exit hose of the Smittybilt pump. i didn't want to do anything to the pump I couldn't easily put back to stock.
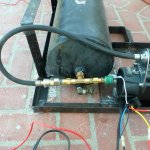
P1050959.jpg

Here is my secret modification. I will use the spare tire winch to lift it into place and hold it while I bolt it into place. P1050961.jpg
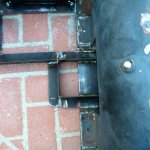
And yes I know I should have cleaned my joints better. I started out real good. Then the heat of the day became overbearing. And then I had to re-due a few sections due to improper planning. So some of the later pieces got a little rushed. I am thinking about putting on a Titan Hitch in the future so I will most likely have to re-design it again around that.

I still have to cut holes for the switches and gauges in the cab plate I made. I also have to wire and plumb the whole thing as well.
 

KSL22

Adventurer
I figure this is a good time as any to introduce one of my made up tools. I place this right up there with adding boat cup holders to the top of my Excursion barn doors.

P1050962.jpg
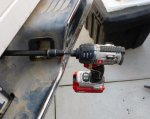
5/8" od , 1/2" id square stock fits almost perfectly over the factory spare tire winch out put. Which means that with a 1/2" extension you can use a socket wrench to lower and raise your spare tire.

Or you can use this and speed up the process exponentially.
P1050963.jpg

The impact also speeds up tire changes by being able to play Nascar pit crew with removing (loosed) lug nuts, and then putting them back on quickly (before properly torquing them to spec).
 

KSL22

Adventurer
Taking a trip next weekend to Kennedy Meadows to camp with the kids. Leaving the afternoon 08/11. Open invite to anyone who wants to come up and camp next to the Kern.
 

Regcabguy

Oil eater.
I'm going with 35's next time. I know a half worn 35" will fit in the 3rd gen spare location.
I'm going to consider the Nitto Ridge Runners. By the time I need them all sizes will be out.
 

KSL22

Adventurer
Yes, my 1/2 tread General Graber fit in the spare well before the new exhaust. I think a new 35" KO2 would have fit as well but never tried it.
 

KSL22

Adventurer
20160808_193647.jpg20160808_193639.jpg
Finally got the pump and tank mounted, wired, and plumbed.

20160808_193556.jpg
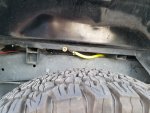
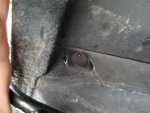
Outlet is below the rear inner fender liners. There was a existing hole that worked perfectly. I will find a cap of some sort to keep the dirt out. I also need to flex it to make sure the tire clears.

20160808_193659.jpg
I temporarily placed the switch in the driver's rear stake pocPocket. It will get moved into the cab once I wire up the panel for the air bags.

20160808_193544.jpg
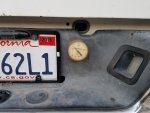
Plumbed a pressure gauge into the rear bumper for easy to see system pressure.
 

Forum statistics

Threads
186,601
Messages
2,887,904
Members
226,715
Latest member
TurboStagecoach
Top