10th Generation F-150 Overland build (The Craptor)

badm0t0rfinger

Raptor Apologist.
This is my sentiments as well. Having familiarity with it is huge if you have an issue while off grid as well.

I've thought plenty about getting something a bit bigger and throwing a shell on the back of it and build a little sleeping area and calling it a day but that means new payments and a new truck and all that jazz. I like what I got, its getting a bit old now, but I have plenty of good memories and adventures with it. Plus its paid off and only has like 71k on it.
 

OBS460

Well-known member
I've thought plenty about getting something a bit bigger and throwing a shell on the back of it and build a little sleeping area and calling it a day but that means new payments and a new truck and all that jazz. I like what I got, its getting a bit old now, but I have plenty of good memories and adventures with it. Plus its paid off and only has like 71k on it.


I keep looking at new trucks, and there is no way I can justify the payments on one. There's nothing wrong with wheeling an older truck!
 

OBS460

Well-known member
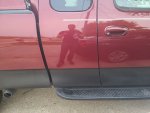
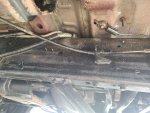
With winter rapidly approaching, I decided to take some time to ensure the rust free condituon of my F-150 lasts as long as possible.

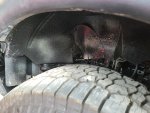
To start, I addressed and surface rust with a rust reformer. Once this cured and chemically stopped the rust, I went over it with gloss black enamel paint to seal up the reformer.

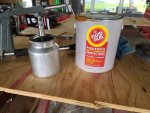
From there, I applied 3/4 of a gallon of Fluid Film with an undercoat gun. (Lord does that stuff stink..) The entire underside was liberally coated, as well as the inside of the rocker panels (rubber body plugs were removed, fluid film was sprayed inside, and the plugs were replaced). I also sprayed the perimeter of the engine bay down to protect the radiator core support as they are a known rust point on the 10th gens.
 

Attachments

  • 20200927_110054.jpg
    20200927_110054.jpg
    2.1 MB · Views: 65
  • 20200927_110047.jpg
    20200927_110047.jpg
    1.7 MB · Views: 67
  • 20200927_110038.jpg
    20200927_110038.jpg
    1.5 MB · Views: 62

OBS460

Well-known member
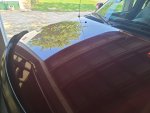
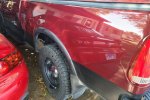
With the undersides rust prevention taken care of, I turned my attention to the paint work. Luckily, the truck spent the first 18 years of it's life being garaged so the paint has remained very clean and clear.

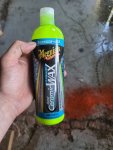
Meguiars has their new hybrid ceramic wax line out, and the durability testing looks to be pretty promising. I was wanting a paint protectant that would last the majority, or all of, the winter months as applying more mid winter is not my idea of a good time.

Overall I was pretty pleased with the way the paint looked. I applied it with a DA buffer, waited the 4 minutes, and removed with a Terry cloth.
 

Attachments

  • 20200925_125837.jpg
    20200925_125837.jpg
    1.3 MB · Views: 58
  • 20200925_125828.jpg
    20200925_125828.jpg
    1.3 MB · Views: 58
  • 20200926_141659.jpg
    20200926_141659.jpg
    1.5 MB · Views: 63
  • 20200925_125421-01.jpeg
    20200925_125421-01.jpeg
    2.9 MB · Views: 60

Grassland

Well-known member
In the Neverending quest for more power, I addressed the air intake on the 5.4. The bean counters at Ford won, and had the engineers install the same air box on all F150s except for the Lightning.

The factory air box is too small in volume to properly feed 5.4 liters, and the inlet opening is smaller than the throttle body. First, I tried the 'Gotts Mod' and found that I gained about 3-5 g/s with my mass air flow reading at WOT. This should be roughly a 4-7hp gain. Still, I felt things could be improved.

In my reading, I found that the Ford Lightning did not share the same air box as the other trucks due to its higher air flow needs. This box has roughly 2.5x the internal volume, a 3x larger opening by area, and places the MAF away from the walls to help prevent stagnant flow around it.

I cut up the factory tube to reuse the connections for the IACV and breather, purchased a generic 3" cold air tube kit, and a Lightning air box. From there, I cut the inner fender opening larger to match the snorkel dimensions of the new air box.

Once it was all installed, I logged my MAF readings on the same stretch of road as before and found 10-18 grams per second increases over the Gotts Mod! We are looking at another 15-20hp gain, and the truck feels much stronger at all RPMs.

I'm not familiar with the older PCM in this generation.
Is the engine even cable of adjusting fuel trim to go with the increase in airflow?
Or are you running a tuner?
 

OBS460

Well-known member
I'm not familiar with the older PCM in this generation.
Is the engine even cable of adjusting fuel trim to go with the increase in airflow?
Or are you running a tuner?

The fueling is MAF based, so the fueling will increase with the added airflow within reason.

I'm running the 89 tow tune from 5 star tuning, and I added timing after 4k RPMs to help slow the torque drop off. O2 voltage is around .88V-.9V at WOT, so there seems to be plenty of fuel.

I'm looking at potentially getting a Quarter horse and wide band in the future, and writing custom tunes to better extract power.
 

badm0t0rfinger

Raptor Apologist.
@OBS460 I love the Meguiars stuff you used however I just tried the Chemical Guys Hybrid Ceramic and I think I like it a bit more.

Oh and you'll never go wrong with fluid film. I literally just put half a can on the underside the other day after cleaning.
 

OBS460

Well-known member
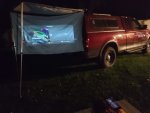
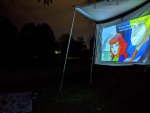
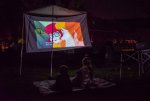
Part of any successful trip, is keeping the children happy and entertained.

On that note, the latest addition to the overlanding rig is a "movie theatre". The kids seem to enjoy it quite a lot, and the entire setup adds less than 6lbs to the camping gear! Sure its not Hollywood quality, but the portability and low power consumption is perfect.

Here is the setup, the screen is hanging from my rear awning (it needs ironed out still)

-Ozark trails 100" projector screen

-Miroir M75 DLP micro projector (runs 2 hours on a charge)

-Usb to HDMI adapter

-Cell phone with Netflix subscription

-Battery powered Memorex speaker
 

Attachments

  • 20201010_194148.jpg
    20201010_194148.jpg
    2 MB · Views: 66
  • received_4494109663995732.jpeg
    received_4494109663995732.jpeg
    477.9 KB · Views: 65
  • received_369103504213849.jpeg
    received_369103504213849.jpeg
    1 MB · Views: 58
  • 20201010_204259.jpg
    20201010_204259.jpg
    1.4 MB · Views: 57
  • FB_IMG_1602384069502.jpg
    FB_IMG_1602384069502.jpg
    40.8 KB · Views: 57
Last edited:

hammerg26

SE Expedition Society
Part of any successful trip, is keeping the children happy and entertained.

On that note, the latest addition to the overlanding rig is a "movie theatre". The kids seem to enjoy it quite a lot, and the entire setup adds less than 6lbs to the camping gear! Sure its not Hollywood quality, but the portability and low power consumption is perfect.

Here is the setup, the screen is hanging from my rear awning (it needs ironed out still)

-Ozark trails 100" projector screen

-Miroir M75 DLP micro projector (runs 2 hours on a charge)

-Usb to HDMI adapter

-Cell phone with Netflix subscription

-Battery powered Memorex speaker

Good call on Scooby Doo!!!


Sent from my iPhone using Tapatalk Pro
 

OBS460

Well-known member
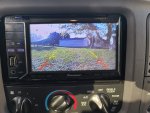
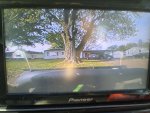
Anytime you drive a full size truck with a topper, you can't help but notice the fairly substantial blind spots (especially in parking lots or on tight trails)

We addressed this issue by adding forward and rearward facing cameras, tied into a double-din Pioneer DVD head unit. The reverse camera is tied into the reverse light circuit, so it comes on automatically when the truck is placed in reverse. The front camera goes to the auxiliary video input.

The auxiliary video output goes to the rear seat so we can send a video signal to a rear video monitor for the kids.
 

Attachments

  • 20201011_164717.jpg
    20201011_164717.jpg
    1.3 MB · Views: 57
  • 20201011_164749.jpg
    20201011_164749.jpg
    1.8 MB · Views: 58
  • 20201011_164803.jpg
    20201011_164803.jpg
    2.1 MB · Views: 59
  • 20201011_164755.jpg
    20201011_164755.jpg
    1.9 MB · Views: 58

Dougnuts

Well-known member
Question for you - was there a reason you went with the Lightning intake instead of something like a K&N FIPK?
 

OBS460

Well-known member
Question for you - was there a reason you went with the Lightning intake instead of something like a K&N FIPK?


Most of your open element filters cause issues with MAF metering due to helmholtz resonance in the intake, as well as increased intake air temperatures.

The Lightning intake will flow enough air to support any future mods and it keeps the intake air temps close to ambient.
 

OBS460

Well-known member
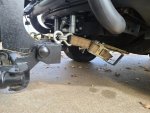
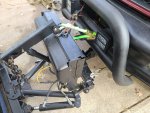
Since it was warm out today, I decided to finish up the remaining things for the plow. The ol girl has to work to pay for future mods ;)

As its a light duty 2" receiver based plow, I was worried about twisting the mounting point if I clipped the edge of the plow against a curb. To help with this, I added 2 eyelets and ran 10klb straps back to the frame to help shore it up against lateral movements.
 

Attachments

  • 20201022_123752.jpg
    20201022_123752.jpg
    2.1 MB · Views: 44
  • 20201022_123804.jpg
    20201022_123804.jpg
    2.1 MB · Views: 47
  • 20201022_104624.jpg
    20201022_104624.jpg
    2.2 MB · Views: 46

OBS460

Well-known member
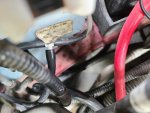
The previous front camera was a mirrored image, so I went with a flush mount that corrected the image. I was also concerned that road spray would render my camera useless. To alleviate this potential issue, I tapped into the windshield sprayer system and mounted a nozzle adjacent to the camera to clean it everything I clean the windshield.

Now we just need some snow fall to test it all out.
 

Attachments

  • 20201022_122859.jpg
    20201022_122859.jpg
    1.7 MB · Views: 41
  • 20201022_104208.jpg
    20201022_104208.jpg
    1.5 MB · Views: 41
  • 20201022_122101.jpg
    20201022_122101.jpg
    1.4 MB · Views: 41

Forum statistics

Threads
188,042
Messages
2,901,560
Members
229,352
Latest member
Baartmanusa
Top