1958 Unimog 404 with cabover flex

joeblack5

Active member
Already 3 weeks ago, the weather is changing. Cold early in the morning and daylight savings don't help.

Cut more of the floor for the wheel well out.
Made some more solar panel clamps. Tanya had to "readjust" them using hoe/sledge.


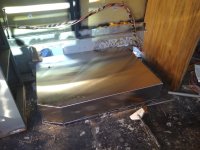
Cut another section out of my stai less scrap cabinets to be used as wheel well.
Here is my back alley brake.

The piece of square pipe under it is the wheel well framing.

Tomorrow we will mock up the wheel well and a first attempt for a bulkhead .

Johan
 

Attachments

  • IMG_20231027_130126812_HDR.jpg
    IMG_20231027_130126812_HDR.jpg
    5.7 MB · Views: 9
  • IMG_20231111_095414235_HDR.jpg
    IMG_20231111_095414235_HDR.jpg
    4.5 MB · Views: 9
  • IMG_20231111_094604635_HDR.jpg
    IMG_20231111_094604635_HDR.jpg
    5.1 MB · Views: 9
Last edited:

joeblack5

Active member
The curves of this bus body are a bit of a challenge. First cardboard. then old roof decking to make a template..we used a 4 drawer steel cabinet. This one is 15" wide and 18" deep. On top it is bolted to a reinforcement purlin in the bus body. We like steel cabinets, light , strong, mouse proof and cheap.


Now we need to copy the template 3 times from some nicer wood.

Johan
 

Attachments

  • IMG_20231111_134136653_HDR.jpg
    IMG_20231111_134136653_HDR.jpg
    5.2 MB · Views: 9
  • IMG_20231111_155458948.jpg
    IMG_20231111_155458948.jpg
    4.3 MB · Views: 10
  • IMG_20231111_155507357.jpg
    IMG_20231111_155507357.jpg
    4.5 MB · Views: 8
  • IMG_20231111_155527719.jpg
    IMG_20231111_155527719.jpg
    4.1 MB · Views: 9

joeblack5

Active member
Took the mock up apart, to mock up a bit more accurate.. here is the wheel well and frame a bit more visible. There is 10-1/2 " above the tire. Hope it is enough with the swivel frame. Should have tested it ,but I did not.


Next step will be welding it all more or less properly and fix the remaining holes in the floor.

Johan
 

Attachments

  • IMG_20231114_135213834.jpg
    IMG_20231114_135213834.jpg
    3.4 MB · Views: 6
  • IMG_20231114_135843467.jpg
    IMG_20231114_135843467.jpg
    3 MB · Views: 6

joeblack5

Active member
Over at benzworld someone motivated me to do an wheel clearance test again.
I loaded 5 Mercedes rims and tires, all what I easily had laying around as weight.
Waited till late afternoon with the highest temp to give my forklift a fighting chance of starting.
Lifted the rear driver side. At 27" the diagonal opposed tire hits the cab. The cab is 1-1/2 raised. The rear axle does not get close to the bump stop. Maybe I am to light?

It looks like the hardmount of the cab and the hardmount of the bus twist a little bit. Of course the bus body is not properly tightened to the cab yet. So some of those forces will be transferred to the bus body.

The bus body does not twist. The cab front swivel mount swivels but stays in position. That is good.

I still can raise the cab another 1" but after that I would need to work on the pedals.

The rear pic shows nicely that the overall twist is half taken up by the swivel frame and half by the suspension.
 

Attachments

  • IMG_20231116_150813917_HDR.jpg
    IMG_20231116_150813917_HDR.jpg
    4.3 MB · Views: 11
  • IMG_20231116_151441212.jpg
    IMG_20231116_151441212.jpg
    3.7 MB · Views: 11
  • IMG_20231116_151129615_HDR.jpg
    IMG_20231116_151129615_HDR.jpg
    3.9 MB · Views: 10
  • IMG_20231116_150854597.jpg
    IMG_20231116_150854597.jpg
    3.1 MB · Views: 10
  • IMG_20231116_150958142.jpg
    IMG_20231116_150958142.jpg
    3.9 MB · Views: 10
  • IMG_20231116_151426770.jpg
    IMG_20231116_151426770.jpg
    3.1 MB · Views: 10

joeblack5

Active member
A bit unhappy about the front tire rub. Some discussion at benzworld gave me more food for thought.

A bit of a restless night, thinking about how to go about it raising the cab another 1-3/4" to get to the 3". Forgetful me did not take a picture of the offending front wheel and see if I was on the bump stop or how close.

Raising the cab will cut into the bedroom head space. I had originally thought this as an easy fixed floor that would give additional racking strength in the horizontal plane direction and would make a bit of a box structure

Making a lowering bed loses all those advantages and creates additional technical complications.

Nevertheless , micmoor (b..world) I think you are right. This would be a bad compromise to leave it with a rubbing front wheel..

On a positive note is that all the stainless front cab pieces and windows are more or less set up with c- clamps.. so it is relative easy to take those pieces out and modify.
This could have been easily more frustrating.


Johan
 
Last edited:

joeblack5

Active member
After my restless night an early start.
Got the forklift set up to take the image of the dragging tire. That axle still would be able to go up so indeed the 3" cab lift is required.
Removed the stainless cab corners and undoing whatever held the cab to the bus body. Raised cab. Cab got stuck on VW tdi starter solenoid and remote oil filter adapter. Guess I have to make a small dog house modification. It was tight before and those pieces were protruding 1/4 " Inside the cab but above the floor. Now they are under the floor repeated forklift procedure.
Some gain,about an ", front tire came of the ground. Overall now 29" between ground and tire. Other side not dragging but still did not bottom out on block. All good, nice to know that I have some weight margin for the interior.

Modified stainless to fit again..
Nice benefit of the raise that I now can work on the turbo thru the wheel well.

Happy I did this and it is behind me..
Thanks again NhBen( b..world)for getting me started and thanks MicMoor(b..world) for pushing thru.
 

Attachments

  • IMG_20231117_121335375_BURST001.jpg
    IMG_20231117_121335375_BURST001.jpg
    3.7 MB · Views: 20
  • IMG_20231117_122057355_HDR.jpg
    IMG_20231117_122057355_HDR.jpg
    4 MB · Views: 19
  • IMG_20231117_100317940.jpg
    IMG_20231117_100317940.jpg
    2.9 MB · Views: 17
  • IMG_20231117_141545440_HDR.jpg
    IMG_20231117_141545440_HDR.jpg
    4.4 MB · Views: 17
  • IMG_20231117_122125190_HDR.jpg
    IMG_20231117_122125190_HDR.jpg
    3.7 MB · Views: 16
  • IMG_20231117_121429958.jpg
    IMG_20231117_121429958.jpg
    3.2 MB · Views: 17

joeblack5

Active member
We want to prepare to drive this project
from our barn to our home downtown. Winter is coming and it will be easier to do interior projects where we have electricity available.
Time to start working on the dragging brakes.

Since brakes are universal I felt that our oldest daughter should have some hands on. Happy she was willing to help out.
Will see if these calipers are salvageable.

Here some pics.
 

Attachments

  • IMG_20231118_154152364.jpg
    IMG_20231118_154152364.jpg
    3.1 MB · Views: 29
  • IMG_20231118_144218346.jpg
    IMG_20231118_144218346.jpg
    4.7 MB · Views: 30
  • IMG_20231118_143507652.jpg
    IMG_20231118_143507652.jpg
    3.4 MB · Views: 30
  • IMG_20231118_141118366.jpg
    IMG_20231118_141118366.jpg
    4.2 MB · Views: 23

joeblack5

Active member
Spring has started so we got out and tried to remember what was on the agenda.
Decided to tackle some insulation, more as an experiment and to get back in the groove.
Then we drilled holes and screwed the skin with ss screws and 1/8" thick nylon washer of the bus framing to reduce with thermal bridging.. left the screws loose, added sicaflex 252 in the gap and tightened the screws.
 

Attachments

  • IMG_20240329_165827349_HDR.jpg
    IMG_20240329_165827349_HDR.jpg
    3.2 MB · Views: 13
  • IMG_20240329_170059604.jpg
    IMG_20240329_170059604.jpg
    3.3 MB · Views: 12
  • IMG_20240329_132343048.jpg
    IMG_20240329_132343048.jpg
    3.1 MB · Views: 12

Forum statistics

Threads
188,262
Messages
2,904,695
Members
229,805
Latest member
Chonker LMTV
Top