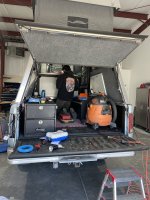
1985 F-250 6.9IDI Build Thread- Tractor Camper

Chris Tom

Member
Hi Expedition Portal,

My name is Chris - Creating this thread to document and share the restoration and build out of my 1985 F-250. This was my father’s camping / adventure truck and the goal of this project is to outfit this vehicle for many more extended trips as a simple and reliable platform.

The truck is a 1985 (Bullnose) F-250, with 6.9L International Harvester / Navistar IDI Diesel, with 4-Speed MT, 4WD, 8.5' Bed, outfitted with factory dual fuel tanks and a Banks Sidewinder Turbo System. With only 88,888 original, non-rolled over miles on the odometer when I took possession of the vehicle, we are confident the truck has plenty of life but will need to be fully checked and updated before starting the build.

Initial Check-Up (June 2022)

When I first picked up the truck it started up without issue and ran perfectly fine. The first order of business was going to be a full fluid flush (Oil, Coolant, Power Steering, Transmission, Differential, Transfer Case, Brake) and general inspection of all consumable parts (Hoses, Gaskets, Filters, Belts) and components. The entire engine and undercarriage was to be steam-cleaned as well.

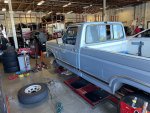
After some research, I elected to partner with Steven’s Bay Area Diesel in South San Francisco based on their familiarity and experience with the IDI Platform. I was impressed by the collection of fleet and private vehicles at Steven’s and would gladly return to them for any diesel service in the future.
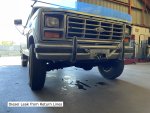
IMG_8535.jpg


A three week stay at Steven’s revealed the following items to be addressed:

  • Fuel Return Line Leak is a common and known issue on these motors as the OEM rubber hoses naturally ware, crack, and leak.
    • Symptom: Odor of diesel while running, visual leakage around injectors.
    • Solution: Replace entire return line system.

  • Power Steering Leak had caused the entire system to run dry. There was some difficulty locating the leak which ultimately proved to be pump itself.
    • Symptom: Rough / Unassisted steering, most noticeable when starting from stopped.
    • Solution: Replace power-steering pump.

  • 4WD Locking Hubs Damage due to age had caused some of the interior splines to break, meaning the front hubs were locked permanently.
    • Symptom: 4WD Hub Locks were rotated into LOCK 4WD Position but could not unlock.
    • Solution: Replace with WARN Locking Hubs.

IMG_8785.jpg


Interior Work

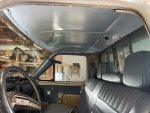
The interior of the truck is entirely original and in great condition, though time had taken a toll on the headliner and door panels. A trip to the local pick-n-pull yielded a headliner out of a 1993 F350 and a replacement interior cab light and housing assembly. After some debate on re-upholstering this replacement headliner myself, the headliner was ultimately taken to Metzel Auto Upholstery in San Francisco. Removal and Installation was simple, requiring the removal of the dash assembly (8-10 Phillips Head Screws located along the dash) as well as the ceiling / post trim pieces. Be careful when removing the clipped in components not to crack any aged metal trim pieces (Above doors, rear window, and windshield).

The replacement light was an easy install, once the headliner was installed. There are three mounting screws, two of which connect to leads in the ceiling to provide power to the lighting unit, the third screw of which connects to ground. The white plastic piece snaps into place.

Finally, the shifting knob had come off of the lever, which was a quick fix by cleaning with Isopropyl Alcohol and JB-Welding back into place.

IMG_8821.jpg
IMG_8823.jpg


Throttle Cable / Rough Acceleration

After driving the truck one day the throttle pedal dropped to the floor and engine went to idle. It so happened that the ball fitting on the engine side of the cable had popped of the injection pump lever. It snapped back on easily and we made it home without issue. A quick removal and re-shaping of this clip with a set of vice grips solved the issue.

I wanted to address the roughness / grittiness in acceleration (You could feel this through the pedal). The first step is to locate the end of the throttle cable that attaches to the injection pump. You will find a series of levers, springs, and fittings that connect to the main throttle cable and cruise control housing. A quick removal, cleaning, and lubrication of the return spring to clean with Tri-Flow helped address some of the roughness. We also lubricated the lever pivots and contact points with Tri-Flow which greatly improved the response and smoothness.

Actually, the above was addressed after having purchasing and attempting to install a new OEM throttle cable (37.5” off a 7.3IDI E9TZ-9A758-U) which I realized was too short to fit around the Banks Turbo System. I am currently running the ATP-Y290 42.5” cable without issue. The moral of the story here was to work either end of the cable (Pedal and Injector Pump) before removing the cable, as most of the roughness was solved by cleaning and lubricating the components at the injection pump. If this does not help, then consider replacing the cable assembly itself.


68058443628__B6DEAB75-AF80-4EDE-90B7-15DFC5FB99FA.jpg

IMG_8804.jpeg

General Maintenance

Aside from the major work above, we've gone through the vehicle and lubricated various joints and pivot points (Think door hinges, hood hinges, etc.) which have improved and quieted day-day use of the vehicle.


Next Steps

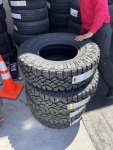
The truck is running great and is a pleasure to drive. Next step is to replace the aged stock-sized Yokohama Geolander tires on the vehicle now (235x85xR16) with a more aggressive tire. We have run Duratrac’s on our 4Runner for years and are partial to those, but are actively exploring the Falken Wildpeak AT3-W, both in a 285x75xR16.

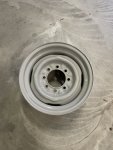
In order to fit these new tires the OEM 16 x 6 wheels are being traded for Dorman 16 x 7 Steel Wheels (Sold as OEM replacements for 1992-1999 F-Series).

On-highway, the wind-noise is pretty bad, so we’ve also ordered a full door and window gasket replacement kit from LMC Truck, which we will be installing in the next couple weeks.

We are experiencing one of the known issues with these trucks, with Fuel Gauges reading full, quickly dropping to half, then E, while having plenty of fuel left in the tank. Our current approach is to run on empty and count our gallons at each fill-up to determine miles / tank, then simply count miles on the odometer for any extended driving.

We are also evaluating replacing the entire brake system due to age and surface rust, but for the time being, everything seems to be running fine.

Future Plan

We’ve been working with a well-known topper company to determine fitment of their topper on the truck (Older 8.5' Beds have slightly different dimensions than modern day equivalents) and have since put a deposit down to be ready for installation in March 2023. Will post more about this later!

***For those interested, the stock wheels and current Snug-Top shell are for sale
 
Last edited:

bigoldford

New member
I have done a lot of work on IDI’s and have had a lot of info shared with me. Looks like you have a good handle on it but in case you didn’t know.
Only use motorcraft glow plugs, only use injectors and injection pumps form Russ repair or R and D idi. They usually last about 100k. If you used parts store return lines you may want to swap it while you are not on a trip or at least have a spare kit on hand as they tend to leak which causes air intrusion and hard starts. Same only use Russ repair or R and D for them. Make sure you are using fleet guard or a similar coolant that has SCAs to help your engine to last. An egt and boost gauge are a good idea and boost low on a 6.9 without studs. I have personally met Russ from Russ repair and have purchased a lot of parts from him including a turbo kit he rebuilt and upgraded, Cam, injectors, pump and return lines. He has amazing customer service and his parts have not let me down
 

Chris Tom

Member
I have done a lot of work on IDI’s and have had a lot of info shared with me. Looks like you have a good handle on it but in case you didn’t know.
Only use motorcraft glow plugs, only use injectors and injection pumps form Russ repair or R and D idi. They usually last about 100k. If you used parts store return lines you may want to swap it while you are not on a trip or at least have a spare kit on hand as they tend to leak which causes air intrusion and hard starts. Same only use Russ repair or R and D for them. Make sure you are using fleet guard or a similar coolant that has SCAs to help your engine to last. An egt and boost gauge are a good idea and boost low on a 6.9 without studs. I have personally met Russ from Russ repair and have purchased a lot of parts from him including a turbo kit he rebuilt and upgraded, Cam, injectors, pump and return lines. He has amazing customer service and his parts have not let me down

Great, I'll surely be reaching out to you for some advice! Really appreciate the input.
 

Chris Tom

Member
IMG_9353.jpg


Wheels / Tires

The original 16” x 6” wheels spec’d on the 1985 4x4 6.9L proved to make tire choices few and far between. After some research, the solution was the Dorman 16” x 7” 8 x 6.5 Lug Steel Wheels for later model OBS Fords, purchased through LMC Truck. Wider wheels meant a wider variety of modern tires to choose from. These wheels also have the 5” center bore diameter necessary to fit OEM and Warn Locking Hubs (For 4WD).
Screen Shot 2022-08-22 at 4.30.31 PM.png


After some debate, I opted for a set of 5 LT285 x 75 x R16 Goodyear DuraTrac Tires. The runner-up was the Falken Wildpeak, however, at this size, the Falkens were actually more expensive than the DuraTrac. Having run DuraTrac for the past 65,000 miles on our 4runner, we were comfortable going with another set. Note that the LT285 (Near 32.8”) fits on the 85’ 6.9L 4X4 with no detectable rubbing during normal driving. I am running 35psi in the rear, 50psi in the front, and will re-evaluate once the truck is loaded after build-out.

IMG_9331.jpg

IMG_9335 (1).jpg


IMG_9340.jpg


Door Seals

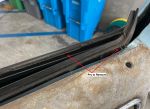
Naturally, on a 30+ year old truck, you will find a lot of rubber degradation. One of the overlooked areas to check for is around the door and window seals. These gaskets will get dry, crack, and result in significant road noise due to air-intrusion.

Screen Shot 2022-08-22 at 3.22.27 PM.png


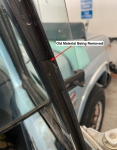
LMC Truck sells a complete overhaul kit for the door seals (2 per side) and window seal kit (3 pieces total per side). A few pieces to note if you’re planning to do this on any vehicle, to also have a shop-vac, flat-head screwdriver, razor blades, and Goo-Gone handy, as removing the old material is the most difficult part.

In these old Ford trucks, the first step is to remove the dash pad cover, corner trim posts, and ceiling headliner pieces to expose the old door gasket. You must also remove the silver kick-plate. This will expose the seam in the door gasket, and removal is as simple as pulling the liner from the cab.

Next, you will remove the single adhered gasket piece on the door itself. I recommend marking with a sharpie the position of the old trim as the replacement piece is slightly longer and must be cut to size.

Thoroughly clean the area, and finish with isopropyl alcohol to remove any residual oil. Note this may likely require scraping with a razor blade to remove the hardened adhesive. This process is critical to ensure good installation with the new gasket.

Screen Shot 2022-08-22 at 4.40.37 PM.png

Installation of the new pieces will be simple, the above steps essentially done in reverse. Note that the gaskets (and doors) will be very difficult to close for the first few weeks, though they should soften over time. When closing for the first time, if you have difficulty shutting the door, do NOT press in the middle of the door panel as it will dent the sheet metal, press near the lock / edge of door where there is more structure.

Window Seals

The first mandatory step is to remove the interior door panel. I say this is mandatory not only to vacuum out the old material (which will inevitably crumble into the door itself) but also to easily install the window trim seal.

There will be one screw that holds the door panel in place at the pull handle area inside. Then, gently use your hand to pop the door panel off. There are several plastic clips holding the panel on. Unless you plan to discard the old door panels, be very careful as the OEM clips are brittle
 

Attachments

  • IMG_9326.jpg
    IMG_9326.jpg
    3.3 MB · Views: 20
  • IMG_9353.jpg
    IMG_9353.jpg
    2.6 MB · Views: 18
  • Screen Shot 2022-08-22 at 4.40.37 PM.png
    Screen Shot 2022-08-22 at 4.40.37 PM.png
    785 KB · Views: 20

Chris Tom

Member
Next, you will begin to remove the old seal. Note the old rubber will be hard, brittle, and in some cases sharp, so take care to remove it. A simple flathead screwdriver will crack / pry the old material away. For material below the window line (the channel continues into the door), roll up the window and continue to work the screwdriver from within the door panel. Be very careful your tool does not slip and hit the glass. You likely will need to remove the vent window assembly, be removing two screws on the door frame, and one screw in the door panel. The vent window will be tilted towards the rear of the vehicle and carefully rotated 90 degrees to clear the mounting bracket before removal (Check Youtube for this).

Screen Shot 2022-08-22 at 4.27.42 PM.png

Finally, using a flathead screwdriver, remove the window felts from the door panel (secured using several staples). The second door felt is clipped into the door frame and can be removed with a flathead screwdriver and upwards pulling motion.

Screen Shot 2022-08-22 at 4.21.50 PM.png

Screen Shot 2022-08-22 at 4.29.44 PM.png

Screen Shot 2022-08-22 at 4.28.25 PM.png

As soon as everything is removed, clean and sanitize the area. Periodically use the vacuum to remove the scraps that accumulate inside the door.

When you prepare to install the new window channel material, there will be one pre-formed corner which fits into the 90 degree corner (Rear top corner of the door). Use this as a reference point when measuring / trimming the channel material. It will help to have an assistant, but you need to carefully “press” the material into place, letting the ends hang down, to understand how much the material needs to be trimmed (at either end, at the termination of the window channel frame). Measure twice, cut once.

Finally, the new material can be pressed into place. Using a plastic scraper (used squeegee film) will help this process. Start by pressing the material into the vent window frame, and work your way to the rear of the channel. It will take a few attempts to position the liner properly. Once the liner is in place, you can roll the window up a few times to position everything.

Next Steps


While the door is dis-assembled, take this time to consider installing sound-deadening, which is my next step. I opted to go with a brand called Resonix. After chatting with their team, he recommended their CLD panels, at 50%+ coverage, as the best application to reduce the noise associated with the loud diesel engine / road noise. This product is intended to stabilize large flat panels (i.e Doors, Roofs, etc.) and reduce structure borne vibration. I will report back on this later. We will also be installing new door panels (Coverlay), which will be treated with Resonix CLD before mounting.

The truck will receive a full bushing rebuild (Body Mount, TTB) and front-end rebuild kit (steering assembly), followed by shocks and a refresh of the leaf-springs (remove, clean, remove rust, paint, and replace bushings). We are also working on a replacement of brake calipers, drums, and rotors, as the current is coated in rust.
 

Chris Tom

Member
Sound Proofing

I will begin by mentioning that the installation of Resonix into the cab of this old diesel truck was 100% worth it. The noise reduction at all times (highway driving, idling, vehicle off) is absolutely noticeable and makes the truck immensely more pleasant to drive. That said, this is a job that I would do once, and only once.

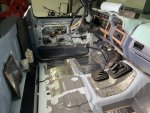
The first step was to remove the single bench seat, all carpets, trim panels, and rear cab carpet to expose the bare metal. Throughout this process I was constantly vacuuming to keep the workspace clean. Beneath the carpet you will likely find an asphalt based “sound proofing” coating which is applied at the factory. Needless to say, this was not serving any purpose and had to be removed.

After some YouTube research, I decided to attempt to use the dry-ice / isopropyl alcohol method, which essentially freezes and contracts the asphalt coating. The contraction action results in a clean removal from the painted surface below. AirGas welding stores (or other industrial gas suppliers) should be the cheapest source for dry ice, which I purchased in pellet form.

The freezing method worked as well as I could have expected, but the removal process still involved over 8 hours of scraping, freezing, and cleaning. I would highly recommend a painting scraper, flat-head screwdriver, and a few cases to beer to make it through this job. Once all the asphalt was removed, I used a vehicle bug-tar remover (aerosol available at Autozone) to remove the final stubborn bits. Final step was an isopropyl wash to remove any remaining oils.

Once the removal and surface preparation was complete, the Resonix Installation went quickly. The panels arrived in great condition, and adhesive was very easy to work with. I recommend a new pair of industrial scissors for clean cuts on the more specific / nuanced shapes required for good coverage. I used a tennis ball as a pressing tool which worked great.

Resonix CLD panels were applied on the entire floor (including on the transmission cover), ceiling, rear cab, and doors. When installing on the floor, be sure the panels do not cover or interfere with critical ports (such as the ones that access body mount hardware).

Slowly but surely, all interior carpet, trim pieces, interior door panels were replaced. Once I sat in the truck, I immediately felt the “silence”- like when you are in a recording studio or theater.

Overall, 100% I recommend this. The Resonix CLD panels were not cheap, but I absolutely think they are worth every penny.

20B410B5-F9C3-435C-8A06-C47F6915EA92.jpeg

8170CEE5-DBC6-4A1E-9316-15D25F3577E1.jpeg

Body Mount Bushings

Over time, all rubber components will become dry, cracked, and not perform as intended. As part of this overhaul, I decided to replace and upgrade all body-mount bushings, suspension bushings (leaf-spring bushings and axle pivot).

Removal of the existing cab-mount bushings is simple, with two bolts accessible by removing the front bumper, and two accessible under the bench seat (Remove carpet and locate two bolt heads).

The old body mounts came out without issue, and the new S&B Silicone Mounts fit easily. Their kit includes everything needed to perform the job, including replacement hardware and even a tool to extract the old bushings.

This made a pretty significant difference in dampening the ride.

Leaf Spring Bushings

This part sucked, and I am glad we will likely never have to do this again. Leaf springs rely on a set of metal sheathes and rubber bushings to mount into the spring hangers on the frame of the truck. With constant loading, road dirt, and age, these bushings are a source of rough rides on many older vehicles.

In theory, the job is simple: remove the old bushings, and press in new poly-urethane bushings from Prothane.

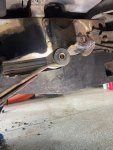
We didn’t have much trouble removing the leaf-spring bolts, using a series of impact guns and wrenches. We used jacks and jack-stands to lower the axle (and springs) to access the bushings. Removing the bushings involved a homemade bushing extractor tool (threaded rod, nuts, and a steel pipe, see YouTube), a blow torch, and a series of drill bits. The old rubber was completely hardened and deformed, making extraction a multi-day job. The new bushings pressed in easily with the help of a dead-blow hammer and the included lubricant.

While working, we soon realized that the ¾ ton axle was slowly pulling the springs out of alignment with the hangers. Once we jacked the axle back into position, the leaf-spring bolts were as much as 1” out of alignment. Fortunately, we had some chain come-alongs in our shop and, along with a series of ratchet straps, dead-blow hammers, levers, and physical force, were able to re-align and secure the leaf-springs into the hangers.

This was intended to be a weekend project that finally concluded after 5x 8 hour days of work.

After the first test drive, the improvement was immediately noticeable. What small bumps would have formerly been loud and enough to bang your head on the ceiling were absorbed with ease, and the truck was much quieter on-road.

645724F5-1A74-4934-9B8A-E9AC2539F116.jpeg

21ADC67E-F1DA-45CB-96FC-BE561BDFF90C.jpeg

133AACD5-A903-4995-8EB6-4D72E13365C5.jpeg

82FD2938-9D48-4A72-BF75-700E6D9C3FA8.jpeg

Corbeau Seats

The original bench-seats in the truck left a bit to be desired in terms of comfort and adjustability. With long road hours in this truck, I began my search for improved seating.

After some research, I learned that Corbeau created a drop-in bracket that mounts to the original bench-seat location, and accepts any of their wide variety of bucket seats.

I spoke to the team at Corbeau and settled on a set of Moab seats, along with their F554 Bracket (Direct drop in for 1983-1995 Ford Trucks w/ Factory Bench Seat)

Installation took a couple hours, and everything was seamless.

The addition of bucket sets meant we lost the middle seat (not a huge loss), but gained comfort, adjustability, and a much more comfortable ride.

Preparing for the Camper

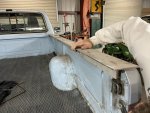
I knew that the camper I had purchased had slightly narrower mounting positions than my truck would allow- My truck bed was almost 4” too wide for the camper. To solve for this, my good friend at Lehman’s Manufacturing in Fresno helped me design some stainless steel adapters.

Our design work was based upon CAD drawings of the camper. We measured the bed-rail of the truck, and calculated the necessary inboard dimension to support the camper. We exchanged CAD files with the camper manufacturer and confirmed fit before sending the parts to the laser cutter at Lehman’s

It helps to have a buddy with a big laser.

We decided on 3/16 stainless plate, as it would surely provide enough strength and rigidity to support the build. This material would also provide enough thickness to countersink our ¼-20 mounting screws into the bed rail.

With the parts laser-cut and formed on the press-brake to match the contour of the truck, everything was TIG welded together and polished.

The team at Lehman’s did an incredible job on these parts, and the finished product looked (and functioned) amazingly. I highly recommend them for any custom or semi-custom steel fabrication work.


AF05B313-2AAB-4110-9EEE-512DB90338F4.jpeg

754889F6-60F3-4CC7-9744-D9A5B27BABB8.jpeg

99107A31-78C2-402D-87D9-FE09C5F092C8.jpeg

32B612FB-FE5B-40A9-B6F1-5EBF5714C2F5.jpeg
 
Last edited:

Kingsize24

Well-known member
Liking this build. I had an 85' 6.9 manual transmission 4x4 dually just out of HS. That truck was an absolute beast. I look forward to your progress.
 

Chris Tom

Member
Tractor Camper gets a Camper

It’s been a while since posting here, mainly because the camper / interior build-out have been completed, and we’ve been non-stop on the road. After months of coordination with the folks at AT Overland, I put my deposit down for the AT Atlas. Mark and Mario were extremely helpful in the design of the bed-rails, which were necessary to adapt the Atlas onto the wider-than-average 8’ Bed.

After a few months, we drove down to Prescott, and dropped the truck off for the three week installation period. (We allowed some extra time as this was the first time installing an AT on this generation of Ford truck). The drive went smoothly with no mechanical issues in the 800 mile drive to AT.

My good friend and I, who helped with the previously mentioned suspension and bed-rail project, flew down to Prescott in March 2023 to pickup the truck. The AT Team did an amazing job with the install, and gave us a thorough run-down of the camper, interior build-out, etc.

We drove up to spend the night around Quartzite for the first night in the camper-

48AE486F-419F-4019-8B6B-CD4107638AB5.jpeg
B024C9D6-C929-4B01-803E-130DDD85A90F.jpeg
 

Chris Tom

Member
Solar / Power Systems

My good friend @tierra.ex at ZeroDeclination helped install the 12v system into Tractor Camper. Although the truck is already running dual batteries (providing the necessary CCA to turnover the massive 6.9L Diesel Motor), I wanted to run a ”house” battery system for the entire camper, which would eliminate any risk of draining the starter batteries.

The install went fairly smoothly, enabling the camper power system to charge off the alternator when moving, and to transition easily over to solar when parked. We equipped the entire system with a master shut-off switch, and integrated all of AT’s electronics (interior lights, 12V plugs, fans) into the system. We exclusively installed BattleBorn, Victron, and SunPower products. As of writing this post (9+ months of use), the power system has been extremely reliable.

I absolutely recommend anybody interested in installing / upgrading their 12v system to reach out to ZeroDeclination. From the “big-picture” build plan, to the fine details of cable routing and layout, these guys understand how to install the right system, the right way. As avid outdoor enthusiasts themselves, both KP and Zac have the experience and knowledge (They’ve worked on high-profile builds such as the Turtle Expedition and many more).

With relatively low power requirements, we installed one 100AH Battleborn, which has provided plenty of power to support all of our electronics, occasional electric blanket (snow-camping), and lighting. Living in California, where we have plenty of sun-light, the 300W of SunPower panels keep everything topped-off.

The panels themselves are attached to the camper using 3M RF6761 Velcro, and UHB Tape. We ran the PV line through the AT Clamshell, into the cabinets, which contain the 100AH Battery, DC-DC Isolated Charger, Circuit Breakers, Fuse Blocks, BMV 712 Monitor, and MPPT 100-30 Solar Controller. It’s critical to use the appropriate gauge wire / connectors for this sort of work, so again, I highly recommend the ZeroDeclination team.

We’ve put this power system to the test, and it’s met all of our expectations. The battery rarely dips below 75% (We typically drive the truck every couple days which charges fairly quickly). We are not running a 12V Fridge, but this system has plenty of capacity should we choose to do so one day.
5FE4A2C7-8CBC-4DBD-82C7-18EAD41E8BAF.jpeg
1A18DF62-8A16-4D0C-8BEF-F75747FFCD99.jpeg
2DA54EE7-CC61-44C5-83A2-20BC7B70D3F1.jpeg
 

Kingsize24

Well-known member
Pictures of the electrical or the interior?

Mainly curious of the wiring and how it was run into the top. Glands used, etc. And also curious what you did for the electric panel. I'm pulling all my stuff out of the trailer for interior now and honestly trying to get more ideas. I like seeing different setups and mixing what I like about each.
 

Forum statistics

Threads
188,178
Messages
2,903,430
Members
229,665
Latest member
SANelson

Members online

Top