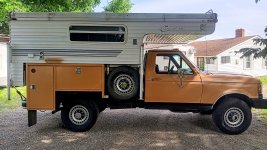
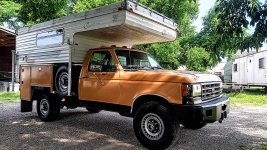
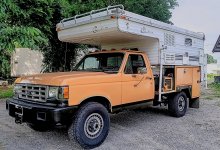
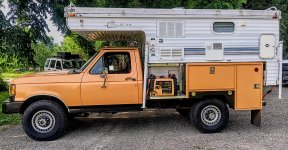
1988 F250 Utilitarian Camper build.

1000001019.jpg1000001048.jpg1000001049.jpg
1000001022.jpg


So this is it. I've always owned an old square body ford and have always wanted to build one into something great. This is the build to scratch that itch.
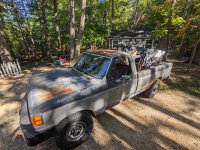
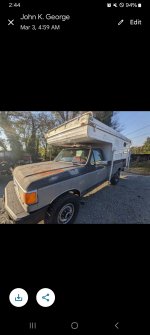
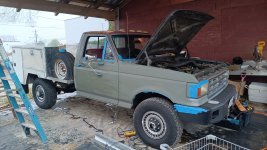
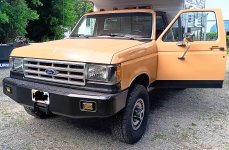
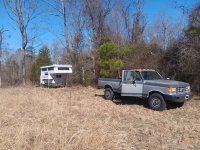
About four months ago I began the project. I started with an old patina freckled 1988 f250. It has a 460 gas engine mated to the ZF5 manual 4wd transmission. Here it is in its original form.f3726ca3-f116-4ca8-a245-1e5afa5f4a6a-1_all_187.jpg

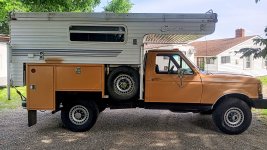
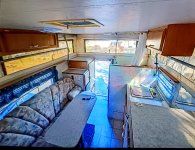
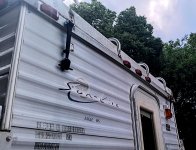
I started the build by buying the truck camper. I knew I wanted something cheap, was fully contained with a bathroom, and was a pop-top. I ended up on this 1988 sun-lite camper. This camper will be completely rennovated (will do that when im done with the truck portion). For A bit of foreshadowing though. I'm going to replace the entire pop-top roof. The original is way too heavy to have that high up and it's original crank-to-pop the top system is garbage... its 2024 for Pete's sake.
1000001062.jpg


After I bought the camper, I knew what dimensions I needed for the utility bed. So I bought an aluminum utility bed from an old Toyota pick up and started chopping it up.f3726ca3-f116-4ca8-a245-1e5afa5f4a6a-1_all_85.jpg
 

Attachments

  • 1000001019.jpg
    1000001019.jpg
    2.6 MB · Views: 17
  • 1000000915.jpg
    1000000915.jpg
    1.2 MB · Views: 16
  • 1000000885.jpg
    1000000885.jpg
    611.8 KB · Views: 18
Last edited:
Once the bed was bought, I removed the old square body bed off the truck and sold that for half the price of the utility bed, score.
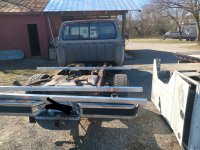
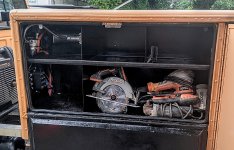
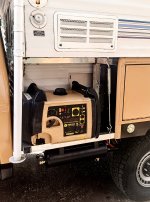
So I cut the rear boxes off of the utility bed and opted out of using the forward box in order to make room for my full size spare and generator. I built this bed around having that full size spare placement. I love the old jeep trucks with that set up so I copied them.
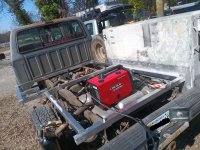
I built the entire bed out of aluminum. The utility boxes are aluminum and I made the bed frame with 2x2 aluminum tubing.1000001061.jpg1000001063.jpgf3726ca3-f116-4ca8-a245-1e5afa5f4a6a-1_all_7399.jpg
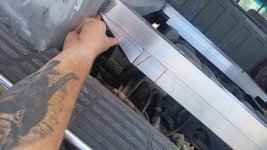
I've since doubled up the aluminum Tubing and reinforced with these trianglur gussets that give the bed way more support for the weight of the boxes and my tooling.

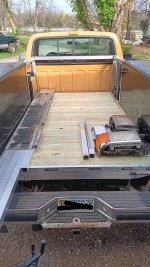
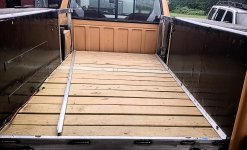
I went with a wood flooring for a few reasons. One, it's easily replaceable, two its cheap, and three, I made the bed flooring easily removable. The wood is held in with two pieces of aluminum angle bolted to the bed. This way, I have easy fuel tank, axle, and suspension access throughout the build and on the trail when things need to be fixed... it is an 88' afterall.
1000001058.jpg
 
Last edited:
Once I had the boxes welded to the frame, I mounted the generator and full size spare and it was ready for paint.
If you can't tell already, this is a budget build. I like to DIY to learn for the future builds and to keep it budget friendly...ish.
Anyway, paint, here's what I did...

I did some basic body work, nothing crazy. I bondo-ed a few dents, banged some out with a shaping hammer, cleaned and patched some body rust and sanded the hell out of it. The whole cab and both boxes. As I sanded each panel, I would finish it off with spraying etching primer since I would have bare metal in places.
f3726ca3-f116-4ca8-a245-1e5afa5f4a6a-1_all_7383.jpg


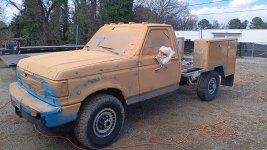
I knew I wanted bedliner but I hated the textured crap as a body paint. So I found durabak smooth finish bedliner. Sweet. 140 bucks for a gallon. I needed 3 gallons. Two desert sand and one gallon of black. Why? Because it's a square body and square bodies HAVE to be two-tone.

Next I knew I had to spray it because it's impossible to roll on shiny bedliner and not see lines. So I bought a 60 dollar airless paint sprayer on Amazon. I've never sprayed before so I royally messed up the first attempt. Drips every where from overspray.
I ended up having to resand the entire thing but it kind of worked as a filler primer for the next attempt which turned out 1000x better.
Here's the result of my screw up.
f3726ca3-f116-4ca8-a245-1e5afa5f4a6a-1_all_7410.jpg

Overall I'm very happy with the paint job and for the cost. The durabak is super durable too. I'd give it a 7.5(or 460 ;) out of 10 paint job.

I will be using the same color scheme on the camper so it looks like one unit when the camper is mounted.
 
Last edited:
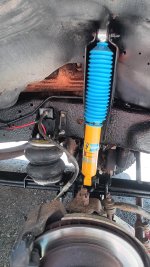
Next, I installed some suspension components. I went with blistein struts with airbags at all four corners. 1000001046.jpg

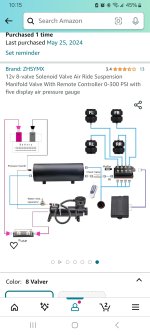
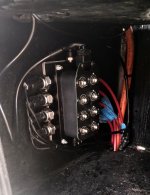
I rigged up the bags to an 8-way low voltage solenoid valve system. I did this because I wanted it remote control operated and I wanted to control them individually. This way I can level the camper truck when it's on a slight incline.

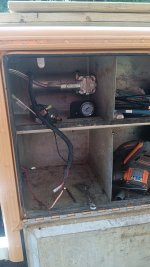
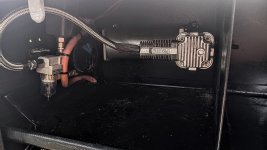
To power this system, I have a battery in the same box on the bed. (I am keeping the truck and bed battery systems separate). In that same box is the Viair, continuous duty, onboard, air system I installed. Along with a pressure switch and water separator af the exhaust check valve of the compresor. 1000001039.jpg1000001032.jpg1000001031.jpg1000001052.jpg

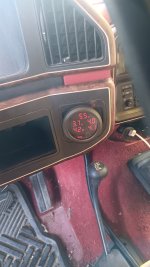
This is my digital read out of the air system. All four bags and tank pressure.

I'll have to get some more photos of the finished solenoid box set up inside the box with the compressor.

This is where she stands as of now. Next is to rennovate the truck cab interior and the camper interior with the roof replacement. However, work calls and I must go back to sea for a a couple months before I can continue.
 

Attachments

  • 1000001038.jpg
    1000001038.jpg
    450.4 KB · Views: 12
I figured I'd just post some pictures of little progress I get done here and there while I'm waiting to go back offshore for work (I don't want to dig into the major camper work until I'm back.)

I didn't have finished product pictures for the air compressor set up in the utility bed box. I'm also cleaning and painting the insides of the boxes as I get them configured how I want them.
1000001099.jpg

1000001097.jpg1000001080.jpg
The blue tape on the hoses was just for identification of which lines comes from where. All that will be removed eventually.
 
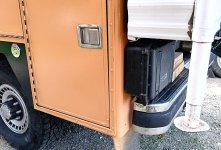
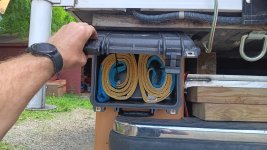
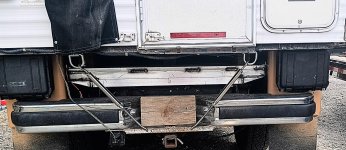
Next, I decided I didn't like the rear overhang of the camper. The 90° lines were too long or something. So I mounted two pelican cases under that overhang on each box. Right now it's a perfect box for my rigging and straps.1000001101.jpg1000001073.jpg1000001094.jpg


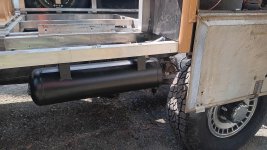
You can see in the above photo that I've Configured my rear camper mounting as well. I'll build a beefier bumper for it soon and I'll make its mounting similar. I also have the front camper mounts figured out in the below photo. Notice the mounted and finished air tank below the generator too.
1000001095.jpg

And some cheapo fog lights installed. I'll have to upgrade these eventually but they look pretty sweet for now.
1000001100.jpg


Heres a photo of the wood plank bed floor. Notice the piece of angle I've unbolted and moved to the side. This makes it way easy to remove the wood and access all of my rear undercarrage from above.
1000001096.jpg


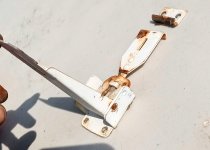
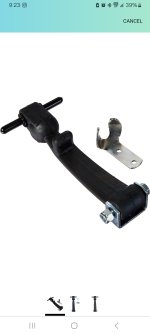
Lastly I removed these old crazy latches that would just barely hold the pop-top down. I replaced them with some Buyers heavy duty rubber ball latches.
1000001090.jpg
1000001102.jpg
1000001092.jpg
1000001091.jpg
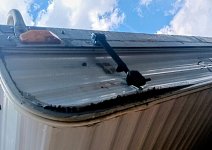
And on the last latche install, I find this... ROT. So that's going to need some serious attention when I get back from work in a few months... I'll ********** the 1988ness right out of that camper....
 

Forum statistics

Threads
188,395
Messages
2,904,138
Members
230,274
Latest member
mbauerus1
Top