1989 Cherokee Laredo Build Thread

zachtyler

New member
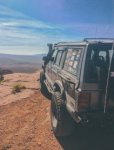
Hey there, my name is Zach! I just joined the forums, and wanted to introduce myself! I'm a 21 year old student in Southern California. I've got an 89 Cherokee, and I have recently become more interested in the expedition/overland style of off-roading. I grew up riding in my dad's jeep which included a lot of hardcore wheeling. I'm going to be using this as a build thread, so everybody can check out my rig and see what I've done so far. I am also a member over at Overland Bound, where I already have a build thread, so I will be transferring the text and images over.

1989 Jeep Cherokee Laredo
Engine: 4.0L Inline 6
Transmission: AW4 Automatic w/ NP231 Transfer Case
 
Last edited:

zachtyler

New member
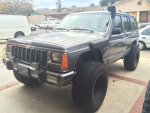
When I got the jeep it already had a small 3 inch lift. It also had some beefy tires. Too beefy for my liking! There were 33'' Dakota Definity All-Terrains on 15x10 rims. The 10 inch rims were very wide and brought the tires out more than I had lked. Other than that, pretty basic Cherokee. Power locks and windows. Tinted windows were a plus! Missing radio faceplate. Overall the interior looked fairly new. Paint was decent. Minimal rust. Overall, pretty good shape for a 27 year old car!

One of the first pictures. I don't have a pic of the jeep when I first got it, but this is how it looked minus the snorkel. There were also some weird aftermarket mirrors bolted to the doors. This meant we needed to take a trip to the junkyard to yank some mirrors off a Cherokee. Which we did, and those junkyard mirrors were quickly installed and are seen in this picture. The snorkel wasn't even hooked up to the air intake. It remained like this for a couple months. But don't tell anybody! There was some under-the-hood maintenance that needed to take place so I figured that should get done first before I put too much work into this thing.

IMG_9871.jpg
 

zachtyler

New member
Got a CB antenna installed (above drivers side tail light) by my dad's friend who owns a CB shop. (Yes, they do exist!) I could've done it myself but having him tune it for me and make a custom bracket was much easier. Picked up a CB on the way home. A Uniden Pro520XL. My father had always used one of these, and I had been in other peoples vehicles before and was amazed how crystal clear he would sound. Our wheeling buddies had expensive CBs and they nearly all sounded horrible. So, we went with the same one he had! Took my rig out for a test run to a riverbed off Lockwood Valley Rd that is open to off-highway vehicles. Had a good time despite my build being very simple as of then.

IMG_0026.jpg
 

zachtyler

New member
Next, I added a 50 inch curved lightbar to the top of the windshield. I can't find a picture that I took right after install, but you will see it in later pictures. I lost quite a few images when I went through some phone issues. I removed my stock rear bumper in anticipation for my new rear bumper + tire carrier to come in. I had a front bumper on the way as well. Both bumpers are from a company by the name of Affordable Offroad. I didn't want to break the bank and they appeared to be solid. I also added some vent visors above all my windows for a different look. I also installed some Flexy Flares, which are just flexible rubber fender flare extensions. They are still my primary fender flare. The reason is to avoid any tickets. Where I live, you are supposed to have your flares cover the width of your tire. No flares, and you might get a ticket. A cheap way to avoid the risk.

EBA76675-8CDC-4A30-B3C9-1B6C664843F7.jpg
 

zachtyler

New member
Time was passing by. I'm in college so my schooling and work had kept my pretty busy. The build didn't happen overnight! My birthday gift was a 4.5'' long-arm suspension lift kit to replace the CHEAP 3-inch lift the previous owner had put on it. I also installed my new tire carrier and mounted a 33'' BFG All Terrain K02 on a 15x8 rim, rather than another 15x10 rim that was currently on the rig. This brings the tires in towards the body a bit more. I put a Hi-Lift Jack on my tire carrier which had incorporated mounts. I also installed a front bumper which will be featured in the next set. This is how it looked after the new suspension/lift was installed. In person it looked like much more than 1.5 inch difference!

3742EC39-873C-4E66-8F31-976C6C3769B0.jpg
 

zachtyler

New member
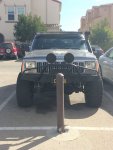
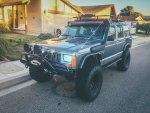
Next thing I did was pick up 4 more 33'' BFG All Terrain K02s. Mounted them up and was very happy with the look and the fact that they weren't as wide as my old tire/wheel combo. Here is a picture showing the new front bumper and the K02s. You can also see the 50-inch curved lightbar at the top of the windshield I had mentioned earlier. I managed to sell my old tires (which were still in good shape) and 15x10 rims for $200 which was a good deal for the buyer. Wanted them off my hands! On top of the front bumper I mounted two 7-inch LED spot lights that my dad didn't end up using for his buggy. They didn't have lens covers. They did however have flood covers which are clear covers that disperse the light into a flood pattern instead of the pencil beam. A quick coat of spray paint and they were now light covers which also prevents tickets. I threw on a couple D-ring shackles as well.

5BB87D13-BDC3-4313-B137-C0AC24E41BE8.jpg
 

zachtyler

New member
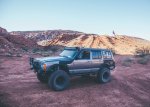
I removed the CB antenna from the left rear of the vehicle and mounted it to my tire carrier on the passenger side. I was now expecting some rear quarter panel armor from DB Metalworx. This is how the build was looking from a side view. You can see the long arms under the rig.

39F405D2-B3C3-49F0-ADA0-364E72E42F4B.jpg
 

zachtyler

New member
Not totally bolted on as of this picture, but here is the new armor panels. It extends out past the taillight housing the prevent any damage from the side. The tube essentially puts a spacer between your vehicle and say a boulder, protecting the body. But, this can also save a window from being shattered because it will prevent the boulder from hitting the window itself. I personally always liked the look of having that extra rubrail coming out from the side. I also like the look of my Flexy Flares up against the armor.

Screen Shot 2017-03-14 at 8.30.26 PM.jpg
 

zachtyler

New member
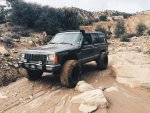
The next installs were JCR Offroad Deluxe Rock Sliders and a Smittybilt XRC9500lb winch with a synthetic cable. A front locker was also isntalled. I also went to the hardware store and bought some materials to build limb risers and made some for fun. Totally changed the look of my rig. These pictures were taken in Utah at an event named Trail Hero. Held at Sand Hollow State Park. The first real test of my build! The new tires and the front locker proved to make a HUGE difference compared to that first run I did. It was like night and day.

DSC04300.jpg Screen Shot 2017-03-14 at 8.32.11 PM.jpg
 

zachtyler

New member
Next up, I managed to find a rear window louver, similar to the ones for old school sportscars. I was shocked to actually find one made for a Cherokee. I bought it because I figured it would be unique and look cool. I think it looks pretty sweet. I've also added a Trasharoo. This is how the build currently stands as of Nov. 30, 2016. I am currently waiting on my roof rack to be finished. Will update thread in the coming days!


IMG_0709.jpg
 
Last edited:

zachtyler

New member
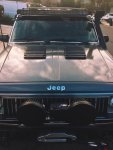
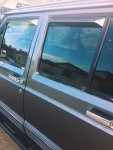
I cut some holes in the hood and installed some Napier Hood Vents. Cherokees don't exactly have a lot of extra room under the hood. This makes it hard for the hot air to go anywhere. Naturally, it wants to rise. I can put my hand above the vents and feel the heat coming off. Plus, i like the look. Next thing I did was take those black vent visors off. I replaced them with some smaller stainless steel/chrome ones that I feel suit the look of the vehicle more. It also allows me to use the small vent windows on the front windows. The previous vent visors didn't allow me to open them. And of course, put my OB emblem on!

ImageUploadedByOverland Bound Talk1480613683.145816.jpegImageUploadedByOverland Bound Talk1480613843.637011.jpeg
 

zachtyler

New member
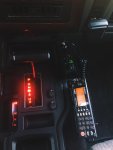
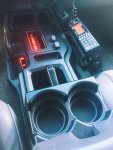
On the interior, this is where I mounted my CB. I also have a Uniden scanner right next to it. I use for a couple things. First, I actually like being able to pick up the weather broadcast. Secondly, when I am tuned to a channel on my CB, I can use the scanner to scan the rest of the channels. It is fun to mess around with. I replaced my shifter lights with red. I originally did white LEDs but they were very bright at night. The red is much softer. My guages are also backlit with red LEDs now. Without cupholders, I was struggling a bit! I bought a cheap little XJ cupholder than uses some existing screws in the center console to mount. The two switches next to the shifter are for my auxiliary lights (lightbar and spots). I plan on using the empty space in front of the shifter, under the middle A/C vent to build a bigger switch panel.

IMG_0824.jpgIMG_0823.jpg
 

zachtyler

New member
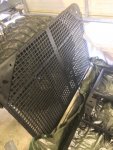
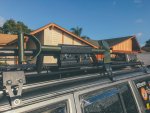
Got my roof rack installed today. The rack itself is a JCR Base Utility rack. I got the platform version, without a basket. The reason for this is I didn't want a basket around the entire rack. I wanted just the front to have some tubing above the platform. I took it to my buddy who made the fabrication mods for me and added some tubing. This rack has no floor, and there was a lot of space between the tubes. I added some FarmTek chicken-coop flooring. Before you say I'm crazy, this stuff is actually quite popular for roof rack flooring. It's gotten to the point they even added it to the product description on their website. It's super easy to cut, strong, and can be zip-tied into place. It simply adds something between the tubes. The majority of the weight will still be on the tube itself. I can walk around on top of the rack with no issues. If I stand in the middle of the flooring, it will obviously flex and the zip-ties will be tested! :grinning:

I also added my limb risers back onto my rig. Here's a picture of the flooring I am talking about, and another shot of how it's looking.

IMG_0893.jpgIMG_0897.jpg
 

zachtyler

New member
Added a Smittybilt Defender Axe and Shovel Mount. It's made to mount on the defender rack from Smittybilt, which I do not have. I have a custom rack, as mentioned before in earlier posts. My tubing is 1.25", so I bought some tube clamps off Amazon, used for mounting lights to tube bumpers, racks, etc. I then bolted on the axe & shovel mount. It works. I have this shovel, it's a little small but for now I am going to keep it up there. I plan on adding an axe at some point as well. Hopefully sooner rather than later.

IMG_1064.jpgScreen Shot 2017-03-14 at 8.37.27 PM.jpg
 

zachtyler

New member
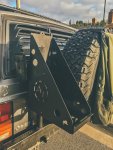
I've added an Adventure Trailers NATO Jerry Can Holder. I welded on a couple of light tabs to my rear tire carrier so I can easily bolt it on and off. It's lockable and securely holds a 20L jerry can, which I also have.

IMG_1122.jpgIMG_1424.jpg
 

Forum statistics

Threads
189,265
Messages
2,914,944
Members
231,959
Latest member
lkretvix
Top