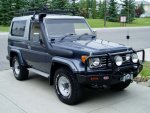
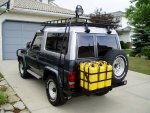
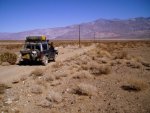
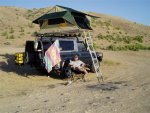
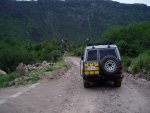
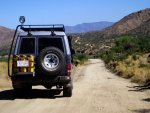
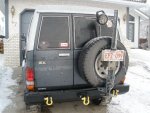
1990 Land Cruiser HZJ73 vetting and build

CanuckMariner/Nomad

Love having fun 😊 in the 🌞 by the ⛵ and the ⏳
Battery Management System

I was starting to think I needed to figure this out, as I had a number of 12 V applications (CB, Ham, Stereo, etc) which only came in 12V so I had to address this quickly before I did any damage to my 2 new Optima blue tops.

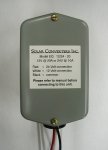
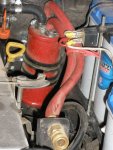
Luckily there is a company (http://www.solarconverters.com) [nothing to do with the sun, just the name] here in Kanukistan (actually upper Kanckistan) which made a device which had three wires one positive, one negative and one between the two batteries which measure the voltage about every second and drew power from the battery with the most voltage. This device they call a 12 / 24 V @ 20 Amps Battery Equalizer and DC Autotransformer and goes for about $200, yes it seems expensive but then so are the two Optimas and why not keep them in great condition so the truck will start when you want it to. It essentially keeps both batteries the same so that the alternator keeps them both charged the same. Neither one is discharged more than the other. The two additional leads go to a 6 or 12 fuse panel (Blue Sea Systems) and then the applications hook to this. By the way, this device is totally water proofed with a seal and has fuses to protect it from damage. This was a very neat installation.

Initially I attached the solar converter device to the side of the passenger seat and a mickey mouse fuse panel from NAPA and soon had a bird's nest of wires under there that I knew if I didn't fix this I would have a fire or short out when I filled with water. So I once again removed the seats and carpet etc. and put all the wiring in a loom and directed it to the back of the centre console where I had room as my truck didn't have the rear heater/A/C controls, for the Blue Sea fuse panel. The solar converter device was moved to behind the passenger air vent so it was high enough not to short out.

So now, I have enough fused spots for my CB, Ham, ERC, Stereo, 12V aux plugs (front/back), etc. Given that very few things are on at once (CB/Ham - <10 AMPS; 12 V Aux < 10AMPS) that draw more than 20 AMPS, I can't see any problem,. The fuse panel is rated for up to 100 amps max, so the multi-fused solar converter can handle is all. I also mounted the two lights (green/red) indicating all is good or not, in a position where I can see.

I also installed an ERC (Electronic Rust Control) system called CounterAct from Canadian Tire, which had its origin in OZ. A cousin has a similar system on his airplane for over 20 years with no rust. This unit draws such little power (.55 AMPS) and is on all the time to stop NOMAD from loosing any more of her nickers (more on that in future installments).

As we are in the electrical mode, I also rewired by FET LandMaster hi/lo auxiliary lights (JDM - now defunct but I think IPF bought them as they look so similar) from 12V (I was surprised) to 24V which meant changing the bulbs and wiring and relays and a lighted Toyota switch. Won't bore you with how this was done as I am sure enough of you have wired in lights before.

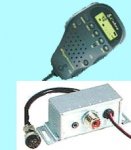
Next was the CB, as they are relatively cheap and easy to get. Ever notice that there are very limited CB stores in towns and finding anyone who knows anything about them is even harder! I contacted Cobra and Wilson directly to make sure it would all match and work as desired. I got a used Cobra All-In-The-Handset 75 WX ST from eBay for $60 and bought a Wilson Trucker 2000 as I was told that it would improve the range. I chose the Cobra as it needed little room and I could find some obscure spot (under the trani console) to mount it and the hand set had all the controls so looking down for settings.

I also posted a photo of the No Ground Antenna Kit I am hoping to get from Wilson..soon? Got it! Now to try it out after the great freeze!

The microphone bracket I attached to a steel bracket I fabbed during my time with the rear bumper fabrication.

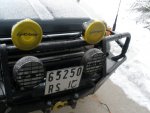
The antenna was mounted on the ARB Bull bar to an ARB antenna bracket. Had to remove the plastic/rubber grommet from the antenna kit to get a good ground. However, I have since found out why my range is still rather limited, courtesy of Mark Weiss (Gadget Guy) at SnT 08 who suggested I contact Wilson regarding a No Ground Plane. Since then, Wilson has confirmed they had a product to fix this on trucks with no metal roof (remember, mine is FRP) like tractors, etc. but didn't sell enough so took them off their website. Well they are sending me one and perhaps two for my friend (Targa88 - he bought one on my recommendation) as the coil has to be above the rood line to work. They didn't mention that when I bought it as they assume it will be mounted on the mirrors of a 18 wheeler. We are currently waiting for them to arrive.
 

Attachments

  • eq12-24-20.jpg
    eq12-24-20.jpg
    39.9 KB · Views: 57
  • 126.JPG
    126.JPG
    25.9 KB · Views: 64
  • P1010005.JPG
    P1010005.JPG
    85.7 KB · Views: 55
  • 75_th.jpg
    75_th.jpg
    26 KB · Views: 36
  • P1010003.JPG
    P1010003.JPG
    86.7 KB · Views: 54
  • ngkit.jpg
    ngkit.jpg
    152.5 KB · Views: 41
Last edited:
CanuckMariner/Nomad

Love having fun 😊 in the 🌞 by the ⛵ and the ⏳
1st Gen rear bumper

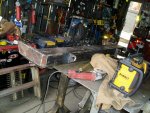
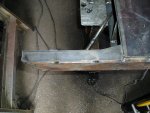
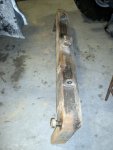
My 73 came with a pretty lame excuse for a rear bumper and since most of the time which way do you get pulled out, the rear, right! So I wanted to replace mine with something I can actually pull someone or they can pull me. Highlux had met a guy who is a welder/fab guy by trade and introduced him to me.

We spend a good part of an afternoon going over what I wanted and made an appointment to meet again and get started. When I got there, he had already started with 1/4" material as he had it as scarp metal, and my being a newbie, did know any better and figured stronger has to be better, right?

I also wanted to put a jerry can holder on it to hold at least 2-3 cans, as I was wanting range.

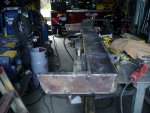
Also wanted it to look like it was meant for the truck not an after thought or tubular. I even copied the cut off corners as on the body. You will note that there is a lot of welding, rather than bending (see 2nd Gen Bumper next). This additional welding proved to be problematic as ti has the tendency to heat up surrounding metal and begin to warp. Hence you have to weld in sections no more than and inch or two and then move away to somewhere else until it cools down.
 

Attachments

  • P101000c.JPG
    P101000c.JPG
    673.3 KB · Views: 73
  • P101000b.JPG
    P101000b.JPG
    660.3 KB · Views: 87
  • P101000a.JPG
    P101000a.JPG
    646.4 KB · Views: 75
  • DSC00012.JPG
    DSC00012.JPG
    876.7 KB · Views: 78
  • DSC00014.JPG
    DSC00014.JPG
    814.6 KB · Views: 85
  • DSC00016.JPG
    DSC00016.JPG
    839.9 KB · Views: 87
  • DSC00017.JPG
    DSC00017.JPG
    856.6 KB · Views: 79
  • P1010002.JPG
    P1010002.JPG
    666.6 KB · Views: 85
  • P1010005.JPG
    P1010005.JPG
    667.3 KB · Views: 83
  • P1010006.JPG
    P1010006.JPG
    662.7 KB · Views: 89
Last edited:
CanuckMariner/Nomad

Love having fun 😊 in the 🌞 by the ⛵ and the ⏳
1st Gen Bumper continued

As noted afterward, we forgot to put on safety hooks for the chains required by DOT/MOT when hauling a trailer. 2nd Gen fixed that (more on that later)

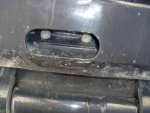
A hole was cut under the 2" receiver to allow access to the 4 bolts holding the receiver to the rear frame rail cross member.

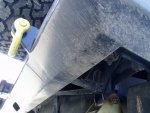
Note the corners as well as the underside where beveled to allow for a larger departure angle.

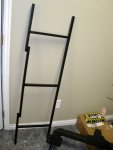
During the build, my welder/fab guy waffled a bit on the agreed price so the fuel carrier never got finished nor did the roof rack get built. However, I did meet his partner who designs way better and finished the project on time with no waffling. He did build a sharp looking ladder which I found on a troopy photo form Africa. As you ca see, I attached a Hella Matador work lamp (from Sierra Expeditions) which was converted to 24V and switched from inside with an old Toyota deck lamp switch from a junk yard.

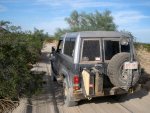
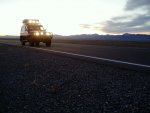
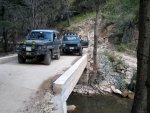
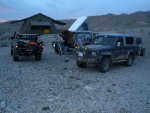
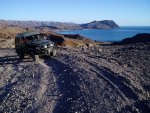
Looking back now, the 1/4" steel was way over build (heavy) and probably contributed to the trani problems I had on my next big trip. More on that later...there is a lot of that isn't there, but you will understand why shortly. As with all builds, like a house, doing it the first time is more or less a learning experience and one definitely thinks of better ways of doing it the next time. All in all, a great experience and I learned tons. I have also posted a few photos of the truck in action on some trips, I am sure most of your will spot the locations.
 

Attachments

  • P1010007.JPG
    P1010007.JPG
    634.2 KB · Views: 80
  • P1010008.JPG
    P1010008.JPG
    664 KB · Views: 71
  • Trip - 007.jpg
    Trip - 007.jpg
    44.6 KB · Views: 171
  • Trip - 014.JPG
    Trip - 014.JPG
    684.2 KB · Views: 222
  • Trip - 035.jpg
    Trip - 035.jpg
    53 KB · Views: 84
  • Trip - 020.JPG
    Trip - 020.JPG
    65 KB · Views: 180
  • Trip - 005.JPG
    Trip - 005.JPG
    247.5 KB · Views: 100
  • Trip - 012.jpg
    Trip - 012.jpg
    39.5 KB · Views: 73
  • Trip - 022.JPG
    Trip - 022.JPG
    245.5 KB · Views: 89
  • Trip - 025.JPG
    Trip - 025.JPG
    247 KB · Views: 96
Last edited:
CanuckMariner/Nomad

Love having fun 😊 in the 🌞 by the ⛵ and the ⏳
2nd Gen rear Bumper

It is now about 2 years since I had the 1st Gen Rear Bumper and had a great time with it, lots of trips (Baja, Death Valley, Moab, etc.) and problems. As I may have mentioned in an earlier post, I had a trani problems part way through one of my trips. This was primarily due to the trani and a weight power ratio thing (more on that when I get to the trani a bit later).

On my Nov 07 annual fall/winter desert trip to Death Valley via SnT 07 (which I didn't make), I was fortunate enough to meet up with a fellow ExPo member at the hot springs in Saline Valley, who has a sharp rig with many mods done by himself. With some discussion and picture taking, he volunteered, should I ever be in his area to let him know and he would be willing to fab anything for me. You may note I am leaving out details about him, his location, rig specs, etc., on purpose, as I am sure he doesn't need more fab work as he spends most if not all his time between his welding/fab work and off-roading. More about him later.

On with the bumper...during my several trips to my local Toyota Dealer (CCT) that helps me out with mechanical issues I cannot repair myself, the GM comes up to me on one of my visits, as he too owns a HZJ73, but in white, manual transmission , etc. and offers to buy my rear bumper, fuel carrier, ladder and roof rack. Surprising even myself I say OK, how much? Long story short the deal is made and I have some funds to get the bumper redone but better, right! More research into this and roof racks, fuel carrier etc., over the winter naturally as not much going on here in Kanukistan, with blankets of snow on the ground and sub freezing temperatures. I find that having a roof rack, at my age, and opening and closing a RTT each day, at 7 feet plus off the ground (they do not go up/down as fast/easy, as OJ says it does when they are 7' off the ground!), is too much hassle so I sold it to Highlux and have more funds for more goodies!

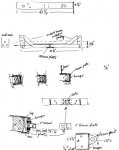
I contacted the DV friend I had made by email to let him know of my plans to make a trip to see him and make use of his extensive fab/weld skills and yet to be seen workshop..WOW, what a shop! We exchanged a few emails on design (see sketch) and materials (bending instead of welding, 3/16" instead of 1/4" (probably should have gone 1/8" instead but that's for 3rd Gen) and then it was merely plan a trip to be in his area. What a trip, best I have had but that's another story.

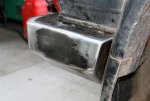
When I arrived we immediately got into it. He had already had a friend with a commercial shop who bend a "G" channel into 3/16" steel and cut it with a laser cutter with two end pieces about 20" long each for the side guards. This saved a lot of welding, time, and warping as well as having a much better look. It also has a much better fit than the 1st Gen.

First was to get the mounting brackets in so we knew where it was going to sit. Centred the main bent piece and market the spots. Brackets where made from 1/2" steel. Once they were welded on, next is to test fit and adjust (if necessary) and mark the tree holes on each to bolt to frame rails. Drill and mount to measure for 2" receiver (he had already gotten that) and plate to hold in place. Weld that on, test fit and adjust again (if required) and mark four bolt holes to frame rail end member. Reattach bumper again and begin side guards for each side.
 

Attachments

  • B-1.JPG
    B-1.JPG
    858.7 KB · Views: 62
  • B-2.JPG
    B-2.JPG
    867.5 KB · Views: 46
  • B-0 (Small).jpg
    B-0 (Small).jpg
    52 KB · Views: 72
  • Bumper 001 (Small).jpg
    Bumper 001 (Small).jpg
    23.6 KB · Views: 87
  • B-5 (Small).jpg
    B-5 (Small).jpg
    52.6 KB · Views: 53
  • B-4 (Small).jpg
    B-4 (Small).jpg
    41.8 KB · Views: 55
  • B-3 (Small).jpg
    B-3 (Small).jpg
    37.4 KB · Views: 59
  • B-6 (Small).jpg
    B-6 (Small).jpg
    30.5 KB · Views: 62
  • B-8 (Small).jpg
    B-8 (Small).jpg
    50 KB · Views: 74
  • B-9 (Small).jpg
    B-9 (Small).jpg
    55.1 KB · Views: 81
Last edited:

CanuckMariner/Nomad

Love having fun 😊 in the 🌞 by the ⛵ and the ⏳
2nd Gen Rear Bumper Cont'd

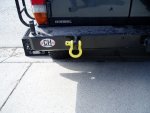
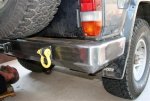
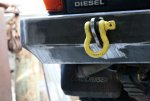
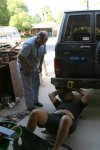
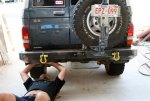
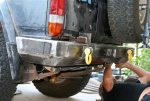
Lots of fiddly welding and cutting, trips to ACE hardware for bolts, etc. so while he fabbed/welded I ran errands. We also didn't forget the safety hooks/chain links that DOT/MOT requires. You may note that the main 1/2" brackets holding the bumper to the side frame rails were also cut right through the bumper face to allow for 2 clevis points. Receiver was drilled to allow for a locking tube for a middle clevis point or ball hitch.

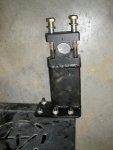
Lastly, as can be seen in previous post photos, a mechanism to hold or hinge the fuel carrier I wanted. My Friend resisted this at first as his normal way forward was to use a hinge made from an axle and that would be too large - blocks turn signal. After a few beers, a day of trails, I cam up with a solution since he had a bucket full of heavy duty bolts (1-1/4"), Why not use a bolt with two nuts separated with a tube and welded to the interior of the bumper. Then let the bolt screw down into the second (deepest) nut for strength and then fab a clamp to hold two AT fuel carrier cages bolted together. The real problem was the clamp, but he didn't say anything. So while I slept one night he fabbed a clamp. We used 3/5" bolts grade 5 of coarse to bolt the clamp together. Once the carrier was on, we unscrewed the bolt 1/2 turn so that that was the limit of the swing around of the carrier and it wouldn't hit the side of the truck. Eliminates the need for a stop.

So now I have an extra 40 litres (10 US gals) of fuel or water or any combination. This would change before the end of the trip (more on that later).

Continuing my travels. I noted that the locks on the AT fuel carriers would bounce up and hit the rear door leaving little marks. This progressed to getting jammed between the carrier and the door resulting in small dents. I placed some electricians tape between the locks and the door but that didn't help. Finally, I sued some zip ties to hold the locks in place but this was not the right way to fix this. When I got to CBI in Idaho Falls, ID - Steve Eagan, the proprietor and another fab/welding extraordinaire, let me use some of his scraps and equipment to build a fix.
 

Attachments

  • B-11 (Small).jpg
    B-11 (Small).jpg
    56.4 KB · Views: 80
  • PB160548.JPG
    PB160548.JPG
    872.5 KB · Views: 46
  • PB160550.JPG
    PB160550.JPG
    825.8 KB · Views: 38
  • PB160547.JPG
    PB160547.JPG
    815.4 KB · Views: 42
  • PB200611.JPG
    PB200611.JPG
    943.9 KB · Views: 50
  • PB200609.JPG
    PB200609.JPG
    856.1 KB · Views: 46
  • PB160551.JPG
    PB160551.JPG
    925.3 KB · Views: 45
  • Trip - 642.JPG
    Trip - 642.JPG
    733.3 KB · Views: 125
  • PB180585.JPG
    PB180585.JPG
    741.1 KB · Views: 39
Last edited:
CanuckMariner/Nomad

Love having fun 😊 in the 🌞 by the ⛵ and the ⏳
4x4 Lightforce Striker 170

You may well wonder what happened to the lights...with the sale of the roof rack, ladder, bumper and fuel carrier, I kept the 4x Lightforce 170 Strikers (24V version) thinking that I could use them in the future. I ended up putting two up front with yellow filters (SierraExpeditions.com) and sold two to a friend at cost and converted to 12V.

The yellow filters work wonders in the desert through the dust (moon dust) and also the fog when doing the mountain passes in MT/ID in late fall and winter. Also, when driving in the pitch black (anywhere) having all up front - the 2 x Lightforce Strikers, 2 x FET LandMasters and the 2 x OEM driving lights; all on hi beam, makes for a very bright vision. And remember for those that have Lightforce driving lights, they are adjustable from pencil to wide beam by merely turning them.

Also, something to remember when mounting them, keep the lights so that you cannot see them from the driving position as the filter throws very bright light back at you. So they must be mounted below the line of sight ahead of you or above you while driving.
 

Attachments

  • Trip - 002.JPG
    Trip - 002.JPG
    271.3 KB · Views: 98
  • Trip - 314.JPG
    Trip - 314.JPG
    759.5 KB · Views: 125
  • Trip - 0960.JPG
    Trip - 0960.JPG
    743.6 KB · Views: 141
  • P1010001.JPG
    P1010001.JPG
    85.7 KB · Views: 56
Last edited:
CanuckMariner/Nomad

Love having fun 😊 in the 🌞 by the ⛵ and the ⏳
The Transmission Problem

Where to begin other than some technical stuff. My '90 HZJ73 from Japan came with an automatic trani. I would have preferred a manual and I would never have had this problem from the onset. It came with a 1HZ 4.2 L 6 cyl. diesel engine and a A440F trani, common to 60, 80 and possibly 100 series, whihc I found out after the fact!

Apparently, and news to us newbies, this transmission is known to have issues with power/weight ratio. That is, when you put too much weight on the truck and too much power this trani overheats and the idiot light on the console comes on.

This happened to me numerous times on my first attempt for a lengthy trip south. Each time the light came on I stopped and waited for it to cool down. I even went to a Toyota dealer in Denver area who said all is fine, even gave me a half full Dextron III ATF container in case I needed more. Ultimately, the trani gave up, no gears, whilst descending Moki Dugway on HWY 261 in S.E. Utah. Luckily my brakes didn't give way and I coasted all the way to Goosenecks. There I tried to hitch a ride to Mexican hat to no avail and ended up walking. Phoned and got a tow to Monticello where I unfortunately chose the wrong shop out of two that are there. Long story short, they knew nothing about tranis let alone how to take them out. Ended up waiting for 3 weeks for a replacement trani from a shop in Edmonton, AB who took their sweet time getting it to me and then didn't ship the torque converter that was with it. Then they shipped one but it was the wrong one. So I sued my old one and drove home in 3rd gear as the shop in Monticello didn't know how to adjust the TV cable.

When I got back I had my Toyota dealer look it over and readjust and all was well until he next trip and ditto, it happened again. This time on the idiot light coming on, I stopped and cooled it and slowly made my way back home. Had it checked and sure enough, this time it was a leak from the transfer case into the trani, thanks to the replacement trani I got from Edmonton shop. It had come with the old transfer case still attached and it was never checked when it was installed (Monticello shop). This time while the trani/transfer case was getting rebuilt, I researched this problem to come up with a solution that you have all been waiting for.

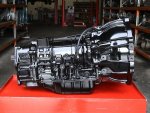
Turns out, on IH8MUD, there is ample discussion (as a newbie, who knew to look?) on this well known problem. A company called Wholesale Automatic Transmissions in OZ and a tech named Rodney had found/engineered a solution. This problem had been known for over 10 years and Rodney had spent quite a bit of time finding a solution, but had never seen this trani in a 73 series. Needless to say, I happy to have found a solution. Rodney had an outfit in Kanukistan as a rep (http://www.outbackgearshop.ca) and they had the parts. He gave me great deal from him as he wanted photos of the rebuild and data on any of my trips. So I only got a heavy duty torque converter and an extreme duty valve body as I had just rebuilt my trani and transfer case.

The Extreme Duty A440F Valve Body for 60 & 70 series, including petrol engines. Major features of the Extreme Valve Body is far greater clamping load to all clutch packs and convertor lock-up eliminating slip when high HP/Torque engines are used and in the case of heavy towing. Eliminates over heating and transmission failure due to heat produced by Lock-Up slippage, Quicker and nice crisp instant shifts (very hard at first but with time soften up a bit) without the flaring and sloppy changes leaving the clutches with very little wear giving you a far greater transmission life span. No flaring on kick down, Higher cooler flow, Lock-Up in both 3rd and 4th gears instead of 4th gear lock-up only, Higher lube pressure and flow.

The heavy duty torque converter looks the same from the outside but has been beefed up to withstand the heavy stiff shifts.

After recently completing a 15,000 km trip to the south side fo Laguna Chapala as well as many side trips, I have had no issues thus far. I conclude that with more discussions with Rodney in OZ that this has resolved my trani issue. On with the build! YEH!
 

Attachments

  • Extreme_Duty_Val_4806484533efe.jpg
    Extreme_Duty_Val_4806484533efe.jpg
    37.1 KB · Views: 48
  • Complete_A440F_E_48064ba2e6012.jpg
    Complete_A440F_E_48064ba2e6012.jpg
    46.3 KB · Views: 69
Last edited:
CanuckMariner/Nomad

Love having fun 😊 in the 🌞 by the ⛵ and the ⏳
Misc. Projects - Work light bracket

Whilst with my fab/welding friend from DV and to change up the work load from the rear bumper (to allow time for thinking, planning, design) we went on day long trail trips and discussed other mini projects.

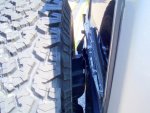
I needed a bracket to hold a Hella Matador Work lamp which I had sold with my roof rack and gotten a new one, from guess who (Sierra). I converted it to 24V as they didn't have it ready, and we made a bracket to bolt on to the spare tire carrier. This bolts on between the tire and the rear window and wiper blade arm. The mounting bracket that came with the lamp was welded to the arm and a hole was drilled so the wire could go inside the square tubing. The base plate has four holes to bolt it to the sloping tire carrier bracket. Lastly, it was powder coated by ACE Powder Coating in Idaho Falls, ID on my way home.

On post #20 second photo from the last you can see the final product before powder coating.
 

Attachments

  • PB160553.JPG
    PB160553.JPG
    447.1 KB · Views: 25
  • PB160552.JPG
    PB160552.JPG
    486.7 KB · Views: 23
  • PB160554.JPG
    PB160554.JPG
    904.3 KB · Views: 36
  • P1010006.JPG
    P1010006.JPG
    722.3 KB · Views: 67
  • PB190588.JPG
    PB190588.JPG
    730.7 KB · Views: 39
Last edited:
CanuckMariner/Nomad

Love having fun 😊 in the 🌞 by the ⛵ and the ⏳
African Outback Drawer System

When I was on my first trip (the one where the trani blew) I was visiting various 4x4 shops along with friends and other more touristy places. Whilst in the Denver area visiting friends, I had time to go to Golden, CO to visit Christo Slee of Slee Off Road (http://www.sleeoffroad.com/) to see what wares he had. During my visit and discussions, he showed me a set of drawers that he had ordered some years ago for a customer with a Land Rover Discovery Mark II. It seems the customer didn't want them after waiting so long for the pilgrimage from S. Africa and Christo wanted to see this leave his shop as he no longer dealt in Land Rover goods, more specifically and preferably, 80 series land cruisers. So we measured for space and yes they fit in my truck, so off I went with a new set of drawers. He even help me put them together a bit so they looked like they were installed I used a couple of bungy cords to hold them down.

Once at home and a spare weekend, I put together the rest of the pieces according to the instructions that came with the drawers and then test fitted them and market were I need the four hoes in the floor to hold them down. Then bolted them in place and completed the upper section/new raised floor.

With 2 sheets of 5/8" marine plywood, I replaced all the top pieces and made sections that would lift out with finger holes as in other drawer systems discussed on this forum. In this way the top was custom fitted to my rig interior sides and still allowed me access to storage units from OEM.

Each front of drawer sides was then custom fitted as well and holes were made on the right rear side for a 12V (ARB Camp Light (from Kurt @ Cruiseroutfitters.com) and a console switched 24 V for the Engel 45 Fridge (from Wil/Wendy @ SierraExpeditions.com) auxiliary plugs. This was then covered with a thin rubberized near colour matched carpet. Holes were drilled into the slide side to allow for large floor clips to mount the turnbuckles used for Engel fridge placement.

In front of the drawer, towards the seats, was a rather large empty space. The remaining plywood was just large enough to make a cover for this area and a piece for a kitchen table top which fit neatly on the two extended drawers when opened. This large covered area was a great place to store stuff (folding chairs, stove, sleeping bag, etc.) as well as extending the new raised newly carpeted floor of the interior, creating a new sleeping area! I also covered the two longer sides of this plywood cover piece with aluminum C channel to give it a finished look as well as prevent unnecessary wear and tear.

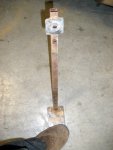
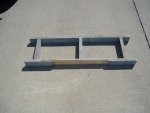
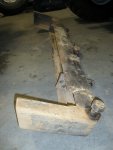
The problem was how to hold this cover up off the floor as it had nothing on the seat end to hold it up and still allow access underneath. The drawer at the back end had an indent which the cover rested on. I concocted a sideways "H" mock up out of old 2 x 4s cut out in the centre for the trani/drive shaft hump. This did the trick until I went to get my rear bumper (2nd Gen) built. Whilst the thinking, planning, designing and trial riding went on, I decided to rebuild this "H" out of square tubing which is lighter, even with powder coating, cleaner than the old 2x4s and looked better as well.

The last minor adjustment I made to this "H" was to bolt it onto the seat end of the storage cover, so when I lifted it, the"H" came with it instead of falling down. I also installed two bolted mini posts so that the drawer end of the cover was held in place and didn't migrate toward the seats as I drove down bumpy roads.

More photos once it warms up some here!
 

Attachments

  • P1010003.JPG
    P1010003.JPG
    692.6 KB · Views: 170
  • P1010007.JPG
    P1010007.JPG
    618.9 KB · Views: 46
  • PB190589.JPG
    PB190589.JPG
    797.3 KB · Views: 42
Last edited:
CanuckMariner/Nomad

Love having fun 😊 in the 🌞 by the ⛵ and the ⏳
Misc.

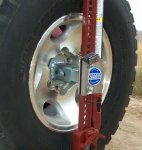
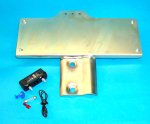
As friend was living in CA, I got a Kaymar Hi-Lift Jack mount sent to him and Man-A-Fre (http://www.man-a-fre.com/parts_accessories/kaymarbumperattachmentsacc.htm) goofed up and sent the license plate holder and light with it so I got a bonus!

I use a COBB BBQ (http://www.cobbglobal.com/) for cooking and it serves me quite well for 1-3 people and lights up quick. I have all accessories except the Wok and Trivet which I am still looking for. I have even converted some trail mates to get them instead of the gas cook stoves. These stoves are made to use charcoal briquettes, I use Kingsford withe lighter fuel already in them so they start quick.

Next I got my ham license and bought installed the Yaesu FT7800R (http://www.yaesu.com/indexVS.cfm?cm...239AEACCA0D33FF2E&DivisionID=65&isArchived=0). Which works well for trail rides when complimented with my CB (for those not ham challenged). I installed the main part of the radio, up under the left side of the African out back drawers so it would be off the floor, should I ever want to take NOMAD for a swim, which has happened a lot in MX. The head is mounted under the dash with double-sided taped Velcro, which works great until it is in the tropics for a few months. Glue gets warm and lets go...anybody have a solution other than screws.

Photos to come...
 

Attachments

  • kahiliftlock.jpg
    kahiliftlock.jpg
    30.7 KB · Views: 56
  • ka6078kit.jpg
    ka6078kit.jpg
    46.7 KB · Views: 28
  • P1010011.JPG
    P1010011.JPG
    89.7 KB · Views: 77
Last edited:
CanuckMariner/Nomad

Love having fun 😊 in the 🌞 by the ⛵ and the ⏳
Blow Dryer (Turbo)

Well ever since the trani problem, I figured the engine was a bit underpowered for the weight I pull on my trips, despite that I pack quite light. So I researched this online (IH8MUD, etc.) magazines (Australian 4WD monthly...renamed to Australian 4WD Action) as well as sites/manufacturers mentioned and friends into that trype of performance gear. Lots of OZ owners of 1HZs put blower dryers (Ozzie for Turbo) on them and I was glad to find there is tons of info about them. Much different attitude (conservative) to turbos down there than up here (aggressive).

They recommended no more than 6-8 psi boost where chaps that I chatted with here said up to 25 psi. Ozzies say that will kill that engine in less than 50,000 kms. Also EGT (Exhaust Gas Temperature) should not go above 1000 F or if you must just for a very short time.

The amount of power that a diesel engine makes is directly proportional to the amount of fuel injected into the cylinder and that fuel needs sufficient air for complete combustion. For smoke-free performance, the engine needs about 18 times more air (by mass) than fuel. Also, the fuel mixture (lean/rich) needs to be tuned to the correct air/fuel mixture for the altitude you mostly drive in. As more fuel is added, additional air needs to be added also. In most applications, the stock turbo has some additional capacity for increased power, but as the compressor reaches the choke limit (maximum flow), the turbo speed increases rapidly, the efficiency (boost) drops dramatically, and the compressor discharge temperature (EGTs) ramps up very quickly. This creates a "snowball" effect in that the higher discharge temps mean higher intake manifold temps and higher EGTs. The lower efficiency means that more turbine power is required to reach the same boost causing higher back pressure in the exhaust manifold. This can usually be seen on an engine with a performance chip (at the highest power setting) and maybe an intake or exhaust upgrade. Under heavy acceleration, smoke is pouring from the tailpipe as the EGT's and turbo speeds are climbing into the danger zone requiring a more prudent driver to back off the throttle early to keep from damaging the engine. Under these conditions, the stock turbo is running on borrowed time.

In order to decide on the appropriate turbo, the very first thing that needs to be established is the power target. Since turbos are sized by how much air they can deliver and airflow is proportional to engine power, a realistic horsepower goal is critical to make the right choice.

Sure, everyone would like to have a mega-horsepower vehicle but past a reasonable limit, as the power goes up, the reliability, drivability and day-to-day utility is diminished. Things are more likely to go wrong, wear out and break down as the output climbs.

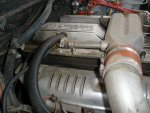
So after learning about hair blowers, I ended up with a Garrett (service in my town) rather than an Ozzie kit (harder to get serviced if a problem should arise) and a whole lot cheaper. It is T3/T4 Hybrid oil cooled journal turbo which was custom mapped for my preferred RPM range (1500-3000 rpm) that I drive in mostly. I wanted the horsepower to be there when going up those long 6-8% grade climbs over the passes mostly found in the states (MT/ID, NV/CA, and in MX as well as a few in Kanukistan. I didn't need an extra performance while trailing as I was at lower gears and lower speeds.

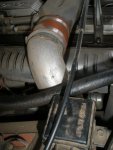
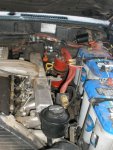
A friend had the mounting plate for the turbo to mount on the exhaust side of the engine and helped me modify/customize the tubing required to hook up to the air intake and exhaust. A set of 2 1/16" Black Auto Meter (http://www.autometer.com) Temperature (EGTs), Boost (0-30psi), and electronic Oil Pressure gauges (electronic cause I didn't want any oil leaking on the inside of the cabin).

When I first got it in and did some tuning, I had huge boost (15psi) and EGTs were up to 1200-1300 F, with large amounts of black smoke but man did it have pep and go! We tuned the lean/rich a bit too much to the rich but with some time I have adjusted it down so no more black smoke unless elevation varies tons (thinner air - less oxygen), boost is 6-8 psi max but usually only 1-3 psi, EGTs rarely go above 1000F mostly in the 500-700F range and has really improved my performance (est. 30% on HP/Torque) as well fuel economy.

On long trips (highway, mostly flat) I get about 10.5L/100 kms (23 mpg US) but have gotten better on the odd tank and certainly worse when my foot gets a bit heavy. I drive about 80-90 kph or about 55 mph. Remember diesels are not fast but they get you there and last forever doing it. Also, despite the current trend, fuel prices will go up again and past the $4-5/gal...get some good driving habits and keep them. You will always save some bucks that can go towards mods, upgrades and gear as well as trips to get you there and have some fun!

Photos to come!
 

Attachments

  • P1010005.JPG
    P1010005.JPG
    79.6 KB · Views: 27
  • P1010006.JPG
    P1010006.JPG
    88.6 KB · Views: 25
  • P1010007.JPG
    P1010007.JPG
    90.4 KB · Views: 27
  • P1010008.JPG
    P1010008.JPG
    74.5 KB · Views: 21
  • P1010009.JPG
    P1010009.JPG
    78.6 KB · Views: 26
Last edited:
CanuckMariner/Nomad

Love having fun 😊 in the 🌞 by the ⛵ and the ⏳
Auxilary or replacement Fuel Tank

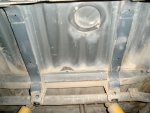
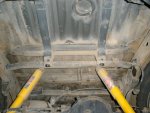
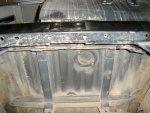
I can't remember when or where but I somehow heard of Steve Eagan and CBI (http://www.cbioffroadfab.com/index.php). It may have been somewhere on this forum (pretty sure it was) or it may have been Wil Kuhns rear bumper chat as it was made there. Either way, glad to have found this guy and his shop!

Before I went this route, I had always had the single in the cabin jerry can (smelly and dirty diesel), or 2-3 jerry can holder out back (not the best solution but it worked), to increase my range (700-800 kms on a 90 L tank - 450-500 miles on a 24 US gal) when in remote areas. Death Valley, CA had become one of our favorite places to explore (only one more trip and we have pretty much done all the trails) and anyone who has been there knows there are only two fueling places and they are damn expensive compared to outside the park.

So having heard and now spoken to Steve about a aux/replacement tank, I had to meet this guy and see if it was possible for a reasonable price. Steve even said he would meet me on my way south from Yellowstone/Teton parks to SLC, UT. Only problem was I didn't know when I would be there and didn't want to hold him up. So we arranged I would stop at his shop on the way home from my marathon trip last year.

I made it there as planned but arrived at night so left a message and camped behind his shop with a note on the door that I was there. Surprised no cops came by or that Steve came out to wake me. He got in on a Sunday morning at 5:30AM! but didn't wake me, the kind sole! So I woke about 6:30 and came in and the discussion ensued. We came to the consensus that a replacement would work better than an aux tank as we could use all OEM parts instead of introducing new problems.

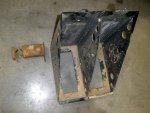
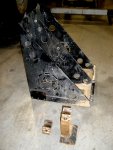
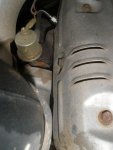
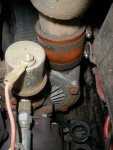
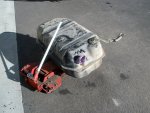
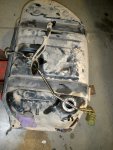
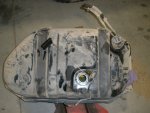
We went to work or rather he did right away, I just helped and over the following days, I ran errands and helped where I could and he fabbed and welded and fielded phone calls and guest visitors. We removed the old tank about half full (turned out to have 50 or so L) and began to measure and calculate whether or not it was worth the time, effort and money to do it. Removal was quite easy (4 spots and filler tube and breathers)along with skid plate but the tank had been in there for so long that the rubber straps or cushion pads actually held it up to the floor; we had to pry it off! Calculations revealed we could almost double the tank volume so off we started.

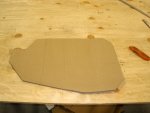
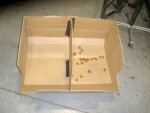
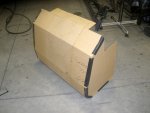
A mock up out of cardboard to see the fit and actually size it up for volume and it still checked out to be worth it. So we removed the sending unit/sensor (actually like a toilet float but smaller) and the filter pipe to the fuel pump and various EPA gadgets that did next to nothing and breathers.
 

Attachments

  • PB170563.JPG
    PB170563.JPG
    742.2 KB · Views: 16
  • PB170564.JPG
    PB170564.JPG
    769.7 KB · Views: 27
  • PB170560.JPG
    PB170560.JPG
    733.8 KB · Views: 31
  • PB170565.JPG
    PB170565.JPG
    800.7 KB · Views: 22
  • PB170566.JPG
    PB170566.JPG
    757.3 KB · Views: 21
  • PB170567.JPG
    PB170567.JPG
    795.3 KB · Views: 20
  • PB170568.JPG
    PB170568.JPG
    691.2 KB · Views: 20
  • PB170571.JPG
    PB170571.JPG
    756.4 KB · Views: 24
  • PB170572.JPG
    PB170572.JPG
    705.8 KB · Views: 32
  • PB170573.JPG
    PB170573.JPG
    725 KB · Views: 27
Last edited:
CanuckMariner/Nomad

Love having fun 😊 in the 🌞 by the ⛵ and the ⏳
Helton Hot Water System/Shower

With the long trips I tend to have, I thought some personal hygiene might be in order, so I began to research showers. I had seen the green/black bag solar ones but really wondered where am I going to hang this while I am trailing and expect to have a bag of water left yet alone warm enough o shower with. This concept is great if you stay in one spot or at least come back to camp and clean up but ride the trails and I will loose most if not all the water if not the entire bag or a nice tear in it at best.

So I checkout the usual (Glind, Helton, Piranha, Primus, Twine, R&M, BushRanger, Sea 2 Summit, et al.) and found that getting one locally instead of all the kool OZ stuff would be better in case of a problem. So I delved into that a bit deeper and put Helton, Glind and Twine (all about the same technology) to the test to prove or disprove theirs vs the competition. Helton was the only one who didn't blow out everyone else's candle to make theirs brighter..i.e. didn't bad mouth the competition while telling me about theirs. Also spoke to a few fellow off-roading types, and found that Kurt Williams (http://cruiseroutfitters.com/helton.html) who sells them (the USA distributor for Helton) and he had one. Since I had initiated the sale from another vendor, I went ahead with it. However and unfortunately, I got mine with a 5/8" tubing adapters instead of 3/4" (wasn't asked which one I needed or that there was an option) but end result was good. I didn't get the C-clamp or large hose clamp to hold the heat exchanger to the the truck. Kurt helped me out on both issues as well as some kool quik-connects

I admit I was rather hesitant to cut into my coolant system given that it was Japanese and I didn't know if I could get a spare tube from a shop like most can if I made a mistake. So hunted around some installs to see how I might do mine before I botched it up. DesertDude had the solution and the idea for the quik-connects, so I borrowed his method and it worked out great. My buddy who made the rear bumper (2nd Gen) also made a small bracket to hold the quik-connects in place. Photos explain everything or search this forum for DesertDude's install as I could not have done it better!
 

Attachments

  • P1010002.JPG
    P1010002.JPG
    81.2 KB · Views: 61
  • P1010003.JPG
    P1010003.JPG
    80 KB · Views: 61
  • P1010004.JPG
    P1010004.JPG
    88.7 KB · Views: 54
Last edited:

CanuckMariner/Nomad

Love having fun 😊 in the 🌞 by the ⛵ and the ⏳
Petromax BriteLyt Lantern

While at SnT 08, I was fortunate to meet up with numerous people, who I have stayed in touch with since. One who I have nicked named Gadget Guy, he'll know who I am talking about, had some of the koolest gear or gadgets as I call them.

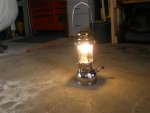
He had a Petromax BriteLyt 500CP (http://www.petromax.com/) their largest lantern. They are similar in some respects to the standard Coleman lantern that burns on white gas (Naphtha in Kanukistan). However, there is where the similarity stops. These lanterns are German design and built, burn any combustible fuel (you know how I am about having fuels inside my truck) like gas, alcohol (literally - rum, vodka, etc.), kerosene, diesel, biofuel, etc. They come with considerable options, like a top or side reflector, stove attachment for heating up water, an attachment to make pumping them up easier with a bicycle pump, deluxe carrying case, tempered glass, comes with 3 mantles which are way better than the Coleman ones, etc.

It has a few more widgets on it than the Coleman, a pressure gauge, starting cap, easy to remove handle, etc. It also comes with 3 mantles, alcohol bottle (for lighting with biofuels), small funnel with fuel filter screen.

I got the 150CP as the 500CP is a bit big and other than the stove attachment being for the 500CP only and its size, the 150CP suits me just fine. Tons of light (100-250W) for the camp area at night, a tree hanger is also available.
 

Attachments

  • P1010001 (Large).JPG
    P1010001 (Large).JPG
    78.8 KB · Views: 40

Forum statistics

Threads
188,395
Messages
2,904,142
Members
230,274
Latest member
mbauerus1
Top