1994 Toyota Pickup Build

saltwatertoyota

New member
The Beginning:

Too many hours were spent going down rabbit holes on YouTube, Toyota Forums, classified searching and much more, constantly building plenty of knowledge that I had no way to capitalize on, seeing as how I didn’t have a truck of my own. Living in the Greater Toronto Area (GTA) with a less than ideal commute, a new truck was out of the question, I needed something that would fulfill the ultimate goal of being a camping rig, without being a vehicle that I had to take out payments on. I'm hesitant to use the “O” word as the truck wouldn’t really be used for any sort of overlanding…YET, but it had to be more than capable of a commute to get outside the GTA to explore and camp all across Ontario. I also didn’t want to worry about racking up the kilometres on a newer vehicle.

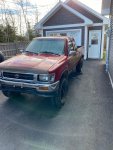
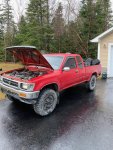
This journey started with a late night browsing of the local classifieds from my home province, with the pink elephant of ads coming across my screen. A 1994 Toyota Pickup Extended Cab, at a price that doesn’t make you scratch your head like most these days. Even with the time change between Newfoundland and Ontario, I sent multiple messages knowing immediately I had to have it (I also knew it would be snatched up very quickly if I didn’t jump at the opportunity). To say I hardly slept was an understatement. The Ad only had one picture, that was clearly taken at a point in time that was not November in NL
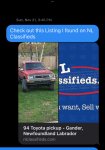

IMG_1044.jpeg
 
Last edited:
saltwatertoyota

New member
The next morning my eyes opened and there on the phone, lied a message with the guys number, telling me to give him a call about the truck. Against all advice and second-hand hesitancy from family back home, 10 minutes later, sight unseen, I was now the proud owner of a truck that was older than me.

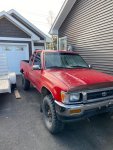
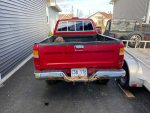
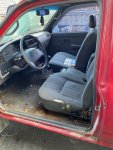
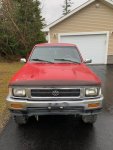
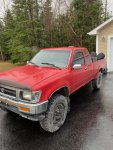
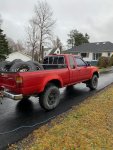
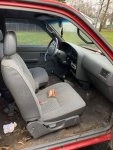
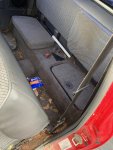
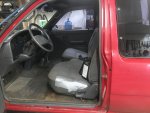
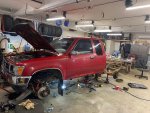
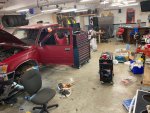
Later that day the guy sent me a couple more pictures of the truck so I could start visualizing what I was in for.

At this point I had still only been living about 10 seconds ahead of life. I had no plan on how to get the truck 2500km back to Ontario, Had no plan on where I was going to put it once it eventually got here, and most importantly, I had no idea what kind of price point I was in for to get this truck to the point that it was essentially safe enough to put on the road.


IMG_6245.jpegIMG_6246.jpegIMG_6251.jpegIMG_6255.jpeg
 
Last edited:
saltwatertoyota

New member
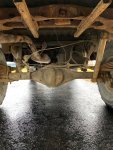
Fast forward a couple more days and my father is now thrilled to have another 4 wheels parked in his driveway taking up space… (sarcasm). At least now I can annoy him and my brother to take as many pictures as possible so I know what kind of trouble I’m going to need to fix.

While I was on the phone with the seller the first morning, He did tell me that for the last five years (at least), he had been essentially using the pickup as a Side by Side on woods roads to get back and forth to his cabin. Pair that with consecutively in years prior being driven on Newfoundland’s harsh salt littered roads in the winter, I thought for sure I had a Toyota frame disaster on my hands. Never the less, I needed a professional to put the truck up on a ramp so I could get a baseline to gauge what I was up against.

1.jpeg2.jpeg3.jpeg4.jpeg5.jpeg6.jpeg
 
Last edited:
saltwatertoyota

New member
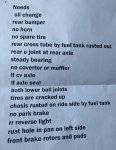
A couple more days passed and I finally found a shop that was willing to squeeze my hunk of junk into their shop to come up with a list of things that mechanically (excluding the engine) should make a “sounder” truck to drive. This was the list given of items that need to be replaced. I had to pay extra for proper English Lol. I cheaped out. I was racing the clock with Christmas right around the corner, I had to take what I could get.

1 (1).jpeg
 

saltwatertoyota

New member
Starting to come up with a plan:


Up to this point, I lived in Ontario and this truck was 2500km away on the farthest part of the east coast of Canada. Me being the overly optimistic person I am, came up with my brightest idea yet… To travel home for Christmas, “Fix” the truck over the holidays, and drive the truck back home to Ontario in time to get back to work. How hard could it be?


With the list in mind, I set out to order as much as I possibly could and have it delivered so I could throw it in the car with me when I drove home for Christmas. Newfoundland isn’t exactly known for their reliable and expeditious shipping times so the more I could take down with me the better. After pricing out many things, I needed parts that would do the job within reason. I didn’t want to be too frugal here and end up with crap, but ultimately I didn’t know if this little 116hp trusty steed would be able to stand up to the trek home and didn’t want to spend a pile of money that could end up as a pile of scrap.

In the end decisions were made and I had much of what I needed and hoped whatever I didn’t have, I would be able to find a working fix for at home.


Parts here included:

KYB Shocks All around
New Horn Relay
New Moog Lower Ball Joints
Left and Right CV Axles
New Front Pads and rotors
New Parking brake cables
New Front Corner Light Assembly
Led Reverse Lights
New Moog U Joints
New Drum Hardware kits
New Parking Brake Bell Cranks
Center Support Bearing
New Axle Seals
As well as New shifter Bushings

Majority of these parts came from either RockAuto, Napa Auto Parts, Parts Avatar and even the Stealership themselves.... Toyota.

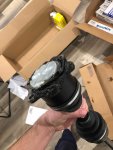
Initially I had only ordered the one CV Axle from RockAuto but it came busted up with grease everywhere in the box. I ended up starting the return process and just getting two overnighted from the local Toyota dealership. It was more pricey but It was a critical piece I needed and I couldn't risk ordering from RockAuto again and having them arrive in the same condition. Peace of mind more than anything.

1 (2).jpeg2 (1).jpeg
 

saltwatertoyota

New member
Last minute covid restrictions in NL started the Christmas trip home off with a bang. Dropping everything and ducking out of work just a little early, myself and my girlfriend loaded up the car at 2030hrs (8:30pm) and departed 1950km eastbound towards the North Sydney Ferry Terminal hoping to squeak in just under the cut off from having to isolate over the holidays. The picture is Gifts/Truck parts/Bags that all had to fit in the back of the car for the ride. It fit! But very little room to spare.

1 (3).jpeg
 

saltwatertoyota

New member
Bed Removal:

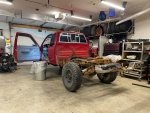
Knowing that the truck pan had to be removed which I assumed would be quite a task, having my doubts it had ever been done before, I asked my brother to get a head start on taking that off for me so I didn’t have to worry about that when I got home (Thanks Josh!) Once that was off Dad started at the frame with a wire wheel to attempt to shake off some surface level dirt and rust.

The notorious bolts that hold the bed down with the flange, gave some grief coming off and took quite a bit of effort. While driving down my brother called and said he had to cut 2 of them off. Unfortunate, however it's the price of doing business. I called the dealership in NL to see if I could have a couple new ones shipped down. Apparently there was not one in North America and it would take 5-6 weeks to receive some from Asia... So that was out of the question. I stopped in to a Napa in New Brunswick and picked up a couple Grade 8 Bolts and washers to make do in replace of the the OEM ones.

How Cruddy!

1.jpeg2.jpeg3.jpeg
 

Attachments

  • 3.jpeg
    3.jpeg
    1.5 MB · Views: 10

saltwatertoyota

New member
Home Sweet Home. Quickly running down to the shed as we pulled in the driveway I was able to take a quick peak at the dismantled truck that was. First on the list was saying hello to family and getting some real rest after the 2 day Trek, so that I had some actual energy to face the monstrosity of a project ahead.

And of course theres nothing like Home-brew at home…


IMG_0733.JPG
 

saltwatertoyota

New member
Interior:

After Spending the better part of a month, reading…re-reading…analyzing and taking notes from all 19 pages of the @DeskToGlory pickup build thread, I had filled my soul with blind optimism that I would be able to breathe life back to the decrepit 4x4 within the span of about 9 days. With the bed off, I started with an overall cleaning of the truck and stripping out the interior. The mould was a big issue that needed to be dealt with. The vents, Carpet, Cushions, and most vinyl trim throughout looked as though it had the ability to grow warts. Using a mild acid to neutralize the mould, the rest was left up to good ol’ elbow grease

I don't have any great shots of the interior while it was apart or quite frankly any of it now being back together. But I will throw some up when I get some.

The Carpet, Seats and Trim all cleaned up quite nicely with the help of a Spray Bottle a Drill Brush and a Shop Vac. I have Mom to thank for that, While we tackled other parts, she made sure the interior looked the best it has in years.

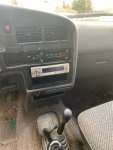
While the dash was apart I threw away the ancient (Non-Bluetooth) receiver and wired in an upgraded Alpine (CDE172BT) Unit. Much better.


65998814224__6B6A4387-1066-4FB3-97E5-8F70C6BD1D2E.jpeg65998816296__F8A456AE-FAC8-4FDE-A924-C8FBB1356C22.jpegIMG_3624.jpegIMG_7745.jpegScreen Shot 2022-04-08 at 8.45.20 PM.png
 
Last edited:
saltwatertoyota

New member
Also with the Interior that I don't have pictures of. The rubber plugs in the floor pans had disappeared at some point in the trucks 28 year life, with that brought on drenched carpet, Waterlogged and rotten Sound deadening (i'm assuming) and good old rust. To Fix: I chipped away as much sound deadening as I could and wire-wheeled away majority of the flakey rust to get "Mostly" good metal. Temporarily there is spray foam plugging the two little holes, until I get a chance to fabricate up a couple replacement floor pans this summer. From my searching it seems as though there is no one that sells replacement floor pans. Custom it is!

The seat rails also need attention. The passenger side rail, is in pretty good shape and is still adjustable. The drivers side is permanently stuck in the furthest back position no matter how much heat, penetrant and hammering I done it would not budge. Being 6'5" I don't find it to be much of an issue. Plus i've got plans for the seats.
 

saltwatertoyota

New member
Front End:
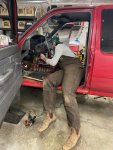
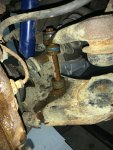
Anything that had exposure to the elements was a pain in the a** to get off. Rust had taken ahold of every nut and bolt and required 10x the effort to remove. Hammers, oxy-acetylene torches and rust penetrant became my best friend. The CV axles were no joke to remove, the 6 bolts from behind were awkwardly positioned and every one of them required persuading to come off. Like most things it's the removal that takes the most work, going back together is easy.

I really hope it's me, however the next person to work on this truck will be very thankful. Every nut and bolt that went back, had a very generous coating of Copaslip.

The Brakes were fairly straight forward. I really should've picked up new calipers as well, or at the very least a rebuild kit for them. That was a major oversight on my part. You could tell my moving them, or lack there of, that they had their fair share of corrosion. It just meant another thing to add to the to do list.

Using Air to pop the pistons out worked like a charm and they cleaned up quite nicely. The difficult part was the worn and loose dust boots that fit around the exterior of the piston and are held in place by a keychain ring style clip. Because the boot had so much stretching it was VERY tedious to fit back in place. The only thing in the end that "worked" was placing the boots in the freezer for upwards of 30 minutes to stiffen them up before putting on the piston. Again the ideal solution here would be to have new ones but, you work with what you have.

Other than that The CV Axles, Shocks, Sway Bar Links, Ball joints and Brakes went back together without a hitch.


IMG_2511.jpeg66224338647__A6A4D248-8AA3-4C1D-A219-12B38753B430.jpegIMG_0983.jpeg
 

saltwatertoyota

New member
The Back End Saga: Part 1

This turns out to be quite long. So I’ll split it up into multiple parts.

Initially the plan was to fix the most dire, and leave the rest for this summer. Plans changed pretty quick as we got into the thick of things.

Being that this truck would be making its maiden voyage with me travelling at highway speeds, stopping power was a huge box to check off the list; it needed to be there. So, to start I tackled the parking brake beginning with changing the rear cable. The back portion runs through a hole in the cross member directly behind the rear of the truck cab and from there is sandwiched in a clamp positioned between the fuel tank and the frame rail. The fuel tank only has so much lateral movement after loosening the bolts holding it in place and it wasn’t enough to be able to fit any sort of leverage inducing tool on the presumed rusted-in bolt. Dropping the fuel tank was the smart choice regardless knowing that welding would need to happen later on in close proximity on the cross tube. The risk of welding that close to the tank, far outweighed the 15 minutes it took to remove it.

66156867792__E7260080-04D4-4279-BDB4-74A10B52E026 (1).jpeg

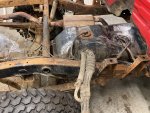
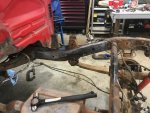
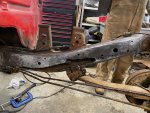
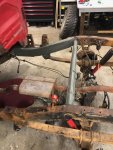
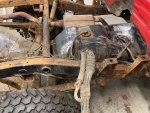
The emotion from dropping that fuel tank was one similar to stumbling upon a ginormous active hornets nest inches away from your face. Much like an iceberg underwater, 90% of the hole that was in the frame was masked over by the fuel tank, only to be visible by removing it. The eluded response, should’ve been to run. But after an hour of frustration feeling as if luck had run out, the decision was made to dive in and see, how bad it actually was, what it would take to fix, Would it be safe, and lastly, had this happened somewhere else on the truck that we hadn’t seen yet.


IMG_7728.jpegIMG_3718.jpeg

Testing the metal to see how far the hole went involved lots of hammering, grinding, picking and prodding to get all the cancer out and have good margins around to make sure what we truly had was…solid steel. With the rust and frame inspected to ensure this wasn’t happening elsewhere we starting coming up with a plan to replace what we removed with something stronger. That involved making a cardboard template to cut out a piece of 1/4” sheet to match. Being that the metal on the frame had already proven to be weak, puzzle piecing the template in the frame and welding flush wasn’t an option. The worry was that blasting the bottom edge of cutaway with heat might blow out the steel, leaving us with even less of a frame rail to work with. The solution we came up with was to use a piece of 1/4” Angle to weld to the newly cut 1/4” sheet. And then weld again on the very bottom of the frame rail. Doing this allows us to use the strength of the 90 in the angle going from new metal to old metal and moving the welding surface on the bottom side from directly on the 90 degree to the horizontal surface on the rail. It took quite a bit of fit up to make sure that all joins were tight and even more cleaning of the existing frame to allow to great welds with good penetration. In the end I am happy with the turn out. While it may not look perfect, this isn’t intended to be a show truck (obviously) and I am confident it will provide a safe frame for me to enjoy the truck.

IMG_0998.jpegIMG_1001.jpegIMG_0999.jpegIMG_7731.jpeg
IMG_4912 (1).jpeg
 

saltwatertoyota

New member
The Back End Saga: Part 2

Obviously I should mention the bed removal was most definitely one of the most important things to do before starting all of this as things were able to be worked on from above. Without the aid of a 2 post lift, lying in fallen rust and dirt to wrench would’ve made the experience an absolute nightmare and even then you wouldn’t have had the room to fix things such as the frame mentioned above.

Next up, we decided to mark, and remove the drive shaft, to get it out of the way for the support bearing and to change out both U joints. It also made it convenient to have out of the way to fix the cross tube behind the fuel tank. The centre bearing and U-joints were very straight forward, something that at this point felt like a gift to get.

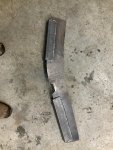
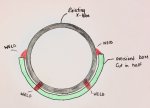
So the cross tube…. The hole that needed attention was directly on the bottom in the middle about 4-5 inches in length, I thought the best course of action was to run a piece of DOM tubing through the centre, weld the ends of the tube to the frame and drill holes every 5-6 inches across and plug weld the existing cross tube to the new DOM now sitting inside. The fun keeps getting better when the local steel shop doesn’t have the size DOM we need and being around the holidays, further exasperated the supply chain issues that were. This meant “PLAN B”. I got the exterior circumference of the cross tube and managed to find a length of DOM that when cut in half lengthwise would essentially hug half the X-tube. From there it is welded on all seams. Not the way I wanted the repair to be done, but with the fuel tank out, the box off and easy access to all equipment to do as best of job we could, it will make it plenty strong for years to come. I’ve attached a picture down below illustrating what I attempted to explain.

IMG_4912.jpegIMG_5541.jpeg
 

Forum statistics

Threads
186,809
Messages
2,890,310
Members
227,012
Latest member
dalewelsh

Members online

Top