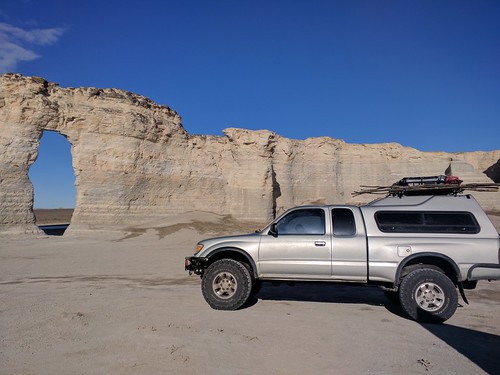
Sadly, I didn't get any photos of the installation process... But here's a quick photo-less writeup.
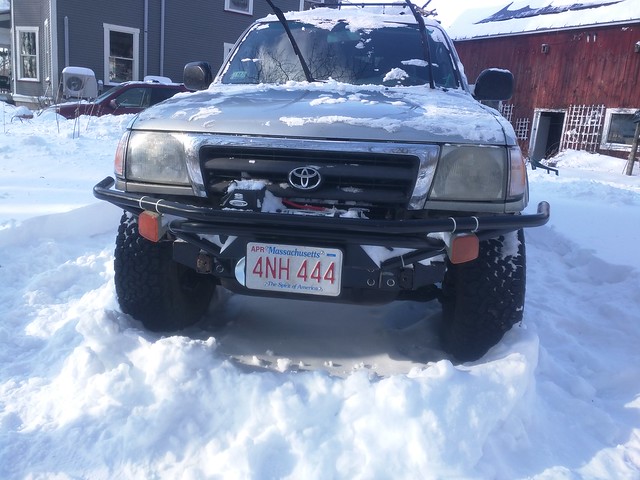
In case anyone else is searching for it. If you are installing a trail gear front bumper on a 2000 toyota tacoma, you need a grinder.
The crossmember that comes with the bumper replaces the cross-member that the front skid plate bolts to. It seems that on 2001-2004 models this crossmember is bolted on, but on the 2000 model year it's definitely welded.
Additionally, my original bumper didn't have a steel bar in it or anything, which surprised me a bit when I started taking things apart.
Total cost was ~$1000, about the cheapest I think you can mount a winch on a 1'st gen taco without fabbing your own bumper.
The Bumper: ~$500.0 (amazon)
So, to install:
1) remove the stock bumper. There's the obvious main attachment point, but also annoying side brackets.
2) unbolt the frame ends (the bolt is hidden inside the domed bit)
3) take a grinder and cut off the crossmember. You don't need to grind it all perfectly smooth, but you do need to cut it flush with the bottom of the rail, and on mine I needed to take down the most forward welds flush to get the new frame-member to slide on.
4) Slide on the frame member. This is the part that needs a BFH, a grinder is helpful here too. A heavy rubber covered deadblow mallet beats the pants off a wood block and hammer for this... I tried both. I added a slight bevel to the ends of my frame to help the member slide on. It was almost aligned, I just needed ~2 mm and simply hammering wasn't working. Some time back while dragging a log I yanked like heck on my tow-hook on the right side, actually bending the bottom of the frame rail a little, and it was still fine and bolted right up.
5) Bolt on the frame member. Put in all the bolts loosely, including the upper side bolts that also run through the bumper later on. Tighten the bottom ones up like this, this will ensure the upper bolts are aligned when you go to mount the bumper itself. Now pull them out.
6) Take a grinder and lop off the bumper stabilizing brackets that hang off the body (they are painted the body color). Each of these brackets has 2 spars, one of them will now be loose, you can simply go under the hood and unbolt it. I was able to reach the bolts on both sides without removing anything extra.
7) Trim your fenders. I used a utility knife for this.
8) Bolt on the bumper. A helper is REALLY useful here. I held the bumper while my dad got several bolts started to hold it all in place. I'm sure you could brace it with jack-stands or something, but a person is way easier and faster.
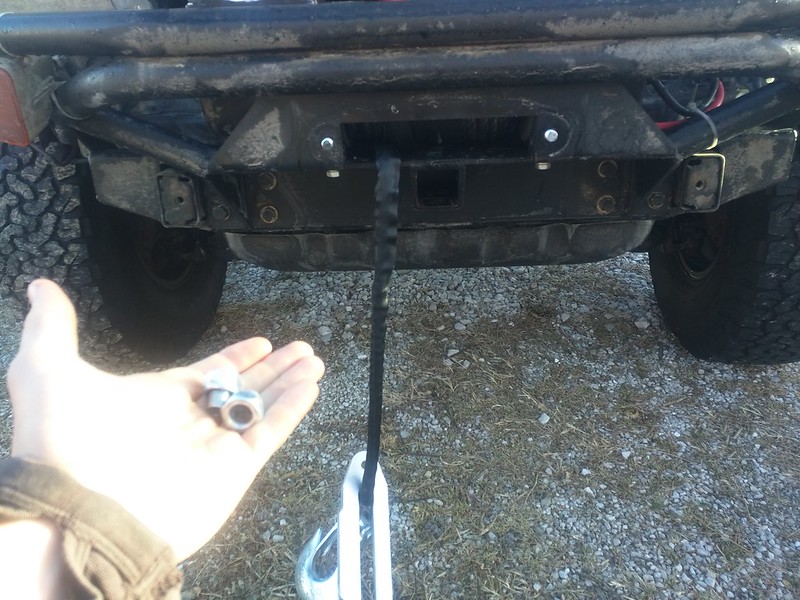
The winch ~$470.0 (amazon):
I had to drill the bumper to fit the bolts for the fairlead that came with my winch. The pre-drilled holes were too small. Bolt this in place first with the bolt-head on the inside... there isn't enough clearance to do it the other way. The 9500lb tigershark superwinch I installed is a tight fit. No trimming of the grill needed, but it took a little shoving to pop it in. It sits touching the bolt-heads for the fairlead, but bolts right up. I ran the cables across the front and through the firewall on the right, so they come out next to the battery, holding them in place with a few zipties.
The Lights ~$0.0 (a few cents in zip ties):
I originally planned to do the corner-light blinker mod by moving the actual socket
https://www.tacomaworld.com/threads/the-free-blinker-light-relocation-mod.186115/... but after more research and actually looking at it myself I realized the light doesn't fit right (it's too tall) and some folks report it partially melting the housing due to it ending up too close. I didn't like that. A better option is to rewire it with a 1157 socket as many report doing, but I'm unhappy with having to run screws in to epoxy that I pull out every time I change the light.
So, instead, I took the original signal housings off my bumper. My fiance realized that they fit really nicely in the triangles on the sides of the bumper if you flip them upside down. I decided I might as well give it a shot, so I drilled some of the extra plastic bits (stabalizing flanges and screw mounts). I drilled 2 on the top of each light and hung the light from the bar with zip-ties. This worked, but the lights still swung around too much, so next I drilled 2 more on the bottoms and zip tied those to the 2 bottom bars of the triangle. This worked great, and I even like the look. Best of all it means everything is stock, including all of the rain/humidity management seals and breathers. The wires are already in the right place, no relocation needed there either.
Painting in the cold:
My mom has a greenhouse, I turned on the heater and was able to get it up to ~55F. Then, lots of drop clothes and cardboard. I cleaned the bumper with mineral spirits, and painted with a self-priming rustoleum pant. I got on ~4 coats. When I did my rear bumper almost 2 years ago I did use a separate primer, but I had some minor peeling problems anyway (I didn't let it cure long enough I think). No matter what it seems like you always end up touching it up anyway, so at least I got it done and touch-up it's easy this way. Honestly, the bits of the frame I had to grind are still raw... I'd like to fix that at some point, but it's so cold right now that the paint'll freeze before it even make sit to the frame. I'll probably fix it once we're in warmer climes.
Front license plate ~$50.0 (amazon):
Given where I put my lights, there wasn't anywhere to put the plate directly on the bumper. I did find a decent hawse fairlead mount, but it seemed more fragile. The curt mount is exactly right, 6" from the pin hole to the plate, so it has just enough clearance for the hook. I used a locking hitch-pin so it'd be hard to steal. I like the look and clearance, and I can pull it off easily to use the winch. It cost ~$50.0, I was hoping to do better but I do like the result.
Note: prices include shipping
 IMG_20170715_194049 by smalladventures photos, on Flickr
 IMG_20170716_153329 by smalladventures photos, on Flickr
 IMG_20170715_202656 by smalladventures photos, on Flickr
 IMG_20170717_200939 by smalladventures photos, on Flickr
 IMG_20170715_194049 by smalladventures photos, on Flickr
 IMG_20170716_153329 by smalladventures photos, on Flickr
 IMG_20170715_202656 by smalladventures photos, on Flickr
 IMG_20170717_200939 by smalladventures photos, on Flickr


