sallf
Member
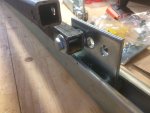
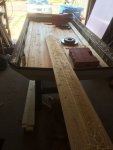
I used some extra aluminum square tube I had to test the concept, thinking I might need to use steel (spoiler alert, I do), sandwiched that with steel bar and picked up some longer bolts so I could bolt it to the same bolts that are coming through from my rack.


Next I drilled some rivet nuts into the top of the truck. It's a shame because I was hoping to use the original ones from the original rack but the topper ends up sitting right on them when it's centered on the roof. That's probably the biggest downside to the female mold is it was difficult to see exactly where it was going to hit the roof...at least that's what I'm blaming it on.
The rivet nuts were probably the biggest pain in the --- I've had yet on this project. If you've never worked with them you can install them by cranking down on a bolt while holding a slip nut in place with a wrench. My first issue was the slip nut they sent me was so small that I couldn't get any of the 3 wrenches I have in that size to hold just the nut. My very standard wrenches were all too thick and would grab the bolt in addition to the nut. Seriously, who has a wrench that thin!
I ultimately solved it by doubling up on nuts, but that wasn't before I tried some less successful things and ended up with some not so great rivets. There were some other complications, like the edge of an internal rib that runs down the truck which I hit it with every hole I drilled; which caused the rivet to not sit flat. I spent a few hours trying to use the dremel to cut into the rib which was exhausting. I figure worst case I'll pull out all of my interior upholstery and run bolts.


I don't have a picture of it bolted, but on the left here you'll see the super strut I ended up using. I'm hoping I'll be able to use it to mount the scissor lift, gas struts and bed platform so I don't have to drill any more holes.
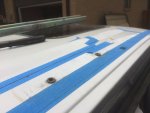
(metallic original rivets, with gold new ones in the background)
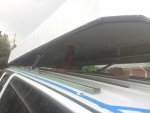
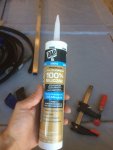
I ran some silicone around the edge, attached the bulb seal and got it on top. I had to cut a couple slits to get it to go around some corners, but I think the silicone should keep me waterproof.


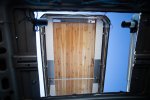
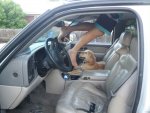
Lastly I crawled up through the sunroof and bolted it to the truck (my dog gets anxiety when I open a car door and she can't get in, so she's spent a lot of time in her copilot chair this project).
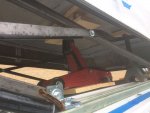
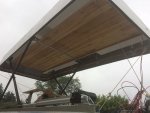
I'm out of pictures, but I lifted it up about 2 feet from the back and could see the aluminum tube wanting to bend. Dropped it back down and have some steel 1"x1" square tube that I can pick up tomorrow. I got the thickest gage I could find but it's possible that the steel can't handle the 3' cantilever either. I'm hoping it'll be okay but at this point I really won't know until it's up there.
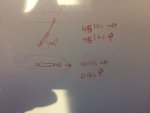
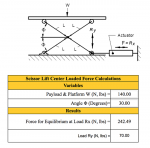
My other options are 1.5"x1.5" square steel tube which I can get at 1/4" thickness (should be overkill) or more likely I'll mess with my model scissor lift and find a way to add more angle when it's lifted, which will reduce the length of my levered arms.
Looking forward to wrapping this stage up so I can get to the fun stuff like wiring, lighting, interior design and CUTTING OFF THE ROOF...which is honestly the only reason I started this project .
.
Appreciate any thoughts or ideas! Also I haven't been able to find anyone in the Denver/Boulder area that wants to sew canvas sides for me, so looking for a connection there if anyone happens to have one. I know boll_rig went through Colorado Camper but I can't get them to answer the phone.


Next I drilled some rivet nuts into the top of the truck. It's a shame because I was hoping to use the original ones from the original rack but the topper ends up sitting right on them when it's centered on the roof. That's probably the biggest downside to the female mold is it was difficult to see exactly where it was going to hit the roof...at least that's what I'm blaming it on.
The rivet nuts were probably the biggest pain in the --- I've had yet on this project. If you've never worked with them you can install them by cranking down on a bolt while holding a slip nut in place with a wrench. My first issue was the slip nut they sent me was so small that I couldn't get any of the 3 wrenches I have in that size to hold just the nut. My very standard wrenches were all too thick and would grab the bolt in addition to the nut. Seriously, who has a wrench that thin!
I ultimately solved it by doubling up on nuts, but that wasn't before I tried some less successful things and ended up with some not so great rivets. There were some other complications, like the edge of an internal rib that runs down the truck which I hit it with every hole I drilled; which caused the rivet to not sit flat. I spent a few hours trying to use the dremel to cut into the rib which was exhausting. I figure worst case I'll pull out all of my interior upholstery and run bolts.


I don't have a picture of it bolted, but on the left here you'll see the super strut I ended up using. I'm hoping I'll be able to use it to mount the scissor lift, gas struts and bed platform so I don't have to drill any more holes.

(metallic original rivets, with gold new ones in the background)
I ran some silicone around the edge, attached the bulb seal and got it on top. I had to cut a couple slits to get it to go around some corners, but I think the silicone should keep me waterproof.


Lastly I crawled up through the sunroof and bolted it to the truck (my dog gets anxiety when I open a car door and she can't get in, so she's spent a lot of time in her copilot chair this project).

I'm out of pictures, but I lifted it up about 2 feet from the back and could see the aluminum tube wanting to bend. Dropped it back down and have some steel 1"x1" square tube that I can pick up tomorrow. I got the thickest gage I could find but it's possible that the steel can't handle the 3' cantilever either. I'm hoping it'll be okay but at this point I really won't know until it's up there.
My other options are 1.5"x1.5" square steel tube which I can get at 1/4" thickness (should be overkill) or more likely I'll mess with my model scissor lift and find a way to add more angle when it's lifted, which will reduce the length of my levered arms.
Looking forward to wrapping this stage up so I can get to the fun stuff like wiring, lighting, interior design and CUTTING OFF THE ROOF...which is honestly the only reason I started this project
Appreciate any thoughts or ideas! Also I haven't been able to find anyone in the Denver/Boulder area that wants to sew canvas sides for me, so looking for a connection there if anyone happens to have one. I know boll_rig went through Colorado Camper but I can't get them to answer the phone.

