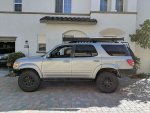
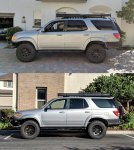
2002 Sequoia Limited 4WD

Sal R.

Active member
MODIFICATION: Cargo Box V2

GOAL:

Make the available storage more practical to use under all conditions.

MATERIALS:
40" Drawer Slides (x2)
etrack Rails (x2)

COST: $150

SUMMARY:
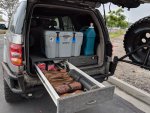
My old two drawer system with two top loading cubbys worked great until my first trip out fully loaded. The cubbys were practically unusable and inaccessible unless you unpacked everything. Not so fun when you're en route and need to access something under there. The tie downs comprised of removable brackets. They worked, but not very flexible in terms of packaging arrangement.

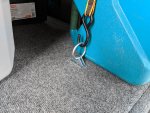
So, I updated the box to use full length drawers and integrated Etrack rails for a more flexible tie down system. Of course, the rail is hidden under the surface for a clean look and to maintain a flat sleeping surface. I re-used as much of the old material to keep the upgrade cost to a minimum.

Overall, I may have less storage space, but have way more usable volume under all conditions.
IMG_20190808_074843-80.jpg

IMG_20190808_074904-81.jpg
 
Last edited:

Sal R.

Active member
I love my tool roll. So functional.

What's up with the missing swing-out?

The tool roll is the best.

I leave the swing out off when not on the road. Makes getting in and out of parking spaces a little easier. ?
 

Sal R.

Active member
Sal,

It looks like you kept the stock rear bump stops when you had the Dobinsons installed. Were they adequate or did they allow the shocks to fully compress before making contact? I currently run the Dobinson GS59-685 with OME 862 on my 03 Sequoia and I just recently encountered a "full stuff" situation that got me thinking about this (after the fact of course). However, I can't jack the tire high enough at my house to measure safely. Any chance you've already measured this? Thanks, your Sequoia is one of the sickest I've seen across the interwebs!

Almost forgot, if you're on 35x12.5 on a wheel that has less than 4.5" backspacing, you'll probably need to keep the bumpstop extensions because the tire will hit the inner fender wall. That area is hard to tub because of all the HVAC plumbing in the passenger side area.
 

Sal R.

Active member
MODIFICATION: Awning

GOAL:

Throw up some shade when there are none available.

PURPOSE:
I debated getting an awning for, like, ever. I just couldn't justify the cost for one, even the simple ones like the Smittybuilt offering. When a TSOR member posted up the listed awning, I thought it was too good to be true. For the 1-2 times I'll probably use it, it's not bad. You do get what you pay for though.

Out of the box, it looked alright. Once mounted and ready to deploy, you'll really see where this awning falls short.

First off, the retaining straps are on the outside. Also, it's mounted zipper down. This means that once you unzip it, the awning pukes itself out of the bag if you aren't there to catch it. So, zipper first, then straps.

Second, the legs didn't want to stay extended. I had to pull both awning legs out and pop the stoppers back into the extending portion of the pole to allow the twisting motion to keep the legs out.

Once I fixed the legs, everything seemed to work as intended.

Really though, for $90, it's not bad. Takes some work and rework, but I'm all about that and I'm okay with it.

DURATION: 2 Hours

MATERIALS:
7.6x8.2ft Car Side Awning

COST: $90

HOW-TO:
To make this work, you'll definitely need to custom fab some mounting hardware. The provided hardware kinda stunk, but I already knew that going into this project.

I started with the provided hardware mounted on some universal roof rack brackets I had lying around to see what I had to work with. Once mounted up, I hated it. It was mounted too high, looked like ass, and I was concerned with the brackets breaking due to fatigue over time. Not to mention I'm short and it was a pain to access and setup.

2019-08-08 16_17_43.jpg

Yuck ?.
2019-08-08 16_16_59_2.jpg

So, using some scrap I had lying around, I cobbled together some new brackets designed to quickly mount to the universal roof rack brackets. The reason for this is I wanted a setup that can be added and removed easily. I don't really need to drive around the city with an awning all the time.

My solution was a "T" bracket that featured a large bend radius to help transfer the load to the roof rack brackets. It has two load paths versus one. The "T" schema will help absorb the cyclical aero loads by reducing the overall moment arm. In fact, the stress load "should" be rotating along the awning bracket centerline, to the bracket, to the roof rack brackets.

Also, only two brackets were supplied with the awning. I didn't like that either. Considering the length of the awning, I opted to make three brackets to better secure and support it. I considered making more, but my roof rack is small and I run out of space quickly.

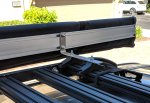
Close up of the "T" bracket on roof rack brackets.
IMG_20190920_160726-98.jpg

The new brackets lowered the awning a little over 2 inches from the previous height. Looks much better, IMO.
2019-08-09 17_12_08_1.jpg

Poser pic mallcrawling.
2019-08-09 08_49_55.jpg

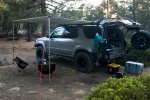
Deployed easily with one person, even a short round like me. I didn't need a step stool like before. Mounted height is just right to clear the driver's side doors.

bear02-279.jpg

Comparison pic before and after.
2019-08-08 16_16_59.jpg

It ain't no Foxwing, but for $90, I'm pretty satisfied.

Removal/installation takes ~10 minutes.

Cheers.
 
Last edited:

calicamper

Expedition Leader
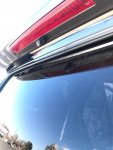
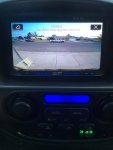
I mounted my camera in the center trim section mid hatch behind the hatch window. Fed the camera wire through the hatch harness boot. Pulled power off the rear light in the hatch while replacing the plastic stock hatch handle with a metal one off Amazon. I was replacing my 2nd broken plastic hatch handle/latch in 6 yrs. Finally someone made a metal replacement?

Camera behind the hatch glass was a win. Rear wiper clears snow and dirt, no dirt view issues ?
 

Sal R.

Active member
I mounted my camera in the center trim section mid hatch behind the hatch window. Fed the camera wire through the hatch harness boot. Pulled power off the rear light in the hatch while replacing the plastic stock hatch handle with a metal one off Amazon. I was replacing my 2nd broken plastic hatch handle/latch in 6 yrs. Finally someone made a metal replacement?

Camera behind the hatch glass was a win. Rear wiper clears snow and dirt, no dirt view issues ?

Kudos to you on that job.

I wired a license plate frame back-up camera on a relative's Sequoia and also went thru hatch boot.

Man, that was a real pain.

I need to find a better spot that's not obstructed by my swing-outs.
 

calicamper

Expedition Leader
Kudos to you on that job.

I wired a license plate frame back-up camera on a relative's Sequoia and also went thru hatch boot.

Man, that was a real pain.

I need to find a better spot that's not obstructed by my swing-outs.
Ha ha yes yes it was. Pretty sure my neighbor learned some new colorful words

My other idea was to mount it under/in the rear foil over the back window. That would possibly get the camera clear of much of your rear rack gear.
 

Sal R.

Active member
Ha ha yes yes it was. Pretty sure my neighbor learned some new colorful words

My other idea was to mount it under/in the rear foil over the back window. That would possibly get the camera clear of much of your rear rack gear.

I've seen other Sequoia guys do that. Good visibility and FOV. Attached is another user's images I saved for reference.

I tested that spot and my big ass spare obstructs my view.

54255541_10157276481290962_8908860661329559552_n.jpg

55771740_10157310043120962_4324070509793771520_n.jpg
 

calicamper

Expedition Leader
Ha ha yes yes it was. Pretty sure my neighbor learned some new colorful words
I've seen other Sequoia guys do that. Good visibility and FOV. Attached is another user's images I saved for reference.

I tested that spot and my big ass spare obstructs my view.

View attachment 532575

View attachment 532576
You would need to put it over to the left side, but angle the camera a little and you would have a view. It wouldn’t be strait line but it would probably work after getting use to the off center view
 

Sal R.

Active member
You would need to put it over to the left side, but angle the camera a little and you would have a view. It wouldn’t be strait line but it would probably work after getting use to the off center view

Yeah, no. My anal retentive tendencies won't allow me to accept an off-center view.

Plus, symmetry is beautiful.
 

calicamper

Expedition Leader
My late 06 early 07 build Sequoia has 107,000 on the Odometer. Its still straight up soccer mom rig. I even dumped my Beefy BFGs that were 6yrs old and put hybrid m+S BFG Advantage Sports on it before our 2900 trip in June. Lol

My wife is cracking the whip on me to replace it and the daily Subaru with one rig. ?. Fingers crossed the new Bronco isn’t a tiny attempt to knock off the 4dr Wrangler. I want something 1st gen Sequoia ish in size bonus points for plugin hybrid. Then I’ll be doing a once in 1.5 months gas station stop in the usual daily use.
 

Sal R.

Active member
My late 06 early 07 build Sequoia has 107,000 on the Odometer. Its still straight up soccer mom rig. I even dumped my Beefy BFGs that were 6yrs old and put hybrid m+S BFG Advantage Sports on it before our 2900 trip in June. Lol

My wife is cracking the whip on me to replace it and the daily Subaru with one rig. ?. Fingers crossed the new Bronco isn’t a tiny attempt to knock off the 4dr Wrangler. I want something 1st gen Sequoia ish in size bonus points for plugin hybrid. Then I’ll be doing a once in 1.5 months gas station stop in the usual daily use.

She's a thirsty B, that's for sure.

Sequoia in volume but with hybrid mileage? Sounds like a minivan, to me. lol
 

Forum statistics

Threads
188,363
Messages
2,906,072
Members
230,117
Latest member
greatwhite24
Top