2005 Tundra novice build - "The Rez"

Kpack

Adventurer
Crystal Ridge Trail, Liberty WA Part 2

Eventually you reach the namesake of the trail: the Crystal Mountain Lookout, which is the 2nd area of great views.
hvYGdgRPHBXL4A0ZWQpZZQ8p--tfvjT6h-IrV1XFOzJwqwXOuvLI2ItmwLmTruHI2B-u5ry0u0Y7QE2EDrzmVE93qnKRWBti5pmj_IkJB-I9Rgl7qBS6N_rHXxi-zn1b7-WnQH_LtiUNJJZ4kIoupbqEkSXWbMz-D2zEw_Z_JqQgqtvcWQkzJIFk__tObiY5ihBQZj2o2NJt2m8Supg4i737MBz0C7Rf0FJeJxossLw4pPpWcJWkQm9bqRMhgJ3RHyozL0u_WFIH0jcH8PaXetSmbZq6_R86ldTBUUzB7OfXszM2xt-hOveUjYaed8YeM_R9M6_6lwoOPhN74ezAGgCclJImFdHQgyLPYv-gJWFzMoynmJAFk6Q62_CY_9GB690aWIkrkI9qIOFTImqUos08T8Umr5Euw3b5WLJ_klKX0Py1UPpD245TrntbV6wATz-3mFNk0S7KYRNFr5bctyBSKWPsWO0Bckns8NY5ze5w6uLVsNzjLaXbV76lovTY523utXL8zqzLyUKcK3QGS04s-6Y8DScqia33PvWdtIPoyeZ03CVQ3An9W_Yu4Uxx8aO1ulMEcphcvKOzmX11T_TSllqMaZw9Cw7ZMXqhiyvqaDydRmtHwyGhAuM3VFHsK_DaVL6BoyvUVuqO2mz6_vVzfSIEv1oZrAQ2OOJagmYxcQyTZLe8CQYPNQO7x8JDBY1s3-DtQpgFzLCWlTHA0IFV=w1333-h888-no


Stuart mountains off to the left:
LOszOF3P61uwD2syswYXXWqchUTfnWuhzadmIXDC3bmDUvlC3ieDn8fIsqvZJd8KProf7cgchj1K41WjKqv0EZzv3mWT3hYT_JjmofIPs6g9m1GBPGsJWFn4B1BniNUK3Qg6EXpWuVuzi6n4zsnc3H31--PnElcJ5d_ja59vhX4ZuMcu8DxvE54XMvheK_is7DNWW7Nww_uKBJ-VPPN-UdMF9Qq-ZIZRt3rFLwk0W76tk7hrEFt0btzk1ByAlq-hDrds5SyKax0aX4GByEQZ-ujNh9htyfV4Z7cGnmVmBd6T9AqWc9WwB0q3Ej7YFvZ1oeSvfs_3dBchglhP4AV2Cug-Vc6EmVdjB_FQ7XgXWLv9VYTFdoaIDCgxHNJTBt6gXV-Fm90S4xh7DpltmM9t5jO0QJb2AtBGrC6KUHiE1t2CqEzIprYSUoeRinHz1fwWCzA36AgCWrjyhcEPsxXWEK7FZNbns6t3G6OBIXxM4_mDb_QAukREz8jRYmmnp9nEDEXyDpQgUo1CukSc3CnEZF_88lreW6JrWTzDJS-Uwe7Yn8B1UDWpynrJLerT-yGeics80MlLlFf954r8R5uxUyigVwmPCfcHge5U4nz4V_ttVj_L640alCnFHZnuo5jS0my3k-FCG2zMRwfDByVst7qjVXraBgl-0Jo7LepGCyZsq6eokaBMva-IfwR0oBG10RtU5M89BDRp1bXogOYdeilT=w1333-h888-no


This is a very dangerous area. Some years ago and unfortunate accident claimed the lives of two young men when the Jeep they were in tumbled off the cliff and plunged hundreds of feet below. Vehicle access to the cliff has been blocked off by large trees.
2WPwLNnbtc4McOLuQl9WHAdoZZBFCcU8qW7SwsWzK4mLxPRNt800kqgcgB5D2gAGX0em9MVYZl5lGyhapyT0JFQ-KLDBVEA4GOeseakh6_-Qz8jxM_J5qHVP2vslvrXkKNcz7yujx4pV7HzM95DTqhToUp49yZzApLHkEKuu-S5NI7pd8i4_yYMG4Zvs32aXeuLdrX058w3urts3EI4WEFVib44_WFZ5F25_MMC16uxSKXDD7Qgz2x4JWHWWRjqJTfryz1Hm_8mgq9Pj2M2XODivXfHLYAGZ1oO3TTlkNl9JXvHCALGFWfW1aO0bTn76zPf7h4w_ogvPtKrnb-3CcZJamsnl_jhrMb_K5rkul49KgfPHO8P-Y7Q3fyZunayAnthOqMILDPp7aMyDXpJ0iewVvlqAujVox9DpbTimf-XnSuvOffTLFMtD_9D6i5BqgDNCA_YJiq5xz3yNkUZ_zkpYCMoHJxBDZytFejYofPXDPGFh277f_XzPm3c0OxAxdCgWiSK0WZGjO8BWCQd8xlaZ_Mjk0dq8k2VD_21RErhfuS0-EK3eAhY9NeSInzanm6mdjj0GWnBIPp3jGsT-qXN7824Er2CECYhCTBQyt1568n5GvGmKvZuVxFcL7UlSYAKiPRsm4fuUTJKbUhMTZ7Xq9aFPbvIF3ArHav9dnbv0Fwx38zU9kgLvJBKUWZYGulUY_bTvxE1tbSpPcFf5Q5DW=w1184-h888-no


After this the trail meanders a bit with some up and down. We came to a section where a large tree had fallen across a part of the road, and it was too big to move. It made for a tight squeeze with the tree standing in front of the fallen one.
ztqYw_RVw28mU9AWV1Zc58HzBYZixTNDUWvVULyOfu2lnBYrd3_47_Z-hiOz1OHZSUBPp29EI4jbaITnKmLuDIGDFYtViYYE0220jTFD0Cys88mu2jU1FHrqF1Ls3LBsKzX7bRc9fE513dVG6wIiqapHjl_CCnjsUa_QdTA8ghpFURoWU9jbWBSLhHT6tY_HQ-cTYXoUQe0w_9s5rQyti5yAuE7I9ICiGG0u9Jajqrcc0qwfYZfBSEsnPtNXsu5L_KTfnMSzJcPwn9YATI0GbShPUGde147SG_c0bqjQ3zr0lrujw88NX77NWvD6_J9pImoN7-6tXNuAr8CvRs_sxo8p_mT6nDW1O0F5Kl7ELp4MS30dQlrW129T6ChXsZkcXNvGpKNozIC5F-FN9sj9z85Ez-3tjL4h1X4-EFw_8uQM8kqUZJ0cgg5zIQGSOrbWVD6Pj1CfCM2YH3AwrKSia-v4xwgUvOCql_yikLeJNZARM-LKghMqWdUZVniYH12cOh9azkYkZ-Fdi0FcJIbwZpKxxpU5pi8qSeexcc3dY5-_ndGP3Mi6rvBvWtyYO3dBHNYgeQWuxvVWLjjFAgcm7VDvlqy_sVSzFIGFOndB1bID0KzHDeJHfRk45YYVvMU0nahM6WOHonrf-JjNvU8ozZcI-kF6kyvitrvZ1tZS4GjDCpcbq3LJDFAPpKTA8bQ9iH5ZFajc8XRfysLaeD5ih8k33Q=w1666-h937-no


Right before the end of the trail we hit the last of the viewpoints. Lion rock is off to the right.
mEMvVH9okHggOGrs7M_uPw-FacAR87KO3bU2NlkC0jwvbsoGK_1sBtcZP2qlyrpYU6oYPeybTzFVDEA5WEqIOkMNKGZ80zomzHl2AMnQ7PC0Qf36i4PinDMlIEou28hG-AuRB43-Koit8KlbevHaTXD4MTXIg09rSmvKvkb5d2TuOSAXrNi-mXxVpfeADuOk86e0hgXv0j92L8AljWJHmUnITO1pRxsTdbjTOHfEcRQ_RRB5uveKJxCnUcgvd_zp3O3AG4d21FOgoYWXQ0vsaVGRe6fNjvo1iN5bvw-yWNNhusqkYMUAr0lky7JO-V27iL3V0J5Pjvda2Nqpn0hn97ic3kemDUSTqz9cmMpsLufXKk4eLNpAe49Nx-0eEo6Ijb3U7F6byqMhW0Vb80nCrD5KfbCl9JIKgJtBd8FViN5yohKoCD9kMvGbmGK3izPYL_Q9JuSbf0koCp36CRu1u9gbAJYkVN7B6Oc9GYH2ARYnTgpNOtfFHREJjcu8bUV0BHz0dWr11ZkTd98CfdvS7pyCvGuVmgsG2qGo7ddawD-gcSuQIuC3W9a9Jw24mqsk2XqujHWfkQxijHpb_IJ1Ul9vIM0h3HwVc41YqBzwNWN6TlinKHy1Ju9v9pKv00hmgFyGf0cpZUPABUYD7ZEdYF-6-hE0U6MFFvYZVjkCEGN6Nt6wYVuEP0SC_LX_nIJ2AtKm5bRTsS3dh5J-lusOCT8c=w1406-h937-no


End of the trail. It puts you out onto a rare paved FS road, which leads you down to Ellensburg.
PgTERGMv6QQhIjss14amW2nfOiCyBJnXM_5liKKTbTboNgHRuwUGzVYuyVgP3HJN0JGU7NflWZsMIhP1DfwdxZMwQ1CqunIp7ALLeBMHa5gvw88OIFPV_G4uiXLYCmIXbxgLPeWrEj7GMKatq0J1E2Q_Kq0KBYc6CT3Mk4P74zbz3jrcNzRf67yiw-7wKjQeBOi-EXbi8sqi1_elr4k-zvhGAr0IfopxhhcJ6Mxhs6VHiR1Lsru3oP_0_S7M3d8ST38iKHeOc8AHM0M6ACArXJlpMKZGkA9uL8oUNN93IFoA2_NrcJTRaPL4-6iCHc_cLDMZvFHQFGyyDfXB85B8gseGMOWVycQrjBoE4AQOXuAv56teOJIbCWcytVvipUfUvfL7aYUF5j1Q14JK8o1iay4nfdLMhwrvTACxIa9Lw4VqFUO8omY8RSI1T9RQ9AwKF6FCbANOOg0mrrYnF8hMosrWWWDAB8uswELVcq2P7DAYWRE957LGC_wSxhbEFFwqrM4dTtMQzxcR5YzDkh_vwLVhC23P6X-3oSE0yvi9yuVxiMX6SKbNHiFhqUE1-n7sFNBDxoDgRznuiakKKaVyGcoY2SJBCIV392EeGj5_YA0AKRftLbdWscZosT90dQTa5s75kkjmmDY7NzwAvANY99iZlI6P4c9HM9Areev3gIw8Je_cjnw94sqogMNQeVEhSv9J5uRBija2R-V4_0yG3myq=w1406-h937-no


Here's a video that one of the guys put together. Most of it is sped up so it doesn't take forever to watch.
 

Kpack

Adventurer
Project: Improve transmission and power steering cooling

Purpose

Ever since I hooked up an OBDE II reader and Torque Pro, I've been keeping an eye on the engine and tranny temps, especially while towing. I don't like how high both of them climb when I'm going uphill. Tranny gets to 240 sometimes, and engine gets up to 225 at the peak with no A/C on. When running trails the transmission doesn't get too bad, except for long and constant uphill. My power steering on trails gets blazing hot though. Towards the end of most trails my pump is whining like crazy and the steering wheel fights me. This is full, fresh fluid....but the itty-bitty loop of metal that Toyota uses for the power steering cooler can't be touched by hand at the end of a trail.

Materials
-Hayden power steering cooler (https://www.amazon.com/gp/product/B0049EWDX0/ref=ppx_yo_dt_b_asin_title_o01_s00?ie=UTF8&psc=1)
-Cheap 12" electric fan (https://www.amazon.com/gp/product/B00TI0DE4W/ref=ppx_yo_dt_b_asin_title_o00_s01?ie=UTF8&psc=1)
-Electric fan wiring harness (https://www.amazon.com/gp/product/B003PB4AY8/ref=ppx_yo_dt_b_asin_title_o00_s00?ie=UTF8&psc=1)
-small SPDT switch
-Dexron II or III ATF to replace lost PS fluid
-Zip ties
-Heat shrink tubing

Cost
-Cooler - $37
-Fan - $27
-Wiring - $34

Procedure
First step was to replace the power steering cooler. I removed the skid plate, unhooked the lines and drained whatever I could out into a catch pan. I then decided to replace the existing hoses with the supplied ones from Hayden, as the Toyota lines were too short to allow me to position the new cooler where I wanted. Getting the new lines on was a real pain. I used the hose clamps from Hayden rather than the squeeze clamps from Toyota.

I then positioned the new cooler where I wanted it and secured it using zip ties. I kept it off the A/C condenser by about 1", and it is very stable where it's at. I refilled the PS fluid reservoir, lifted the tires off the ground and cycled lock to lock several times and refilled as necessary until no more air was released.

This picture shows the two new PS hoses
y4mbsdOWzaGNlcB65XDGyJryTBd9f73E8GFlElPHNcQw2_19LA19qI2nzIYSEsBfT2EXOdxwduU08buz7M0rtR4e9xaMZ6gdH-IaQBegm98Qrse7Qp_4V6XaL-egO_im0QSU4suCvfimORULYYLBeZzXMKCl-pwJDUST1sAFFcwxjoHjVbNRkSOH-LTn7WvOdY6OqP4oWuDGcjS7oMwGuEm1Q


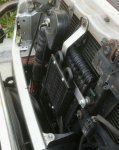
I then mounted the fan directly over the stock trans cooler and the new PS cooler. I used one of the mounting screws for trans cooler, then zip tied in 3 other locations. It is totally immobile and has about 1/2" space between the fan and the trans cooler. I didn't really want a red fan, but that's the only color Amazon had in stock at the time.
y4ms-HQi1FhgNfHN4goeeHhZIOUjMXIOyFPoKfrMZJCbMax9mLiEyZjClbrFet5dGI8I1dIf3QtisHfzQ5zRpSgFSkb_2kB9BjUqT70ckL32-_EXh9GOrVkpMpeGiNuKS8WiSS02qng0bYAU0sA5ZOOkoVt36d9rBGo059Ic89L7-1qdtfUxZNPyyx4gtv_y-kbyTbcWm4Sah0KtcbDWWgcEQ


Here's the coverage the fan provides. It covers most of both of the coolers. This fan is sent as a puller, and I had to change it over to a pusher. All that is required is to remove the nut that holds the blades on, flip the blades over, then wire the fan backwards of normal (fan black wire should go to positive, fan blue wire goes to negative).
y4mWqrOPai6J6mp4zQRPx-lo1-3sEIwsXoJmXjdKYP0xjvzEbEuMWglW2qhsbaayRdALbZbk7ssi9d3e_Ne6sZ4x4olQNsBcGx4FhzW383V_pjxQkrnVg00cle6Y8wt4DGKxQhmzfr4mf3QLRyGaC2Ew8AOK5LxbSXkCg6viNMmFdt7VKohPpf6eNOdYQlKsCWyFOBqKjKR4-UEJU4hNp3fUg


The wiring harness comes with everything you need and has clear instructions. I mounted the relay on the driver's side close to the battery.
y4mLFRkXD71oMCuDIQdeleL7zoXeK9Nxm5g8HY0P0B9j_BAZexWmwkIA4UXgBX_sLXvwvonQPBPPqT2iJ6YNvBwGLacQh4A1VQJ-AGvxSKqGbxkh2SzA7rVhNDG5al1kX3Jn_OfOE8jPJmLN4PD0ef8_LC8IH_X1Y-CLZTsXLEaiWqKRwGOkV0sqDX2GQfbBjmh8wcP9sFKhy-iyw8qfR2Gug


I ran the orange and gray wires up through the firewall to the cab. I tapped the orange wire into an ignition wire (same one I used for my front camera.....now that doesn't turn on for some reason....need to figure that out), and soldered the gray wire to a SPDT switch. I ran a ground wire from the SPDT switch to an existing ground spot behind the driver's left kick panel. I mounted the SPDT switch right below the fuse panel. Eventually I will get something like a SwitchPro and all my accessories will be neatly organized into a single panel.
y4mrYupUKsN9K_tHrX7Hm60rEADH0TU8_LtOWETyvWm3YAgGjvHFaWhK0I36DUfqeVekiV4JWTR7Lhni5mooYGVqBic6Ys53EPD1Lok_L2IV4kNJDT5ItW8Zfy2ETqjn7YctyMgItZcviYwRQr9R6ZZMW3o9coChB3iRMqI2RzfCChLbSoORBE0tGV3UclpbVXFS4TGZrYkMeJMNrb9B6Q2qA


The hood closes with just enough space on all sides to clear the fan.
y4mNRGK1c-uuGU449TKHgIW8QVG9L-lJst1ICZzEFxXSdDKYIvx90i_SOa_YzoAV1it-oUCW-3FyvqrvkS6We9a_O58cFHfboLEm2pXUYcSZoFEIRcEtWXTkMzzvNIERfT6GPHi1VAxiFC8uHiynxi12bgU0NID7KY7ocnJauuWARQVFnBbZDgXcwIYA9zb2J5IQHMQnoUzW9qbY20PDixL_A


So far initial testing is positive. The fan is quiet and works like it should. The real test will come next time I tow the boat and next time I hit a trail. So the jury is still out until then....


-Kevin
 

Sal R.

Active member
Project: Improve transmission and power steering cooling

Purpose

Ever since I hooked up an OBDE II reader and Torque Pro, I've been keeping an eye on the engine and tranny temps, especially while towing. I don't like how high both of them climb when I'm going uphill. Tranny gets to 240 sometimes, and engine gets up to 225 at the peak with no A/C on. When running trails the transmission doesn't get too bad, except for long and constant uphill. My power steering on trails gets blazing hot though. Towards the end of most trails my pump is whining like crazy and the steering wheel fights me. This is full, fresh fluid....but the itty-bitty loop of metal that Toyota uses for the power steering cooler can't be touched by hand at the end of a trail.

Materials
-Hayden power steering cooler (https://www.amazon.com/gp/product/B0049EWDX0/ref=ppx_yo_dt_b_asin_title_o01_s00?ie=UTF8&psc=1)
-Cheap 12" electric fan (https://www.amazon.com/gp/product/B00TI0DE4W/ref=ppx_yo_dt_b_asin_title_o00_s01?ie=UTF8&psc=1)
-Electric fan wiring harness (https://www.amazon.com/gp/product/B003PB4AY8/ref=ppx_yo_dt_b_asin_title_o00_s00?ie=UTF8&psc=1)
-small SPDT switch
-Dexron II or III ATF to replace lost PS fluid
-Zip ties
-Heat shrink tubing

Cost
-Cooler - $37
-Fan - $27
-Wiring - $34

Procedure
First step was to replace the power steering cooler. I removed the skid plate, unhooked the lines and drained whatever I could out into a catch pan. I then decided to replace the existing hoses with the supplied ones from Hayden, as the Toyota lines were too short to allow me to position the new cooler where I wanted. Getting the new lines on was a real pain. I used the hose clamps from Hayden rather than the squeeze clamps from Toyota.

I then positioned the new cooler where I wanted it and secured it using zip ties. I kept it off the A/C condenser by about 1", and it is very stable where it's at. I refilled the PS fluid reservoir, lifted the tires off the ground and cycled lock to lock several times and refilled as necessary until no more air was released.

This picture shows the two new PS hoses
y4mbsdOWzaGNlcB65XDGyJryTBd9f73E8GFlElPHNcQw2_19LA19qI2nzIYSEsBfT2EXOdxwduU08buz7M0rtR4e9xaMZ6gdH-IaQBegm98Qrse7Qp_4V6XaL-egO_im0QSU4suCvfimORULYYLBeZzXMKCl-pwJDUST1sAFFcwxjoHjVbNRkSOH-LTn7WvOdY6OqP4oWuDGcjS7oMwGuEm1Q


I then mounted the fan directly over the stock trans cooler and the new PS cooler. I used one of the mounting screws for trans cooler, then zip tied in 3 other locations. It is totally immobile and has about 1/2" space between the fan and the trans cooler. I didn't really want a red fan, but that's the only color Amazon had in stock at the time.
y4ms-HQi1FhgNfHN4goeeHhZIOUjMXIOyFPoKfrMZJCbMax9mLiEyZjClbrFet5dGI8I1dIf3QtisHfzQ5zRpSgFSkb_2kB9BjUqT70ckL32-_EXh9GOrVkpMpeGiNuKS8WiSS02qng0bYAU0sA5ZOOkoVt36d9rBGo059Ic89L7-1qdtfUxZNPyyx4gtv_y-kbyTbcWm4Sah0KtcbDWWgcEQ


Here's the coverage the fan provides. It covers most of both of the coolers. This fan is sent as a puller, and I had to change it over to a pusher. All that is required is to remove the nut that holds the blades on, flip the blades over, then wire the fan backwards of normal (fan black wire should go to positive, fan blue wire goes to negative).
y4mWqrOPai6J6mp4zQRPx-lo1-3sEIwsXoJmXjdKYP0xjvzEbEuMWglW2qhsbaayRdALbZbk7ssi9d3e_Ne6sZ4x4olQNsBcGx4FhzW383V_pjxQkrnVg00cle6Y8wt4DGKxQhmzfr4mf3QLRyGaC2Ew8AOK5LxbSXkCg6viNMmFdt7VKohPpf6eNOdYQlKsCWyFOBqKjKR4-UEJU4hNp3fUg


The wiring harness comes with everything you need and has clear instructions. I mounted the relay on the driver's side close to the battery.
y4mLFRkXD71oMCuDIQdeleL7zoXeK9Nxm5g8HY0P0B9j_BAZexWmwkIA4UXgBX_sLXvwvonQPBPPqT2iJ6YNvBwGLacQh4A1VQJ-AGvxSKqGbxkh2SzA7rVhNDG5al1kX3Jn_OfOE8jPJmLN4PD0ef8_LC8IH_X1Y-CLZTsXLEaiWqKRwGOkV0sqDX2GQfbBjmh8wcP9sFKhy-iyw8qfR2Gug


I ran the orange and gray wires up through the firewall to the cab. I tapped the orange wire into an ignition wire (same one I used for my front camera.....now that doesn't turn on for some reason....need to figure that out), and soldered the gray wire to a SPDT switch. I ran a ground wire from the SPDT switch to an existing ground spot behind the driver's left kick panel. I mounted the SPDT switch right below the fuse panel. Eventually I will get something like a SwitchPro and all my accessories will be neatly organized into a single panel.
y4mrYupUKsN9K_tHrX7Hm60rEADH0TU8_LtOWETyvWm3YAgGjvHFaWhK0I36DUfqeVekiV4JWTR7Lhni5mooYGVqBic6Ys53EPD1Lok_L2IV4kNJDT5ItW8Zfy2ETqjn7YctyMgItZcviYwRQr9R6ZZMW3o9coChB3iRMqI2RzfCChLbSoORBE0tGV3UclpbVXFS4TGZrYkMeJMNrb9B6Q2qA


The hood closes with just enough space on all sides to clear the fan.
y4mNRGK1c-uuGU449TKHgIW8QVG9L-lJst1ICZzEFxXSdDKYIvx90i_SOa_YzoAV1it-oUCW-3FyvqrvkS6We9a_O58cFHfboLEm2pXUYcSZoFEIRcEtWXTkMzzvNIERfT6GPHi1VAxiFC8uHiynxi12bgU0NID7KY7ocnJauuWARQVFnBbZDgXcwIYA9zb2J5IQHMQnoUzW9qbY20PDixL_A


So far initial testing is positive. The fan is quiet and works like it should. The real test will come next time I tow the boat and next time I hit a trail. So the jury is still out until then....


-Kevin

Do post your results. I, too, didn't like my temps climbing and was contemplating doing something like it, but haven't yet. I have the trans cooler, but I wasn't sure if the fan would make a difference.

IMG_20180402_130017.jpg
 
Man, what a thread! Took me the better part of my day to finish this. Thanks for all the detailed instructions along the way. My 02 also makes a series of noises from the rear end. I don't think it's the bolt as I replaced the rear shocks myself and didn't change the bolt. But I will check either way.

I'm also monitoring trans temps with Torque Pro and I've never gone above 200. I'm not sure if it is reading from the pan or the torque converter.
 

Kpack

Adventurer
Man, what a thread! Took me the better part of my day to finish this. Thanks for all the detailed instructions along the way. My 02 also makes a series of noises from the rear end. I don't think it's the bolt as I replaced the rear shocks myself and didn't change the bolt. But I will check either way.

I'm also monitoring trans temps with Torque Pro and I've never gone above 200. I'm not sure if it is reading from the pan or the torque converter.
Thanks, glad you found it informative. That's my purpose. I'm a total noob when it comes to this stuff, so I'm glad to hear my experiences are helpful to others.

What did you replace the rear shocks with? I originally used the factory bolts (or I assume they were factory), but the Icon lower shock mounts require 1/2" bolts, instead of metric.

My trans temps don't go over 200 with normal driving. When towing though, that is a different matter. I towed the boat a couple days back and my route back from the river requires about 15 miles of solid uphill the entire way. At 50mph and 3K rpm's my trans torque converter temp peaked at around 240, while the trans temp stayed at least 15 degrees cooler the entire time (with my new aux fan on). Engine temp got up to 210. 80 degrees out, no wind to speak of. I'm still evaluating the fan setup to see if it actually helps at all.

I went with Icon 2.0's in the rear. I honestly don't remember seeing mention of changing the bolt on the instructions. I'm almost positive it said to reuse the factory bolt. I just checked their website and there are no instructions for the 2.0...:rolleyes:
I just shot them an email. I'll see what they say. I can't remember if the truck made these noises prior to me swapping out the rear shocks.

I also had a horrible time trying to remove the upper ball joints. I knew exactly what you were going through when I read your post. Those tools you can rent from Advance are almost useless for our trucks. I eventually gave up and had a shop do it. I wish I had an extra set of hands to help. None of my friends are mechanically inclined so I've been trying to learn from youtube. I need to replace a CV axle and I'm dreading it.
 
Last edited:

Kpack

Adventurer
I went with Icon 2.0's in the rear. I honestly don't remember seeing mention of changing the bolt on the instructions. I'm almost positive it said to reuse the factory bolt. I just checked their website and there are no instructions for the 2.0...:rolleyes:
I just shot them an email. I'll see what they say. I can't remember if the truck made these noises prior to me swapping out the rear shocks.

I also had a horrible time trying to remove the upper ball joints. I knew exactly what you were going through when I read your post. Those tools you can rent from Advance are almost useless for our trucks. I eventually gave up and had a shop do it. I wish I had an extra set of hands to help. None of my friends are mechanically inclined so I've been trying to learn from youtube. I need to replace a CV axle and I'm dreading it.
On page 25 of this thread I found the lower shock bolts to be the problem: https://expeditionportal.com/forum/threads/2005-tundra-novice-build-the-rez.176272/post-2577158

There are no instructions for the shocks I used either, so I reused the old bolts. Mine might have been worn down or the incorrect size to begin with but the play is very obvious in the videos. Talking to Icon, the inner diameter of their mounts is 1/2". The guy I spoke to had been running 1/2" bolts on his truck for years instead of OEM. So I used some 1/2" bolts and the problem was solved. I don't know how widespread this issue is, but it's worth looking into.

I watch Youtube videos all the time to teach me what to do. Like I said, I'm very new to all this and have never done most of this type of work before. Replacing a CV axle isn't that bad....taking everything apart is a bit of a pain, but it's all rather straightforward. The videos cover it well. A long prybar is helpful to pop it out of the differential.
 
On page 25 of this thread I found the lower shock bolts to be the problem: https://expeditionportal.com/forum/threads/2005-tundra-novice-build-the-rez.176272/post-2577158

No I believe you. I saw your post. I'm just saying that the instructions that came with my 2.0's didn't mention needing a new bolt. If it required a new bolt they should have included them in my opinion. Pretty lame that they don't even have instructions on their website either.

Did you go with 2.0's or 2.5's in the rear?
 

Kpack

Adventurer
Fluid Film - I'm a believer

For the past couple of years I've been fighting to control the rust that appears after every winter on my underframe. Grinding, scraping, and painting would last a year and I would have to do it again. The frame would have surface rust almost everywhere, with a few areas that were really bad. Last year I tried out Fluid Film after reading about others using it. It's a Lanolin-based product, apparently made from the oil that sheep have on their wool. I spent hours with an angle grinder and wire brush cleaning everything off, painting with Rustoleum, and then coating everything with Fluid Film.

Fast forward a year, and I finally got under the truck with a pressure washer and sprayed everything off:
y4mVByul4RnicDr_Cj8zenf3XGH-sbq0So7NZB9mQL0cdLigSAghkK7E7q3nSpTp9wtKAs3cp8B6XbV4BJc1vSjbMkyl9kW6EC2L6wuXjDk9kGotuSRd4W0v2F_E8VrG1jsP3t0WpZp7z18X8iw-unOyh4Xo201VnH2WFXkSVXjNzFQtbJKjyrXg84ukR-wWtl2_wiRYCEXlaimxoZfhkVX4Q


y4mL0eVezoMCcGN-53Cy4GT29_EFv8K3S_umVCrnRLif8epe1HBUP89y4x3kAzSLBvjPWdDhWPQl4jaI9COKGUhoN1AKrL1KL7ZhBq0oHoXgIRVWYcjU4RznXkar9plXgpVHk8D47zDu4Ud9TvGNGM2uPUZbfOkheLMyv2_bLrUIzVrZ4iqjH1ZxWU-YU67ADt6zce-M_Trew6c3rd3zDNjjQ


y4mTovcVi7YHMIldzCtruu_aqP0JRoXD_y6wUHASRuV_jPdffTBDeg3XQkJat0zW_liW0cCVLbFCKG67pv3hxNZXoa0PcPru0nFMt7soQmeql7QQ6caIGqqBdSG45_m6wxKdENiMNVpYGwyrVzD9hi7sCRWR_gvcsWBk5oww--97I118eilpTwmxNg2ZXI69irjXYvNxVBemLlvARld3ojjgg


It was amazingly clean. I haven't washed or sprayed the underside of the truck since last October and we had a rough winter here. There were a few small areas of rust that I quickly cleaned up and painted:
y4mJSk3s88s7wk5PxK0v5v9VKEiJC06q9sO2D0Q1v6vs9L_CCFTKwNWe7wXEHDdauWlUMcfu7JCOxyBfvdpzCMICPnqTlNxUxhRNSqBMEel3Lq2ykYzBVMWdEJk0sIqOHMWLuQUTs_6wRPGy4q1kDgYF-gKeb86P7oRdqmhgY7IhRu-s9UdEw51kyBRIvzGELACSwuPyhBPH_arnSobVpw3_Q


y4mwPYOrbsdHalb4yNiMyiFv7ZXMa5CmZ75dfHIM5aUGuwstmCUlMTW6oHkZ9gNGqcUBFiGB9R7mLxrlUvgplxULKkIzEfbtEHHuD0n6zxA_3u_tkHwPR9uL0fN_DzpHj_tNSMP3qIHPNmJJyookDNjfGoc5FqpTbnxLjL1kwuHLvMDPWDdoLKA4OpRjyIFhpVd666ZuFbrLigHBxg_gc77vQ


I coated it all again in Fluid Film to prepare for this coming winter. I'm impressed with this stuff and will likely be using it from now on.

A few notes to be aware of:
-It's recommended NOT to spray the underside of your vehicle with high pressure water after applying Fluid Film
-This stuff stinks to high heaven
-When the exhaust heats up it will "cook" the stuff and give off an even stranger smell
-It gets everywhere when you spray it. Plan on wearing old clothes and safety glasses
-Put down painter's plastic or spray over dirt/gravel. It will get all over concrete and won't come off
-I used about 2 cans for the whole frame
-During the summer months the dust from trails clings to the Fluid Film and makes the underside of the truck filthy
-Even after pressure washing the frame there was still a layer of Fluid Film in most places.

If you live in rust-prone areas, I recommend you look into this stuff.

-Kevin
 

smokeysevin

Re-redoing things the third time
Hats off to you, your frame looks better than mine (in Texas no less) Fluid film is great stuff, I swear by it for marine winterization when around salt water.

Sean
 

Kpack

Adventurer
Hats off to you, your frame looks better than mine (in Texas no less) Fluid film is great stuff, I swear by it for marine winterization when around salt water.

Sean
Thanks. The frame has only ever looked this good immediately after painting it. I'm amazed at Fluid Film's ability to protect from corrosion. I was shocked to find that it was all still there, even after a year of hard use and abuse. The only areas that rusted were parts that I missed spraying the first time, and parts that I had worked on (replaced the leaf springs in spring time). Even the rear axle and pumpkin were in perfect condition.....normally those would be covered in surface rust.

-Kevin
 
Fluid Film is awesome stuff. I started using it after people on Tundra's.com recommended it. Props to you for actually protecting your frame. I'm convinced that if more people did this in the Northern states their frames wouldn't rot out. My truck is an investment of sorts. Spending a few hours under the truck is worth it to me.
 

Forum statistics

Threads
188,044
Messages
2,901,606
Members
229,352
Latest member
Baartmanusa
Top