2006 DC Tundra. DD meets ongoing tinkering.

wrenchMonkey_

Adventurer
Started mounting the bar today after work.
With the bumper off, first thing I noticed was that the power steering "cooler" (I use that term loosely, as its really just a loop of metal) was sitting too close and would not provide me the depth needed.
Made some brackets to relocate it about 2 inches further back. Fixed that easily enough.

20150930_153036.jpg

20150930_165124.jpg


Drilled and tapped the front end frame. Steel was thick enough that with a M10x1.50 bolt I was able to get 3 threads. That with some blue locktite and not overtorquing it has me with few worries. Good enough for govt work as they say. If I was doing Baha, I'd get out the MIG and weld her on.
Don't ask me why I used M10 10.9 Grade bolts, the only force this thing will have to resist is the wind at 120KMPH

20150930_140845.jpg


After getting to this point, I stopped working on re-fitting the bumper and finished wiring up the light. The reason for this is if you notice in the above picture, and as noted before, I am putting nearly a 2 inch bar in a 1.5 inch wide space. As seen in the above picture, the top of the opening is sitting over the top of the bar and coving up a bit of the light. There is plenty of room for play on the bumper, top mounts all in OEM spots, I can rotate the bottom out about a inch out and that opens up the top of the light to be shown and covers up the bottom. Aesthetically to the eye, this looks better to me from a ground level head on view, but tonight I wanna take it out and see what throws more light. Not much data online about this brand LED ( such as a Rigid, with beam patterns and LUX readings and such) so I am not to sure I'll have to see what actually throws the most light.

20150930_140851.jpg


While I was working on drilling and tapping all the brackets and the wiring I had the bar hooked up to a spare battery, sitting on my work bench, 1 inch away from a plastic bin. 20 minutes later, not even that hot to the touch. I am not worried about melting plastic with such low wattage/amperage on a LED compared to a Halogen/HID. Also, I'll probably be moving while using this unless setting up camp in the dark, so I account for some wind to help cool it down.

When I sort that out, I'll adjust the bottom bumper mounts ( or not ) and finish it all up.
Still have not ordered my switch, but with the exchange rate, at $40 CAD to my door for a switch.... I just cant justify that. I've got plenty of good switches around, they just don't light up and say LED LIGHT BAR on em. :(
 
Last edited:

wrenchMonkey_

Adventurer
I kept getting bugged to bookmark a link to that OTTRAW switch I wanted, so looks like I'll have a project comming up for XMAS. Thanks wife.


In the maitnance world, I R/R the block heater and gonna swap out the front and rear DIF oil.
 

wrenchMonkey_

Adventurer
20151221_121454.jpg
20151221_121550.jpg

Touched up my alignment in the garage. Steering wheel was 20 degrees crooked after I hit a curb so I wanted to address that. Everything underneath looks fine, no TRE bent and the rack looked fine. My last alignment from a shop on paper showed +0.10 degrees total toe in (.05 / .05) but when I measured it this morning, I was around -0.4 degrees of of total toe out! Something happened somewhere, either the shops machine was ****ed, I am ****ed, or most likely the hit. I'll have to look into that a bit more.

Using a 115mm reference line (the string is 115mm from the center of the hub) and a string height of 15 in (center of hubs to the floor)

The short explanation for someone that has never done this before. You are taking measurements with a caliper, I use a 0-6in Digital Mitutoyo, and you are measuring from the string, to the front and back of the lip of the rim on the wheel.
The distance of the front of the wheel is further away from the string compared to the back, therefore the front of the wheel is further in than the back, meaning toe in or toe out. You can see below how these had to be flipped as I went from toe OUT to to IN.

The easy way to do this is to use a tape measure, measure across both passenger and drivers side wheels, front and back, do the math, and shoot for somewhere around 1/16 of a inch. I've done that before, but was not as accurate as I'd like. And besides, who uses inches and fractions anymore? I am Canadian. :)


Before - Front - Rear = TOE
Passenger Tire Front (37.54mm) - Passenger Tire Rear (43.00mm) = -5.46mm
Driver Tire Front (38.96) - Driver Tire Rear (43.85mm) = -4.89mm
-5.46mm + -4.89mm = -10.35mm
(-10.35mm/25.4 = -.407 degrees! Holy ****. Even eyeballing it, I could see it was torqued.

A hour later.
After - Front - Rear = TOE
Passenger Tire Front (40.26mm) - Passenger Tire Rear (39.37mm) = .89mm
Driver Tire Front (40.84) - Driver Tire Rear (39.83mm) = .99mm
.86mm + .99mm = -1.81mm
1.81mm/25.4 = +0.074 degrees

I was shooting for 1.05mm each side, total of 2.1mm which would of given me +.08 as per DJ's spects, but I am happy with that.
This was my third time doing the string method to set toe, first on the truck. Much easier with all the space underneath to be able to adjust from the wheel wheel vs getting under on a creeper.

If you've made it this far, you must either like math or done self alignments before. :)
 
Last edited:

toyotech

Expedition Leader
Your self alignment looks a lot cheaper than buying a kit. I like it.


Sent from my iPhone using Tapatalk
 

wrenchMonkey_

Adventurer
After installing my 22in LED Light bar on the front of the truck a few months ago, the stock switch that I had been using was really bugging me. I kept pushing it and it would go through the hole behind the dash and result in my having to use pliers to try and pull it back through.

After putting off buying and installing the OTRATTW Contura V switch I've wanted for a while, my girl got it for me for XMAS and yesterday I installed it.
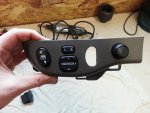
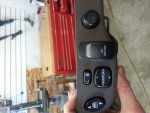
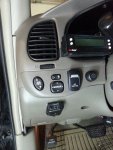
The location where I was going to put it on my 06 DC was on the left side of the wheel, by the rear window switch, mirror adjust and dimmer switch (which came in handy later)
20151226_113600.jpg

The measurements of the switch for the hole is .830 by 1.45 inches. Worked out perfectly as that was about the width of the OEM Oval hole. I marked the area I wanted, under sizing it a bit to allow to fit it in. Always can make it bigger, not smaller. :)

An hour of filing later, after checking the fit dozens of times and blowing away dust, fits perfectly.
20151226_121907.jpg


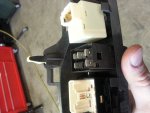
After taking the OEM switch blank out of the hole, I thought I'd of have to cut down the back surround where the OEM switch would click in. However, after fitting the swich in the front panel. Them OEM "switch box" fits the Contour V switch perfectly.
20151226_121932.jpg

With the switch fit, time to do a bit of wiring on the bench.
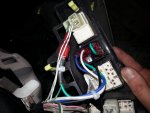
20151226_124952.jpg


Final wiring job. Pretty easy. 3 wire harness had power in, power out and ground. All I had to do was find a switch 12V source when the lights/dash lights are on to light up the switch. Easy enough as I found one right next to it at the dimmer.
20151226_134615.jpg

Finished job. When the switch is turned on, top part glows Amber. When the dash lights or headlights are on, bottom part of the switch glows green. I didn't tap in the the variable dimmer side of the switch, just into the constant 12V, meaning I cant dim the switch's green LED. I thought about re-doing it after I realized my mistake, but I'll wait till I have to wire in my air compressor in the comming months and re-do it then. Also, I never dim my dash lights anyways so.... its more for the sake of doing it because I can. Its very out of the way and I don't really see it anyways, so I am not bothered by it.

20151226_135749.jpg
 
Last edited:

AaronK

Explorer
Does that panel snap off without removing additional dash panels? I may use that spot on my 02

Sent from my OnePlus One using Tapatalk.
 

wrenchMonkey_

Adventurer
Does that panel snap off without removing additional dash panels? I may use that spot on my 02

Sent from my OnePlus One using Tapatalk.

This is for my 06 DC, not sure about other years or AC's.
No, there are four 10MM bolts that hold the lower dash panel on. Two on the left of the column, two on the right. One high one low each side. Once that is off, you can pop that one one in question out.

If you just took the left two off, you could probably make the room to get it out, but it really takes 2 minutes to remove the panel. Mine is still connected by the factory alarm and my trailer brake controller, so I just let it sit on my brake pedal. Not very tough to do.
 

toyotech

Expedition Leader
This is for my 06 DC, not sure about other years or AC's.
No, there are four 10MM bolts that hold the lower dash panel on. Two on the left of the column, two on the right. One high one low each side. Once that is off, you can pop that one one in question out.

If you just took the left two off, you could probably make the room to get it out, but it really takes 2 minutes to remove the panel. Mine is still connected by the factory alarm and my trailer brake controller, so I just let it sit on my brake pedal. Not very tough to do.

It's the same between AC and DC


Sent from my iPad using Tapatalk
 

wrenchMonkey_

Adventurer
Finalized the wiring diagram for my compressor install. Busted the stencils and ruler out for this one.
DSC_0252.jpg


Install will be in two parts -
Part One - Making a custom mount for the two switches/in dash air guage to replace the OEM lower console piece and run the wires/air tubing from the lower center console to the compressor install location.
Part Two - Make custom bracket for installing the air compressor in the location (Between the Airbox/ABS) and push the powersteering resevoir back towards the block 1-2 inches to gain more clearance for the compressor.

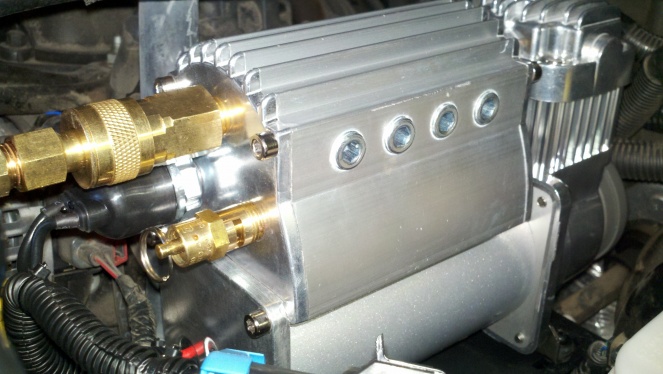
I'll be going with the Vi Air ADA Base Kit with the 400C compressor with 10, yes 10, port manifold/air tank. Don't need that many ports on the manifold, but thats how it comes. Already has the 1/4 QD for the air hose, and a safety valve. So I'll probably add a drain valve, ARB Locker Solenoid (front and maybe rear someday) along with the 1/8in air line with compression fitting to the in dash air guage. Maybe a air guage mounted on the manifold itself, why not.

Stolen picture, but this is the compressor/manifold.
207112d1376066935-viair-automatic-deployment-air-systems-ada-now-rockridge-4wd-w-best-price-2012-05-06_19-48-27_615.jpg
 
Last edited:

Forum statistics

Threads
188,132
Messages
2,902,554
Members
229,582
Latest member
JSKepler

Members online

Top