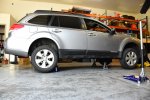
2011 Subaru Outback Overland Build

Stokes

New member
Hello everyone!
This thread is the story of my project to outfit my vehicle for overland travel. I am a
senior at University of Pittsburgh studying Material Science Engineering.

This story started out with a bed liner-painted 2000 Jeep Cherokee.

IMG_20171124_135857-01.jpeg

My plans were to lift, new shocks, tire carrier, roof rack, sleeping platform in the back and customized
bumpers that incorporated a winch and LED light bar. The goal was to take my car across the country this
summer and have the ability to handle some backcountry car camping.
6 months after I completed the bed liner project I got in a car accident and Stokely the Jeep was totaled.

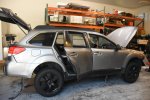
This is where the 2011 Subaru Outback, Stokely the Subaru, comes in.

MVIMG_20180315_141700-01.jpeg

I went back and forth about whether it would be worth it to continue my project on a vehicle such as that or
if it would be practical. I came to the realization that it didn’t matter to me what the car was, what
mattered was that I complete my project and gain knowledge in the process. I am more interested in
learning and doing something fun rather than limiting myself. The worst that could happen is that I end
up with a ************ vehicle to take me on ************ adventures. After all, we all like to be ************.
Enough of the jibber-jabber, here’s what we are working on.
Project Outline
Strut Spacers:
Winch:
Shocks/ Struts:
LED Bar Light:
Internal or External Snorkel Intake:
  • Details to come
Front Bumper:
  • Fabricated using steel tubing and Aluminum plates
  • More details to come
Rear Bumper:
  • Details to come
Tire Carrier:
  • Details to come
Roof Rack: (Details)
  • Details to come
Skid plates: (Details)
  • Aluminum plates
Sleeping Platform:
  • Fabricated from econolite panels
  • Pictures to come
Total build price so far: $1,573.61

Initially I researched Subaru Outback builds and came up with only a handful of people who had tried something similar so I sought the help of my good friend David, who is a complete genius when it comes to projects like this. He has a mechanical engineering background and years of innovation in several different industries, I was positive we would be able to pull this off. With that said a lot of the products that I chose for this build were grounded in recommendations from David.
We just finished up our second day of 10 and so far we have the sleeping platform panels cut to size and are ready to start the fab work for the front bumper. I will be posting plenty of photos as the build continues. I hope you all enjoy the story of our experience and the insight we gained from this.
 

Stokes

New member
Hello everyone!
Sorry for the delayed post, we have been working some long days this week and have been making some good progress. The following posts will be organized by day so the photos don't get confusing.
 

Stokes

New member
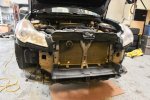
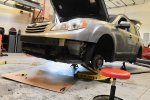
Day 1:
  • Prep work
  • Car jacked
  • Front plastic removed and planned the bumper design
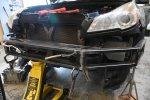
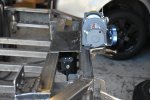
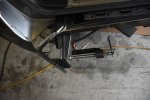
One major thing we noticed here with the bumper design is that the factory mounting plates are not strong enough to support any kind of pulling force from a winch or recovery system. Since I plan to integrate a winch, we decided to drill out the two outside mounting bolt holes to half an inch and also attach a secondary point of contact to the subframe of the car. These adjustments will strengthen the mount and also disperse any kind of frontal loading throughout the forepart of the car. A more detailed layout of the bumper will be posted later.
We also found out that the windshield washer fluid reservoir sits pretty low on the drivers side, so will need to design a skirt to hide that and offer some protection.
 

Attachments

  • Sub1.jpg
    Sub1.jpg
    1.5 MB · Views: 90
  • Sub2.jpg
    Sub2.jpg
    1.4 MB · Views: 94
  • Sub5.jpg
    Sub5.jpg
    1.6 MB · Views: 102
  • Sub6.jpg
    Sub6.jpg
    1.7 MB · Views: 104

Stokes

New member
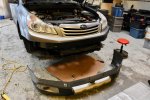
Day 2:
  • Front plastic cut
  • Sleeping platform designed
As you saw from Day 1, I drew a level line across the bumper by clamping a marker to a cart with wheels and following the contour of the bumper. I then taped along the line to keep the plastic from chipping on the top side and made the cut using a standard oscillating cutter tool. This method worked out pretty well. The cutter makes it very easy to follow the line fairly accurately and didn't splinter the top section at all.
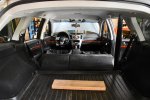
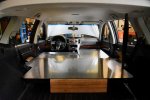
I landed with this sleeping platform design because I wanted the option to be able to sleep by myself and my dog or with my girlfriend and having the sleeping area broken up into three panels with the seats folded down seemed like the best way to accomplish this. I especially like the aspect, if I'm traveling by myself like I am this summer, I can take out the drivers side panel and leave the passenger side and back panel up while I drive and literally have no setup for when I need to pull over and sleep. Plus Ursa (my dog) gets a nice level surface to sleep the drive away.
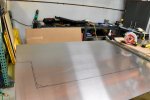
The process for making the panels was fairly straight forward but tedious at the same time. I started out doing some CAD work (Cardboard Aided Design) to get the overall shape and dimensions figured out. I made sure to situate each panel with clearances such as the console and the passenger panel, which I would want to access if I was driving.
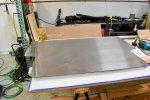
The material that I am using for the panels is called Econolite, it is a aluminum-polymer laminate that offers a great strength to weight ratio. The panels will be reinforced by light weight thin walled aluminum tubing that is strategically placed in areas of high use to minimize bending and sagging of the panels.
After I got the CAD work figured out, I traced the patterns onto the Econolite and used a skil saw with a blade designed for cutting aluminum with a very fine tooth pattern. The fine tooth pattern made a very clean cut on both sides of the material. I also made each corner a specific radius in order to have a rubber trim fit nicely around. Like I said I plan to trim the panels with rubber on the perimeter only and carpet the top sides with a thin, outdoor carpet like material. As I finish up the panels I will post pictures of the final product.

Lots more to come so stay tuned!
 

Attachments

  • Sub 1.jpg
    Sub 1.jpg
    1.7 MB · Views: 130
  • Sub 2.jpg
    Sub 2.jpg
    1.6 MB · Views: 128
  • Sub 3.jpg
    Sub 3.jpg
    1.5 MB · Views: 135
  • Sub 4.jpg
    Sub 4.jpg
    1.3 MB · Views: 131
  • Sub 6.jpg
    Sub 6.jpg
    1.5 MB · Views: 144
  • Sub 5.jpg
    Sub 5.jpg
    1.6 MB · Views: 155
  • Sub 7.jpg
    Sub 7.jpg
    1.3 MB · Views: 164

Stokes

New member
Day 3:
  • Wheels sanded, cleaned, taped and painted
  • Begin the front bumper fab
  • Rear plastic cut & rear bumper planned
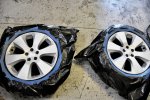
To prep the wheels I just sanded them down with a scuff pad and taped around the rim. Because of our crunched time schedule I decided to get the wheels painted on the old tires incase the tape didn't seal completely and some paint got through. The paint that I used is Duplicolor high performance wheel paint. I think the mat black looks great on the wheels. The tires that I got are the A/T Yokahama Geolandar G015 series 225 65 R17. These tires are only a few pounds heavier than the old tires ( Kelly 225 55 R17) but offer 2 extra inches in height. They seem to have the best combination of off road and mixed condition ability for what I would like to do with my Subaru. We may need to make some trims to the front of the rear wheel well to prevent rubbing, it looks a little close.
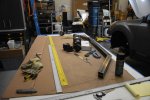
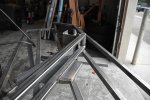
To begin the bumper fabrication I transferred the front bumper contours onto cardboard and made tangental lines to each curve. This allowed us to accurately determine the angles that the new bumper would need follow. The rest of the bumper fab was just cutting tubing and making the welds but ended up taking few days longer than we were expecting.
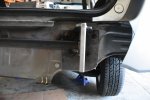
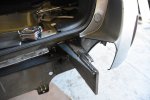
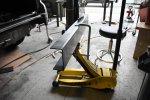
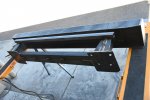
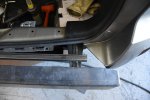
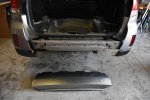
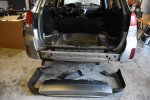
The rear bumper was much less complicated than the front. I plan to secure the plates directly to the 8 studs and other than some measuring magic everything lined up perfectly. The most time consuming part was probably fabricating all of the little support pieces that gives the bumper its strength. Measuring, drilling, cutting and grinding is the bulk of the time. Seeing it all come together is the best part.
 

Attachments

  • Sub 1.jpg
    Sub 1.jpg
    1.4 MB · Views: 132
  • Sub 2.jpg
    Sub 2.jpg
    2.1 MB · Views: 126
  • Sub 6.jpg
    Sub 6.jpg
    1.4 MB · Views: 131
  • Sub 7.jpg
    Sub 7.jpg
    1.5 MB · Views: 132
  • Sub 8.jpg
    Sub 8.jpg
    1.9 MB · Views: 132
  • Sub 11.jpg
    Sub 11.jpg
    2 MB · Views: 120
  • Sub 15.jpg
    Sub 15.jpg
    1.7 MB · Views: 114
  • Sub 16.jpg
    Sub 16.jpg
    2 MB · Views: 144
  • Sub 17.jpg
    Sub 17.jpg
    1.4 MB · Views: 153
Last edited:

Stokes

New member
Day 3: (Continued)
 

Attachments

  • Sub 9.jpg
    Sub 9.jpg
    1.9 MB · Views: 105
  • Sub 10.jpg
    Sub 10.jpg
    2 MB · Views: 102
  • Sub 12.jpg
    Sub 12.jpg
    1.9 MB · Views: 97
  • Sub 13.jpg
    Sub 13.jpg
    1.8 MB · Views: 100
  • Sub 14.jpg
    Sub 14.jpg
    1.9 MB · Views: 101
  • Sub 19.jpg
    Sub 19.jpg
    2 MB · Views: 111
  • Sub 20.jpg
    Sub 20.jpg
    2.2 MB · Views: 115
  • Sub 21.jpg
    Sub 21.jpg
    1.7 MB · Views: 107
  • Sub 4.jpg
    Sub 4.jpg
    2.1 MB · Views: 106
  • Sub 5.jpg
    Sub 5.jpg
    1.3 MB · Views: 106

phalanx

New member
I love this! I just purchased the same Yokohama tires for my 2017 Outback after my second tire puncture with the OEM tires (I’m a slow learner). Looking forward to seeing the rest of your build.
 

borison

Adventurer
Looking really good. A trick I learned for painting rims on the tire is to get a deck of playing cards. Stick them between the tire and rim, overlapping. Also, what’s with the plunger hanging from the rear view mirror?
 

Stokes

New member
Looking really good. A trick I learned for painting rims on the tire is to get a deck of playing cards. Stick them between the tire and rim, overlapping. Also, what’s with the plunger hanging from the rear view mirror?
That is a good trick to know! It may be hard to see but I was able to get black electrical tape to seal up pretty nicely. The plunger was a rock climbing joke from my brother about it being a trad climbing piece of gear for slab routes.
 

Jeffer949

Observer
The excel g shocks are a decent upgrade. I put them on my wife's and they are nicer. But personally I would snag a set of 13-14 outback strut assembles on eBay. They have stiffer springs and the shocks have more damping. And my wife has blown out the front KYB's in 50k and getting warranty is a pain through amazon.
 

Stokes

New member
The excel g shocks are a decent upgrade. I put them on my wife's and they are nicer. But personally I would snag a set of 13-14 outback strut assembles on eBay. They have stiffer springs and the shocks have more damping. And my wife has blown out the front KYB's in 50k and getting warranty is a pain through amazon.
Along with the KYB's I also got a set of RalliTEK stock length springs with a higher spring rate. So that paired with the new strut assembly made a very noticeable improvement.
 

downhill

Adventurer
NIce build. Any new pics? The Subarus have become more urbanized over the years. Gone are the high/low range and adjustable ride height, but the car remains pretty capable. It's too bad that the brand is not better supported in the aftermarket. Luckily the rally guys have produced some good stuff that can be borrowed. I'm looking forward to seeing this progress. I think the sleeping deck is a brilliant use of space.
 

Forum statistics

Threads
188,396
Messages
2,904,147
Members
230,274
Latest member
mbauerus1
Top