You are using an out of date browser. It may not display this or other websites correctly.
You should upgrade or use an alternative browser.
You should upgrade or use an alternative browser.
2011 Tacoma 4cyl Build
- Thread starter nr13
- Start date


Eric Mayer
New member
Nice set-up! Are you having any problems with dust getting in the bed? I am going to duplicate your plans for my bed, but I am having major problems with dust getting in.
I appreciate any thoughts or ideas.
Thanks!
Eric
I appreciate any thoughts or ideas.
Thanks!
Eric
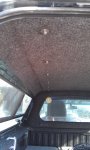
MMM dust! well I put gorilla tape over all the drainage holes (three in the front of the bed, three in the compartment's above the wheel well) then I put some weather-striping around the the two compartments at the back of the bed and finally I put weather-stripping around the tailgate. This cut down on dust quite a lot but the weatherstripping around the tail gate needs some work. Keep in mind that weather stripping around the tail gate does make it a little harder to shut, but if it keeps the dust out its worth it. There is still a gap around the rear window that I need to figure something out, but I just have not had the need as of yet to remedy that. I will take some pics of my efforts to keep dust out and post em up!
Post up some pics of yours when you get it done. Seems like every time something like this gets duplicated someone makes some interesting improvements....
Post up some pics of yours when you get it done. Seems like every time something like this gets duplicated someone makes some interesting improvements....
Eric Mayer
New member
I appreciate the info! I may be going a completely different direction, depending on the opinions of my hard-sided camper thread.
In the meantime, I am working on a flange for the back window, so if it is still needed I may have some ideas!
Thanks!
Eric
In the meantime, I am working on a flange for the back window, so if it is still needed I may have some ideas!
Thanks!
Eric
So I bought some Hancook Dynapro ATM's in 245/70/16 and have had a chance to test them out this month on various hunting trips in Utah. As many of you in Utah may know October has been rainy and muddy. The Dynapros have performed great. I really have no complaint, they handle well, they don't increase road noise and they are great off road and in the mud. I will post up some pics. Just wanted to say how happy I am with them.
Ryan- I bought the tires from my bro slightly used and he gave me a great price. They get great traction though. Not sure of the weight but if I had to guess 175 ish. The stock suspension handles it fine it drpped it about a 1/2 inch in the front. I will eventually get some icon coil overs though.
Zolo- I put three additional supports/mounts on each side and I feel really confident about how secure the bumper is now. Those stock bumper mounts were way to flimsy . Thanks for your help and pics. I got some great ideas from the pics.
Zolo- I put three additional supports/mounts on each side and I feel really confident about how secure the bumper is now. Those stock bumper mounts were way to flimsy . Thanks for your help and pics. I got some great ideas from the pics.
Old Man Emu suspension and load bars
Finally got around to installing some new suspension. I went with the Old Man Emu set up with dakar rear leafs. The front coil overs are set up with the 885 spring. I debated back and forth with myself on whether I should do the 886 with the added weight of my bumper and winch, but ultimately went with the 885 due to the lighter 4cyl motor in my truck. I am very impressed with the suspension so far. it has definitely improved the ride on the road. I have not had a chance to take it off road yet, but I'm looking forward to really testing it. Install was pretty easy. I did by myself in my two car garage with a couple jackstands and a floor lift. I used some write ups as a guide from a member on tacoma world and from Barlowrs write up here on expo. here are the links
http://www.expeditionportal.com/for...all-on-05-Tacoma?p=562017&posted=1#post562017
http://www.tacomaworld.com/forum/su...talls-full-ome-kit-rear-brake-lines-pics.html
One thing I found extremely helpful was a tip from HMR here on the expo that I found in barlowrs install thread. HMR recommended using your OEM jack from your truck to press the control arms down far enough to slide int he new coils in to place. This tip worked flawlessly. All you need to do is put the base of the jack up in your wheel well and the press end on the top of your upper control arm and jack it down until it gives you enough clearance to slide the coil in.
Anyways here are some pics


I also recently installed a yakima track system and load bars on my shell. works great and pretty easy to install


Finally got around to installing some new suspension. I went with the Old Man Emu set up with dakar rear leafs. The front coil overs are set up with the 885 spring. I debated back and forth with myself on whether I should do the 886 with the added weight of my bumper and winch, but ultimately went with the 885 due to the lighter 4cyl motor in my truck. I am very impressed with the suspension so far. it has definitely improved the ride on the road. I have not had a chance to take it off road yet, but I'm looking forward to really testing it. Install was pretty easy. I did by myself in my two car garage with a couple jackstands and a floor lift. I used some write ups as a guide from a member on tacoma world and from Barlowrs write up here on expo. here are the links
http://www.expeditionportal.com/for...all-on-05-Tacoma?p=562017&posted=1#post562017
http://www.tacomaworld.com/forum/su...talls-full-ome-kit-rear-brake-lines-pics.html
One thing I found extremely helpful was a tip from HMR here on the expo that I found in barlowrs install thread. HMR recommended using your OEM jack from your truck to press the control arms down far enough to slide int he new coils in to place. This tip worked flawlessly. All you need to do is put the base of the jack up in your wheel well and the press end on the top of your upper control arm and jack it down until it gives you enough clearance to slide the coil in.
Anyways here are some pics
I also recently installed a yakima track system and load bars on my shell. works great and pretty easy to install
Attachments
4cyl gone BLOWN
Well decided I needed to add a little power to my little 4cyl, so I decided to order me up the URD supercharger kit. The Kit showed up today and work has begun. I'm super excited to see how this performs.
Here are some pics


Got the intercooler installed and holes cut in the radiator support panel to run the piping

Going out of town for the weekend, but more to come....
Well decided I needed to add a little power to my little 4cyl, so I decided to order me up the URD supercharger kit. The Kit showed up today and work has begun. I'm super excited to see how this performs.
Here are some pics
Got the intercooler installed and holes cut in the radiator support panel to run the piping
Going out of town for the weekend, but more to come....
Supercharger
Well after a few long days the supercharger is installed. Drove it a little over a hundred miles today and the power is a great improvement. Here are some pics of it installed.
Big *** intercooler to keep things cool!


I also tinted the windows and plastidipped the rims since I last posted

The headlights got blacked out as well

Well after a few long days the supercharger is installed. Drove it a little over a hundred miles today and the power is a great improvement. Here are some pics of it installed.
Big *** intercooler to keep things cool!
I also tinted the windows and plastidipped the rims since I last posted
The headlights got blacked out as well