Tacopirate177
Member
Hey Everyone!
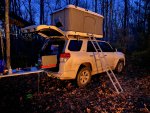
My wife and I have decided to make the move from a 99 Jeep Cherokee to our 2012 4Runner which is my wife's daily driver. We have started by moving the existing rear build out into the 4R as well as attaching our James Baroud rooftop tent onto the 4R. The first time we took the 4R out on a trip was last winter (2020-2021) for a week long excursion throughout KY/TN/NC. We ended up taking the 4R instead of the Jeep because of a shock mount being busted on the Jeep. This was the moment we knew that the 4R was for us! The Jeep has been amazing for us and a great starter vehicle to get into traveling off grid but once you take an 8 day trip filled with leather and cruise control it's hard to go back.
We had little time to prep the 4R before that first trip luckily for us our rear build out in the Jeep transferred nicley to the 4R and we rolled the dice on attaching the tent to the factory rails with yakima cross bars (lots of conflicting information on whether the factory rails will support the weight). Fortunately this all worked out great and our trip was a success.
Enough rambling, time for the build plans.
Vehicle: 2012 Toyota 4Runner, SR5, Leather Interior
Plans by priority (Some transferred from the Jeep)
Roof Rack-Front Runner Slimeline full length with quick release mounts
Tent-James Baroud EVO Explorer
Rear Build-Homemade platform with grill drawer
Fridge-Costway 32qt
Lighting-Wire the lighting that came with the used rack we bought
Suspension-OME is the plan but open to suggestions. Edit: just ordered Dobinson!
Rear Ladder-Leaning towards Front Runner but really like Victory 4X4. Any real world experience with them?
Sliders-Leaning towards Victory 4X4
Front and Rear Bumper-This isn't a "must have" but an "I want" so i know I will be getting them at some point. I want to get the rear tire from under the vehicle so the rear bumper will be higher priority than front.
I'll plan to update this as we continue to add to the build. My wife and I are buying a house soon so I doubt much will be getting done until we're through that process but who knows ? .
.
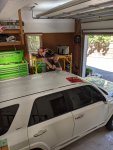
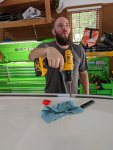
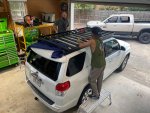
Here are some photos most which are from the first trip we took it on before installing the new rack. I'll make another post for the roof rack install. Take a look and let me know what you all think!
My wife and I have decided to make the move from a 99 Jeep Cherokee to our 2012 4Runner which is my wife's daily driver. We have started by moving the existing rear build out into the 4R as well as attaching our James Baroud rooftop tent onto the 4R. The first time we took the 4R out on a trip was last winter (2020-2021) for a week long excursion throughout KY/TN/NC. We ended up taking the 4R instead of the Jeep because of a shock mount being busted on the Jeep. This was the moment we knew that the 4R was for us! The Jeep has been amazing for us and a great starter vehicle to get into traveling off grid but once you take an 8 day trip filled with leather and cruise control it's hard to go back.
We had little time to prep the 4R before that first trip luckily for us our rear build out in the Jeep transferred nicley to the 4R and we rolled the dice on attaching the tent to the factory rails with yakima cross bars (lots of conflicting information on whether the factory rails will support the weight). Fortunately this all worked out great and our trip was a success.
Enough rambling, time for the build plans.
Vehicle: 2012 Toyota 4Runner, SR5, Leather Interior
Plans by priority (Some transferred from the Jeep)
R
Suspension-OME is the plan but open to suggestions. Edit: just ordered Dobinson!
Rear Ladder-Leaning towards Front Runner but really like Victory 4X4. Any real world experience with them?
Sliders-Leaning towards Victory 4X4
Front and Rear Bumper-This isn't a "must have" but an "I want" so i know I will be getting them at some point. I want to get the rear tire from under the vehicle so the rear bumper will be higher priority than front.
I'll plan to update this as we continue to add to the build. My wife and I are buying a house soon so I doubt much will be getting done until we're through that process but who knows ?
Here are some photos most which are from the first trip we took it on before installing the new rack. I'll make another post for the roof rack install. Take a look and let me know what you all think!
Attachments
Last edited:


