2012 Chevy AWD Family Adventure Van

MoonMan

New member
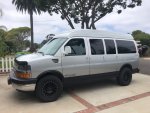
Update. I took delivery of the van a week and a half ago. Removed the body kit the first weekend. Trying to find time patch the holes and paint the lowers with bed liner. Ordered up the torsion key, springs, shocks and control arms. Also have new tires and rims mounted up and ready to go when the lift is complete. We are really loving this van and can't wait to get it dialed in.

The van as delivered.
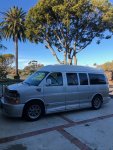
IMG_2800.JPG

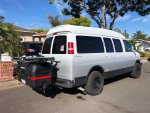
Body kit removed. Currently has Michelin 265/60/R18 with good tread. Wheels and tires will go on Craiglist after swap out.
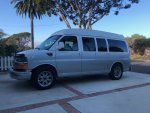
IMG_2840.JPG

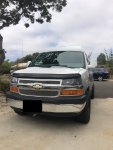
The front bumper step is removed for the Explorer conversion with a front bumper cover. I will order an OEM replacement after getting the bumper media blasted and sprayed with bed liner.
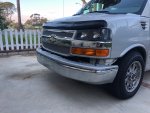
IMG_2841.JPG

Body kit pieces removed and placed on Craigslist.
IMG_2803.JPG
 

Len.Barron

Observer
I'd rethink the bed-liner on the bumper, the textured surface will be a nightmare for cleaning out bugs/road debris. Honestly, other than the lower rockers, bed-liner pretty much sucks on the exterior. I've have it (for 10yrs)on the Safari top of my Jeep and some other surfaces, I hate it, it collects every bit of dirt that lands on it and is a PITA to get/keep clean. I have heard that some of the Line-X installers have a "smooth" option...that might be workable...no way I would use the tradition bed finish on an exterior panel..
 

kntr

Observer
Sounds like you have it figured out, torsion bars are pretty simple but are different from the "normal" spring type suspensions. Keys just allow you to twist the bar farther than stock!


Before you go out and buy new torsion keys there is always the option of just cranking your stock torsion keys. I got about 1.5-1.75" out of my stock keys.

With just keys and shocks I would stick to 2-2.5. If you want to go 2.5-3 you are going to need new upper control arms, I had a set of Cognito upper arms and they worked well.

If I were to do it again I (i overdid it and went a full 5.5" with drop brackets, custom steering knuckles, drag links, custom rear springs, etc, etc) I would:
*Run lift keys (F-150 stock or aftermarket)
*Install some Silverado Z71 bumpstops
*Buy some cognito upper control arms (skip the uniball style, mine squeaked incessentaly, as uniballs often do)
*Run Bilstien 5160 remote resivior shocks
*Crank it to 3"
*slap some suburban springs in the rear and stop messing with it.


Which Z71 bumpstops will work on the front of a 2006 AWD? Part number? I have the traxda 2" and suburban leafs.
 

OldYota

Observer
Did anyone bite on buying the body pieces? I’m wondering how careful I have to be when I remove mine. I’m modifying a gutter mount roof rack system this week to put an awning on mine, I’ll post up how it turns out.
 

MoonMan

New member
IMG_4300.JPG

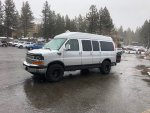
Well, a 6 month late update is better than no update at all. Life, work, family, all that. Here is the van after all the work was completed and a summary of what we did:

Suspension: Used the Suburban leaf springs in the back and Ford F-150 keys in the front with Bilstein shocks. The front also got the Cognito upper control arms. Ended up with 2.75" lift in the rear and 1.75" lift in the front with 1/4 turn left on the keys. I had originally ordered the Rough Country keys but the mechanic couldn't get more than an inch out of them. Ordered the Ford keys and they got us another inch. I was worried the van would drive rough/stiff but it actually handles and rides much better than before.

Wheels and Tires: Got a good price on the Pro Comp wheels from Summit and really like the look. 0 offset wheels sit about an inch outside the body and I am really happy with the stance. The tires are Falken Wildpeak 265/70/R17 that came highly recommended from a couple friends. They are a great value and are quiet on the highway. Needed some minor trimming to avoid wheel rub.

IMG_4302.JPG

Trim and bumpers: After removing the body kit there were over 100 holes in the body. I had originally wanted to patch and paint myself, but with the kids I never had the time. I took it to a local body shop and they welded all the holes, ground them down and sprayed the black Raptor liner on. It definitely added to the project cost but it got done and I love the way it looks. I also ordered new bumper step pads and had the body shop install them. I was never able to find a buyer for the old trim kit, even offered it up for free. It ended up in the dump.

Roof Rack: I had planned to install a roof rack and cargo box and even ordered up a Vantech rack. However I quickly realized it would be too tall and really kill gas mileage. I ended up buying a StowAway hitch mounted cargo box. I swings away from the doors for access and didn't effect gas mileage at all. I figured out a DIY ski rack mount to the top and we were sent for a couple of long trips to Mammoth.

IMG_3497.JPG


IMG_3548.JPG

We love how the van turned out and are looking forward to many years of adventures. It is definitely unique and we get a lot of compliments too. Thank you to everyone on the forum who chimed in and help me figure this all out. Let me know if you have any questions or need part numbers.
 
Last edited:

2dayztomsawyer

New member
Moonman, do you know what kind of open road mileage you are getting with those 265s? Sweet build BTW. I have been planning a similar build and was really impressed with what you ended up with.
 

MoonMan

New member
Moonman, do you know what kind of open road mileage you are getting with those 265s? Sweet build BTW. I have been planning a similar build and was really impressed with what you ended up with.

Thanks! Getting 13-14 MPG with the 265s. There wasn't a huge change. I did have someone update the computer settings and shift points for the new tire size and that definitely helped the feel. I imagine it helped correct some of the MPG loss as well.
 

dleeallen

Adventurer
Suspension: Used the Suburban leaf springs in the back and Ford F-150 keys in the front with Bilstein shocks. The front also got the Cognito upper control arms. Ended up with 2.75" lift in the rear and 1.75" lift in the front with 1/4 turn left on the keys. I had originally ordered the Rough Country keys but the mechanic couldn't get more than an inch out of them. Ordered the Ford keys and they got us another inch. I was worried the van would drive rough/stiff but it actually handles and rides much better than before.

Van looks great! Do you have the part numbers on the cognito arms you used and the keys?


Sent from my iPad using Tapatalk
 

nsmith

New member
Great build! I have been wanting to do the same thing with a conversion van for the high roof, but don't like the lower body kits. Nice to know what I would be getting into if I want to remove.
 
Last edited:

MoonMan

New member
Van looks great! Do you have the part numbers on the cognito arms you used and the keys?


Sent from my iPad using Tapatalk

Cognito 110-90289

Torsion Bars Keys tried two different ones and pretty sure we ended up using the Rough Country.

Rough Country 7592 Link

KSP Performance Link
 

dleeallen

Adventurer
Thanks @MoonMan . Nice to be sure which UCAs actually fit!

I thought you had used F150 keys and that's another where it would be nice to know which exact part has worked before I tear apart my daily driver. Those Rough Country ones are pretty reasonable cost. Thanks.
 

MoonMan

New member
Thanks @MoonMan . Nice to be sure which UCAs actually fit!

I thought you had used F150 keys and that's another where it would be nice to know which exact part has worked before I tear apart my daily driver. Those Rough Country ones are pretty reasonable cost. Thanks.


That's right! Haha...thanks for stoking the memory, it has been a year. Tried those two I linked above but didn't get enough lift. Ordered the F-150 keys and got a little more.

Here link to the part: https://www.tascaparts.com/oem-parts/ford-torsion-bar-adjuster-xl3z5b328ca
 

Forum statistics

Threads
188,069
Messages
2,901,840
Members
229,418
Latest member
Sveda
Top