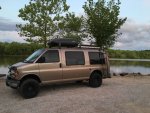
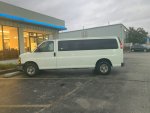
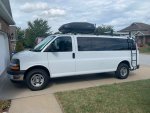
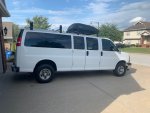
2017 Chevrolet Express Camper Van

I have enjoyed my trusty old 2000 1500 van so much over the last 6 years I decided to upgrade and swap most of what I could over to the new van. Here's the build thread on my old van.


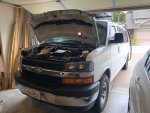
So out with the old and in with the new/er. I found a 2017 1 ton Express with a 6.0 engine, 6L90 transmission and 47k on it locally to me with the intentions of building another camper van. Even though I knew I would be getting rid of most of the seating and seat belts, I still wanted an extended 15 passenger van. I wanted the extra amenities not found on most cargo vans. Nice big factory windows, headliner, rear heat and air, and interior trim panels throughout. My skill level is certainly not on par with many on this forum when it comes to full fabrication from an empty cargo van. I honestly would have rather had a different color other than white, but it seems in my local search, white vans were the primary color GM sold. But that should help keep it cooler inside in the summer time.
 

Attachments

  • IMG_7297.JPG
    IMG_7297.JPG
    143.6 KB · Views: 111
  • IMG_1331.jpg
    IMG_1331.jpg
    73.2 KB · Views: 107
Last edited:
So oddly I suppose but luckily at the same time, GM hasn't changed much of the body of the G-van since 1996. Aside from powertrain improvements, a front face lift and dash improvements, it's shares many of the same exact body part numbers for 20 plus years. Knowing this, I knew everything on the roof of my old van, the front seat swivel, Aluminess ladder, my bed platform, and custom 3 point hitch would be a direct bolt on swap to the new van. So weekend one the fun begins.
 

Attachments

  • IMG_1334.jpg
    IMG_1334.jpg
    97.3 KB · Views: 77
  • IMG_1335.jpg
    IMG_1335.jpg
    82.1 KB · Views: 75
Last edited:
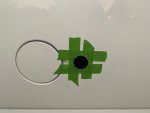
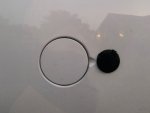
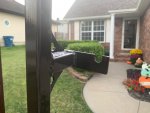
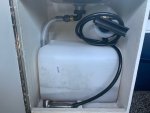
Next came the shore power inlet. I have had great success with this method for right at 6 years. It is only rated at 13 amps max draw so your results may vary. I am very careful to think about what is running before I plug something else in. No high draw electrical items at the same time.


And yes I know fuel and electrical sparks don't mix. But I can't think of any time that I will be adding fuel to the van while it's plugged into shore power. It lined up perfectly inside where I wanted it without having to remove a bunch of interior trim panels.

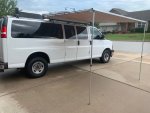
I also installed the ARB awning. One of my best purchases. Works great and easy to put up even by myself.
 

Attachments

  • IMG_1384.jpg
    IMG_1384.jpg
    35.7 KB · Views: 49
  • IMG_1385.jpg
    IMG_1385.jpg
    35.8 KB · Views: 76
  • IMG_1403.jpg
    IMG_1403.jpg
    82 KB · Views: 79
Last edited:
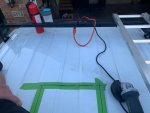
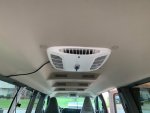
Even though summer is almost over, it's still 90 degrees here and who know what the next few weeks will be like. I have the new van's maiden camping trip planned soon. I decided the nerve racking A/C install was next. Nothing better than climbing on the roof of a new to me vehicle and cutting a 14" hole. But it turned out great and works well just like on the old van. Even though the Coleman Mach 8 is one of the lightest on the market, I still made sure to cut between the structural roof cross rails so I wouldn't have any sagging issues. I have the optional heating element installed as well so it can be a heater or A/C.
 

Attachments

  • IMG_1395.jpg
    IMG_1395.jpg
    74.2 KB · Views: 57
  • IMG_1411.PNG
    IMG_1411.PNG
    903.6 KB · Views: 68
  • IMG_1401.jpg
    IMG_1401.jpg
    61.3 KB · Views: 68
Last edited:
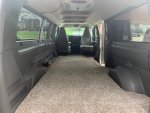
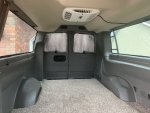
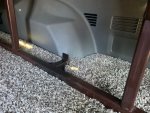
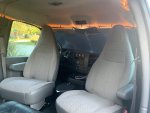
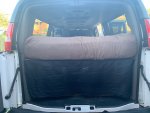
So one of the main things I wanted differently in this van was the ability to safely carry more than just two people but only as needed. Most of the use of the van will be me going mountain bike camping solo, or the girlfriend and I taking vacation trips all around the country. Occasionally I would like an option for at least a couple more people safely with seat belts. My plan is to have swivels on both the driver and passenger front seats as the main hangout when parked. Then keep the second row bench in my garage but be able to put it in as needed. The flooring has seat mounting rails for all the benches that are kind of annoying and a trip hazard when all the seats are out. I didn't really want to go through the hassle of removing them all. I've read other people having a good amount of difficulty getting to all the nuts on the underside of the van. Plus I needed them to stay for my plan of keeping the second row. My solution was just a 4x8 sheet of underlayment plywood and a cheap carpet remnant over the top. Then I can simply roll back the front portion when I want to put the other seat back in. Front passenger swivel swapped from old van, drivers side on order. I'm currently working on bed mounting points that utilize hooks and the factory seat rails. I want the bed to stay in place if something unfortunate should happen while driving.
 

Attachments

  • IMG_1400.jpg
    IMG_1400.jpg
    101.1 KB · Views: 119
  • IMG_1402.jpg
    IMG_1402.jpg
    89.2 KB · Views: 117
Last edited:
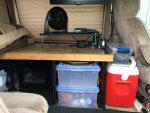
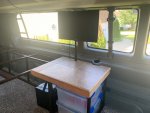
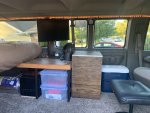
Even though this van is longer than my old one, I still needed to shorten my table area to have the option to put the bench seat back in. The table in my other van became a cluttered catch all and lost its sandwich making purpose. At one point I had my PS3 and a dvd player on it but found that most of the time I used the TV I just used an adapter from my phone for Netflix or Prime. The table frame and bed frame are all 1x1 square tubing. So some cutting, welding and board trimming and it's now a little smaller. The counter top is just thick vinyl peel and stick floor tile on 3/4" plywood. I also made an upright to mount the TV securely. It is on an articulating mount so it can be turned either toward the front seating area or to watch laying at the foot of the bed. The microwave is handy to have but rarely used. I changed the orientation of it under the table. Just have to slide the totes out to open the door. A little awkward to use it, but no more than it gets used, it's nice to have it out of the way.
 

Attachments

  • IMG_7583.JPG
    IMG_7583.JPG
    105.5 KB · Views: 90
  • IMG_1404.jpg
    IMG_1404.jpg
    77.9 KB · Views: 88
Last edited:
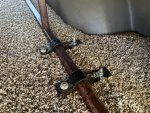
I got a little welding done on the bed frame. Mounts that utilize the factory seat rails in the front and straps that tie into the original jack base mounting studs in the rear. Lets just hope I never have to actually test them out.
 

Attachments

  • IMG_1422.jpg
    IMG_1422.jpg
    68.7 KB · Views: 61
  • IMG_1426.jpg
    IMG_1426.jpg
    112.9 KB · Views: 64
  • IMG_1427.jpg
    IMG_1427.jpg
    161.9 KB · Views: 63
Last edited:
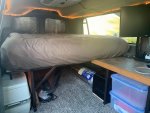
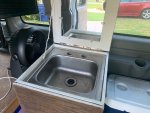
More progress on the van this past weekend. I should be ready for this upcoming weekends camping trip. It's amazing how much more room 20 inches adds. Drivers seat swivel installed, 48 feet of rope lighting, deep cycle battery and solar controller installed. Portable sink fits great and will actually be usable inside the van. Porta-potty in a much easier location for the girlfriend to access.
 

Attachments

  • IMG_1449.jpg
    IMG_1449.jpg
    91.2 KB · Views: 141
  • IMG_1447.jpg
    IMG_1447.jpg
    102.4 KB · Views: 149
  • IMG_1446.jpg
    IMG_1446.jpg
    82 KB · Views: 148
  • IMG_1451.jpg
    IMG_1451.jpg
    89.8 KB · Views: 140
  • IMG_1452.jpg
    IMG_1452.jpg
    64.2 KB · Views: 135
  • IMG_1450.jpg
    IMG_1450.jpg
    65.7 KB · Views: 128
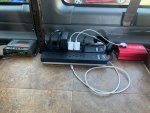
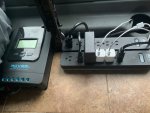
Simple solutions from a simple brain. Rather than some fancy switch this is my solution between shore power and solar power. Only the things I want to run off deep cycle/solar when no shore power is available. Rope lighting, TV, DVD player, fan, phone, and watch chargers. I can simply turn on the inverter and swap the plugs to the other power bar. Meh... not fancy but cheap and works well.

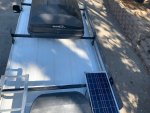
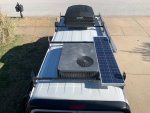
Next project is a new standing platform for the roof. I will eliminate the aluminum motorcycle ramp and fabricate a new platform from 1x1 square tubing and wood slats. I'd like to be able to set a camping chair up on top between the A/C unit and my toy box. Might be a few weeks before I can start that though.
 

Attachments

  • IMG_1495.jpg
    IMG_1495.jpg
    107.2 KB · Views: 84
  • IMG_1494.jpg
    IMG_1494.jpg
    102.6 KB · Views: 80
  • vantop.png
    vantop.png
    4.8 KB · Views: 50
Last edited:
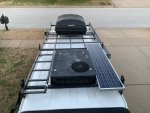
Bought a larger capacity deep cycle battery so I decided to upgrade the charge controller as well. From PWM to MPPT.

The fun of owning a house with a nice big garage and a vehicle that's too tall to pull into it. Of course Saturday was cold and rainy.

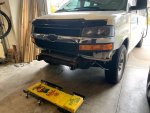
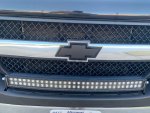
I mounted the light bar. One of those 1 hour projects that turned into about 4 hours. Had to remove bumper, fully disassemble all the brackets from the inside of it, carefully remove upper cap not breaking any of the tabs, mount light bar brackets to chrome bumper bar, then slot upper cap around the brackets.

I also blacked out the front emblem while i was at it.

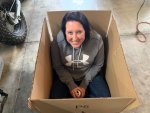
Girlfriend decided to randomly climb in a box and keep me company in the garage for a while. She said it was warmer in there haha
 

Attachments

  • IMG_1571.jpg
    IMG_1571.jpg
    89.1 KB · Views: 93
  • IMG_1572.jpg
    IMG_1572.jpg
    97.7 KB · Views: 99
  • IMG_1575.jpg
    IMG_1575.jpg
    98.9 KB · Views: 103
  • IMG_1580.jpg
    IMG_1580.jpg
    108.4 KB · Views: 127
  • IMG_1574.jpg
    IMG_1574.jpg
    90.1 KB · Views: 126
Last edited:
blanksky

New member
Looking great! Thanks for the detailed write up and pictures. Keep 'em coming!

Does your battery pull power only from shore & solar? Where is it mounted?
 
Looking great! Thanks for the detailed write up and pictures. Keep 'em coming!

Does your battery pull power only from shore & solar? Where is it mounted?

Thanks. My deep cycle is a 100 ah sealed AGM and is mounted under the corner of the bed right behind where the microwave is. It's totally separate from shore power and the van's starting battery. It only gets charged from the solar panel. Generally if I'm camping more than one night in a row I'm in an RV park with access to shore power. I dry camped for one night a couple weeks ago, had the rope lights on and watched a couple movies before bed. Then had the fan running all night (white noise) and charged my phone and watch overnight. Then got up and watched a little more TV before heading out on the mountain bike trails. Worked very well. I'm hoping the new MPPT charge controller will fill the battery back up quicker but I haven't really had a chance to monitor it yet.


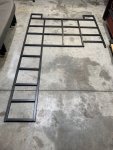
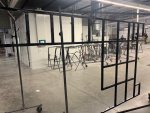
I got the square tubing cut last night for my roof standing platform. I will get it welded up this weekend and painted here at my employers body shop. One of the perks of working at a large car dealership.
 

Attachments

  • IMG_1605.jpg
    IMG_1605.jpg
    80.2 KB · Views: 21
Last edited:
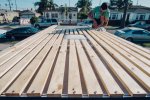
Fresh out of the paint booth. I will let it cure a day or so before I put it back on. Then eventually I will do wood slats similar to this. I did add bike fork mounts to the rack as well so I can carry a bike or two on the roof if desired. I just have to be real cautious of my height.
 

Attachments

  • IMG_1632.jpg
    IMG_1632.jpg
    108.5 KB · Views: 46
  • Wood Slats.jpg
    Wood Slats.jpg
    96.2 KB · Views: 49

Len.Barron

Observer
Fresh out of the paint booth. I will let it cure a day or so before I put it back on. Then eventually I will do wood slats similar to this. I did add bike fork mounts to the rack as well so I can carry a bike or two on the roof if desired. I just have to be real cautious of my height.
I'd look at a receiver/swing out mounting system for your bikes; the combination of risk of injury/damage carrying them up there, the crazy amount of height when they are up there, and the PITA pulling them down just for a short ride would be (for me) too many cons..
 

Forum statistics

Threads
188,163
Messages
2,902,928
Members
229,582
Latest member
JSKepler
Top