2017 E450 Motorhome 4x4 swap

welndmn

New member
It has been a long time since I've been to Expo portal, I hope this is in the right spot.
I've had a cabover camper for the last 15 years but switched up to a class C motorhome, and I miss having 4x4.
I am starting to document this here, mainly to make sure I remember everything and see if others have some good ideas too.
Starting off with a 2017 (Based off 2016) Four Winds 28z, Ford E450.
Plan is to run 295/70/R17 up front, and a 255/85/R16 in the rear, kinda the standard the U joint off road has created.
 

Attachments

  • RV.jpg
    RV.jpg
    816 KB · Views: 42
Last edited:

welndmn

New member
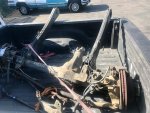
Starting to collect parts over the last few months, I got a 2016 F350 Dana 60. If you did not know the Super duty brakes grew from a 13.657 Inch rotor to a 14.291 in 2013 and newer. The stock Van/E450 is only 13.58.
Bigger brakes always a plus.
Full loaded axle, 3.55 gear, radius arms, steering, trac bar, drag link, sway bar brake lines and ABS wires $1200.
I have to round here, but stock Van swaybar was 20 mm thick, the F350 is 28mm, so thicker is better.
I plan to try and use as much ford parts as I can, but I will probably make my own track bar as the F350 has stupid ball joint lower I don't like.

Transfer case found, 2012 F250 Borg Warner 1128F Manual shift with flange yokes, this matches the 43 spline (good god!) output of the 6r140 (6 speed Torque shift Transmission).
$400
 

Attachments

  • 1.jpg
    1.jpg
    830.1 KB · Views: 30
  • 2.jpg
    2.jpg
    751.3 KB · Views: 28

welndmn

New member
Step one, get rid of the dumb metric bolt pattern to match the rear axle.
I used a Motobuilt drill guide ($15) and steeping up to a 39/64 drill bit. The hubs are soft and drill easy.
Dorman 610-347 wheel stud
9/16-18 Serrated Wheel Stud - .625 In. Knurl, 2-29/32 In. Length


Application
FORDF SUPER DUTY1988-1997
 

Attachments

  • 3.jpg
    3.jpg
    566.5 KB · Views: 40
  • 4.jpg
    4.jpg
    635.2 KB · Views: 40
Last edited:

welndmn

New member
Rear lift, I got some used F450 springs I will take apart and make an add a leaf for my motorhome. The motorhome is undersprung as is, so adding more spring seems nice, but I might have to add a lift block to it as well, no idea yet.
Probally going to start with 3 springs from below the clamp and see where that gets me.
 

Attachments

  • 5.jpg
    5.jpg
    821.2 KB · Views: 20

welndmn

New member
Some track bar stuff, The stock ford used a ball joint on the axle end of the track bar, most fords also seem to have some wobble as dual steering stabilizers seem to be really popular on all the forms to fix that wobble, I blame the track bar ball joint as we all know TJ's with a ball joint on the track bar also wobble.

I pressed out the ball joint, what a PITA!
You have to cut the stud off the ball joint for the ball joint press to fit over it, even then it still took heat and the air hammer to knock it out.
Click image for larger version  Name:    trackbar.jpg Views:    0 Size:    189.2 KB ID:    98038
The ID was 2.08 or something, so some left over 2" 1/4 tube fit pretty well inside the old ball joint hole. I added a few beads to the OD of the 2" tube so it then became a press fit for the ball joint hole.

I made 2 sandwich plates to sit on the old track back mount, I welded the 2" tube to them and added a center bolt as well to it (really overkill here, but why not)
Click image for larger version  Name:    trackbar2.jpg Views:    0 Size:    595.9 KB ID:    98039
I have these 2 tabs in the box, they are massive so that's why I never put them on a rig, but being 3/8" plate seem to fit for an RV just fine.
Bonus they are even drilled to 3/4 for the heim I want to use for the track bar.
Clearly, the tabs are not welded on yet as I need to know the actual height everything needs to be.
Yes, the Tabs on the picture are upside down. they go on the other side, but that would require me to roll that axle over again for a picture and it's not worth it.
The track bar mount will be on the top side of the mount, not the underside like OEM ford.

Click image for larger version  Name:    trackbar3.jpg Views:    0 Size:    216.3 KB ID:    98040
 
Last edited:

welndmn

New member
So from my tape measure and asking other people with Vans , I need about 3"-4" of lift to clear the pumpkin. I looked at other popular Van MOOG brand coil springs, none were near the same wire diameter as my motorhome, so I decided to keep my stock springs and just build towers/spacers to gain lift. I have heard that F450 - F550 2wd springs will give me 3" of lift, but I can't find used ones and don't want to buy new ones only to find out they didn't work. If I end up not linking the coil spacers, I'll buy new coils. The TTB coils are stiffer to control the TTB and I'd like to ride to stiffen up anyway so going to a beam axle with the stock coils might be the ticket.
To help anyone as well, coil spacers are not dangerous, it's quite normal.
I made a 4" wide 1" thick round, the stock van lower spring cup and islator are flat and about 4" so it will bolt perfectly to this. the pad to the Dana 60 is smaller, so I'll need to bridge that soon
Cost - beer money for using a friends torch.
Click image for larger version Name:    coiltower.jpg Views:    294 Size:    1.10 MB ID:    109414

I did buy some wheels too, Procomp 7069 wheels, in a flat chaulky black, $130 each (2).
First thing I did is had to check if my home drilled unit bearings fit the wheel, I have one stud that was a little crooked from not being pressed in all the way, but other than that they fit. That gives me hope that I drilled them true.
I had to buy stupid spline drive lug nuts to fit these wheels ($30).
Click image for larger version Name:    wheel.jpg Views:    288 Size:    170.1 KB ID:    109415 Click image for larger version Name:    wheel2.jpg Views:    287 Size:    857.9 KB ID:    109416 Click image for larger version Name:    wheel3.jpg Views:    289 Size:    1.01 MB ID:    109417
 
Last edited:

welndmn

New member
I also started on the gears, I bought NON- crush sleeve style gears because of my distaste for crush sleeves. $140, 4:56 thick.
New crush sleeve is pictured.
You can see the machined difference on where the crush sleeve sits.
Diff is still on the ground as I can't pick it up because it's hot outside.


Click image for larger version Name:    Diff.jpg Views:    289 Size:    861.7 KB ID:    109420 Click image for larger version Name:    pinion.jpg Views:    287 Size:    241.9 KB ID:    109421 Click image for larger version Name:    gears.jpg Views:    290 Size:    313.3 KB ID:    109422
 
Last edited:

welndmn

New member
Tires came in Cooper SST MAXX, I have some clean up from camping/4wheeling this last weekend to get taken care of, then I get to start taking apart a perfectly fine RV this week.

Click image for larger version Name:    tires.jpg Views:    93 Size:    191.8 KB ID:    118892 Click image for larger version Name:    tires2.jpg Views:    88 Size:    114.8 KB ID:    118893


It's happened, I have started ruining a perfect handling RV.
It's way too big to fit in my shop so I have to do it in the sideyard in the gravel. Working in the gravel helps remind you that you're a man.

Click image for larger version Name:    ttb.jpg Views:    0 Size:    116.0 KB ID:    121916 Click image for larger version Name:    ttb2.jpg Views:    0 Size:    95.5 KB ID:    121917
 

mmp3823

Observer
Following along to see your build. I have an E350 Motorhome and was contemplating if this would be worth it or not.
 

welndmn

New member
It was 110-115 degrees this weekend, so a lot of pictures did not get taken, but I will take more of the finished project.
The front end is off the jack stands and it just needs the drag light and trac bar dialed in and figure the sway bar.
Ended up with 4" of lift, 6.5" total with the tires.
I might try and go down 1", but it gets too damn close to the engine oil cooler.
Now the fun part, dealing with the rear lift, blocks, add a leafs, no idea yet.
fetch
1599586891536.gif
 

welndmn

New member
The front end is off the jack stands and it just needs the drag light and trac bar dialed in and figure the sway bar.
Ended up with 4" of lift, 6.5" total with the tires.
I might try and go down 1", but it gets too damn close to the engine oil cooler.
Now the fun part, dealing with the rear lift.
Click image for larger version Name:    Motorhome3.jpg Views:    377 Size:    118.3 KB ID:    126051
 

welndmn

New member
A few updated pics.

Click image for larger version Name:    axle1.jpg Views:    0 Size:    123.3 KB ID:    129141


Here is the trac bar mount. It's an off the shelf one from Motobuilt, that just trimmed to fit. I plated the frame around the steering box and captured one bolt of the box and the track bar bracket.
You can see the heim on the outside of the bracket, that is a support rod (and place to store spare heims) that goes from the track bar bracket to the engine crossmemeber..
You can also see the Super Duty sway bar mounted to the front trailer hitch, one bolt on the hitch, then a bracket spaced off the hitch for the other bolt.
Front shocks Bilstein 24-185776 BE56681H8 Shock Absorber This is a Superduty 4" lifted shock

Click image for larger version Name:    trackbar.jpg Views:    0 Size:    80.1 KB ID:    129142


The coil towers are just 3" lift spacers for a super duty. I used the Stock van springs and all the van spring retainers fit well.

Click image for larger version Name:    coil tower.jpg Views:    0 Size:    83.2 KB ID:    129144


The stock Superduty drag link kinda fit (well you need to ream out the pitman arm). but there is not a lot of thread left in the adjuster sleeve.
The superdutys came in 2 flavors, "Normal" was 34" drag link, and "Wide frame" as a 36" drag link, I just bought the 36" to install it to get me more treads in the adjuster sleeve.


Click image for larger version Name:    coiltowner2.jpg Views:    0 Size:    88.5 KB ID:    129143


Now on to rear lift.

Click image for larger version Name:    rear lift.jpg Views:    0 Size:    89.9 KB ID:    129145
 

welndmn

New member
All the leafs!
I added 3 leafs to the pack from the F450 springs I had, I still need 2.5" of lift, so I ordered some 3" blocks.

The Moog/AC delco drag link (PN (45A10048,) needed 1" cut from it, but after that fits perfect.
Click image for larger version Name:    leafs_add.jpg Views:    156 Size:    950.7 KB ID:    131792
 

Forum statistics

Threads
188,304
Messages
2,905,200
Members
229,959
Latest member
bdpkauai
Top