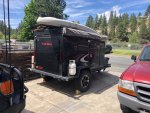
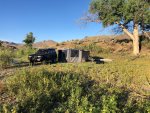
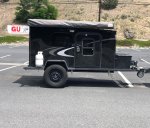
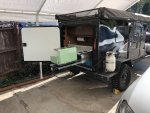
2018 Three Feathers Mfg. 'Trail Head'

80t0ylc

Hill & Gully Rider
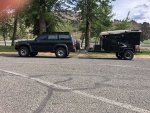
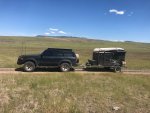
Got a little crazy and hooked it up to my F350 to see how it tows it. I'm not sure if the truck knew it was there.:rolleyes: I couldn't tell the difference - unless I checked the mirrors. I had to make some changes on the 7 pin trailer connector on the truck, anyway. So, I made sure it was compatible to tow this trailer. Normally, my Lance slide-in camper is connected through that connector. The PO had modified the connections, so I had to eliminate a wire connected to a pin to be compatible. It wasn't used anyway, so it wasn't a problem. It seems easier to back up with the F350. I guess the longer wheel base helps.

IMG_1403 (2).JPG
 

80t0ylc

Hill & Gully Rider
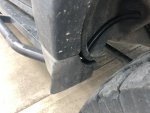
Well as an update, I attempted to meet up with the ROF group for the RimRocker run in Colorado and Utah but had a setback. I wasn't paying close attention to tongue weight and the capacity of my rear springs. In the pic below that I previously posted, both trailer and LC were unloaded:
IMG_1375a.JPG
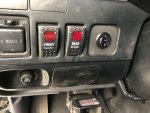
As you can plainly see from the gap above the tire in the rear wheel well, it's already hunkered down. Loaded up for the trip and weighed in at the local truck scales the trailer was 2000 lbs and rig was 7500 lbs, including tongue weight. I don't have any pics of that but, IIRC it didn't seem any worse. And while towing it the perfomance and handling was pretty much what I expected. So, I set out for meeting the group. I have a 24 gallon LRA aux fuel tank mounted in the OEM spare tire location, which adds to the droop, somewhat. This aux tank transfers fuel into the main tank by a dash mounted switch/gauge:
IMG_1109a.JPG
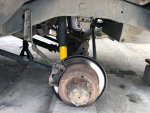
There's an amber LED above the switch to indicate pumping or transfer is in progress. A sequence of 4 green LED's tell the level - full, 3/4, 1/2, 1/4 and a red LED at the bottom to indicate empty. As your main tank gauge goes down you start up the transfer. I choose to do it in 1/4 tank intervals. It's not quick, but it's effective. You watch the main gauge and the LED's to monitor the progress. Well, I was doing my second transfer between Burns, OR and Winnemucca, NV, but it appeared there was no progress after what I thought was reasonable amount of time. So I pull over. There's 2 other checks you can make to be sure that it's working. 1st is to listen for the fuel pump (toka-toka-toka) sound. 2nd is to open the fuel cap to hear the gurgle of fuel being pumped into the main tank. Well I could hear the fuel pump (sometimes you can hear it while driving - depending on road noise - wind - surface). Ok, now to open the fuel cap. The 80 fuel cap takes several turns to remove, so as I'm unscrewing it I hear the sound of escaping pressure. Unbeknownst to me, my recently replaced charcoal canister was malfunctioning. I had replaced it with an Autozone VC120 when installing the aux tank, a year ago to avoid this exact problem. It's a common issue with the 80 series, given their age and a substantial number of guys still running them. Well, the pressure release continued and increased as the cap was about to come off. It's a good thing I had a firm grip on it or it would have been blown several feet away. Wet fuel was being blown out also. I was able to block most of that by holding the cap close to the spout. This continued for well over a minute, but what was terrifying was the sound of the fuel tanks contracting back with the pressure release! Hmmmm, time for a decision. I was not far from Orovada, just into NV so I recapped the tank, stopped the transfer and continued to Orovada and pulled into the dirt parking lot. Did some more "on the road" troubleshooting. Decided to pull the tank hose from the charcoal canister and loosely cap the tank, but Colorado was out. The tranfer now seemed to be normal. So, I topped off both tanks and headed home, but decided that on the way back, I could do some exploring. Stopped for another tank topoff and no pressure was building up, so I headed off road. Going slower with the windows down and the tires aired down I could hear what seemed like, something was rubbing occasionally. It was sort of like when I was a kid and clothspinned a card into the spokes, but muffeled. The exploring wasn't working out anyway since I stumbled on an unexpected "no tresspassing" sign and it was too late to pick an alternate rout to my destination, I decided to pack it in and headed home. A good friend, @LandCruiserPhil, noticed my troubles when I posted on Expo what my issues were when I dropped out of the run and had a suggestion. I had not thrown away the OEM charcoal canister so was able to put an end to this problem with the fix from his thread - Thank You, Phil!!! But the rear sag and rubbing issue still needs to be fixed. Did some research and some Air Lift air bags were ordered. They're supposed to arrive today. I've prepped the LC and am waiting - which is also why I'm posting. Here's some pics of a rig waiting for a fix:
IMG_1418a.JPG
IMG_1416a.JPG
And one of my trailer waiting patiently for action:rolleyes::
IMG_1419a.JPG
 

80t0ylc

Hill & Gully Rider
The air bags arrived and are installed, in spite of Cottonwood season, here.....ugg. Here's a tip for those who might install a set in your rig. The instructions lead you to believe you can install the line on the bag after you have re-installed your springs with bags back on the axle. I imagined how difficult that would be and installed lines on the bags, placed bags into springs, ran lines out through spring coils to keep them out of harms way as springs were put in place. The uninflated bags will slide up and down inside springs easily, so I used a little duct tape to temporarily hold them high in the springs. Once springs are in place, the lines can be easily threaded through hole in bottom spring perch and routed to your fill point(s) or 'T'. Then pull duct tape off and guide bag down, nozzle through hole in perch to it's resting place. I also sheathed the line with wire loom to protect it. Install in progress:
IMG_1420a.JPG

I chose to have separate fill points. The runs are less than 3 feet and in the same place on both sides:
IMG_1423a.JPG

With door closed, the shrader valve is protected by the rubber end piece on the front of the wheel well flare.
IMG_1424a.JPG

The LC now, has a better stance. 35 psi is max, according to Air Lift. This is at 32 psi. The way it was riding, I think I could have dropped the pressure some and not lost any in rear sag or droop.
IMG_1422a.JPG
 

80t0ylc

Hill & Gully Rider
Off exploring this week
IMG_1430a.JPG

On roads like this - which is not much trouble on the flat, but I had a descent of aprox 2000' and then will have to climb out of in 100*F heat. Thank God for the excellent A/C in my LC!
IMG_1442 (2).JPG

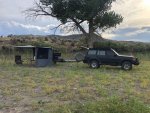
Made it to my camp and just as I was deploying awning and trying to set up wall kit by myself, 30 - 40 mph wind gusts hit. I was struggling with one wall and decided to wait, but dusk was coming. See the clouds in the distance? Somehow missed them - I was concentrating on the heat on the way in which was showing on my outside thermometer. My only solice with the wind was it's cooling the 100 degree heat, now that I was outside.
IMG_1443a.JPG

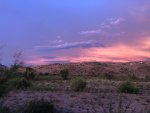
Weather front was hitting which I missed because ODOT NOAA weather forecasts on Tripcheck is a week behind. Some pics around sunset of weather that miraculously missed me. I got a few drops, but that was all, thank the Lord!
IMG_1446a.JPG
IMG_1448a.JPG

As wind was calming down, I finished setting up camp. Next morning, the heat was hitting early and so were the insects, biting flies, knats, kamikaze bees, hornets and a good size spider or two.
IMG_1453a.JPG
IMG_1451a.JPG
 

80t0ylc

Hill & Gully Rider
My wall kit does not protect me much from insects. My under the trailer barriers helped the 1st night some, but eventually, the pests invade. I put tarps down inside the "annex" for a floor, which really helps because the coco burrs or whatever they were - were terrible on bare feet or your knees when kneeling down. And I can hear the pitter-patter of the big spider's foot steps on the tarps, so they don't surprise me as much...:rolleyes: So I went exploring in the morning in the LC to the end of the trail, where the Owyhee River ends and Lake Owyhee or reservoir starts. And kayaking on the lake in the afternoon.
IMG_1455a.JPG

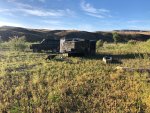
I have no idea what the stack of cut rocks or bricks were.
IMG_1456a.JPG

So back to camp. Dealing with the heat and the insects and constant dry mouth, I decided after kayaking to pack it in the next day. Thank the Lord for my National Luna fridge and bringing plenty of water! Reflecting on the trip in and concerned about tackling the climb out in 100* temps, I reviewed these pics from the trip in. I wanted an early start for cooler temps, but I also wanted whatever protection the annex gave me as long as possible. So I decided to do all packing in the morning, leaving whenever I was done and rely on the LC and the preps and mods that I've made to it for this kind of travel.

Looking down to where I would camp from above, on the way in. The end of the lake is visible. Just powder puff clouds - nothing threatening in sight.
IMG_1433a.JPG

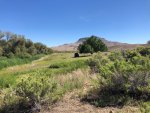
Some scenery of terrain dropping down to the lake. Road was relatively smooth near the top. There were no sharp hairpins as on the Flint Trail in southern Utah, or I might have had a problem.
IMG_1437a.JPG

You can see the road if you look close in the next 2 pics.
IMG_1438a.JPG
IMG_1439a.JPG


About 1/2 way from the top to camp.
IMG_1441a.JPG
IMG_1440a.JPG


The trip was a success and the trailer performed very well. The LC also perfomed well as the tow rig. I need to find a way to secure things in the kitchen and sleeping quarters better. It just takes time to find out what moves and bounces around and a practical fix, but we'll get there. About the only thing that I physically have to fix is the sharp corners on the trailer's fenders will hit the outside tread of the tires when the suspension flexes in the rocks. There were some slight gouges in the tread that had me wondering about the quality of the tires, until I figured it out. I think I can trim the fenders down without a problem, though.
 
Last edited:

80t0ylc

Hill & Gully Rider
A problem that surfaced on my Owyhee trip was the fenders contacting the tires during suspension flex when loaded with camping gear. The rims that came with the trailer were an alloy 5.5" x 15". Their back space caused the tires to hang outside the fenders aprox 2" - they didn't have enough of a positive offset for the fenders on this trailer. My first inclination was to trim the fenders since they had fairly sharp points at their ends where they blend with the trailer's running boards. I decided to go talk to my local Les Schwab tire store (which gets a lot of my business:unsure:) and see if there were some rims available to tuck my wheels more under the fenders. It was a difficult task because of the limitations of that size wheel. The hubs on the trailer are bigger in diameter than most auto hubs that use that size wheel. I was ready to order special wheels if necessary, but Clint, the Les Schwab tech, had an idea to look in their used wheels for uni-lug wheels that are used to mount snow tires on some older front wheel drive cars. The specs said they could have a more positive offset by as much as an inch and a half. I was hoping for 2", but the wheels we found measured aprox 1.5" more positive offset and are close to perfect for this trailer.

So, I went from this:
IMG_1377a.JPG

To this:
IMG_1459 (2).JPG

Side view:
IMG_1458 (2).JPG

They charged me $30/tire, so $60 bucks for everything including new valve stems. I left Les Schwab a happy camper! I'm glad they're steel. They should be problem free. I'm still going to trim the sharp points from the ends of the fender openings since there's still a chance under full stuff (or flex), they could contact the sidewall or tread.
 
Last edited:

80t0ylc

Hill & Gully Rider
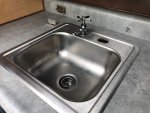
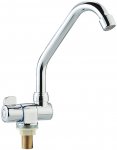
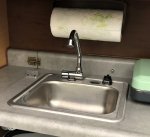
One other issue, actually more of a dissapointment, that surfaced on my shakedown camping trip is the galley or kitchen. The sink and stove setup has to be improved, especially after looking at the galley in this trailer. I looked at this Boreas trailers thread here on Expo and have been drooling ever since. First glaring issue in the galley that will be improved is the sink's faucet. As you can see in the pic, yes it is a faucet, but barely. I have ordered one off Amazon that is taller and pivots both left & right and can be folded down for whatever reason.

Sink and existing faucet:
IMG_1468a.JPG

This is the faucet that is ordered:
TFM galley faucet.jpg

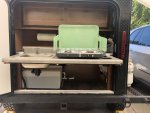
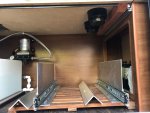
Second improvement will hopefully be an under the counter pull out tray for my stove. I was hoping to find one that I could just attach to the counter, but it appears that I'll have to order slides and fabricate the tray locally. Currently, I'm hauling the stove around in it's retail box to protect it. The tray, when finished will also house the stove while traveling. I'm going to try and design the tray so it can be easily modified in the case where I need to change stoves.

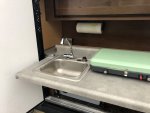
As you can see in the pic below, the stove takes up considerable counter space. The pull out tray should get the stove off the counter and that should make the improvement desired.
IMG_1469a.JPG
 

80t0ylc

Hill & Gully Rider
The water pump in this galley is the traditional RV pump that is pressure activated. Open a faucet and the loss of pressure from the water escaping will kick on the pump until you shut the faucet off. When it reaches a set pressure, the pump shuts off. New faucet has improved water flow as well as a superior position to work with and more flexible. Definitely an improvement!

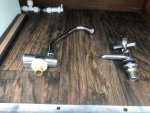
New vs old:
IMG_1479a.JPG

Easy access:
IMG_1477a.JPG

Looks better, too:
IMG_1480 (2).JPG
IMG_1481a.JPG

I really like the improvement - such a simple upgrade made a big difference! Now on to a slide/ pocket for my stove.
 

80t0ylc

Hill & Gully Rider
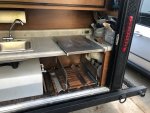
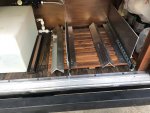
Working on the right side of my galley where I'm fabbing a slide system for my stove which will also house it while traveling. Had some aluminum brackets and slides donated to me by my brother-in-law for this. He lives 7 hrs away from me, but he'll be helping with some plans I have later, for a propane heater and a cabinet sized door through galley wall into sleeping area. Needed some more specifically sized aluminum pieces fabbed for my slide assy, so I visited my local welding and fab shop and got the tray and sides fabbed for a very reasonable $35. Got the side plates with slides and tray assembled.
IMG_1484a.JPG

Angle brackets will attach to top of side plates and then will be attached to bottom of counter to hold slide asm. The wood lattice piece that they're setting on is the floor for my 23Zero shower enclosure.
IMG_1485a.JPG

I've got a 2" square aluminum tube cut to attach the left side plate to the counter top to match the existing wood 2x2.
IMG_1486a.JPG

I hope to have this finished this week and will post pics of results.
 

80t0ylc

Hill & Gully Rider
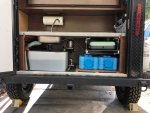
More progress - the slide assembly is installed. When retracted for traveling:
IMG_1492a.JPG

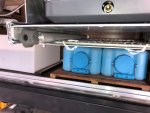
Room for Water Bricks and shower floor underneath:
IMG_1493a.JPG

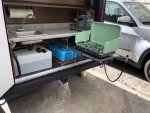
With stove extended, but counter not extended:
IMG_1490a.JPG
IMG_1487a.JPG

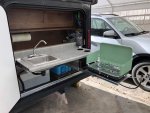
With both counter and stove extended:
IMG_1489a.JPG
IMG_1488a.JPG

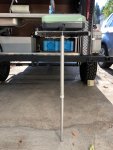
Was thinking that with both extended it might over stress the slides on the countertop, so I borrowed a support pole from my Trail Kitchen and drilled a hole in the slide tray to attach support pole:
IMG_1494a.JPG

Good place to store pole and a additional grill for stove:
IMG_1496a.JPG

Can't wait for the next opportunity to try out the mods to the galley!
 

80t0ylc

Hill & Gully Rider
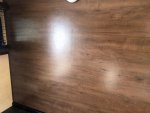
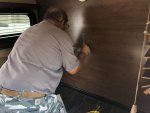
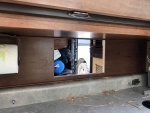
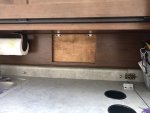
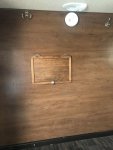
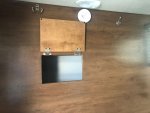
Got my brother-in-law, Dave, to install a pass-thru window in the wall between galley and sleeping area. It's not for me to "pass-thru", but for convenience. Other similar trailers to mine have this built in from the shop, but it wasn't a TFM option back in 2018. So what do you do? Improvise. Dave has considerable experience with trailer and houseboat construction and repair and offered to give it a go when I showed him what I wanted. Of course, he wanted to finish it off with more trim, but all I wanted was simple access to the galley from my bed. Turned out perfect for me. And just the cost of hinges, knob and I added some coat hooks from Lowes for convenience.

Wall above counter before:
IMG_1518a.JPG

Wall from sleeping area before:
IMG_1519a.JPG

During project:
IMG_1520a.JPG
IMG_1521a.JPG
IMG_1523a.JPG

Finished as far as I was concerned:
IMG_1531a.JPG
IMG_1534a.JPG
IMG_1526a.JPG
IMG_1528a.JPG

Midnight snacks with less chance of spilling food or drinks all over my bed and not having to walk around to the galley are now possible. Door shuts and seals sleeping quarters from bugs during the day.
 

80t0ylc

Hill & Gully Rider
Went on a trip with ROF's to KOFA in AZ between Yuma and Quartzite which was a good opportunity to check out the mods made to the galley.
IMG_1585 (2).JPG


All mods made were an improvement and made for a more organized and efficient kitchen. However, on the way back to OR the 12 gallon water tank developed a leak. I noticed water dripping from the rear of the trailer while fueling up. Opening up the rear door revealed water on the floor which thankfully hadn't wicked into the sleeping quarters. So I drained the tank as much as possible since I was less than a day's drive to home. I'll need to pull the tank since the plumbing is behind it. I've been keeping the galley temps above freezing at all times, so I'm thinking something has vibrated loose or broken.

Another problem that has surfaced, actually before the trip, was with the electrical control center. I had plugged into shore power and noticed the 12v fuse was blown. This prevents charging of the battery from shore power, however all outlets - 115 ac,12v, USB & lights have power. When I remove shore power and replace the blown 20 amp 12v fuse, everything seems normal. Until this issue is resolved, I must charge battery with solar or 12v from tow rig.
 

80t0ylc

Hill & Gully Rider
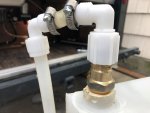
Pulled the water tank and found a loose fitting that could only be found by pulling the tank. It was the 1st nylon 90* fitting off the exit line brass fitting. It was loose enough to make me wonder if it was not checked during assembly. Also replaced short hose that's cable clamped with thicker walled stock.
IMG_1626a.JPG


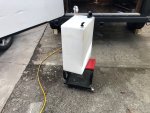
Pic of water tank out of trailer with vent and fill fittings shown:

IMG_1627a.JPG

The water tank was not secured by the manufacturer, which did not set well with me. It was just setting on the galley floor which I think contributed to the loose fitting. So when I re-installed it I secured it with wood blocks glued & screwed to the floor. Vent hose was replaced and fill hose shortened to remove unnecessary length. I like the tank and plumbing being inside design, though for below freezing camping. It is easier to avoid freeze damage to the system. I will be replacing the tank eventually because I can't totally drain it because the exit line is like an inch above the tank bottom. On this size of tank, that's more than a gallon of water. Funky design, IMHO.


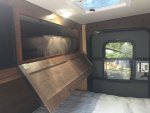
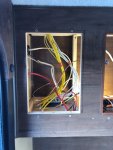
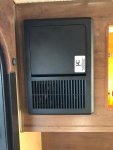
Trouble shooting the battery charging problem with the originally installed WFCO WF-8735P Power Center that is located in the upper front left corner of the cabin shown below to the left of the open storage door:

tfm3a.jpeg

The converter has an internal problem that blows the 12v fuse when you connect shore power. Researching availability on Amazon, I could have replaced with same Power Center, but reading reviews revealed a substantial number of complaints of same problem, even with very little use. Looked at upgrading the WFCO unit with a higher rating, but again, lots of negative reviews. Not to mention having to try and deal with a physically larger unit. So checked out a different brand, Progressive Dynamics (still on Amazon) and found my replacement. Old unit converter/charger is rated at 30 amps. My replacement, PD4045KV is rated at 45 amps. Very close size physically - might have to do some minor triming on cutout in paneling. Reviews looked quite a bit better, of course the price indicated that it was a better quality unit. I will be getting this wired up in the near future:
IMG_1634a.JPG

IMG_1635a.JPG
 

80t0ylc

Hill & Gully Rider
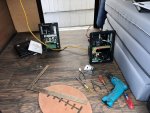
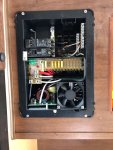
The new Progressive Dynamics Power Control Center is installed. It has twice the number of fused D.C. circuits available and 2 more A.C. breaker slots available. The converter is more heavy duty. It's really designed for a larger trailer, but like my Land Cruiser, I like the "overbuilt" idea.

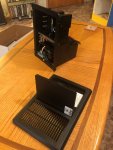
Top half of the old 'busted' WFCO power center
IMG_1636a.JPG

Cutout in cabinet needed some trimming to fit new power center; 1/4" more - both horizontal and vertical
IMG_1638a.JPG

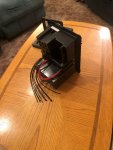
Both power centers shown in the transition. Old one on the left, new one on the right
IMG_1637a.JPG

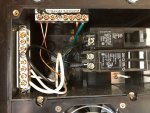
New power center wired up and ready for final touches
IMG_1639a.JPG

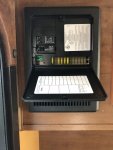
Convenient door opens for access
IMG_1640a.JPG

Installed and ready for service.
IMG_1641a.JPG
 

80t0ylc

Hill & Gully Rider
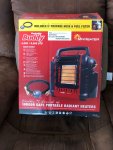
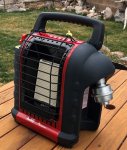
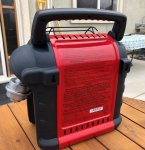
Well, it's been a year and finally got around to a heater. At Costco (Carson City, NV) wandering around and found a propane radiant heater on sale ($10 off) for $64.99.
IMG_1922a.JPG

It includes a hose and filter for larger tanks since the 1 lb bottle limits heating time. Filter is a necessary thing for most hoses. Why? Watch this video.
IMG_1919a (2).JPG

Can be wall mounted, which I'll take advantage of. The hanger holes (2) can be seen for screws in trailer wall
IMG_1920a (2).JPG

Easy to use 2 heat level (Hi or Low) control knob
IMG_1921a (2).JPG

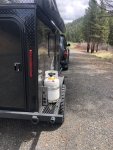
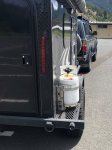
Hose will route from mounted tank through wall on passenger side. Had the idea to use an RV power cord door to accomplish this. I'll provide pics when installed. Found this on Amazon:
 

Forum statistics

Threads
188,225
Messages
2,904,085
Members
229,805
Latest member
Chonker LMTV
Top