Vance Vanz
Well-known member
Slide Out Solar Panel Rack/Arrays - Continued......
Going with the lockable surfboard racks vs cross bars reduced my walkway to get to the boards pretty significantly. In addition, one of the actuators had to be mounted across this path, so I wanted to lay out something to scale. I needed to know what it was going to be like stepping over the actuator in a narrow path and whether a vertical or horizontal actuator mount would be best.
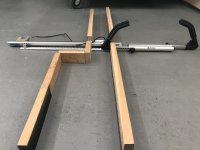
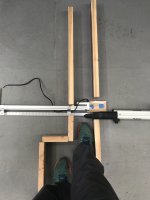
All the details that just eat up time, but are super important. These are the design decisions you don't want to screw up.
Now that the lower slide racks were structurally designed, along with the actuator placements, I had to move onto the hardest part of the design. Figuring out how to secure and run the PV wires was a task I was dreading. My PV wires can't be sealed to the roof (LINE-X is plastic), so I need to mount/secure them to the solar panel racks. My PV wires will also need to be ran and stay under the solar panel array foot print, as every space adjacent to the panels is either the side of the camper, or a usable space/walkway. This may sound simple, but trust me it is not. Every sliding rack design I have seen allows for the wires and/or entry glands to extend outside the footprint, or run above the solar panels.
I also wanted to make sure my PV wires were secured in a a track or raceway, so they would not be flopping/whipping around on the roof (making noise and/or creating some wonderful wear marks on the roof)
 .
.
Playing with the low profile roof entry glands and how to route the PV wires under the panels.
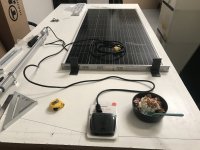
Cable chain track. I tried everything to avoid using this stuff, as a means to keep it simple and less expensive. In the end, it was the only way that made sense (would prevent the issues I noted above). The good stuff is not cheap.
Getting my needed length dialed in.
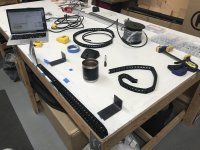
Getting my height dialed in
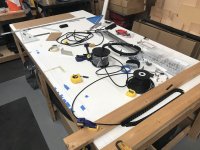
Once the cable chain track was all dialed in, the height of the lower racks changed as a result, so I had to go through everything again and re-adjust/re-design many things.
I then had to design a custom fabricated bracket to: support the PV wires as they come out of the roof entry gland and also to provide a mount and support for the cable chain track. I guess you could call this single bracket my PV wire and cable chain track management bracket. It is one of the most time consuming single fabricated brackets/items that I have had to design on the build so far. The amount of design hours that culminate into this one bracket is nauseating

 to think about.
Somehow I don't have a pic of this thing. I will snap one this week and insert it below on the next round of posts.
(INSERT PICTURE HERE PLEASE)
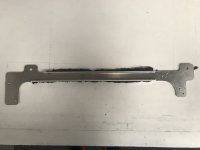
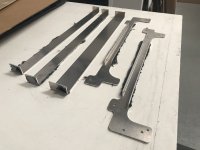
Next up was finishing the layout/design of the upper panels and getting the needed spacers and cover caps all sorted. Figuring out how to structurally tie the lower sliding solar panels together, while keeping everything clean and simple looking, also took some time, Custom brackets/hardware to attach the linear actuators to the solar panel/frames also took some time.
The pics don't really do it justice. It was about Five 12 hour days just for the design of the two arrays. Another 1/2 to 3/4's of a day to complete the drawings for fabrication of items. That's not including the time to research and source all of the parts, aluminum material and mounting hardware. Not to mention I still need to build, dry fit and install this thing. My guess is it will have taken about 3-3.5 weeks total/minimum to complete both sliding arrays when they are finally finished .
.
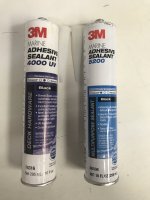
I also had one of the solar panel aluminum frames start to separate from the panel a bit. It looked like the MFG's seal/pooky job was not all that great, so I took the time to 3M 4000 UV re-seal all of the bottom edges on all 10 panels. Not so fun cleaning up somebody else's mess, but that seams to be the story of the build.
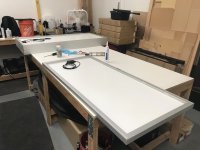
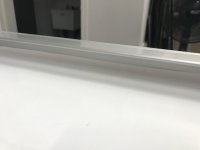
I'm also going to install aluminum angle cross supports at the center of the panels to help stiffen them up, since my mounting feet for the panels will be on the ends of the panels. This was unavoidable given my design (the solar panels needing to be able to slide out towards the side of the panels). Although the seal job was not so bueno on these panels, the frames are super thick and stout. Once my cross supports are installed, these things will be bomber.
Most of this will make a lot more sense as soon as I get the final install pics posted.
Going with the lockable surfboard racks vs cross bars reduced my walkway to get to the boards pretty significantly. In addition, one of the actuators had to be mounted across this path, so I wanted to lay out something to scale. I needed to know what it was going to be like stepping over the actuator in a narrow path and whether a vertical or horizontal actuator mount would be best.


All the details that just eat up time, but are super important. These are the design decisions you don't want to screw up.
Now that the lower slide racks were structurally designed, along with the actuator placements, I had to move onto the hardest part of the design. Figuring out how to secure and run the PV wires was a task I was dreading. My PV wires can't be sealed to the roof (LINE-X is plastic), so I need to mount/secure them to the solar panel racks. My PV wires will also need to be ran and stay under the solar panel array foot print, as every space adjacent to the panels is either the side of the camper, or a usable space/walkway. This may sound simple, but trust me it is not. Every sliding rack design I have seen allows for the wires and/or entry glands to extend outside the footprint, or run above the solar panels.
I also wanted to make sure my PV wires were secured in a a track or raceway, so they would not be flopping/whipping around on the roof (making noise and/or creating some wonderful wear marks on the roof)
Playing with the low profile roof entry glands and how to route the PV wires under the panels.

Cable chain track. I tried everything to avoid using this stuff, as a means to keep it simple and less expensive. In the end, it was the only way that made sense (would prevent the issues I noted above). The good stuff is not cheap.
Getting my needed length dialed in.

Getting my height dialed in

Once the cable chain track was all dialed in, the height of the lower racks changed as a result, so I had to go through everything again and re-adjust/re-design many things.
I then had to design a custom fabricated bracket to: support the PV wires as they come out of the roof entry gland and also to provide a mount and support for the cable chain track. I guess you could call this single bracket my PV wire and cable chain track management bracket. It is one of the most time consuming single fabricated brackets/items that I have had to design on the build so far. The amount of design hours that culminate into this one bracket is nauseating
Somehow I don't have a pic of this thing. I will snap one this week and insert it below on the next round of posts.
(INSERT PICTURE HERE


Next up was finishing the layout/design of the upper panels and getting the needed spacers and cover caps all sorted. Figuring out how to structurally tie the lower sliding solar panels together, while keeping everything clean and simple looking, also took some time, Custom brackets/hardware to attach the linear actuators to the solar panel/frames also took some time.
The pics don't really do it justice. It was about Five 12 hour days just for the design of the two arrays. Another 1/2 to 3/4's of a day to complete the drawings for fabrication of items. That's not including the time to research and source all of the parts, aluminum material and mounting hardware. Not to mention I still need to build, dry fit and install this thing. My guess is it will have taken about 3-3.5 weeks total/minimum to complete both sliding arrays when they are finally finished
I also had one of the solar panel aluminum frames start to separate from the panel a bit. It looked like the MFG's seal/pooky job was not all that great, so I took the time to 3M 4000 UV re-seal all of the bottom edges on all 10 panels. Not so fun cleaning up somebody else's mess, but that seams to be the story of the build.


I'm also going to install aluminum angle cross supports at the center of the panels to help stiffen them up, since my mounting feet for the panels will be on the ends of the panels. This was unavoidable given my design (the solar panels needing to be able to slide out towards the side of the panels). Although the seal job was not so bueno on these panels, the frames are super thick and stout. Once my cross supports are installed, these things will be bomber.
Most of this will make a lot more sense as soon as I get the final install pics posted.
Last edited:

