3.8L timing belt change (gen 3)

Porvalsh

Observer
The kit you buy comes with a new hydraulic tensioner already primmed and ready to go. If you follow the service manual it tells you how to measure it once installed.

If its not your daily driver you don't have much to lose... The difference is substantial in doing it yourself or taking to a shop because of the time involved.
 

BEG

Adventurer
Also can someone explain how the tensioning of the belt works, specifically?
The initial timing belt tension is achieved by an eccentric pulley that is torqued into the belt. Once the initial tension is set via the eccentric pulley, the hydraulic tensioner is released. This allows automatic tension adjustment as the belt stretches.

Is it necessary to replace the actuator, and what does it do?
If you're replacing the rest of the components, replace the hydraulic tensioner. I replaced everything EXCEPT the tensioner and it subsequently failed and fragged my engine. The purpose of the tensioner is to hold constant tension on the belt as it stretches with both age and RPM.

I have never done a timing belt ever, so a lot of these things are new to me, I think if I work slowly and ask a lot questions, I can accomplish this.
You most certainly can, but keep in mind that the timing belt tensioning process is particularly complicated on this engine. Not impossible if you follow the instructions, but it has many more steps than the pull-the-pin-and-tighten-the-bolt type of belts, which creates a lot of opportunities for human error, and interference engines are not forgiving. Here's a quick step-by-step of the tensioning process:

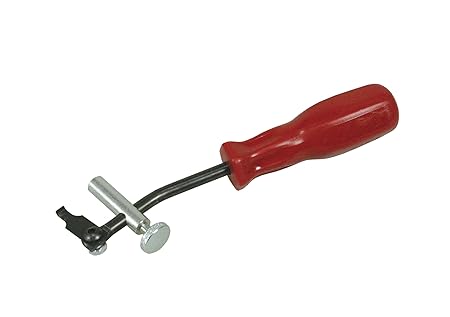
- Bolt the new tensioner in place (threadlocker on one bolt, sealer on the other) and torque to spec. DO NOT PULL THE PIN.
- Add threadlocker to the pulley bolt and loosely install the pulley with the two little holes facing DOWN.
- Simultaneously turn the crank clockwise and the passenger side cam counterclockwise to remove all the slack from the tension side (drivers side) of the belt.
- Wedge a piece of wood or other non-marring material between the pulley and pulley bracket (passenger side of pulley) and SLOWLY rotate counterclockwise. The pulley should press into the belt and the bracket should press into the tensioner piston.
- As you SLOWLY rotate the pulley with one hand, test the tension of the pin on the tensioner by trying to slide it part of the way out.
- Once the pin moves freely, torque the pulley just a little bit more and torque the pulley bolt to spec. This is tricky because you'll be turning the pulley counterclockwise and the bolt clockwise. When you're done the pin should still slide in and out easily. If not, do it again.
- Turn the engine via the crank one or two revolutions and let it sit for a few minutes to let the tensioner relax.
- Measure the gap between the pulley bracket and the face of the tensioner. IIRC, it should be between 3.8mm and 5mm. If it's high or low, redo the tensioning process and apply more or less tension to the pulley as required.
- Once it checks out, put it back together and fire it up.
 

The Viper

Adventurer
thanks again guys for all the replies and detailed info...funny thing is I think i just got to get in there and see how things work, i think at that point Ill have alot more questions.

Its hard to understand some of the concepts (like tensioning) until i actually get in there
 

The Viper

Adventurer
Does anyone know if I need to replace the crank pulley bolt? I know on previous generation monteros there was an updated bolt that you had to replace the old one with
 

nckwltn

Explorer
you only need to replace if you have the old bolt (I think you want a new washer too, but don't quote me on that)... the old bolt looks kind of like a dumbell... the new one looks much more like a normal bolt... google, and you'll find pictures of both
 

The Viper

Adventurer
Im prolly going to want to just order the new bolt, as i dont want to get in there and then realize i have to order one...does anyone have the partnumber for the gen 3 3.8l crank pulley bolt?

also, im assuming you need to drain your coolant before tackling this job? Are there any lines running to the lower radiator that need to be removed (ie tranny lines)?
 

TheMole

Adventurer
Im prolly going to want to just order the new bolt, as i dont want to get in there and then realize i have to order one...does anyone have the partnumber for the gen 3 3.8l crank pulley bolt?

also, im assuming you need to drain your coolant before tackling this job? Are there any lines running to the lower radiator that need to be removed (ie tranny lines)?


Should be 1100A141 for bolt and MR994412 for washer as discussed in the thread below, but please verify. My mechanic was able to replace the bolt on my gen 2.5 without removing the radiator so might be possible on yours as well. If anything like the gen 2/2.5, there should be a couple of tranny cooler lines attached to the bottom of the radiator.

http://www.expeditionportal.com/forum/threads/137347-quick-revised-updated-crank-bolt-question/page2
 

The Viper

Adventurer
Should be 1100A141 for bolt and MR994412 for washer as discussed in the thread below, but please verify. My mechanic was able to replace the bolt on my gen 2.5 without removing the radiator so might be possible on yours as well. If anything like the gen 2/2.5, there should be a couple of tranny cooler lines attached to the bottom of the radiator.

http://www.expeditionportal.com/forum/threads/137347-quick-revised-updated-crank-bolt-question/page2

thanks, i just confirmed those are the correct part numbers

So if you dont have to take the radiator out, are the tranny lines still in the way?
 

cacattack

Observer
Draining coolant from the bottom of the radiator is all you need to do. Expect some coolant coming from where you'll be removing the thermostat housing and obviously from the water pump, so have a pan ready when water pump is removed.

No lines from the radiator need to be removed.i easily did the service without removing the radiator and there is plenty of room. Just take a piece of carboard and put it on the back side of the radiator to protect it from wrenches and such.

In regards to the crankshaft bolt. I have a 2005 and have the "dumbbell" style looking bolt. I reused that one as I haven't heard of an updated bolt... i will be ordering the new bolt now! Thanks for the heads-up on that...
 
Last edited:

BOPOH

Explorer
hey Viper i dont know how rusty your truck is but be careful removing the bolt, i've read here that crank bolt can brake inside of crank. I'm doing timing belt right now on my sport 3.5L and bolt is really stuck, so i had to remove radiator and today i'm going to remove condenser to get enough room for heavy duty impact gun.
 

The Viper

Adventurer
Thankfully my monty is brand new from florida=zero rust

Holy Moly!!! 13.07 for one cam seal! ******, thats over $26 for two tiny little rubber rings (factory oem)

ordered the crankpully bolt and washer, that was a fun $10 for bolt and $7 for a friggin washer

So in regards to replacing the cam seals in the front:

How do you keep the cams from moving when removing the cam bolt?
Im assuming once you remove the pully, the cam seals are sitting right there and can be taken out by hand or with a screwdriver? and new ones just put back in?
 

BEG

Adventurer
Thankfully my monty is brand new from florida=zero rust

Holy Moly!!! 13.07 for one cam seal! ******, thats over $26 for two tiny little rubber rings (factory oem)

ordered the crankpully bolt and washer, that was a fun $10 for bolt and $7 for a friggin washer

So in regards to replacing the cam seals in the front:

How do you keep the cams from moving when removing the cam bolt?
Im assuming once you remove the pully, the cam seals are sitting right there and can be taken out by hand or with a screwdriver? and new ones just put back in?


I've paid twice that for a factory Volvo cam seal. If you want to save a few bucks for OEM quality stuff, do a search for the part number with the word "Mopar" ahead of it. Lots of Chrysler applications use the same parts and they're usually much cheaper. I wouldn't hesitate to use Fel-Pro and other higher quality aftermarket seals, though.

For holding the cams when removing the bolt, you can use the same tool you use for the crank pulley or you can use an old timing belt held with a pair of vice grips. The old cam seals are not easy to remove by hand or with a screwdriver. The easiest way to do it is with this tool:
http://www.amazon.com/Lisle-58430-Shaft-Type-Puller/dp/B000FPYW4K
610D8fZm1rL._SX450_.jpg


As an alternative, you can drill a couple of small holes in the face of the seal, thread in some drywall screws and pull it out with some pliers. To reinstall, I use a cut up aluminum can. I roll it into a funnel shape, lube up the outside, stick the big end over the shaft and slide the seal on from the narrow end. Then do your best to seat is as squarely as possible at whatever depth the manual says. I like to use a little bit of sealant along the outside circumference of the seal just in case, but it's not necessary.
 

BEG

Adventurer
does that tool also help in installing the new cam seals?

Nope. There are Mitsu specific seal drivers that thread into the pulley bolt hole and set the seal evenly and to the correct depth with no fuss. They're expensive though. If you do a lot of seals it might be worth it to buy a seal driver kit that has a bunch of adapters for different size seals. Otherwise, just use a blunt punch and a mallet and drive it in carefully and evenly. I like to check that the depth is even all the way around with a dial caliper before I call it done.
 

Forum statistics

Threads
190,121
Messages
2,924,175
Members
233,417
Latest member
dhuss
Top