4WheelResto

resto

Pacific Northwest
Picking It Up

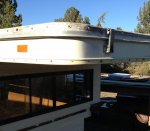
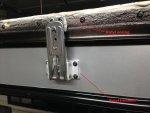
So here are some pictures I took before bringing her home. The seller was a super nice guy, who went out of his way to put things back together enough before I got there, so that I wouldn't have to worry about things falling off or out on my 10 hr drive home. You can see every third screw or so was put back in. Note the rust stains from many of the galvanized screws (click on the picture to enlarge it).
.​
screw.jpg
.
.
.​
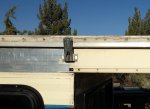
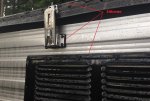
In the next picture you can see the weathered latch. Notice how the screw section is badly rusted (click on the picture to enlarge it).
.​
latch1.jpg
.
.
.​
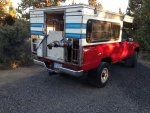
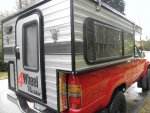
And here I am all loaded up. I was so proud—after a year of searching I was finally a FWC owner (click on the picture to enlarge it).
.​
home.jpg
.
.
.​
All the way home I noticed people staring at my camper, I thought to myself "yeah, they all think it looks so cool."
That was until I got home and my wife burst my bubble—she said "they were thinking, where is this idiot going, there are no scrap yards open this late."
.​
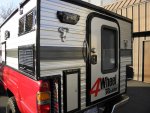
I had already jumped ahead in my mind and saw it looking like this...
.​
after.jpg
.​
 
Last edited:

resto

Pacific Northwest
Wing Removal

Covered taillights.
.​
cover.jpg
.
.
.​
Cutting out wings.
.​
cutout.jpg
.
.
.​
TIG welding.
.​
tig.jpg
.
.
.​
No more wings.
.​
eagle.jpg
.
.
.​
Finished result.
.​
after.jpg
.​
 
Last edited:

resto

Pacific Northwest
Sealants

How did you seal all the edge and corner trim?
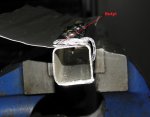
Butyl under trim, then silicone edges. This was the process used everywhere.
.​
My "stainless steel experiment" picture shows butyl underneath trim (click to enlarge).
.​
butyl.jpg
.
.
.​
This pictures shows butyl oozing out, then trimmed back. Again if you click to enlarge. Notice the stainless screw on the hinge looks like it won't be getting rusty anytime soon.
.​
trimmed.jpg
.
.
.​
Finally, Silicone is applied to edges.
.
silicone.jpg
.​
 
Last edited:

resto

Pacific Northwest
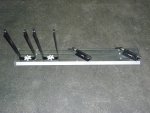
I will be editing my previous post on ceiling L track uses by including these pictures of the "gear line" I will be using:
.​
horizontal.jpg............vertical.jpg
.​
GLN4_Feature_00_n.jpg............GLN4_Feature_02_l.jpg
 

ripperj

Explorer
Thanks for the pics, I need to get started on sealing my Alaskan, there are many linear feet of tape required!
 

longhorn1

Observer
What did you use to secure the track to the ceiling? Are the screws into the wood only or do they go into the roof framing? Also, is there a concern about the ends cutting into the soft side when you have the roof down?
John
 

SLO_F-250

Explorer
Resto! You work is awesome! I really like the silver and all the attention to detail you have. Very nice work! :sombrero:
 

resto

Pacific Northwest
longhorn1—#8, 3/4", screws going through wood and into aluminum roof frame. You will need to drill your own holes as the pre-drilled ones obviously won't line up. I didn't go full width, so not a problem with the soft sides (but probably wouldn't be even if full width).
.​
Soft sides.jpg
.
.​
 
Last edited:

longhorn1

Observer
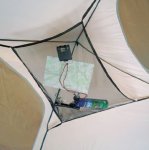
Where did you get the mesh? I like that idea to hold wallets and cell phones, etc. I could even see hanging mesh bags on either side, one for my wife and one for me. I tried looking for mesh to hang but must be looking in the wrong place.
 

resto

Pacific Northwest
Gear Lofts

Where did you get the mesh? I like that idea to hold wallets and cell phones, etc. I could even see hanging mesh bags on either side, one for my wife and one for me. I tried looking for mesh to hang but must be looking in the wrong place.
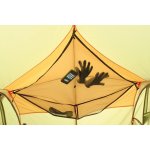
.​
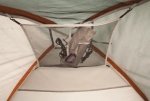
I found it in at the auto wrecker, in the back of a Honda SUV.
.​
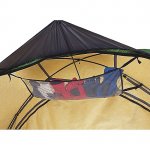
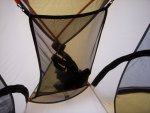
It's OK, but in sticking with my backpacking theme I will use a "tent gear loft." Here are some examples of gear lofts:
.​
1.jpg2.jpg3.jpg
4.jpg5.jpg6.jpg
.
.
.​
Wall lofts: I won't be using one, but if you like gear lofts you might like wall lofts:
.​
1524_4.jpg
.
.
.​
They're all lightweight storage solutions, easy to install, easy to find your items, and allow for things to dry/air out. Found online or at outdoor supply stores like REI (or MEC if you speak Canadian).
.
.​
 
Last edited:

resto

Pacific Northwest
Interior—Before

.​
One of the problems I had when looking for a used Ranger II or Eagle was that I really wanted a shell. I wanted a shell because it was lighter and would be more roomy.
.​
That creates a dilemma as there seemed to be very few shells on the market, and thus, it was more likely I would have to buy a "completed" camper (ie, one with a stove, fridge, heater, couch, etc.) only to remove all these things—and likely having paid more because it had all those things.
.​
I had no remorse when removing those things:
.​
INT.jpg
........
.
.
.
.
.
.​
Lift p.jpg Int 6.jpg int11.jpg
.
.
.
.
.
.
.
.
.
.
.
.​
Nothing was reusable.
.​
resize2.jpg
.
.
.​
 
Last edited:

resto

Pacific Northwest
Bike Rack

.​
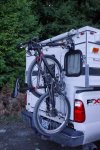
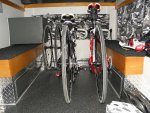
Here is a picture of my bike rack flanked by other typical setups:
.​
bike-solution-FWC-1.jpg mine.jpg image.jpg
.
.
.
.
.
.
.
.
.
.
.
.​
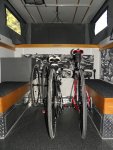
The advantage of my setup comes from theft prevention and protection from the elements:
.​
one.jpg shoes.jpg sar.jpg
.
.
.​
So if I stop at a restaurant, or Costco (to resupply), or .... I don't have to worry so much about theft, no one will even know they're there. Secondly, I have found the bikes get wet and dirty in the rain when mounted at the back.
.​
Once at our campsite I remove the bikes and secure as necessary.
.​
That's another reason why a shell was more advantageous for my application where cycling will often be involved. In a way it's like a "toyhauler"—for bicycles.
.
.​
 
Last edited:

Forum statistics

Threads
188,436
Messages
2,904,815
Members
230,359
Latest member
TNielson-18
Top