'92 Phoenix Camper Rebuild

WolfmanMatt

New member
IMG_0991.jpg
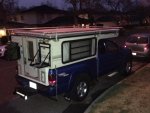
WolfmanMatt here to share some of my camper improvements since I've benefitted from reading about so many of yours. I have great memories of camping for weeks at the lake or the beach with my family in our overhead camper. Through college I camped for many years with a tent set up but really wanted to get outfitted with a truck and an overhead camper, since I also want to pull my small sailboat from time to time.
IMG_3367.jpg
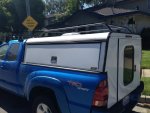
When I was looking for a truck I zeroed in on the Tacoma for its size and capability. While I was looking I happened to talk to a friend who was selling his at a price I could not pass up. I wanted at least a prerunner and his was a 4x4, which I am glad I have now. Since I couldn't afford an overhead camper at the time, I spent weeks trolling craigslist for a camper shell. This worked for a year or so but I really wanted the benefits of a pop up camper.

After getting the funds in order and checking craigslist and the wander the west repostings of ski3pins and others I finally found a popup camper that would fit my truck and it was only an hour drive! The thing was a steal but it did need some work. I called right away and drove down to see it. I figured at the price I could not go wrong. Plus I looking forward to having a project on my hands. With my stepdad being the handiest man on earth I wasn't scared to tackle this thing
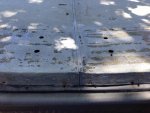
image.jpg

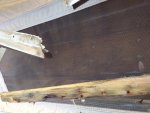
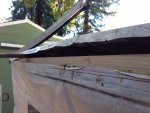
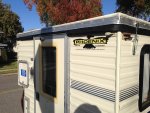
The bad: the previous owner told me that the front top of the camper roof frame had broken when a gust of wind hit the front of his rig while he was driving and a big rig passed in the opposite direction. So the PO decides to fix this by sinking eight 3/4" holes in the roof and sandwiching it with 2 pieces of 2x6" and bolting them on top and bottom... Surprise, surprise this genius move did not work and it broke again not to mention had leaks etc. Lucky for me he did not try to "fix" it further and had decided to buy a new camper. His loss is my gain!
View attachment 273768

I trailered the camper home after finagling with the portable jacks since I still had my shell at the time. Me and my stepdad got to work over the next few months to fix the roof, build a platform so it would fit my truck, fix the roof again, repair the canvas, reseal the roof (did I mention that already), and reposition the water tank drain port. I also had to get the door locks rekeyed.
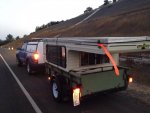
image.jpg

The camper came with a 3 burner stove, sink, water tank, furnace, and fridge. The fridge had to be brought in for service and a new burner to work on propane but now it works like a charm!
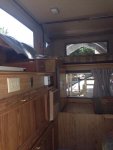
image.jpg
 
Last edited:
WolfmanMatt

New member
The Work Continues

To mount the camper to the truck I used turnbuckles and square tubing bolted to the frame. The camper already had the hardware and holes to bolt through the bed of the truck, but I didn't want to put holes in my bed.
image.jpg

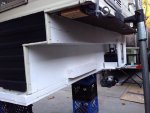
I fixed the broken frame by removing the screws in the flashing, taking out the U-nails, and replacing the flimsy 1x2" with a 2x4". I cut the foam insulation so it would fit and screwed it back together. I also added a metal plate to reinforce the front seam in the flashing.
image.jpg
image.jpg

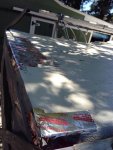
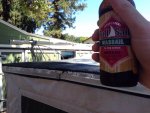
I then tried to patch the holes with aluminum tape and cover it with Kevlar paint. After my first trip, the tape started to peal and break (It didn't work, just wasn't sticky enough or strong enough). After painting with Kevlar Paint I enjoyed a (premature) celebratory brew.
image.jpg
image.jpg

Since this camper is wood frame and base I took the opportunity with the camper off my truck to repaint the base. I also sealed a crack in the front facing part and painted it over with Kevlar paint. You can also see in the picture the battery box we built so when the camper comes off the truck the battery will remain with the camper.
image.jpg

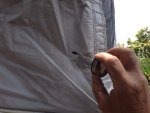
The canvas also had quite a few cracks and pinholes. I used vinyl cement to seal the cracks and holes. I also got some aerospace protectant to treat the vinyl. The patchwork came out pretty good though the glue does discolor a bit after getting some sun.
image.jpg

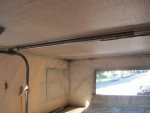
Also the metal lift mechanism inside has quite a bit of rusting on the piping which has stained the nylon and cushions. I've spent some time cleaning them in place, but I'm wondering if I should fully remove them and do a recoat...
image.jpg

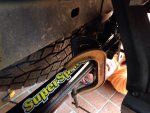
Also, after the first trip down a dirt road constantly on my bump stop I realized I could not wait any longer to upgrade the suspension. I "sprang" for the Superspring! Installation wasn't too tricky and I'm pretty happy with the results. The back end isn't sagging and it's a much nicer ride.
image.jpg

Though the bed is set up to sleep north-south(which I need being 6'2") the pad for your feet just sits loosely in place on some angle iron and the counter above the fridge. I have to put a 2x4 between the pad and the wall so it won't fall out of place. Also the cushion for the legs is only like an inch thick and really needs to be upgraded, since it hurts my knees when I sleep...
image.jpg
 
Last edited:
WolfmanMatt

New member
Roof Repairs and Leak Chasing

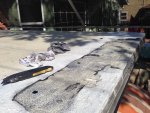
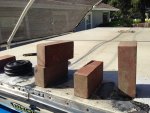
Since the aluminum tape starting coming up after the first use I removed the tape, cleaned the area with some solvent (to also remove the excess silicon the PO used to seal his wood sandwich) and used some JD Weld epoxy to seal the holes. While this works on aluminum it didn't really work for my application because of the flex in the roof. Also I needed to apply it thick to close up the holes. But the lower layers never really hardened.
IMG_4107.jpg

I ended up using a true epoxy with metal washers inside the holes to strengthen it. This time the fix seems to have worked. I covered the area with roof patch paint in a can. I also used roof sealant to seal the center seam on the roof and some cracks I noticed around the roof vent. Covered that with the roof sealant paint as well.IMG_4108.jpg

After this I still noticed leaks so after much researching and reading posts on this site I removed all the screws in the flashing and hit them all with gutter sealant silicone. Some of the screws I also replaced with slightly larger screws. I also ended up putting 5200 sealant along the top of the side flashing.
IMG_4422.jpg

Since when the top is popped down I could still see canvas through the crack I put rubber all the way around the roof with heavy duty double sided tape. The rubber I got from cutting an industrial rubber floor mat into strips.
IMG_4421.jpg
 
Last edited:
brian90744

American Trekker
You could try Eternabondi tape on the roof seam. It will stop leaks. the camper looks good on your truck. just get to use it.=brian
 

WolfmanMatt

New member
Hey Subterran! I actually commented on your thread under my old user name. You inspired me to write my own and I learned a lot from the work on your phoenix! More to come soon!
 

subterran

Adventurer
Thank you, sir! So glad my junk has inspired you. This is a funny forum - it seems like they are intent on sending folks over to Wander the West (good stuff over there, but I can't help but feel excluded, since although I have wandered a bit there, I don't live or wander there exclusively) or are hating on Phoenix campers more than being encouraging to folks who love tinkering with campers and living the lifestyle whenever they can slip off...(shakes head) Your rig is looking really nice. I know you'll love having it. Thanks for keeping us posted. I'll be watching.
 

WolfmanMatt

New member
With the roof looking pretty good and holding up to little shower that we had we moved onto installing a roof rack so I can bring the canoe or kayaks.
ImageUploadedByTapatalk1427555542.838819.jpg

One of the benefits of having a woodframe camper is that you can just sink some bolts right into the wooden frame wherever you want. So we drilled the holes in the side and put in some L braces and set it up for the rack attachment. The connection point for the rack was on the main part of the camper body that way it had much more strength than the flimsy roof.
ImageUploadedByTapatalk1427555564.499649.jpg

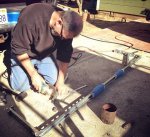
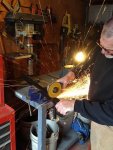
The roof rack was made out of metal conduit and cross braces were welded to it to increase the support side to side. We measured it out to be tall enough set a canoe would not hit the truck at the front or back ends
ImageUploadedByTapatalk1427555598.931103.jpg
Gotta be able to bring your toys with you!

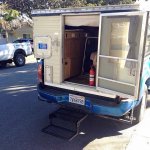
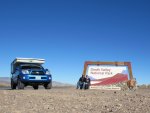
After taking the rig out to Death Valley it became aparent that it would be nice to have a back step so we found an old one my stepdad was no longer using and repurposed it.
ImageUploadedByTapatalk1427555742.586222.jpg

It can also double as an exterior carrier when the step flips up.
 
Last edited:
WolfmanMatt

New member
Interior Improvements

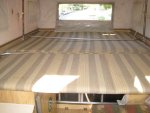
After a few nights in a row on the bed I found that the different cushion thickness for our upper body vs lower body was an issue. The camper came with what I think was a DIY pull out to sleep North South. The part that slid out rested on top of the small lift-top cabinet above the fridge and a piece of angle iron screwed to the opposite wall.
ImageUploadedByTapatalk1427665017.014690.jpg

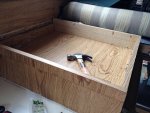
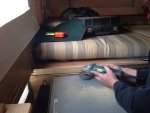
However this meant that the cushion was only about an inch thick. So first step was to cut down the cabinet.
ImageUploadedByTapatalk1427665030.249517.jpg

Then we re-attached the counter top material to the frame to cover the top of the fridge. This will allow about a 4" thick cushion.
ImageUploadedByTapatalk1427665165.248090.jpg

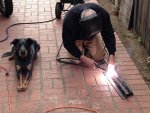
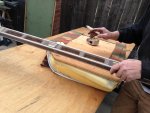
Next for the support on the opposite wall. We couldn't just move the aluminum support down to the new level because the window is in the way. So we took an old bed frame we had and welded two pieces of it together to create a support that dropped down to the desired level.
ImageUploadedByTapatalk1427665314.465021.jpg

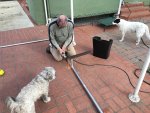
As always our sidekicks did a great job helping out
ImageUploadedByTapatalk1427665801.264747.jpg

Pictures of the finished product coming soon!
 

subterran

Adventurer
Looking good, Wolfman!
Tell me more about your rack. Do you take it off when you're not using it? (I'd like to see a close up of your side mounts) can you pop the top with them on there, or do you have to take the rack and boat down first?

I'm liking your rear step, too. Does it slide into a 2" reciever hitch? I'd like to see a closeup of that thing, too if you can.

You're making great progress! Looking forward to more!
 

WolfmanMatt

New member
Battery Isolator Installation and More

First for the more. Here is a close up of the brackets we used to bolt the rack to the camper. The bolt on the bottom of the rack goes through the hole in the mount and then is secured by a nut. The rack and canoe would need to be removed if I want to pop up the top, but this way its much stronger.
IMG_4423.jpg

Now for the big item! I purchased a Smart Dual Battery 140A Isolator off amazon and intalled it to be able to charge the camper battery while I drive. This also means I can run the fridge on DC while driving as well to keep things frosty. I ran 8 ga wire from the truck battery to the isolator and to the camper battery. I installed fuses at the truck battery and the camper battery. I've been super happy with this installation and it worked great in Death Valley.
IMG_5228.jpg

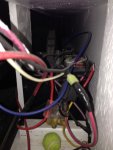
Here is the mess of wires in the battery compartment. I also tried to install a cheap volt meter off amazon but it was DOA.
IMG_5225.jpg

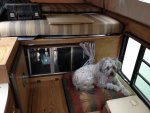
My sidekick standing by.
IMG_5123.jpg

I also took this opportunity to trim down the cushion that is closest to the door since it sticks out and prevents me from sliding my big cooler into the camper and also reaches out and nails my shin once in a while.
IMG_5129.jpg
 

ripperj

Explorer
Very nice, it's good to have family or friends that can do that type of thing.

Sent from my Passport using Tapatalk 2
 

WolfmanMatt

New member
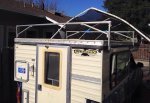
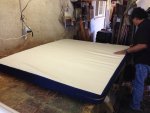
New and improved rack welded for the camper is a couple inches wider than the pop top roof all the way around. Of course our faithful helpers were standing by.

ImageUploadedByTapatalk1452556006.489616.jpg

Perfect length for the 14' canoe. Has easily adjustable cross beams that travel with it on the back of the rack.

ImageUploadedByTapatalk1452555879.365356.jpg

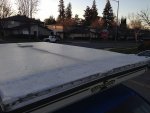
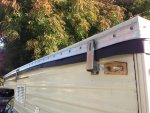
Also resealed the front of the roof where I had some moisture in the canvas after our last rain and in preparation for El Nino.

ImageUploadedByTapatalk1452555973.404986.jpg
 
Last edited:
Forum statistics

Threads
188,391
Messages
2,906,524
Members
230,176
Latest member
Arcadia1415
Top