You are using an out of date browser. It may not display this or other websites correctly.
You should upgrade or use an alternative browser.
You should upgrade or use an alternative browser.
A trailer for the short bus
- Thread starter jays0n
- Start date
jays0n
Adventurer
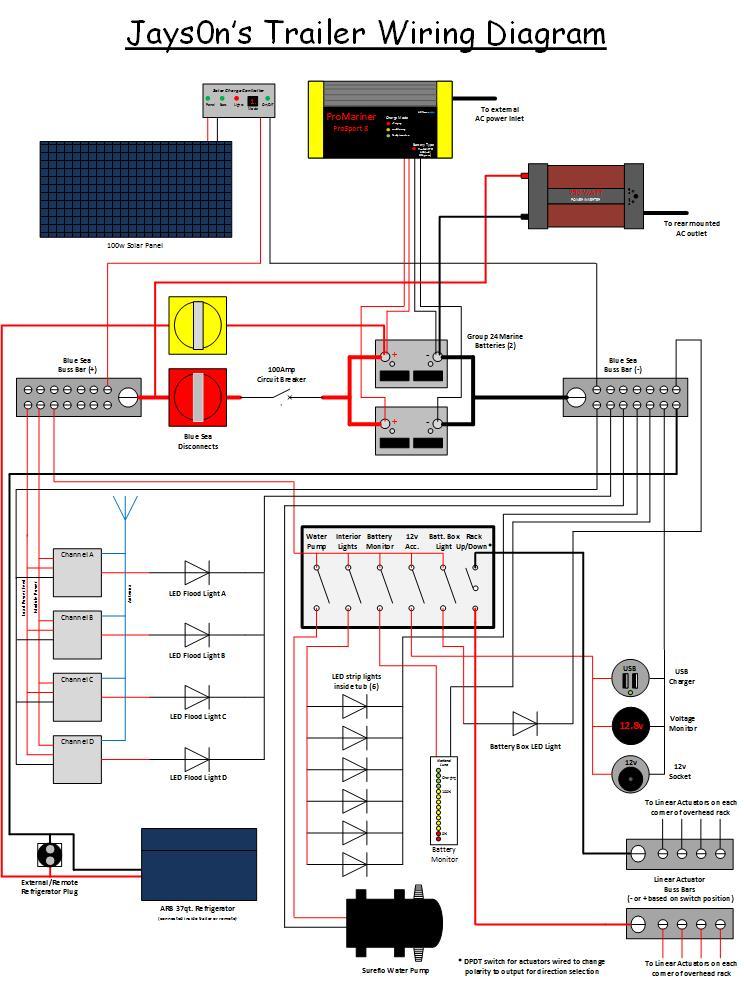
Not much new to report with the trailer modifications, I broke my right hand a couple weeks before I mounted the Rotopax stuff and in doing so completely over did it and decided I should actually let my hand heal before doing much more. I'm in pretty good shape now so I'm getting started again. The steel to rebuild my rack just came in; 1-1/2" telescoping into 1-3/4" with a 16" stroke linear actuator on each corner. I also have the actuators and brackets as well as some pretty cool looking 3/16" steel CNC plasma cut spider web gussets to replace those that I have to cut off. A buddy is coming by tomorrow to help me get the tent, solar and awning setups down off the rack and I've already removed the led flood lights from the legs as they can't be there when the rack telescopes up/down. I went through the tongue box yesterday and did all the mods I need to support the linear actuators, DPDT switch, dual buss bars to tie them to, etc. I modified my wiring diagram to reflect the changes, here it is in case anyone is interested.
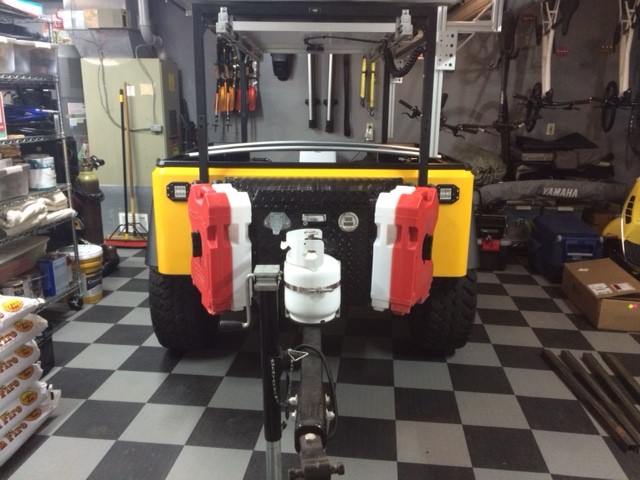
I was going to just mount the floods I removed on the front/sides of the trailer but was worried about catching them on branches or anything really so I sold them to a buddy at work and picked up some knock-off flush mount ones on eBay. I made a quick cardboard template of the contact surface and from that made 4 gaskets out of black EPDM roofing. I marked them out on the trailer, cut and drilled the holes and got them bolted in with stainless hardware. Overall I'm super happy with the way they look and how out of the way they'll be. They are lower than the floods were before but in using the old ones over the last 2 seasons we found we'd rather they be lower anyway so this should work out well. Here are a few pics of the finished product.
The Rotopax tanks will get lit up really well but I really didn't have a lot of options of where to put the lights. We mostly use these during setup/teardown so it will be fine.
Each light has a thick rubber gasket behind it, the hole didn't seem to weaken the fiberglass at all once the light was bolted in.
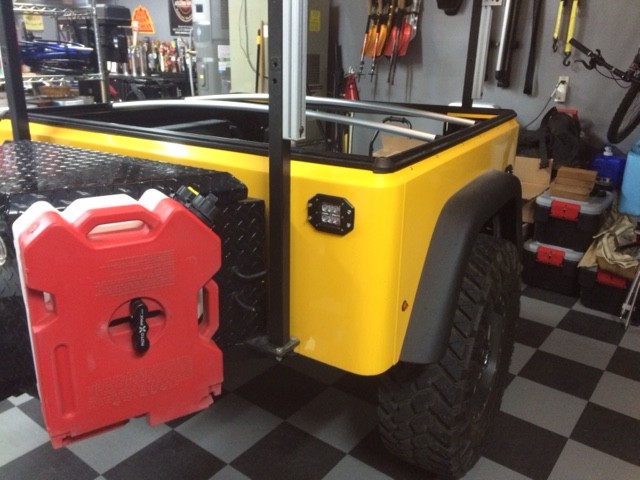
The two forward facing lights do stick into the cargo space a bit but I doubt they'll be in the way much, next is to wire them up!
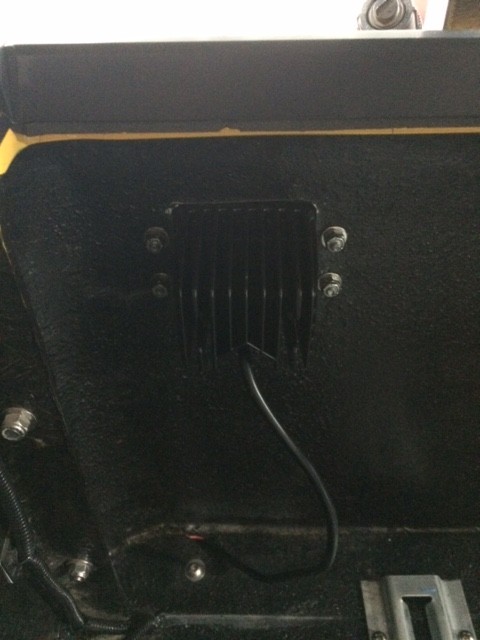
You can see the holes in the rack about 14" above where the light is now, that's where I had the originals mounted, this should be much better.
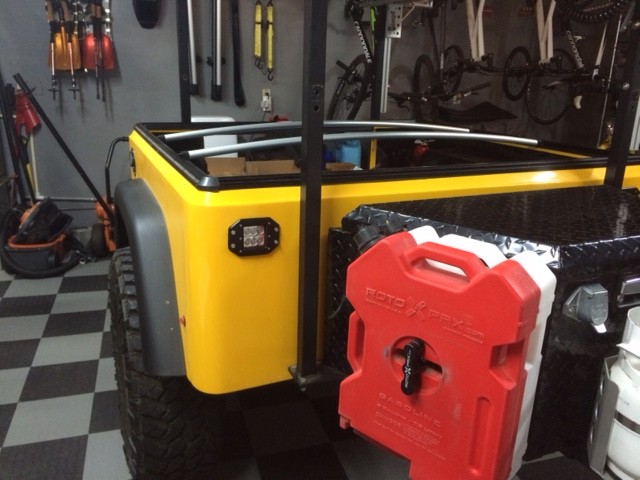
This one will aim right below the tent, it will be blocked when we use the tent's annex but still might make the fabric glow enough to light up the inside of the annex.
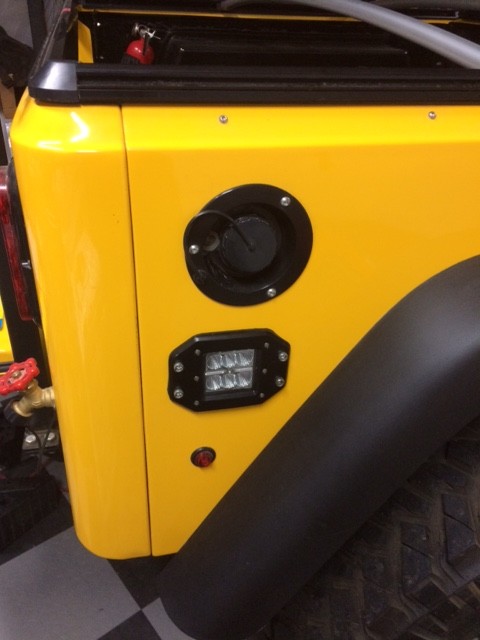
The two rear corner lights will be used much more, this one will basically aim right at our cooking area under the awning.
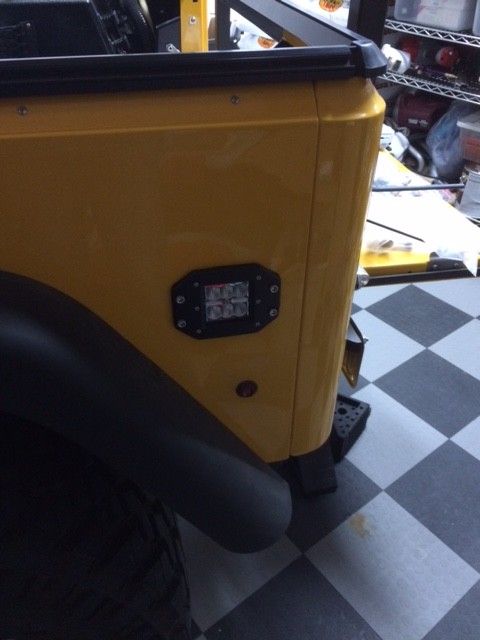

I was going to just mount the floods I removed on the front/sides of the trailer but was worried about catching them on branches or anything really so I sold them to a buddy at work and picked up some knock-off flush mount ones on eBay. I made a quick cardboard template of the contact surface and from that made 4 gaskets out of black EPDM roofing. I marked them out on the trailer, cut and drilled the holes and got them bolted in with stainless hardware. Overall I'm super happy with the way they look and how out of the way they'll be. They are lower than the floods were before but in using the old ones over the last 2 seasons we found we'd rather they be lower anyway so this should work out well. Here are a few pics of the finished product.
The Rotopax tanks will get lit up really well but I really didn't have a lot of options of where to put the lights. We mostly use these during setup/teardown so it will be fine.

Each light has a thick rubber gasket behind it, the hole didn't seem to weaken the fiberglass at all once the light was bolted in.

The two forward facing lights do stick into the cargo space a bit but I doubt they'll be in the way much, next is to wire them up!

You can see the holes in the rack about 14" above where the light is now, that's where I had the originals mounted, this should be much better.

This one will aim right below the tent, it will be blocked when we use the tent's annex but still might make the fabric glow enough to light up the inside of the annex.

The two rear corner lights will be used much more, this one will basically aim right at our cooking area under the awning.

jays0n
Adventurer
Got the legs for the new rack mocked up and built over the weekend. This weekend is bookedbut hoping to get the old rack cut up and ready to weld the new legs on this week. I'm starting to get really excited about how this is going to work and look, here are a few pics.
I first mocked up a leg with PVC and learned a few things, made a few tweaks, totally worth the time and $8
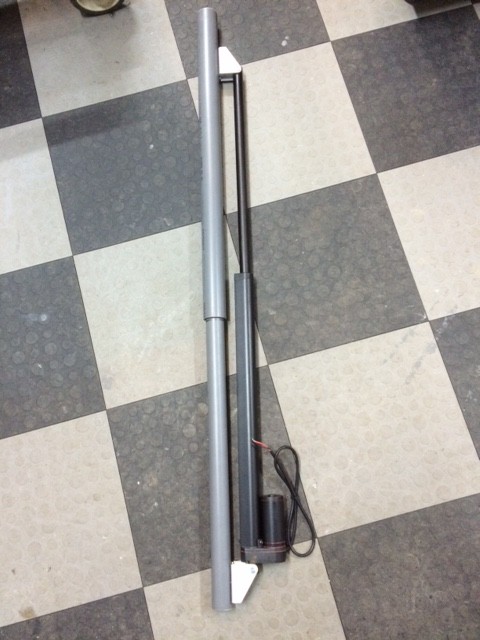
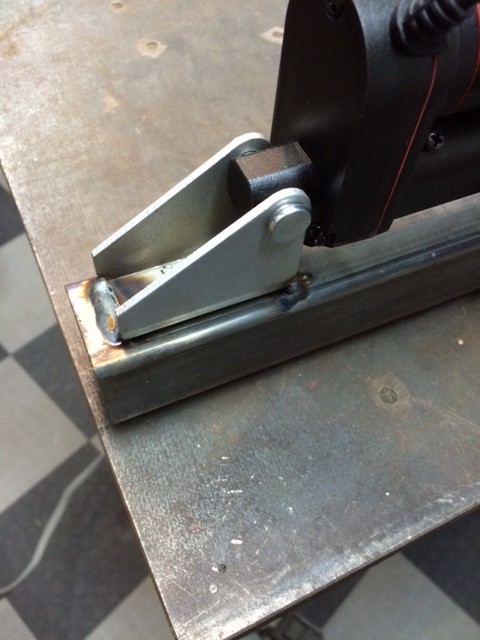
Decided to weld the brackets on once I realized that to maximize the amount of overlap at full extension any fasteners through the tubing would interfere with the telescoping.
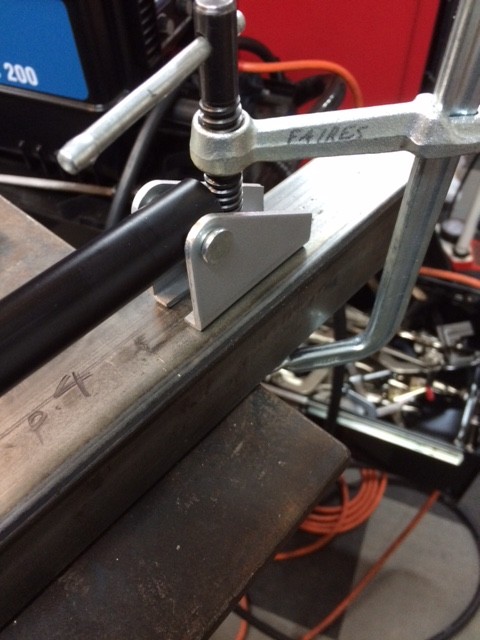
My welds aren't perfect but are much better than they used to be, I give all the credit to my new Miller Multimatic 200
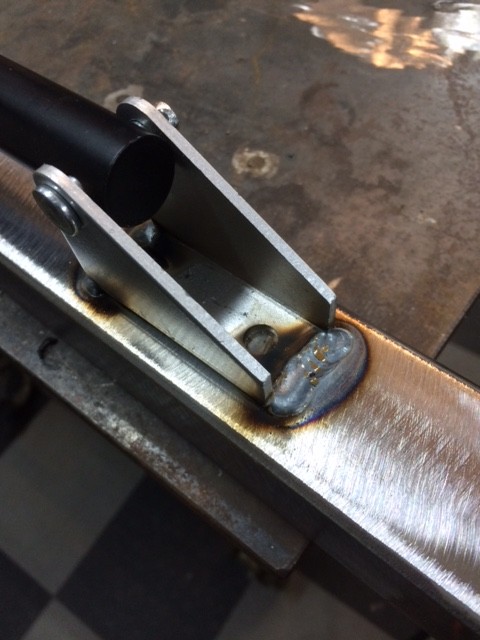
I think they'll hold fine but will be doing testing of the whole rack before I paint anything so I can easily re-weld any places that need attention.
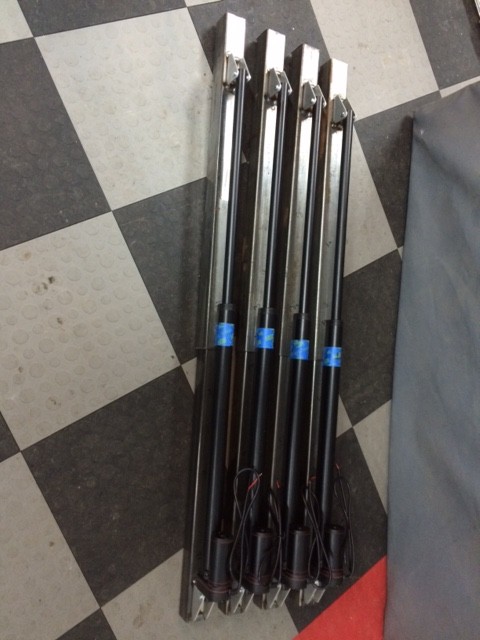
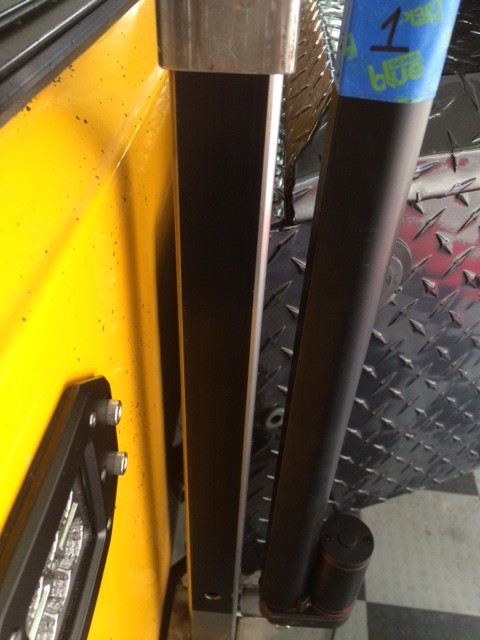
Here are the 4 legs completed, 44" extended, 28" retracted. Each leg section and actuator is numbered to keep track of any subtle differences in length.
I drilled the legs for their upper and lower lock out pins last night. I wanted to get them done before they are mounted so I could easily use the drill press and get them nice and straight. The pins shouldn't be completely necessary but will be nice to know they're in place while we're hauling it down the road or sleeping on top of it, just in case.

The lower hole will be a little tricky to get the pin through and keeper snapped on, the tub is only about an inch away from the leg.

Over all another successful step on the way to getting this rack rebuilt. Next is to cut the old one off and get what I'll be re-using ready for welding. I have a fresh pack of sawzall blades ready to go just not enough time in the day...
I first mocked up a leg with PVC and learned a few things, made a few tweaks, totally worth the time and $8

Decided to weld the brackets on once I realized that to maximize the amount of overlap at full extension any fasteners through the tubing would interfere with the telescoping.

My welds aren't perfect but are much better than they used to be, I give all the credit to my new Miller Multimatic 200

I think they'll hold fine but will be doing testing of the whole rack before I paint anything so I can easily re-weld any places that need attention.

Here are the 4 legs completed, 44" extended, 28" retracted. Each leg section and actuator is numbered to keep track of any subtle differences in length.

I drilled the legs for their upper and lower lock out pins last night. I wanted to get them done before they are mounted so I could easily use the drill press and get them nice and straight. The pins shouldn't be completely necessary but will be nice to know they're in place while we're hauling it down the road or sleeping on top of it, just in case.

The lower hole will be a little tricky to get the pin through and keeper snapped on, the tub is only about an inch away from the leg.

Over all another successful step on the way to getting this rack rebuilt. Next is to cut the old one off and get what I'll be re-using ready for welding. I have a fresh pack of sawzall blades ready to go just not enough time in the day...
jays0n
Adventurer
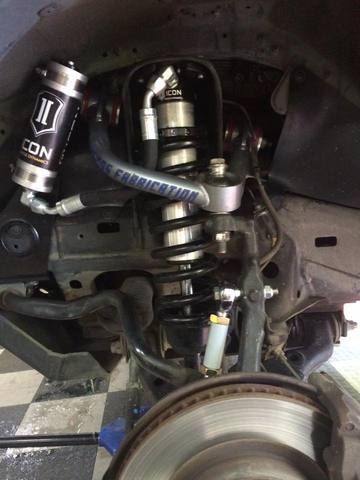
Took a few weeks off from trailer work to get the FJ back into shape. It needed an AC condenser, CV axles, wheel bearings, uniballs in the UCAs, bushings on the UCAs, sway bar links and the new Icon coilovers installed that I got for Christmas. Of course we ran into a couple of frozen bolts that required cutting and replacing, as well as a broken weld nut in the frame. After a few days of sitting waiting for parts it was back on the road and is much happier now than it was before.
Huge amounts of progress on my first weekend back on it. The new legs are mounted to the original upper rack square and the gussets are attached. Probably could stand to clean up the welds a bit but it's fine for now.
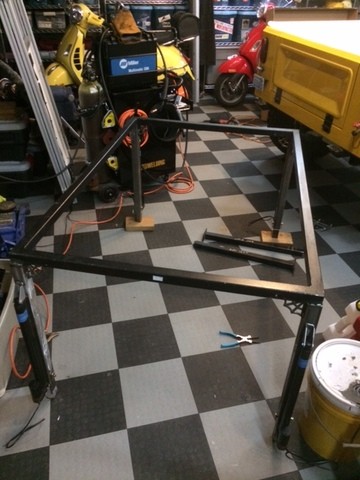
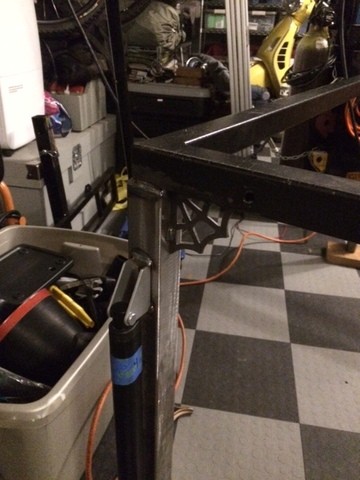
Now the rack is mounted to the trailer and with some janky wiring temporarily going up and down. I used a 12 volt power supply for a test and it seems to work well, check out the video my wife shot while I was holding the wires
I used a piece of scrap lower leg tubing to test the UHMW tape that I ordered to create a smooth, no lubrication necessary surface for the legs to slide on, clearance was fine so I decided to go with it.
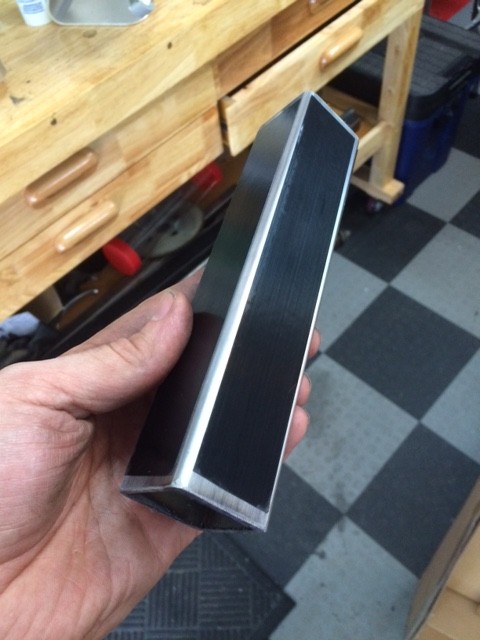
I ground and sanded smooth the bottom edges of the top tubes and top ends of the bottom legs (inside and out), as well as hand "polished" the sides of the legs. After cleaning with rubbing alcohol I covered each side in the tape.
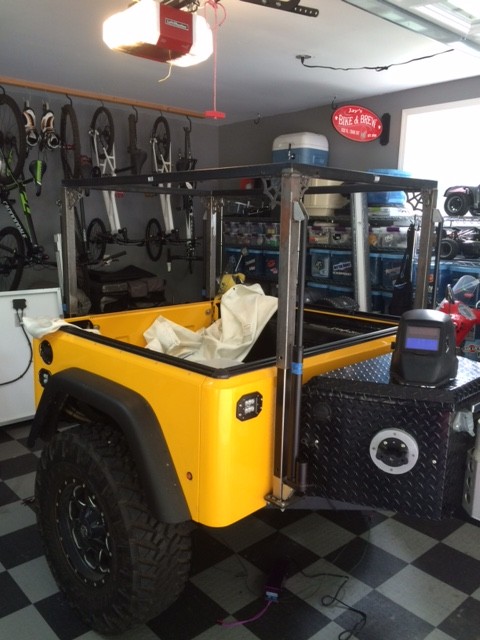
At full extension the rack sits 73" from the ground, perfect height for the Tepui Autana annex.
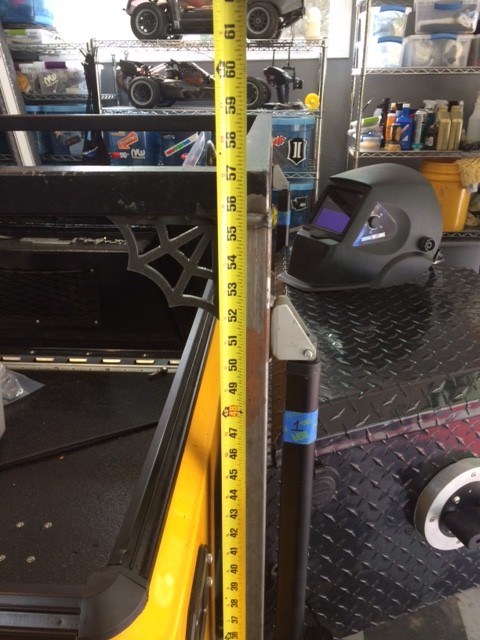
In the fully lowered position it sits 57" from the ground, this should really help with my stability issues offroad. The solar panel will end up about 2" above the bows of the tonnea cover.
Permanent wiring is next then I need to get the awning mocked up before paint and final re-assembly, woo hoo!
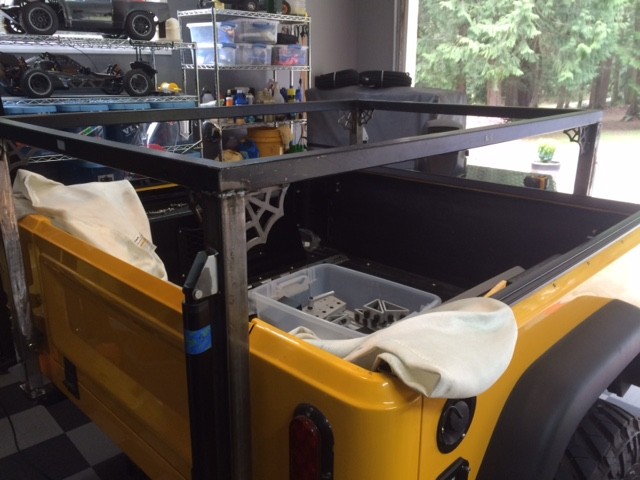

Huge amounts of progress on my first weekend back on it. The new legs are mounted to the original upper rack square and the gussets are attached. Probably could stand to clean up the welds a bit but it's fine for now.


Now the rack is mounted to the trailer and with some janky wiring temporarily going up and down. I used a 12 volt power supply for a test and it seems to work well, check out the video my wife shot while I was holding the wires
I used a piece of scrap lower leg tubing to test the UHMW tape that I ordered to create a smooth, no lubrication necessary surface for the legs to slide on, clearance was fine so I decided to go with it.

I ground and sanded smooth the bottom edges of the top tubes and top ends of the bottom legs (inside and out), as well as hand "polished" the sides of the legs. After cleaning with rubbing alcohol I covered each side in the tape.

At full extension the rack sits 73" from the ground, perfect height for the Tepui Autana annex.

In the fully lowered position it sits 57" from the ground, this should really help with my stability issues offroad. The solar panel will end up about 2" above the bows of the tonnea cover.

Permanent wiring is next then I need to get the awning mocked up before paint and final re-assembly, woo hoo!

jays0n
Adventurer
Was able to get a lot done over the weekend and last night, the trailer is just about back to it's former glory, just shorter, sometimes. I got the rest of the welds done and cleaned up as well as adding a few weld on anchor points for zip tying down things like the actuator wires and the wiring for the solar panel. I got a coat of paint on it, the solar remounted and the tent back up there. I also added a little bling that I'm kinda digging but not 100% sold on yet, though it's growing on me by the minute. Next is to wire in the solar panel with the new curly cord I picked up and then just welding on the shock mounts before it's called done, again.
In setup mode, bottom of tent is about 6' from the ground, perfect height for the annex to fit on the tent.
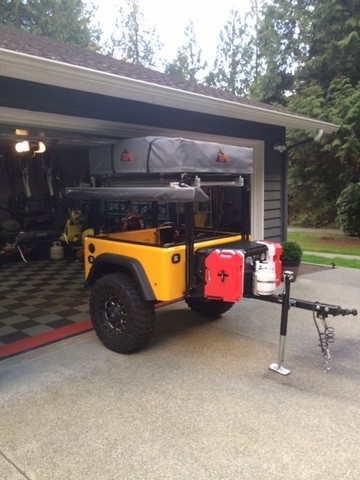
Here it is in compact size traveling mode, should really handle better offroad now.
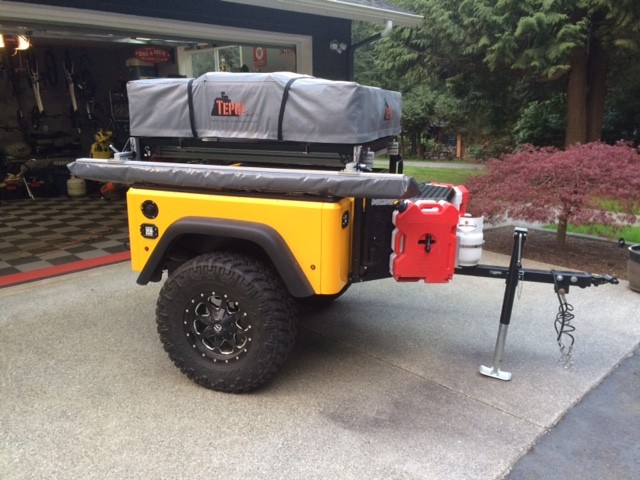
Had a set of decals made up of the brands I run on the trailer or the tow rig, not 100% loving them yet but growing on me.
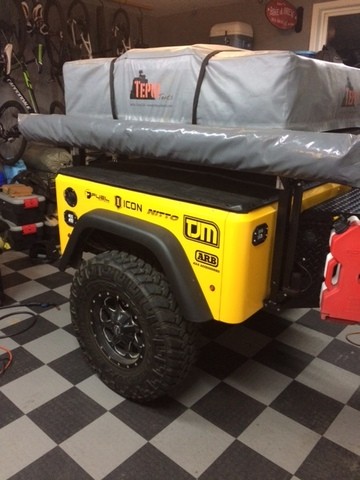
I can always take them off if I change my mind.
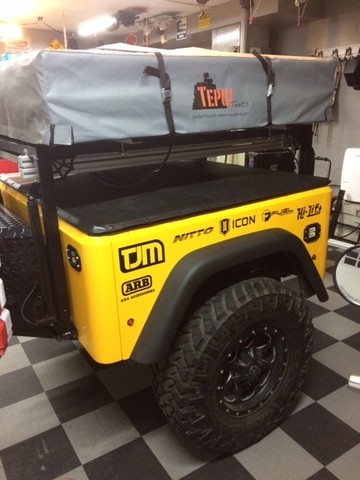
In setup mode, bottom of tent is about 6' from the ground, perfect height for the annex to fit on the tent.

Here it is in compact size traveling mode, should really handle better offroad now.

Had a set of decals made up of the brands I run on the trailer or the tow rig, not 100% loving them yet but growing on me.

I can always take them off if I change my mind.

jays0n
Adventurer
Thanks! I think they'll be staying  I have a set of TJM Treds mounted on the roof and I run a TJM 9k Stealth Winch in my front bumper, as well as some recovery gear from them. Had an issue with the winch and they took care of it for me even though my warranty was expired, happy with the customer service for sure.
Last edited:
jays0n
Adventurer
Wow, looks like it's been years since I've been here, it's time to get back into it. Just a quick catchup on the trailer, never made the trip to Mexico, my employer wouldn't let me take enough time off even though I had it saved up, so I left and started a new job (it was time anyway). We ended up doing a giant renovation of our house not long after so the trailer has been in storage for the last year and a half or so. Just got back into the house and are planning to do the northern section of the WABDR next week, leaving this Sunday. Of course these trailers are never really complete so I'm just finishing up a few additions and tweaks. Here are some pics of the recent changes.
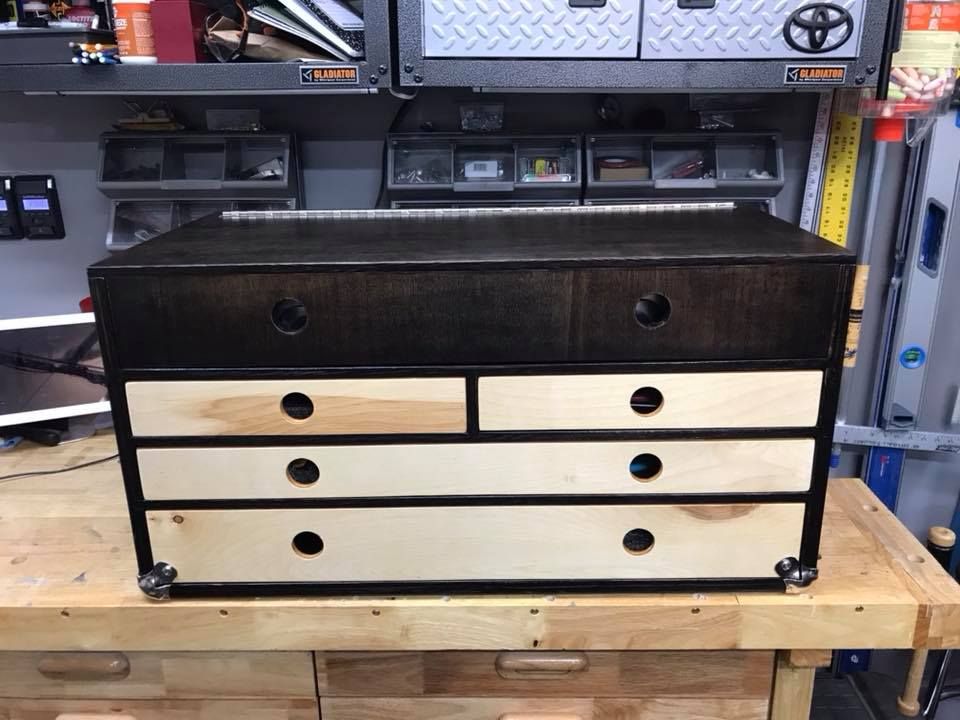
I built a slide out for my fridge to mount in the FJ so I had space in the trailer. I built a chuckbox to fit in the space the fridge used to take in the trailer. It isn't anything fancy, mostly made with stuff I had laying around the shop. Drawers are held closed by magnets and the lid held up with hydraulic pistons.
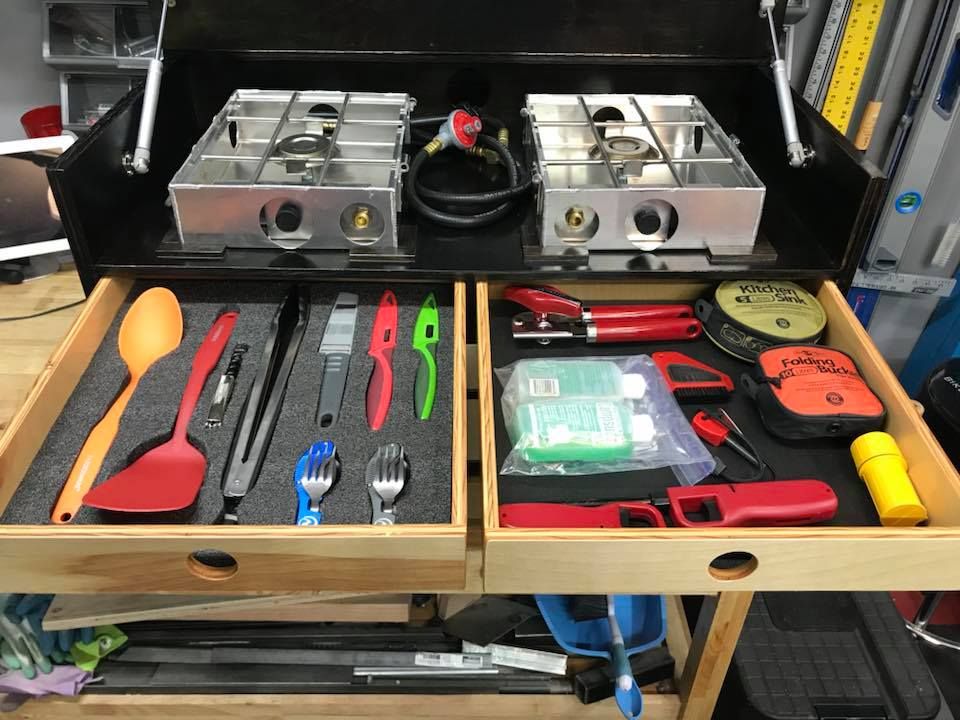
I finally got a Cook Partner stove and clearly love me some organization, friends call it OCD but I disagree, I think it makes it simple to know when something didn't get re-packed
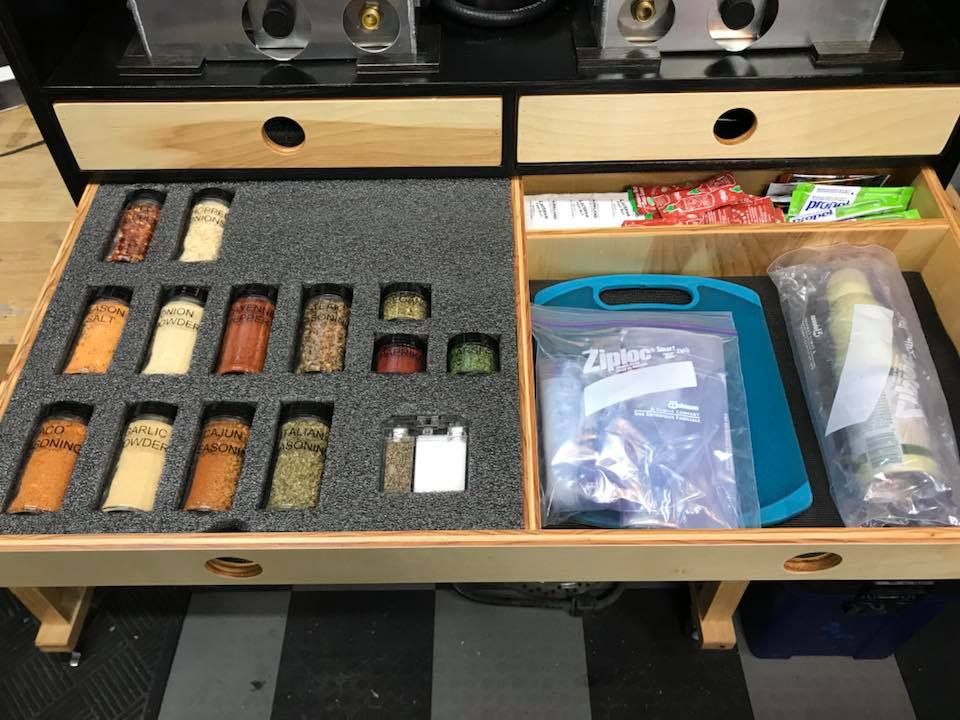
More OCD-ness, we actually cook when we travel and that new stove really helps make that more enjoyable.
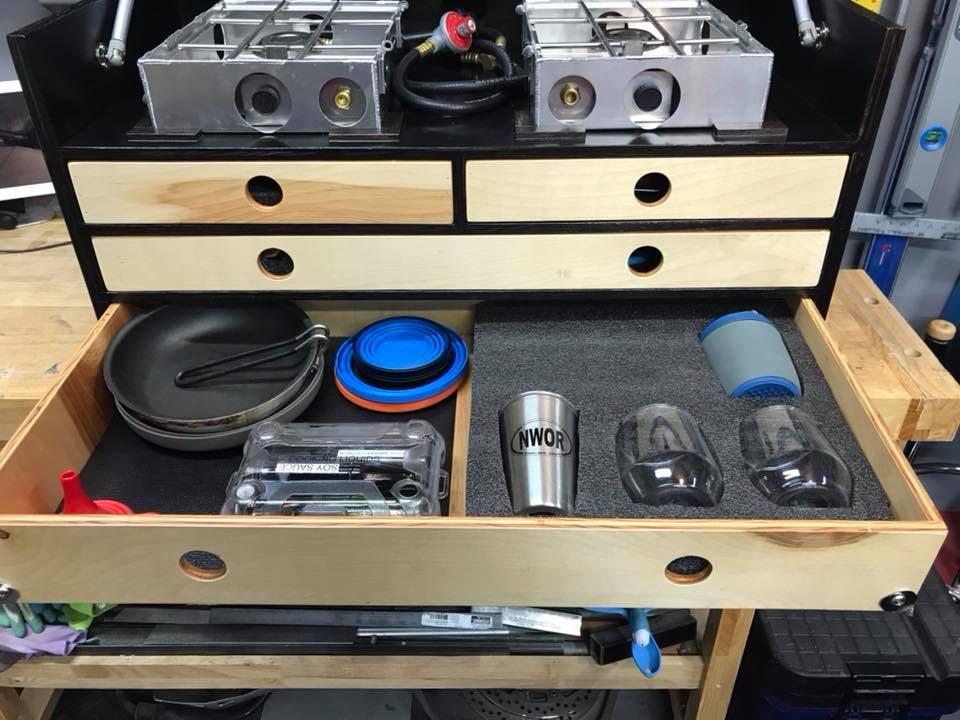
And some more.
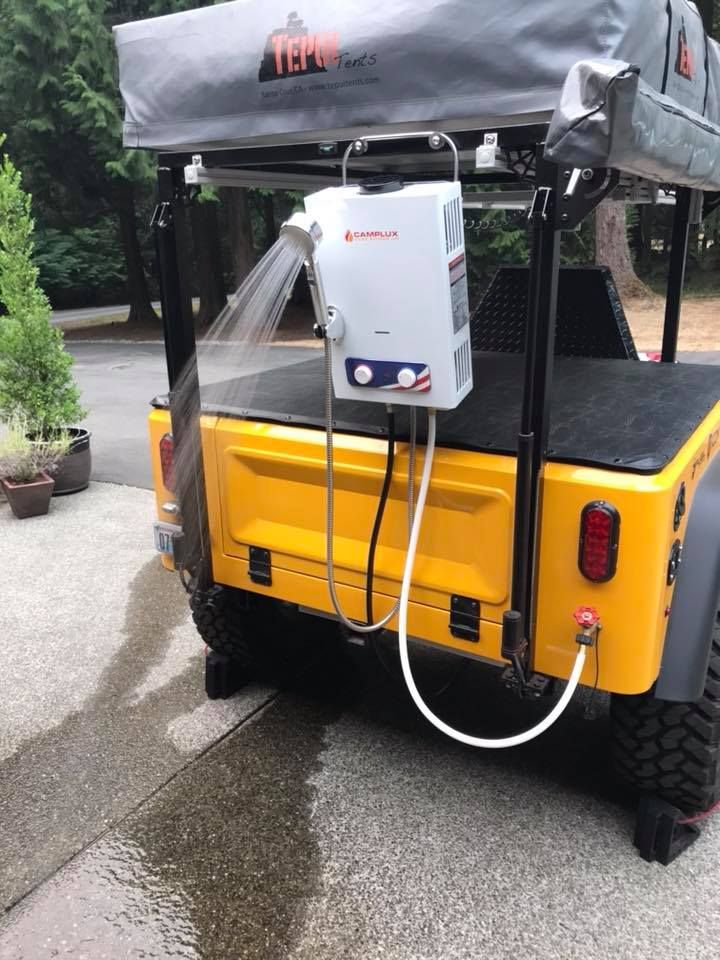
Big change was finally adding hot water. We have a larger version of the same heater at our off-grid cabin for an outdoor shower and have had good luck with it so I picked up the smaller one for this. I had to get a longer regulator hose so it could reach the tank from the where I mounted it. The existing water system creates 25-30psi which is well above the minimum so it works really well just connected to the hose bib.
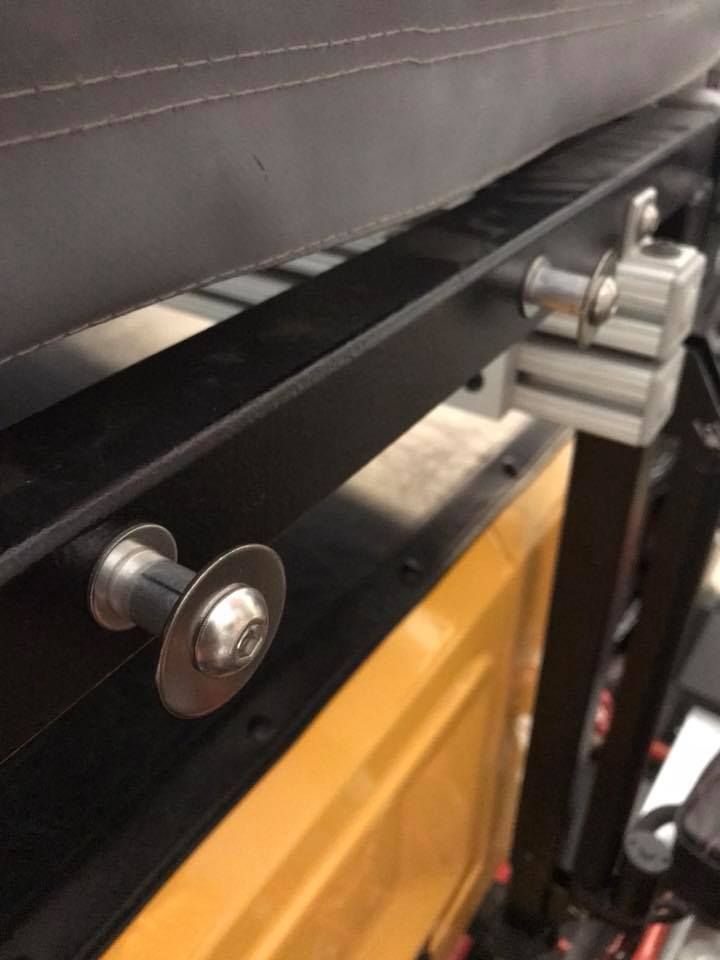
The super simple hanger posts, couple stainless bolts, washers and some aluminum tubing as a spacer. I have some French military, 5 gallon water bladders that are meant to hang for delivering water and their hangers fit over the posts as well.
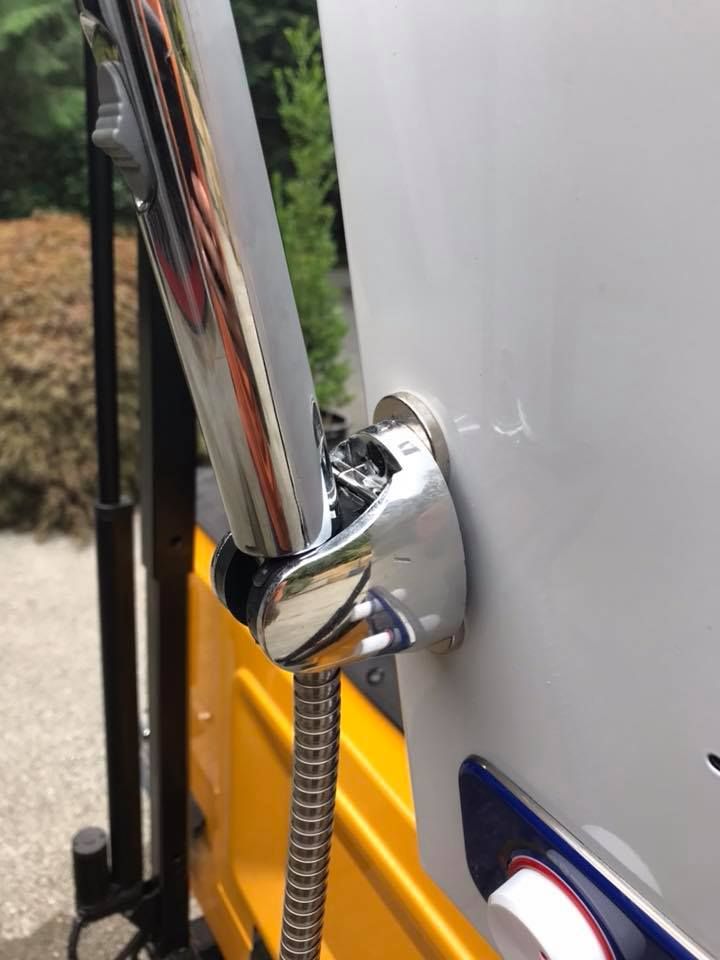
Added some leftover magnets to the shower head hanger so I can mount it to the heater or rack or anything else it will stick to. With the magnets the head can be placed high enough to take a shower right under it
Anxious for the trip this weekend, hopefully we still go, half the group has dropped out already so who knows. The trailer is all serviced, greased, packed, fuel/water filled, all secured and ready to go, just need to pack the fridge and take off. I'll try to post some pics when we get back.

I built a slide out for my fridge to mount in the FJ so I had space in the trailer. I built a chuckbox to fit in the space the fridge used to take in the trailer. It isn't anything fancy, mostly made with stuff I had laying around the shop. Drawers are held closed by magnets and the lid held up with hydraulic pistons.

I finally got a Cook Partner stove and clearly love me some organization, friends call it OCD but I disagree, I think it makes it simple to know when something didn't get re-packed

More OCD-ness, we actually cook when we travel and that new stove really helps make that more enjoyable.

And some more.

Big change was finally adding hot water. We have a larger version of the same heater at our off-grid cabin for an outdoor shower and have had good luck with it so I picked up the smaller one for this. I had to get a longer regulator hose so it could reach the tank from the where I mounted it. The existing water system creates 25-30psi which is well above the minimum so it works really well just connected to the hose bib.

The super simple hanger posts, couple stainless bolts, washers and some aluminum tubing as a spacer. I have some French military, 5 gallon water bladders that are meant to hang for delivering water and their hangers fit over the posts as well.

Added some leftover magnets to the shower head hanger so I can mount it to the heater or rack or anything else it will stick to. With the magnets the head can be placed high enough to take a shower right under it
Anxious for the trip this weekend, hopefully we still go, half the group has dropped out already so who knows. The trailer is all serviced, greased, packed, fuel/water filled, all secured and ready to go, just need to pack the fridge and take off. I'll try to post some pics when we get back.
Last edited:
jays0n
Adventurer
The trip went really well, did about 250 miles and only about 20 on pavement. The trailer did great, no issues at all. The water heater was a great addition, hot showers and instant hot water for dishes was amazing, should have added it years ago. The only thing we ran into a few times was really feeling the weight of it behind the FJ Cruiser (and the speeding ticket I got on the way to the trail, down hill with a tail wind). Enter this spring's project, electric brakes. I've been gathering the parts to add brakes and should be able to get at least the trailer side done in the next few weeks. I plan to use a REDARC Elite brake controller and will install that and the 7-pin on the FJ later. I'll update here when i make some progress, probably starting next week.
jays0n
Adventurer
No new photos but did make quite a bit of progress on the trailer side of this project. There is a lot of wiring on the trailer, and I mean a lot. All the wiring for the brake, park, turn signal wiring runs inside the frame and all the accessory wiring is loomed and clamped to the underside of the floor, which makes this a little more tricky, plus my OCD forces me to make it look good 
- Got the junction box for wiring the 7-pin cable mounted under the tongue box using my new nutsert tool, which was fun.
- After quite a bit of fiddling I was able to get the existing wiring for the lights cut at the coupler side, fished back and out of the frame and loomed into the box.
- Installed the small LED reverse lights and loomed them up to the junction box as well, about 50% through the frame and 50% attached to the floor with all the other wiring.
- Lastly I ran the grounds (I run a ground to everything, nothing uses chassis ground) and power (all loomed) to just above the axle where the brake back plates will be mounted and of course back into the junction box as well.
jays0n
Adventurer
So in normal form for me I was able to find enough time to get the brakes all installed on 1 side of the trailer, adjusted, greased bearings, everything, even put the dust cap back on. When I went to mount the wheel and realized they sent me the wrong lug pattern drums  I ordered 6 on 5.5 but got some 5 lug pattern that I stared at on my work bench for a month and didn't notice were wrong. They came from Amazon and the company that sold them is sending me the correct drums, should be here Friday. In the meantime I got both backing plates mounted and wired so i'm ready for the drums to arrive in a few days.
This is the first time I've gotten under the trailer and really looked it over since our last trip so as I started taking things apart to do this work I realized there was an issue with the leaf springs. These have already been replaced with a heavier version than I built it with but the problem was that the rebound clips (little straps that keep the springs together and prevent one leaf from rotating into a tire) were loose and kept slipping down to the end of the spring. It seems that the springs got a pretty good work out. To correct this and prevent it from happening again I purchased some new rebound clips on eBay. They are stainless steel and get bent into place similarly to the stock aluminum ones but they have a dimple on the bottom to "locate" the clip on the spring and keep it from moving. I pulled the springs off to clean up the pivots and make it easier to put the new clips on.
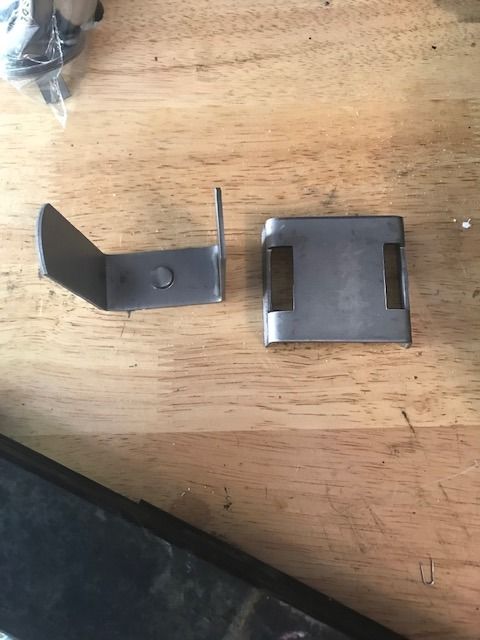
The new clips were $1.99 each, are stamped from 14ga stainless steel, are for 1 3/4" wide springs and have a dimple on the bottom that you need to drill a hole in the spring to locate the clip and keep it from moving around as the spring pack flexes.
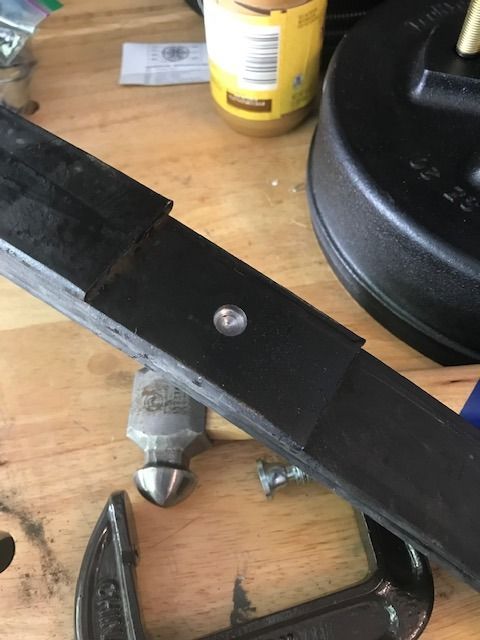
Using the drill press, a brand new bit and some cutting oil it was easy to drill a 3/8" diameter hole 1/8" - 3/16" deep in the spring steel.
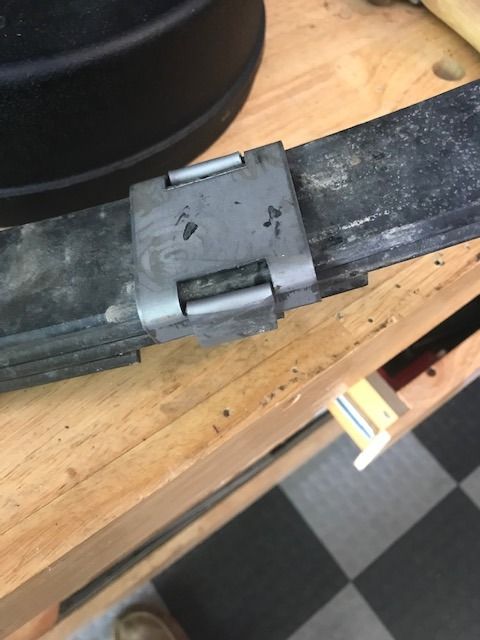
Using the bench vise, a couple c-clamps and a hammer I got the clip straps bent around the spring and the clips very secure. They are tight and should stay in the correct place but should still allow the springs to flex and slide between each other as necessary.
I bolted everything back together with plenty of anti-seize and re-greased the spring bolts. Once the new drums arrive it should be an hour or so and the trailer will be off the jack stands and ready for me to finish the 7-pin wiring and install the brake controller on the FJ Cruiser.
This is the first time I've gotten under the trailer and really looked it over since our last trip so as I started taking things apart to do this work I realized there was an issue with the leaf springs. These have already been replaced with a heavier version than I built it with but the problem was that the rebound clips (little straps that keep the springs together and prevent one leaf from rotating into a tire) were loose and kept slipping down to the end of the spring. It seems that the springs got a pretty good work out. To correct this and prevent it from happening again I purchased some new rebound clips on eBay. They are stainless steel and get bent into place similarly to the stock aluminum ones but they have a dimple on the bottom to "locate" the clip on the spring and keep it from moving. I pulled the springs off to clean up the pivots and make it easier to put the new clips on.

The new clips were $1.99 each, are stamped from 14ga stainless steel, are for 1 3/4" wide springs and have a dimple on the bottom that you need to drill a hole in the spring to locate the clip and keep it from moving around as the spring pack flexes.

Using the drill press, a brand new bit and some cutting oil it was easy to drill a 3/8" diameter hole 1/8" - 3/16" deep in the spring steel.

Using the bench vise, a couple c-clamps and a hammer I got the clip straps bent around the spring and the clips very secure. They are tight and should stay in the correct place but should still allow the springs to flex and slide between each other as necessary.
I bolted everything back together with plenty of anti-seize and re-greased the spring bolts. Once the new drums arrive it should be an hour or so and the trailer will be off the jack stands and ready for me to finish the 7-pin wiring and install the brake controller on the FJ Cruiser.
bluejeep
just a guy
Have you considered putting airbags on?
Genius work and execution. You clearly have a thought process that results in excellence. Identify a need, consider solutions, choose, do it.
I would like to put in my vote for air bags. I built a trailer to haul my jeep and bagged it. So it either rode empty, or was carrying 4500 lbs, nothing in between. I changed the air pressure accordingly and never experienced a smoother riding trailer in either situation. It did need shocks when empty tho, didn't get around to adding those before selling the trailer and driving the jeep to the trail (much more fun that way!)
jays0n
Adventurer
Why thank you! I thought about air bags but never moved forward with it. Currently the springs are rated above the trailer's loaded weight and i have shocks as well so it handles great as it is. If I make any significant changes to the suspension down the road it will probably to go Timbren axle less but I haven't given it any thought really. This project was to add electric brakes and i just happened to find the issue with the springs while working on it.
Similar threads
- Replies
- 3
- Views
- 716
- Replies
- 0
- Views
- 553
- Replies
- 0
- Views
- 456
- Replies
- 0
- Views
- 485
