You are using an out of date browser. It may not display this or other websites correctly.
You should upgrade or use an alternative browser.
You should upgrade or use an alternative browser.
Alaskan Camper '84/'14 Build Thread
- Thread starter ripperj
- Start date
I bought a used 10' siding brake to do the siding trim, being a siding brake means it only has a 13" throat, which means more seams than from the factory.
The siding is fun to work with, but being that it is pre finished, you have to be careful.
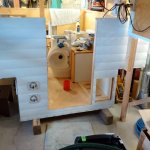
I got most of the lower section done, the Festool saw was great for cutting the long sections and the window cutouts. I tried a router with a 1/4" carbide spiral bit, it works ok, but needs to be lubed every foot or so, the saw is much faster.
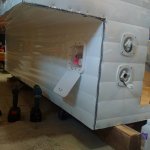
I added the outdoor shower from Spray Away and the city water and water tank fill.
If I didn't have my head up my butt, I could have made the pattern match at the corner, it matches at the top, but not at the bottom. There is a seam and S-lock under the "out" so I could have made it work-oh well., easy to lock back and second guess
Sent from my Passport using Tapatalk
Attachments
I also finished the trim on the rear half of the roof section, I just need to run a bead of 3M4000 along the edge of the butyl tape. Came out nice and clean, but busier looking than I wanted due to all the SS screws. I couldn't find a replacement for the original rain gutter, so I cut 1/16" aluminum and had it powder coated.

I suspect that the factory does not bother trimming out the inside of compartments like the water heater and furnace vent exit, the '84 definitely didnt, the vents and access doors were just sealed to the siding. This type of thing is fun but time consuming as again you are working with pre-finished material.
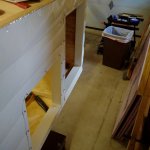
Edit: all these seems need to be caulked. The water heater door trim covers the screw around the large opening. I have to make a propane door. The doors and flip up panels are time consuming

I suspect that the factory does not bother trimming out the inside of compartments like the water heater and furnace vent exit, the '84 definitely didnt, the vents and access doors were just sealed to the siding. This type of thing is fun but time consuming as again you are working with pre-finished material.

Edit: all these seems need to be caulked. The water heater door trim covers the screw around the large opening. I have to make a propane door. The doors and flip up panels are time consuming
Last edited:
piratexpress1369a
Explorer
Pics not working
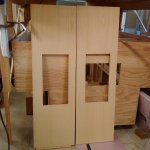
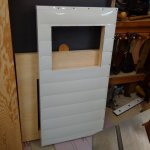
I have the rest of the camper in "Kit" form. Over the winter I made the cab-over section and the three flip up cab-over side walls. The original cab-over floor and flip walls were all solid 3/4' ply with only a front window. I made the flip panels and floor from a ply-foam-ply sandwich. The flip panels have cabinet grade ash on the inside, stained and polyed. The floor has outdoor porch paint where the mattress goes for durability. I still need to put the aluminum siding on all these pieces, but will wait until later so they dont get damaged. I have minimal room to store bif stuff that cant be banged up.
Here is the cab-over floor: 1/4' ply with 3/4" foam. The strange stud placement is to line up with the aluminum siding seam on the bottom.
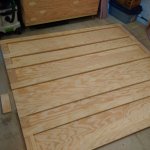
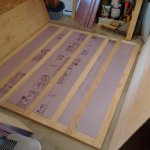
Here is a flip panel before the cabinet grade ash interior. I made 3 flip panels and both doors like this.
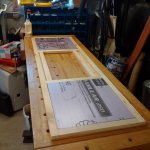
Here is the cab-over floor: 1/4' ply with 3/4" foam. The strange stud placement is to line up with the aluminum siding seam on the bottom.


Here is a flip panel before the cabinet grade ash interior. I made 3 flip panels and both doors like this.

Last edited:
If I can't figure out why I can't post pics from my phone I am going to rapidly lose interest in keeping this thread updated. Before when I attached a photo I was given two options, Tapatalk hosted, or forum hosted, the second option is no longer avaliable, and the first doesn't work. Any ideas?
Sent from my Passport using Tapatalk 2
Sent from my Passport using Tapatalk 2
Brad- I went back and attached the pics that were missing from my pc
I made the edge trim from 1/16" aluminum plate and angle stock that I ripped on my tablesaw. I had it powder coated after sanding and drilling. I have lots more for the front and rear corners and the door trim. While I was at it I had the big cabover support brackets and roof rack brackets done in grey.
I looked at the commercial trim that's available and didn't really see anything that could be bent to the roof curve and still have sufficient overlap on both top and front/rear.
What ever Alaskan is using now (new campers) makes for a real clean look. Bryan at the factory said it was just normal stuff, but I didn't find anything I liked, which is too bad because it would be quick and simple
Sent from my Passport using Tapatalk 2
jrfromafar
Adventurer
Just checking in from WTW - wow what a great project - will be following yourprogress!
Similar threads
- Replies
- 12
- Views
- 423
- Replies
- 2
- Views
- 233
- Replies
- 34
- Views
- 927
- Replies
- 6
- Views
- 4K

