Alaskan on a 97 F250 4x4 Diesel

Motafinga

Adventurer
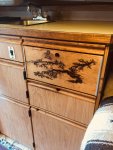
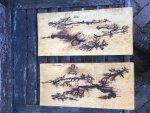
Itching to see what this would look like in the camper I went ahead and took on the drawers first since they were starting to look especially beat. I picked up some cheap pine from the local hardware store and some aluminum moulding to experiment with.

This is the result I got after my first shot of the two drawer faces. I thought it would take a bunch of experimenting to get a result I liked but I like it so much I figured what the hell, lets install it and see how it looks.
IMG_4201.jpg
 

Motafinga

Adventurer
Here's a shot of the first drawer installed above an unmodified drawer for comparison.

fullsizeoutput_32d.jpg


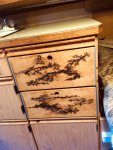
Here's a shot both drawers installed along with the aluminum trim.

fullsizeoutput_328.jpg

I'm sure it's not everyones cup of tea but I dig it and am excited to try it on more cabinets!
 

Chorky

Observer
Hey Chorky, Thanks for the kind words! I had to scour CL for awhile before finding one that fit the bill, but the main thing to look for is the bed height not being higher than the stock beds, otherwise it would require an overly tall platform in the bed for the camper to clear the top of the beds sides, and raise it way high over the cab. Also one thing that stoked me on the bed I found was that it didn't have the usual top lifting compartments built into the rails which would be wasted space with a camper in their way.
If you go second hand expect to cut and section and re-weld the area behind the wheel wells like I did, they all come one length all the back between the wheels. One exception I know of was a Palimino camper I had that was all one width front to back so it would've slid right in. I can't imagine what a custom aluminum UTE would cost but a steel one built to camper specs was over 6k last time I looked into it. I scored mine for 400 bux! It took some work though. I don't have exact dimensions on hand to share but hope that helps, As far as weight I think it's about 200lbs over stock, but I don't have an exact weight. My bed is pretty simple without the top compartments and built in heavy duty bumper most have, so it's lighter than most ute beds.
What kind of camper do you have or are looking for?
Good luck with your build

Oh no hey Mota, just not realized I never responded to your question. Man sorry about that....

I've had a ton of different thoughts over the last, well almost year since the post haha. Needles to say I haven't figured it out yet... theres a ton of options.

Hows your progress coming along? Any new updates to share with us all?
 

Motafinga

Adventurer
I'm still here! The truck and I have had many adventures since my last post although she's under the knife once more, I am redesigning the bed mount system once again. This time she's getting a torsion free subframe to mitigate some issues I was still experiencing with the rigid 4 corner mounts. After much research and head scratching I decided to take a cue from the way some people mount rail on rail subframes on Fuso style trucks. It wouldn't be as simple as just copying whats been done already though since the frame rails of my truck are nowhere near flat from front to back so I had to design around the shape of my frame. I thought about doing a 3 or 4 point pivot type of system but decided against it in favor of something that would distribute the load along more of the frame and not possibly flop around while driving curvy mountain roads and possibly ruin the road manners of the truck, also simplicity played a big part.
I had to start somewhere so I started trying out a few mock-ups using good ol cheap lumber before cutting up expensive steel
lwood mock up.JPG
 

Attachments

  • wood mock 2.JPG
    wood mock 2.JPG
    817.9 KB · Views: 64

Motafinga

Adventurer
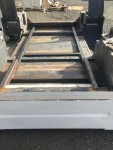
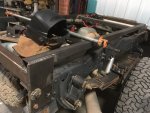
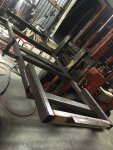
Eventually it started taking shape in steel, I'm using 1/8 thick 2x2 and 3x3 box tubing which isn't really as heavy as it looks. You can see where all the corrugations use to be welded into the under floor of the bed to add rigidity. Obviously those needed to come out to make room for the new SF. Luckily removing all the supports off-set a lot of weight the new system will add!
 

Attachments

  • subframe 1.JPG
    subframe 1.JPG
    711.9 KB · Views: 70
  • subframe in bed.JPG
    subframe in bed.JPG
    286.4 KB · Views: 69
Last edited:

Motafinga

Adventurer
I went with a rigid attachment point at the rear of the trucks frame using big 3/8 plate that would be bolted to the truck with 3 - 1/2 bolts per side, the plate would be welded to the subframe later. The front of the subframe would get the special sauce that allows the truck frame to twist...
 

Attachments

  • subframe plate mock 1.JPG
    subframe plate mock 1.JPG
    339.2 KB · Views: 63

Motafinga

Adventurer
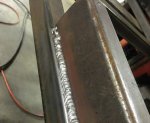
Once I fitted everything and drilled the holes to match the existing holes on the truck I welded the plates on
 

Attachments

  • rear plate welded 1.JPG
    rear plate welded 1.JPG
    328.5 KB · Views: 62
  • rear plate weld 2.JPG
    rear plate weld 2.JPG
    160.8 KB · Views: 61

Motafinga

Adventurer
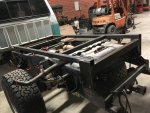
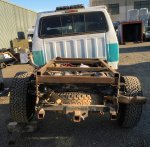
Now with the subframe attached at the rear I could clearly see how much it wants to separate from the truck chassis, yes its a lot! The right side of the SF is tight against the trucks frame and only lifts one side at a time.
 

Attachments

  • first flex test 2.JPG
    first flex test 2.JPG
    421.3 KB · Views: 78
  • first flex test.JPG
    first flex test.JPG
    506.8 KB · Views: 78

Motafinga

Adventurer
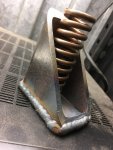
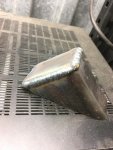
Next order of business was to fab some "spring buckets" part of the special sauce for the forward part of the SF. I made these using 3x2x 1/4 thick box tubing with a 1/4 piece of plate to cap the ends.
The welder is a 3 phase industrial mig my buddy owns and it was ironically in a shop that built utility truck beds before he got it!
 

Attachments

  • spring bucket 1.JPG
    spring bucket 1.JPG
    221.5 KB · Views: 47
  • spring bucket 2.JPG
    spring bucket 2.JPG
    236.1 KB · Views: 46

Motafinga

Adventurer
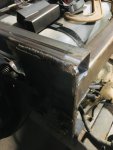
Most of the frame was just tacked together up to this point so after feeling pretty good about the fitment of everything so far, I put some more substantial welds on the frame. I also added some supports for the side boxes and some angle iron for the forward and rear parts of the bed to bolt to.
 

Attachments

  • 1st big welds.JPG
    1st big welds.JPG
    212.9 KB · Views: 50
  • first big weld 1.JPG
    first big weld 1.JPG
    359.8 KB · Views: 49

Forum statistics

Threads
188,020
Messages
2,901,234
Members
229,411
Latest member
IvaBru
Top