Another 2020 Ram 5500 Flatbed Camper Build

Darwin

Explorer
Is the flatbed attached with springs at the front as well or is it hard mounted to the chassis in the front?
 

Brad_UT

Well-known member
Is the flatbed attached with springs at the front as well or is it hard mounted to the chassis in the front?
Good question. As you know, there's lots of opinions out there on how best to do it. Alot of it comes down to just how "offroadable" you want your rig to be. I just want it to handle dirt roads, washboard and the occasional slow rocky section. So for me, spring mounting seemed like a good option.

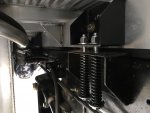
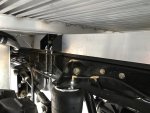
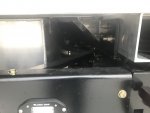
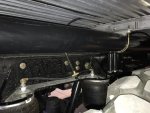
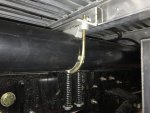
It's rigidly attached at the rear with a 1/2" shear plate welded to the bumper assembly. If I was smarter, I would have made the bumper with this piece already sticking up there. There is a set of springs in the middle and another set up front. The middle set allows about 2" separation. The front allows about 4". At the very front is a guardrail/slider to keep the bed centered but still allow movement up/dn. There is a 3" x 3/4" thick rubber pad along the top of the frame rail to act like a cushion. In between that and the bed subframe C-channel is a thick strip of UHMW-PE to let things move around a bit.

The mounts are 3" x 5" x 1/4" steel angle all fabbed up in the garage. The spring bolts are 5/8". I bought the springs from Lee Spring which seemed to have a better selection and pricing than McMaster-Carr.

Spring Info:
Mid Frame Bracket: (2) 6"L springs per side, 1.25" OD, 390in-lb
Front Frame Bracket: (2) 6"L springs per side, 1.25" OD, 390in-lb plus (2) 4"L springs on top, 1.25"OD, 315in-lb. (hard to get good pics, sorry)
IMG_4379.jpg

IMG_4337.JPEGIMG_4351.JPEGIMG_4353.JPEGIMG_4373.jpg
 

Brad_UT

Well-known member
ALUM-LINE BED
I've got to say a few words about this Alum-Line bed. Dealing with them was a nightmare right from the very first phone call. His first words were, "Oh gawd, you're another one of those damn camper people..." Apparently our crowd likes to make lots of changes and is a general pain in the ****** to work with. I assured him that was the not the case and I gave him the drawings posted here earlier. I told him, build it like this and I won't change a thing. The drawings were good enough, he said, to send right over to the shop. I shot myself in the foot here because now we'd skipped the usual approval drawings back and forth step. This is valuable documentation to have in case the bed doesn't come out right. I got him to put a bunch of details in writing instead. Best I could do to cover my butt.

He said it'd be a month or so before they'd start building it. I said let me know cause I want to talk to the actual builder to make sure he knows which dimensions can be massaged and which ones cannot. I wait and wait and then finally call to see what's up. The bed's done and it'll ship in a few days! ******! I beg for a few pictures which they do send. It looks okay, but I have to trust that the measurements are right.

It ships with no notification to me whatsoever. When it does arrive, some of the dimensions are several inches off. What to do? It's not a show stopper so I suck it up and move on. I was able to locate an upfitter that could unload it and help me get it mounted since I don't have the lifting equipment. Tanner, Trevor and Daniel at Tall Boy Truck Equipment in West Jordan, UT were wonderful to work with. I really got lucky here. They shared my same enthusiasm (affliction?) for big trucks and was happy to let me work beside them to get it mounted. This was huge relief. Everything fit perfectly and we had it mounted in about 5 hours. Check these guys out. They do good work.

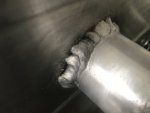
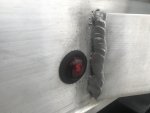
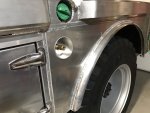
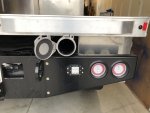
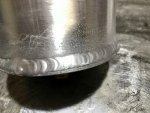
Here are some of the awful welds on the Alum-Line bed. And a pic of the diesel fill port they drilled in the wrong place and then covered up with a patch. (they screwed up both of them!)

IMG_4375.jpg

IMG_4374.jpgIMG_4376.jpg

I'm working on the electrical and air system this weekend. This is the fun part! More pics in the next day or two.

IMG_4364.JPEG
 

DirtWhiskey

Western Dirt Rat
Man that's a bummer on Alum-line. And the fact that they are not one of the cheaper ones is not promising. You're not the first I've read about. I've seen that type of MIG spatter, lack of penetration and rough beadwork before. One of the reasons I was avoiding Aluma et al was because of these types of things. Is the bed square and flat at least? Makes me really wonder if Protech is the correct path. Huck bolts, minimal welding etc.

BTW you nailed it with the overall bed design. Almost exactly what I'll be doing except I'll be doing a full cross box and putting the spare inside of it, or perhaps doing half fully enclosed and half "caged" for the spare and dirty stuff like firewood. I live in downtown adjacent SLC. People steal wheels sometimes. I was also thinking of using a captured spring setup for the front springs to limit side to side movement instead of limiting brackets. Anyway, epic work here.
 

redruby

Member
I have had an Alum-line flatbed on my 3500 for 16 years and since day one have not be happy with their quality of welding. The headache rack welds were consistently braking, I finally guessed them with 1/2” aluminum plate and that finally solved my problem. I regularly have to reweld some of their welds.
 

mk216v

Der Chef der Fahrzeuge
Following along...and like others, sorry to hear about your Alum-Line experience. Glad I found this info out awhile back, and have stuck with Highway Products for my build.
 

Brad_UT

Well-known member
Man that's a bummer on Alum-line. And the fact that they are not one of the cheaper ones is not promising. You're not the first I've read about. I've seen that type of MIG spatter, lack of penetration and rough beadwork before. One of the reasons I was avoiding Aluma et al was because of these types of things. Is the bed square and flat at least? Makes me really wonder if Protech is the correct path. Huck bolts, minimal welding etc.

BTW you nailed it with the overall bed design. Almost exactly what I'll be doing except I'll be doing a full cross box and putting the spare inside of it, or perhaps doing half fully enclosed and half "caged" for the spare and dirty stuff like firewood. I live in downtown adjacent SLC. People steal wheels sometimes. I was also thinking of using a captured spring setup for the front springs to limit side to side movement instead of limiting brackets. Anyway, epic work here.

Thanks man! Dimensionally it seems to be okay. I haven't noticed that the bed is warped/tilted or out of square. I will say the boxes are nicely welded. I'm guessing the senior guys work their way over to that department where the welding is easier and all done at waist height, on a table, etc. The junior guys probably do the bed welding where you have to contort, weld in odd positions, etc. Just speculating here.

Of course the problem with aluminum beds on a flexing offroad chassis is weld cracking. Certainly bolted joints, huck bolts, etc. are the better way to go. With all the things going on in this project, at some point I just had to say the Alum-Line bed is "good enough."

We got the same idea, the space between the spare tire and the front of the camper will be used for firewood storage. I love roaming around southern Utah and sometimes it's hard to find firewood in the desert. :)
 

frodotbaggins88

Active member
Thanks man! Dimensionally it seems to be okay. I haven't noticed that the bed is warped/tilted or out of square. I will say the boxes are nicely welded. I'm guessing the senior guys work their way over to that department where the welding is easier and all done at waist height, on a table, etc. The junior guys probably do the bed welding where you have to contort, weld in odd positions, etc. Just speculating here.

Of course the problem with aluminum beds on a flexing offroad chassis is weld cracking. Certainly bolted joints, huck bolts, etc. are the better way to go. With all the things going on in this project, at some point I just had to say the Alum-Line bed is "good enough."

We got the same idea, the space between the spare tire and the front of the camper will be used for firewood storage. I love roaming around southern Utah and sometimes it's hard to find firewood in the desert. :)

My truck is almost ready for some real world flex testing man, I don't have a forklift so I'm gonna do it the old fashioned way and go hit some rocks. You're welcome to join!
 

Brad_UT

Well-known member
My truck is almost ready for some real world flex testing man, I don't have a forklift so I'm gonna do it the old fashioned way and go hit some rocks. You're welcome to join!
We definitely need to hook up at some point and hit some trails. I'm almost ready. I've got to put some bumpstops on the rear this weekend to keep the tires from rubbing the bed fenders if the airbags go out, and need to do a little more suspension tweaking in front so I can turn the wheels lock to lock without rubbing. Also need to get some bed rails built so I can carry the camping gear. Actual camper shell probably won't be ready until late summer.
 

Brad_UT

Well-known member
BED UPDATE:
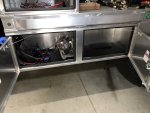
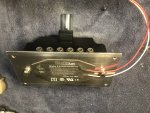
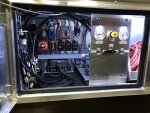
I've gotten quite a bit done to the bed. The pic below is of the front underbed box behind the driver. It has the DC distribution for the two air compressors, compartment lights, camper interface and a few other things. The blue box is a Victron Smart Battery Protect, which is essentially an automatic low-voltage disconnect switch that should prevent the truck starting battery from ever getting run down by accident.

The air system is done too and seems to work okay, although I need to use it more to really tell. It's based on an Airlift 3P controller and uses dual Viair compressors for redundancy and speed. The Airlift 3P completely automates the control of the suspension and although it's "fancy and electronic" I still wanted to have it because of all it does. Inside are (8) solenoid valves and (5) pressure sensors. Plumbing those individually would be messy to say the least. This does it all in one box, has a nice in-cab controller, and even has a Bluetooth app which might be handy for leveling the truck at a campsite.

As cool as this sounds, all the electronics worry me which is why everything has a manual backup. If the controller fails you can flick a switch and have the compressors turned on and off by a conventional pressure switch. The tubing is also arranged so it can be manually reconfigured on the fly with a few tees and splitters. The pressure regulator (normally used for airing the tires up and down) can be easily used to feed the airbags in an emergency.

The Airlift controller is mounted on vibration isolators like the compressors. This was done because it's an important device and needs to be protected from those washboard roads, but also to thermally isolate it from the aluminum box. It has a little RV heating pad on the back to keep any moisture in the air from freezing inside it and jamming up the valves. This heat pad is on the same circuit with the aux water tank heat pad and lithium battery heaters. So, if it gets super cold, I can flick one "freeze protection" switch and all the temp sensitive stuff is protected.

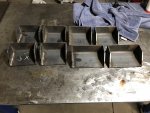
The black grating in the bottom of the compartment is made for pool decking. They're 12x12 plastic/rubber tiles that interlock together. This keeps everything off the bottom of the compartment which will surely get wet due to condensation at some point.

IMG_4421.JPEG

IMG_4388.JPEGIMG_4423.JPEGIMG_4380.JPEG
 

peculierboy

Member
I just came in from the garage wiring up my Sterling B2B and lithium batteries among other things into my 4500 and saw this post. I will never show my wiring job to anybody after seeing this. Well done!
 

Brad_UT

Well-known member
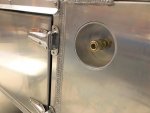
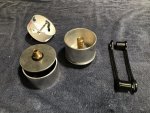
It's been a while since I posted an update. Things are still happening, but everything is moving slowly. Seems I spend most of my time waiting on parts. I got a few punch list items done to the bed like building some recessed air chuck mounts and adding a "conduit carrier" for long skinny things, like awning poles. There'll be an identical recessed mount behind the wheel for the adjuster knob on the remote reservoir shocks.
IMG_4428.JPEGIMG_4426.JPEG

IMG_4446.JPEGIMG_4448.JPEG


IMG_4419.JPEGIMG_4429.jpgIMG_4447.JPEG
 
Last edited:

Forum statistics

Threads
188,211
Messages
2,903,850
Members
229,665
Latest member
SANelson
Top