(Another) Hardbody Overland Build

SevenFaux

New member
Howdy! I've been lurking this site for a while gathering tips and tech information but I figured it was high time I start a build thread with the hopes I could get some more advice and pointers! I suppose I should start with my rig...

1080pictures2Smaller.png

This is 'Hotaru', my 95' Nissan Hardbody 4x4: KA24E, HG43 Axel, 235/75/R15's, 195K when I got her and never ever maintained I soon discovered. In April of 2018 at about 199K and just after putting on fresh tires she developed rod knock. Turns out when the previous owners had replaced the timing chain they had neglected to pull the broken bits of the previous timing chain guide out of the pan. Those bits met a whirring crankshaft, shattered, plugged the oil pickup tube and the rest is history.

Engine Build.jpg

Late September of 2018 she was back on her feet again with a freshly rebuilt engine and a craigslist topper off a Chevy S10. I had just enough time to get a quick off-road run in with a local Jeep club before winter happened. That's roughly where we are today.

offroad.jpg

With an new Engine and fresh fluid in trans and diffs I am now looking to focus on Suspension and 4x4 capability. Stage One plan so far:

* Grassroots 4x4 HooHaa upgraded Centerlink
* Moog Problem Solver Idle Arm
* Moog Problem Solver Inner and Outer Tie-Rods
* Mevotech Supreme Upper and Lower Ball-Joints
- I would use Moog but apparently they have issues and Mevotech also has lifetime warranty
* Tension Rod bushing repair using bearing race and washers welded onto factory bracket (mine are shot and otherwise non-salvageable)
* Energy Suspension Polyurethane Control Arm Bushing Set
* Poor Man's T-Bar Lift in front w/ Automotive Customizers adjustable lift shackles in rear
* Onboard Air
* Second Battery W/ Isolator
* Decent firm Twin Mattress (my back can't handle squishy Air), 2x4's, and Plywood to outfit the rear

Stage Two plan includes:

* Rock Sliders
* ARB Rear Locker
* 31x10.5R15's on Pathy Legos (Already have the rims)
* ARB Winch Bumper and Winch

Stage Three plan (More than 4 years out):

* SAS with 86' Waggy D44 (friend is going to D60's and cutting me killer a deal)
* Front Locker
* LM7 5.3L V8, NV4500 Trans, Atlas T-Case
* 33x10.5r15's

The standing goal for this year is to get her into fighting trim to tackle at least moderately changeling Colorado 4x4 trails and to outfit the bed with a good stealth camping setup. I already have almost everything purchased for 'Stage One' with the exception of onboard air and stuff to outfit the truck bed. If everything goes well this year (financially that is) I hope to have at least some progress made into 'Stage Two' as well.

Once I complete 'Stage Two' I plan to run the rig as is for a few years before deciding if I want to go further. The little KA24E is a decent engine but I don't want to ask it to handle 33's. I come from 240sx land originally and I have learned the hard way that the little Nissan 4-bangers don't seem to like it when you ask them to do more than what they were designed to do stock. When the weather opens up I plan on spending every free chance I can up in the mountains. I plan to eventually go on some longer proper overland trips in the coming years but I want to work out all the kinks in my setup before starting that.

That's about the sum of it. Thoughts and advice would be well appreciated!
 

SevenFaux

New member
Update time!

So I'm in the middle of overhauling the entire front end suspension. First to address was the Tension / Compression / Strut Rod Bushing and Frame Bracket. Following the advice of another thread I picked up some parts and enlisted the help of a friend with a welder. I picked up the Bearing Races at RockAuto and everything else at ACE Hardware. Parts list includes:

Four) LM67010 Bearing Races
Four) 1" Fender Washers (OD wider than bearing races)
One) Brass Bushing: 28mm OD, 20mm ID, 20mm Length
One) 3/4-10 x 2-1/2" Bolt
One) 3/4-10 Nut
Two) 3/4" Fender Washers (OD 2")
One) Moog K200163 Strut Rod Bushing Kit

You will also want a 22MM Deep Well Socket for the Tension Rod to Control Arm Bolts and a 24mm Box Wrench for the rear nut on Tension Rod as you can not get a socket in there (24mm Ratcheting Box Wrench if Possible, makes life easier)

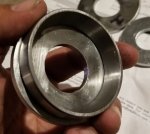
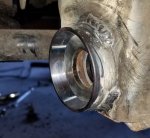
The Bearing races and 1" Washers are used to make replacement bushing cups that will then be welded into place on the factory Tension rod frame bracket.
20190205_214315.jpg

The rest of the supplies are used to hold the bushing cups aligned while welding and of course new bushings for when we put it back together.
20190213_003746.jpg

Now the 1" Washers had an Inner Diameter of roughly 27mm which matches the factory bushing cup from Nissan, however I wanted to expand it to 28mm to give the rod slightly more room and so I could use that brass bushing to help align both cups exactly during welding. To do so I used my Dremel with a Tungsten Carbide Bit (Dremel 9903).
20190205_181646.jpg

I worked in pairs by gluing two washers together then both to a piece of wood. From there I made slow continuous counter clockwise passes around the inside of the washers. I took just a tiny bit of material each pass to keep the inner diameter as round as possible until I could just barely fit the bushing inside them. Then I knocked them loose with a small hammer and used a wire brush attachment to clean them up.
20190205_181606.jpg
20190205_181704.jpg20190205_181946.jpg20190205_182304.jpg

I then removed both passenger and drivers side Tension rods. The rods themselves were thoroughly trashed from years of grinding against the frame bracket after the factory bushings had failed. We decided to temporally reuse the damaged Tension rods until new ones could be ordered from Nissan (PN: 54470-31G00). The factory collar and bushing washer were rusted on to the tension rod so I removed them using a cut off tool on an angle grinder and replaced them with the new ones provided in the Moog kit. You MUST do this; with the factory hardware rusted on there you will not be able to get the new bushings and Tension rod into place when reinstalling.
20190210_152420.jpg20190213_013325.jpg
20190213_013418.jpg

Continued in next post.
 
Last edited:

SevenFaux

New member
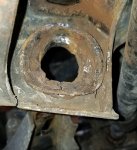
I then removed the remnants of the factory cups and prepped the surfaces for welding. The front was cleaned with a flap disk but to prep the back side we had to use sanding barrels and small wire cup brushes. Here is what they looked like before cleaning.
20190210_150222.jpg
20190210_150212.jpg

My friend then welded the Bearing races to the washers. For the rear cup you may need to flatten one edge of the cup depending on the outside diameter of the washers you used. This is due to fouling on the inside of the metal bracket. This can be done with a bench or angle grinder.
20190210_150014.jpg

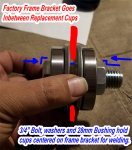
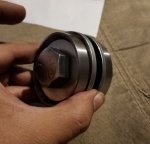
We then bolted the cups to either side of the factory bracket using the Brass Bushing to center the new cups in the frame hole and to each-other. Bolt together as shown with metal bracket in-between. The Brass Bushing placed inside the replacement cups is essential to maintain cup alignment.
Untitled-1.jpg
20190205_215742.jpg

Then we welded the cups in place and then removed bolt, washers and brass bushings. Welding the Rear cup in is a pain, because of clearance issues. Ours ended up a tad sloppy.
20190210_160917.jpg
20190210_160947.jpg

Then I reinstalled the Tension Rod with new bushings. Torque spec for all Tension rod bolts is 87-108 Ft-Lb per FSM (we couldn't figure a way to fit a Torque wrench on the rear bolt so 'tight enough' worked)
20190210_173454.jpg

Of note, the replacement bushing collar in out kit was a direct match for the factory collar. As mentioned in this thread, some of the bushing kits seem to be coming with collars that are too long by about 10mm, however the Moog K200163 Kit was a perfect match. Also, we did not have suitable paint on hand so we skipped painting since I needed to disassemble it again later to replace the Tension rods with new ones. I used Rust-Oleum Rust Reformer, Black Spray Paint to paint the new cups.

That's all for now. More to come later!
 

handsoff

New member
Excited to see your progress, looks like a really clean truck!

I'd like to suggest a step between now and the SAS: 4.6-geared r180 front from a '96-'97 Hardbody or swap to a 4.6 r200 from a V6-equipped vehicle, and a 4.6/lsd 3rd member in the rear, with 33x10.5s. They should clear fine with the Legos and torsion/shackle lift. I ran the AC suspension lift on my HB with your stock wheels and 33x10.5 and had plenty of room. If I had it to do over I would've run them on Legos with just a minor torsion crank as you say you'd like to do
 

SevenFaux

New member
Excited to see your progress, looks like a really clean truck!

I'd like to suggest a step between now and the SAS: 4.6-geared r180 front from a '96-'97 Hardbody or swap to a 4.6 r200 from a V6-equipped vehicle, and a 4.6/lsd 3rd member in the rear, with 33x10.5s. They should clear fine with the Legos and torsion/shackle lift. I ran the AC suspension lift on my HB with your stock wheels and 33x10.5 and had plenty of room. If I had it to do over I would've run them on Legos with just a minor torsion crank as you say you'd like to do

Thank you! She sure wasn't clean when I got her but she's getting there. Even if it's a bad idea to dump so much money into one of these I just refuse to let another Hardbody go to a junkyard, haha.

So if my research is correct I believe you are referring to the HG46 Axle Code. I've already run across a lot of auto WD21 4x4 Pathys in the yards out here so I believe it wouldn't be much of a problem to steal the front diff and rear axle out of one and swap it into mine since I already have a H233B/R200 combo. Truth be told I'm still not totally sold on going to 33's on my factory IFS. I have a friend that went to 33's with a UCA/T-bar lift on his Xterra (R200-H233B, unknown gearing). He said it did alright but I get the impression that he also broke stuff fairly often and I am super leery about compromising reliability. Did you happen to have any issues breaking stuff on 33x10.5's?

Anyway, I finally got around to finishing up the front end rebuild and boy did she need it. Lower ball joints on both sides were trash and the struts were best described as Theoretical. Tie rods and upper ball joints were alright-ish but I replaced them as well. She's had 24 years of deferred maintenance by previous owners so they were likely the original ones from factory.

Rebuild Smaller 2.jpg
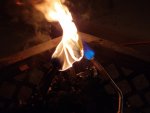
Had to melt the factory bushings out of the UCA's and LCA's with my MAP gas torch. Wife didn't much appreciate the smell. I also ended up needing to extract the inner metal collar out of the LCA bushings because the ones supplied with the Energy Suspension poly bushings kit had too small of an inner diameter and I couldn't get the stock LCA bolt through them.

Rebuild Smaller 3.jpeg

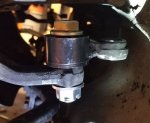
Also got the Grassroots 4x4 HooHaa Centerlink installed. I put the cotter pin in after I took this image for the record. I ended up drilling out the pitman and idler arms the "lazy" way since my dinky little drill press couldn't fit a 5/8" drill bit but my Ryobi hand drill could.

Rebuild-Smaller-Edit.jpg

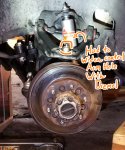
Here's everything reassembled minus the brake caliper. Everything was a fairly straightforward install minus the Mevotech Upper ball joints which gave me hell. The cup on the ball joints that extends through the Upper Control Arm ended up being ever so slightly larger in diameter than the hole in the Control arm which I discovered after getting everything else bolted together. As a result I ended up needing to remove the UCA's again and widen out the hole using a Dremel and my trusty 9903 bit. After that hurdle was passed everything was bolted to factory torque spec and I got her back on the ground again.

I used KYB Gas-A-Just Struts on the recommendation of a friend and so far I am quite happy with them. T-Bars were re-indexed and cranked to give her an inch or so more ground clearance in the front and to level out the nose heavy rake these trucks come with from factory. I was originally thinking I would put Lift Shackles in the rear but I really prefer the look of the truck as she sits without them. I'll probably take her off-road first and then decide if I need them. I'm expecting I will remove the rear sway bar regardless but that can wait until I have a moment to address the rear struts.

With the fully refreshed suspension and a fresh alignment she rides like a whole new truck, although with the HooHaa Centerlink the steering absolutely feels more stiff. I'm lead to believe that this will loosen up and return to normal over time although I'm not so sure. Either way I'm mostly used to it after having driven her around for a couple weeks.

This will likely be it for the next couple months since my garage is now occupied with an engine rebuild on my friend's 86' AE86 Toyota Corolla SR5. Can't wait till the hills start to melt so she can get out there and stretch her legs!
 

RC000E

Member
Nice truck...looks like you're well underway with your stuff. We just picked up a 1992 Pathfinder, so I'll be watching some of your front end mods for sure...trying to figure out the best "path" at this stage in terms of mods and upgrades for off road reliability.
 

SevenFaux

New member
Nice truck...looks like you're well underway with your stuff. We just picked up a 1992 Pathfinder, so I'll be watching some of your front end mods for sure...trying to figure out the best "path" at this stage in terms of mods and upgrades for off road reliability.

Thank you! More than anything, if you are going to be off-roading on the factory Independent Front Suspension I would get an Idle Arm Brace or the Moog Problem Solver Idle Arm first. I can also absolutely vouch for the Grassroots 4x4 Centerlink as well; their turnaround time is very fast and the quality was fantastic. If you have the V6 (I've never actually seen a 4-banger Pathy) you're also in luck since you can get a 3.7 to 1 Transfer Case gear-set from Automotive Customizers or even go to an Atlas T-Case with an adapter. Neither option is available for my D21 as the 4 Banger T-Case has a different input spline and only Calmini makes gears for it. It's a possibility but I'm uncomfortable buying from Calmini given a friend's bad experience.
 

RC000E

Member
We're not looking to push too hard because out here will be a lot of lone wheeling/overlanding, so don't want to push the situation. A lot of this is just dirt and loose rock and long roads through desert to old abandoned towns and things....4wd is more of a security issue to be sure we don't get into something we can't get out of. I have seen the idler arm issue you speak of though, which seems to be an issue. Hopefully though centerlinks and transfer case gear sets aren't needed. What do you think?
 

bushnut

Adventurer
I installed an idler arm brace and a steering damper from Automotive Customisers (AC) on my wd22. I believe it’s the same as the wd21. It was a very noticeable difference on washboard roads. Way less unwanted movements in the wheel. Not a fix for worn steering components though.
 

SevenFaux

New member
We're not looking to push too hard because out here will be a lot of lone wheeling/overlanding, so don't want to push the situation. What do you think?

From my understanding the steering is the weakest aspect of both the Hardbody and 1st Gen Pathy by a long shot. Many say it's under engineered from factory and now that I've taken it completely apart and rebuilt it I would probably agree. I only do more technical weeling with a group for safety but even so I'm planning to do a lot of solo runs this year and I felt it important to overhaul and upgrade for added safety. I can break a lot of things and still make it back to pavement but if the steering goes that's pretty much game over. I noticed on your build thread that you're already up on 31's and bigger tires do amplify this problem. Perhaps instead you could downsize to the other factory tire size (235/75/R15) which would reduce stress on the steering, improve on road handling and improve your MPG some. If your tie rods and centerlink are in good condition you could probably get away with smaller tires and just an idler arm brace. I plan to go to 31's eventually and I personally didn't feel comfortable running them without a full overhaul but I tend to overbuild for my goals, haha.

T-Case gears sound unnecessary for your build. I want them (and a locker too) so I can hit more technical trails and prove to all my Jeep friends that I'm a strong, independent Nissan fanboy that don't need no Wrangler to hang.
 

Arktikos

Explorer
I installed an idler arm brace and a steering damper from Automotive Customisers (AC) on my wd22. I believe it’s the same as the wd21. It was a very noticeable difference on washboard roads. Way less unwanted movements in the wheel. Not a fix for worn steering components though.

Got a photo of that? I'm also curious about the Moog problem solver components that SevenFaux referred to. My '95 has just a bit over 100K miles on it now. Suspension and steering has held up fairly well, but I just run stock size tires.
 

SevenFaux

New member
Wow, hard to believe it has been nearly 2 years since I posted anything. Time for an update! Since my last post my little 95' D21 Hardbody has had a fair few adventures and a couple "stnanks" along the way.

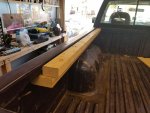
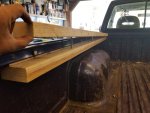
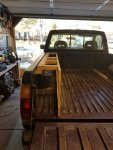
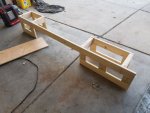
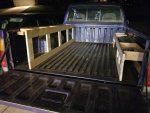
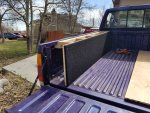
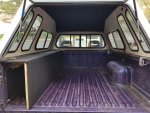
The first project was getting my sleeping space setup in the bed. I bought a decent used twin mattress off of Craigslist first to get my sizing down and then began building wood frames out of dimensional lumber. For the Drivers side I built a anchor point in bed rail and then designed the box frame to be removable. The passenger side was much simpler and built to be about level with the mattress.

1.jpg
2.jpg
3.jpg

The bolts for the removable box are run through metal inserts in the wood anchored to the bed and then secured with wing nuts. No issues as of yet.

4.jpg
14.jpg
5.jpg

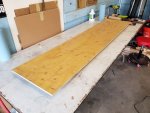
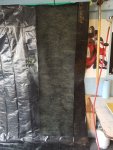
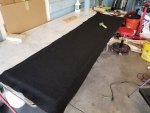
With the frames done I then measured and cut plywood boards to skin them. For both boxes I designed the tops to be removable in places to facilitate storage. Once I had the layout set I carpeted them using a harbor freight spray gun and Weldwood Landau Top Contact Adhesive. Simplified, you spray glue on to both surfaces, let it dry and then use a roller to adhere them together. For more detailed instructions I would check out CarAudioFabrication on YouTube since I basically just followed the tutorials laid out on the channel.

6.jpg
13.jpg
7.jpg
8.jpg

Continued in next Post.
 
Last edited:

SevenFaux

New member
9.jpg15.jpg
10.jpg
11.jpg
12.jpg

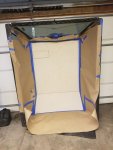
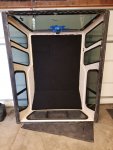
With the boxes complete I then proceeded to carpet the top of my truck cap using roughly the same method I used for the boxes. This was done mostly to discourage condensation from forming above me while I was sleeping. Contact adhesive only sticks to itself so I only needed a box cutter to trim the excess carpet. Some people have used other spray adhesives for this with mixed results but the Weldwood Contact Adhesive has held up great for me. My truck lives outside in the Colorado heat and cold and I have not had any issues with the headliner in the topper falling or coming unglued.

16.jpg
17.jpg
18.jpg
19.jpg
20.jpg

Continued in next Post.
 

Forum statistics

Threads
188,362
Messages
2,906,035
Members
230,117
Latest member
greatwhite24

Members online

Top