AT Shop Truck F250 Build

Martyn

Supporting Sponsor, Overland Certified OC0018
This is my personal truck, but for most of it's life it's been the shop truck at AT. The truck is a 2001 Ford F250 with a 7.3L engine.

Some of you may have seen the truck at Overland Expos over the years, it's had a Wildernest on it, a Flippac, and a Four Wheel Camper. It's also been the demo truck for the tire repair clinics I used to run, and last year at Expo West it was the AT chuck wagon. So it's had many incarnations for AT and it's served our family well as the tow vehicle for eventing horses, our get away vehicle for weekends, and for hauling debris from our home renovation to the dump.

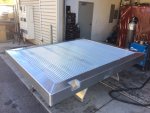
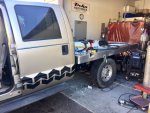
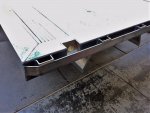
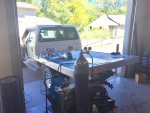
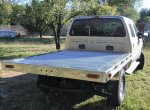
After much procrastination, which is very typical for me, we have decided to remove the stock bed and fit an AT designed and built aluminum flatbed to the rig. The initial plan is to elongate the bed length from 7ft to 8 ft, build a stout but elegant rear bumper, add LED lights all the way around, and aluminum fenders under the body.

The second phase will consist of building under chassis composite storage boxes. After that who knows what wide and crazy ideas we will come up with.

I'll be posting daily on our Facebook Page and I'll be updating here as well. Hoping you enjoy the build and will throw suggestions and comments my way.

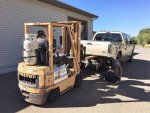
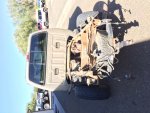
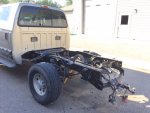
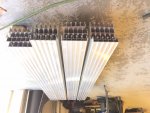
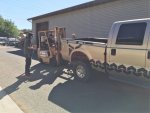
Here are some pictures of the initial phases of the tear down process.
IMG_0404.JPG

IMG_0405.JPG

IMG_0407.JPG

IMG_0408.JPG

IMG_0420.JPG
 

UHAULER

Explorer
Can't wait to see the progress.
I go back and forth on wanting a flatbed. Very functional. Done right they look sweet, done wrong, they look bad. I think the main thing is utilizing the under bed storage and not have wasted space.
 

Martyn

Supporting Sponsor, Overland Certified OC0018
Made some significant progress this week. We started out by leveling the chassis with blocks and isolators. Then the aluminum deck as constructed and tacked together, followed by the perimeter angle.

IMG_0441.JPG

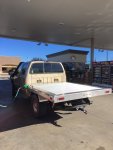
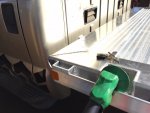
We test fitted the bed to get the fuel fill location and height. We are running a very low deck, 4.5" above the height of the leveled chassis, that required us to put the filler neck as high in the side of the bed as we could to get the gravity flow to work.

FullSizeRender.jpg

With that all worked out the filler recess was built, the bed skip welded together and attached to the C channel.

FullSizeRender (007).jpg

The last part was forming the rub rail along both sides.

FullSizeRender (003).jpg
 

Martyn

Supporting Sponsor, Overland Certified OC0018
The first stage of the build is almost done. The bed is on the truck and the lights are wired up. Just some tidying up to do.

Headache rack and rear bumper are next.

DSCF0885.jpg

DSCF0886.jpg

DSCF0887.jpg

DSCF0895.jpg
 

IdaSHO

IDACAMPER
Fun project :)


That's a heck of an overhang on the rear. Are you going to be extending the chassis to maintain the ability to tow?

And any info on the snorkel? Ive never seen one on a 7.3 Does it use a custom air-box?
 

Martyn

Supporting Sponsor, Overland Certified OC0018
Fun project :)


That's a heck of an overhang on the rear. Are you going to be extending the chassis to maintain the ability to tow?

And any info on the snorkel? Ive never seen one on a 7.3 Does it use a custom air-box?

The aluminum flatbed is 12" longer than the stock bed and right now the tow hitch is at the stock length so I'm thinking the towing performance will remain the same. We may extend the tow hitch by 6" or so in the future to help with backing up.

The snorkel is a prototype that came from ARB years ago and they never went into production. Fits right into the stock airbox. We do know of a supplier in OZ, but we'd need reasonable sized pre order to make the importation feasible.
 

Jeep

Supporting Sponsor: Overland Explorer Expedition V
Looks good, building low has a few challenges but pays off in ease of use and COG. Ever notice how many flat beds are level with the door handles?
 

Martyn

Supporting Sponsor, Overland Certified OC0018
Looks good, building low has a few challenges but pays off in ease of use and COG. Ever notice how many flat beds are level with the door handles?

Thanks, we are using a different construction method from the standard flatbed to achieve the low profile, the lowest point on the bed of this truck sits 2" above the tire when the suspension is sitting on the bump stop. As you say it has it's challenges, the biggest seems to be the fuel fill location.

If the bed is riding high when you eventually fit a camper to it the front profile provides a lot of wind resistance. We are shooting for a low profile and minimum clearance over the cab.
 

IdaSHO

IDACAMPER
Single side tank for the super duty, right?

You might get away with that filler location, although filling might still be a bit slow.

An enlarged vent tube or vent mod would help.


From experience, the twin tank setup on the older 7.3, fuel fillers in the bed rails are troublesome, at best.

Pretty sure the tanks sit a bit higher than the super duty though.

If I were to build my bed again, I would re-route the fillers and integrate them into the headache rack.
 

Martyn

Supporting Sponsor, Overland Certified OC0018
Single side tank for the super duty, right?

You might get away with that filler location, although filling might still be a bit slow.

An enlarged vent tube or vent mod would help.


From experience, the twin tank setup on the older 7.3, fuel fillers in the bed rails are troublesome, at best.

Pretty sure the tanks sit a bit higher than the super duty though.

If I were to build my bed again, I would re-route the fillers and integrate them into the headache rack.

Great idea about putting the fuel fill in the headache rack.

Filled the truck up this morning with 18 gallons of diesel. No issues at all. Don't know if you can see it in the picture but we drew a small line on the back of the cab showing the height of the stock filler, the filler on the flatbed is at the same height.

fueling.jpg

fueling2.JPG
 

Martyn

Supporting Sponsor, Overland Certified OC0018
How does a stiff aluminum floor work with those super flexy old super duty frames? Is cracking a concern?

It's something we took into consideration during the design process, and when we looked at the characteristics of the material, the length of the welds, and how the components would interact with each other in the Overland environment we decided the method of construction was more than capable.

The Ford chassis isn't boxed so it will flex more than say a Chevy full size truck, but the amount of flex is nothing when compared to a Tacoma. We have seen welded trays on Overland Hillux for years in Australia without notable failures, and we have also fitted welded aluminum trays to Tacomas here in the US for the past three years without issue. So there are real world examples to back up the theoretical modeling.

Apart from the outside corners there are no long continuous welds anywhere on the tray so I think the tray as a whole is going to fair very well.
 

IdaSHO

IDACAMPER
My concern would be very much more related to the camper flexing with the bed (as the bed flexes with the chassis).

You really dont want to test the flex limits of a camper, regardless of construction or MFG


That said, glad the filler is working out. The bed does look good. :ylsmoke:
 

Martyn

Supporting Sponsor, Overland Certified OC0018
My concern would be very much more related to the camper flexing with the bed (as the bed flexes with the chassis).

You really dont want to test the flex limits of a camper, regardless of construction or MFG

That said, glad the filler is working out. The bed does look good. :ylsmoke:

While I never plan to go extreme with a full size truck I've often ended up there by mistake!! I don't think we are going to come close to the point of damaging a camper from flex.
 

Forum statistics

Threads
189,893
Messages
2,921,925
Members
233,083
Latest member
Off Road Vagabond
Top