Atl-Atl's 2018 Tacoma TRD Off-Road Access Cab "documentation" thread!

Atl-atl

Adventurer
Hello again. My name is Mike. You may know me from such threads as Atl-atl's Dodge Ram 2500 Regular Cab Long Bed "documentation" thread. and Can someone please take a peak at my basic wiring diagram and answer a few questions? Or you might not know me at all! Anyway Im not new to Expedition Portal, offroading, camping, bikes or most of the other adventure aspects of this forum. I am, however, new to Toyotas and also to independent suspension(on a truck). Ive had lots of Jeeps and one Dodge and they all had solid axles. I love and miss them but...good riddance, Im incredibly excited about this Tacoma!

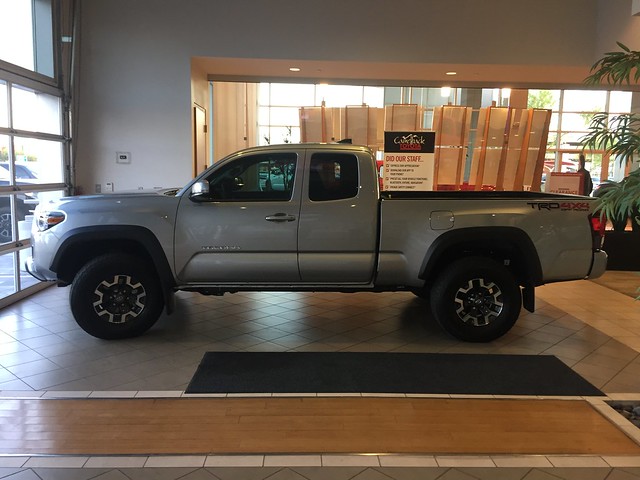
I recently moved from Denver to Phoenix and bought my Tacoma on 8/11/2018 from Camelback Toyota in Phoenix. Its a Silver Sky Access Cab TRD Off-Road with the Technology Package. My experience was excellent, sales guy was cool, their numbers matched online and in person and most importantly the F&I guy was transparent, honest and did not try to hard sell me. All in all Im VERY pleased with my dealership experience. I like to call my threads "documentation" threads because they are more than a build thread, its a mix of build, adventure, shenanigans etc. Ive already gotten to work ordering parts and installing some on the Tacoma. Come along for the ride!

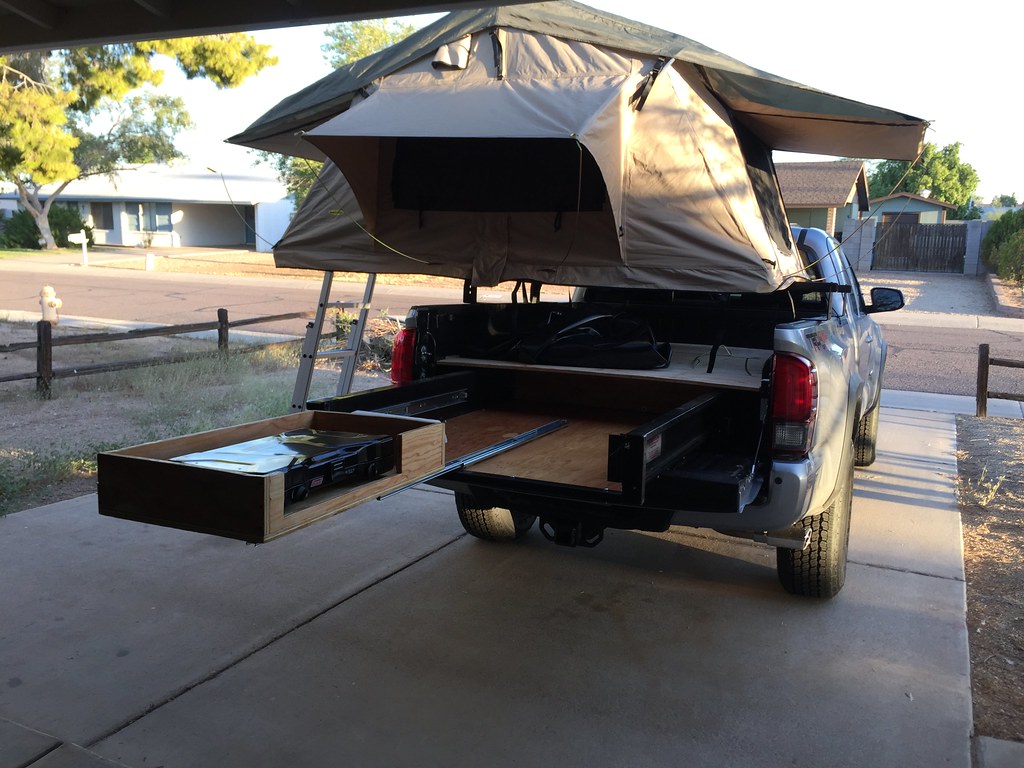
When I picked'er up.
43128180415_b5e36432ec_z.jpg


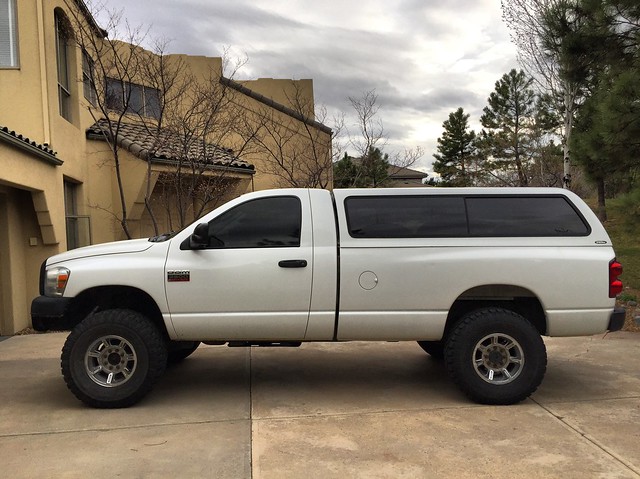
Aforementioned Dodge, 37s with just a leveler, gotta love big trucks.
32992147763_48908a6d48_z.jpg


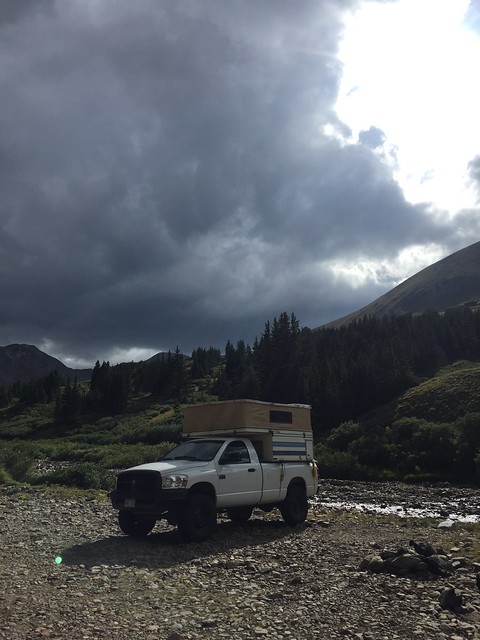
Vintage Four Wheel Campers Hawk that I narrowed and remodeled.
20016506253_ea917d6db1_z.jpg


Wheelin a fullsize in Moab? Check

Donuts at Bonneville Salt Flats? Check! Sorry for the sound on this one hah!

Drunken, shirtless and shooting at beer cans hanging from kites? Check!!!!
 

Atl-atl

Adventurer
I quickly got to work sourcing parts and starting my camp setup. The day after I got the truck, I picked up this bedslide for $200 and went to town refinishing it. Joey Bed doesnt appear to be in business any longer so I have no idea how much one of these is worth or would have cost new. I figured $200 + another couple hundred to build it out is much cheaper than buying something new for $1500+. Most of my plans for this truck revolve around camping/overlanding and the offroading that might be encountered along the way. I usually go to Moab 5-10 times a year and camp locally constantly. Ive had campers before but Ive never done a roof tent and sliding storage in the bed of my truck so I plan to build multiple slides and storage areas that will be covered by a tonneau with a rack and rtt above it. Campers are cool but sometimes it doesn't "feel" like camping so Im going tent this time around.

Crappy craigslist ad pictures
43375956094_95099246b0_z.jpg


29156799367_1fc42f54b6_z.jpg


I completely disassembled the slide and its mounting frame, sanded and repainted the metal and repacked the bearings with grease. It has 10, 1 1/2" ball bearings on either side, unfortunately 4 on each side are not serviceable bearings so I couldn't grease all of them but it slides very smoothly now. The frame width is adjustable so you can fit it between the wheel wells of different trucks. I laid out the frame and mounting holes with about a 1/2" gap on either side so it wouldn't rub on the wells and then measured and cut new ply which got a million and a half coats of shellac and turned out better than expected.

43187875285_4089962073_z.jpg


44118368701_4917620747_z.jpg


I left about 1" at the tailgate so there is no rubbing and you can reach down to the adjustment lever if needed, not that you would with the tailgate up.

44118376111_daaed7db25_z.jpg


29180519807_b126c2ac0f_z.jpg


Reassembled with stainless hardware, ran a little short because a few of the nylock nuts randomly stopped threading on, right in the middle of the bolt, weird. The slide has 3 positions where it locks in place. The middle position sits just before the end of the tailgate and the farthest out position sits 18" beyond the tailgate.

29180517457_244c035b92_z.jpg


29180519677_f9c535654e_z.jpg


29180495817_75a4559a21_z.jpg


42309025480_6154fbe712_z.jpg


43211359385_a54d6c7b5d_z.jpg


Theres about 6" on either side of the slide at the tailgate end. Not sure yet what I want to do here.

29180487677_8260b7fb50_z.jpg


There is just over a foot at the cab end of the slide. Also not sure what I will do with this space yet.

44118353321_8c58542c3f_z.jpg


The entire assembly sits 1/2" below the "ledge" that goes around the perimeter of the bed so I got enough ply to make a platform that will cover the entire setup. Havent started that yet.

42309024320_9561e06ea8_z.jpg


Then I got to work building a box for my stove. I plan to shave 1" off the top of this because I wont transport it with the bottle attached so I dont need the height I initially made it with. Also it wouldnt clear the underside of the upper platform as is. This will allow me to have a hinged lid that can act as a work space when flipped open to use the stove.

42294993340_cea7ba3809_z.jpg


This is where I stopped. I ordered some 200lb 36" slides and will build the "outer" cabinet for the stove drawer once those arrive and I can measure it all. The current drawer is 30" with the stove and propane in it so the entire assembly will slide past the end of the bed slide.

43399394704_527b633d29_z.jpg
 
Last edited:

Atl-atl

Adventurer
Cobra 19DX IV, CBI hood hinge mount, Firestick 4' antenna. Just need to grab a quick disconnect from a truck stop so I can install this because its too tall for my garage.

44209629252_5e0c369cc1_z.jpg


KB Voodoo hi rise bed bars. Took all of 10 minutes to assemble and install. Really nice stuff! Also in the pic are my 36" sliders for the camp stove. Hopefully I can finish the stove drawer this weekend. Rapidly getting closer to camping time!

44209629042_16cd8e278c_z.jpg


43542768544_1be3fb8bbd_z.jpg
 

Atl-atl

Adventurer
Getting close to caught up now. I picked up a Smittybilt Overlander tent yesterday. Figured I would start out with something relatively reliable but not super expensive in case I decide to go with a hardshell tent sooner than expected. I mounted it directly to my KB Voodoo hi rise bars instead of using the "rails" that come with the tent. It sits about two inches lower thanks to this. The top of the tent when closed up and covered is below the roofline of the truck. If it werent for the ladder it would be really low. As it sits Ive got 12" until the bottom of my garage door. If I stashed the ladder elsewhere I could probably have the tent on a topper and still fit in the garage.

As for the tent, setup is very simple. I read through the instructions and a few other peoples reviews of it to familiarize myself. I had the same issue as a lot of people, aluminum shavings inside the tent on and under the mattress. Otherwise everything was great. I did not have issues lining up holes like some people did. I had to drill two new holes for the ladder to be at the correct height for my setup and I had to bend one of the window awning rods to clear my cab but otherwise it went smoothly. Now I just need to finish my bedslide so I can camp this weekend on my way to Vegas for work next week.

42503109490_4a55be7d48_b.jpg


44310744961_7c4f594c8c_b.jpg


44310781611_28e6765320_b.jpg


42503808750_5c54c31f0f_b.jpg


Awning rod I had to bend
44310744801_ce28d7c537_b.jpg


Underside of the tent. The support is increased 2-3 times because the KB Voodoo rails are so much wider than the rails that come with the tent. I also used larger washers than Smittybilt provided for the four mounting bolts to help spread out the load on the inside of the tent floor.
42503443300_9e7486ba1a_b.jpg
 

Atl-atl

Adventurer
This evening I continued working on the drawer for my stove. The slides are from LeeValley.com. They are 36" 200lb capacity ball bearing drawer slides. I paid about $65 shipped for the pair. They are the nicest slides for the money that Ive been able to find. A few notes about them: They do not come with mounting screws as noted on the website. I used 10-24x 1" flat phillips stainless machine screws and through bolted everything with washers and nylock nuts. They "have an internal bumper to hold the slide closed and reduce bounce-back" but offroad trucks are definitely not their intended purpose. It is likely that a more substantial mechanism to keep the drawer in place will be required. Ill go bomb some dirt roads and get back to you guys! The 200lb capacity is based on the 18" length slide, which is fine because at most I will only be mounting about 10lbs of stuff to them. I wanted to go "overkill" on the weight rating of the slides for a number of reasons: The rating is based on slides half this length. It always pays to overbuild the first time. I was thinking I might mount one or both slides flat instead of vertically(which I wound up doing). And of course, I drive like an idiot sometimes when I'm offroad HAH! Not that they will be extended when Im driving, obviously.

In this picture you can see that I used some of the aluminum shims(that I didnt use from the Smittybilt tent) to space the slides up off the wood. I did this for two reasons, not wanting to trap moisture/dirt between the slide and wood and to raise the slide up so it doesnt contact the metal edge of the bed slide when sliding the drawer out.
30466803608_6c96ca51a1_b.jpg


I decided to forego building an external "box" for the stove drawer and simply mounted the slides to the bottom and side of the bedslide. This allowed for squeezing every available inch of space out of the bedslide as well as saving a tiny bit of weight and also some of my precious time.
44285614912_0442e9cecc_b.jpg


30466801398_6a7208b205_b.jpg


44333578561_ed488ebd3a_b.jpg


44285615702_9b917a791f_b.jpg


30466806618_e258ef5f9c_b.jpg
 
Last edited:

Atl-atl

Adventurer
Finished the stove drawer. Through bolted the stove to the drawer bottom, it aint movin! Forgot to take pics of that though. It was a good reason to disassemble and clean the entire thing. Also mounted a paper towel holder to the back side. I started thinking about what to do with my water tank. Ill just use my big 7 gallon jug strapped down for now. Im starting to imagine one or two of the tall skinny square plastic jerry can style water jugs and making slots for them to mount to the outsides of the bedslide. Might go by 4WP and pick one up to start measuring.

43633079784_926fbb806a_b.jpg


43633080874_a462ede821_b.jpg


43633081444_28c4ea7b27_b.jpg


29413174917_25f73bf099_b.jpg


44301028312_371c665c9a_b.jpg
 

Atl-atl

Adventurer
Did a little more work this evening. Started the platform above the bedslide. I used 3/4" ply that has a slight bow to it to support a little weight in gear. Unfortunately the shape of the bed meant that I had to use two entire 4x8' sheets of plywood. Fortunately I will be able to use the "waste" to build my rear seat platform. I put a split towards the cab so I can access the spot in front of the slide where I will most likely store tools and less used gear. I plan to carpet this with indoor/outdoor carpet. It will serve multiple purposes: keeping the contents of the bedslide in place, providing a secondary storage area above the bedslide and providing some amount of security for the stuff below the platform. Eventually I plan to run a tonneau cover and seal off the drain holes, seams at the tailgate etc. so the bed is as dust/water proof as possible. For now I have a plywood platform hah! :ROFLMAO:

There is about 7 1/2" of room between the bottom of the bedslide and the platform so I will most likely run some low/wide/long plastic storage bins in the remaining space of the bedslide. The plan is to have cooking/bathroom related items stored in them.
30486187678_a5b2b89c14_b.jpg


44304773982_c0e81c1434_b.jpg


Above the platform there is about 8" of room until what would be the underside of a tonneau cover. My plan for this will be to store my misc. camping related gear, folding chairs, hammocks, ground tents, bug nets, roof tent annex, outdoor shower gear etc.
30486186678_7413cf6e08_b.jpg


And Im ready to go! Started packing my tools, recovery gear, camping gear etc. and now Im deep into convincing some friends to brave the crowds this holiday weekend.
29419200547_1868fc901d_b.jpg
 

dman93

Adventurer
Nice work and good documentation. I recently removed my shell and I’m trying to decide whether to do some secure storage for the bed. I have a 5’ bed so space efficiency is critical, and most drawer systems leave wasted space but your’s is nicely done. I’m curious to get ideas for a rear seat platform too, though I realize my DCSB has different dimensions back there too.
 

Atl-atl

Adventurer
Nice work and good documentation. I recently removed my shell and I’m trying to decide whether to do some secure storage for the bed. I have a 5’ bed so space efficiency is critical, and most drawer systems leave wasted space but your’s is nicely done. I’m curious to get ideas for a rear seat platform too, though I realize my DCSB has different dimensions back there too.

Thanks for the compliments. Im not sure what I would have done if I didnt happen to find this bedslide cheap on craigslist and didnt have the means to make it work for my purpose. It definitely isnt the most efficient in terms of using all the available space in the bed but for the money Im not complaining. I started working on my rear seat situation today but I dont know how much it will overlap with what you can do in a double cab.
I mounted my CB antenna along one of the bedsides and ran the cable into the cab. Since I planned on removing the rear seat headrests and bottoms I went ahead and started to do that. There is a rubber grommet in the back wall of the cab behind/below the passenger side rear seat-back but unfortunately it was just barely too small for my cable end. I didnt want to open up the hole so I wound up fishing the cable through the vent flap which I think will work just fine. I started to route the cable which I plan to bring under the carpet and up into the rear cupholders in the back of the center console which is where Im planning to put my CB. Brand new truck, rip it apart and change everything, right!?!

Aforementioned grommet and the hole it came from hiding behind the plastic trim. You can see to the ground.
43469146975_86474f5982_b.jpg


Crude red arrow shows where the rubber grommet is. You can see where I wound up running the cable through the vent.
43661112144_fa88499a38_b.jpg


Here you can see where I mounted the bung for the antenna. Its too tall to fit in my garage so the antenna is out right now. I used an existing hole in the bedside but had to drill a hole through the plastic bedside cap. Its located in a spot where the antenna wont hit the cab, tent, bike rack etc when it moves. I dont plan to use the CB unless Im on a trip with other people so Ill just run a Firestick quick disconnect.
43661027534_085009ebc1_b.jpg


This is as far as I got putting the interior back together. I dont think Ill get around to building the platform this weekend because Im now going to help a friend do the axle seals on his FJ80 instead of working on my own junk or camping. Hopefully I can get at least a shakedown run of the new setup.
30510542868_e924a92266_b.jpg


I did install a couple bike mounts too. On the drivers side where the tent flips over I used a bolt on fork mount I had laying around and mounted it to the vertical side of my KB Voodoo bed rails. Ill just strap the rear wheel to the other rail on this side, it will be my "secondary" bike mount. On the passenger side where the tent does not flip over I mounted a (thankfully matching silver) for mount tray. This will be my "primary" bike mount for cruising to group rides on Sunday and hitting he MTB trails during the week. I also have a hitch mount platform rack for when I need to carry even more bikes. Who doesnt need even more bikes, right? Ill post up some pics with bikes on the rack tomorrow.
44373227581_f675455e7a_b.jpg


44324753092_bba281906b_b.jpg
 

dman93

Adventurer
I would get ARB drawers with the sliding top for your bed. They're fantastic and don't waste much space at all. Wish I had gotten them myself!


Have a look at page 14 of my build thread.
Thanks, I’ve seen your stuff @eatSleepWoof but I want my rear seats to be usable most of the time, so not sure about such a permanent platform. The seat bottoms are trivial to remove but I wish Toyota had made it easier to remove the seatback and belts. It’s not hard, just time consuming. As for drawers, again, I need more versatility ... this past weekend I was helping with a bike race and had the bed filled with barricades, tools, and 3 heavy duty wheelbarrows up to cab roof height. If I had drawers, it would have been another foot higher. Hmm, maybe not so bad actually ...
 

Atl-atl

Adventurer
Yesterday I finished up my CB install. I couldn't think of an elegant location to put it without cutting up the headliner on my brand new truck or being in the way somehow. Since Im deleting the rear seats I decided to cut up the rear cupholders in the center console instead. They are easier and surely cheaper to replace than the headliner. I removed the seat parts but retained all the storage bins and the lower portion of the back seat center console. When I get around to building my storage platform Ill remove the rest of the stuff but for now its staying to keep the noise down in the cab. This truck has the easiest-to-remove center console I have ever seen. You just carefully pull up on either side of the plastic right behind the Qi charger and the whole assembly comes up as one piece. I didnt remove the Shifter so I just moved the unit around until I could access the wires I was looking for.

Trimmed the inside of the cupholders. The hole is small enough that theres enough material so I can still put cups in the holders if I take out the CB. I might solder in some Deans connectors so I can quickly remove the CB.
30523559988_5d20caca02_b.jpg


Trimmed some tabs off the "back plate" of the center console so the CB will slide far enough down. All of the plastic in the center console is reeeaaalllyyy soft. I was able to use a razor blade held in my hands to trim, eek.
29454316487_db50c3f177_b.jpg


Vampire taps to the cigarette lighter wires in the center console for power to the CB. I actually really like these taps, in a place where wires wont move or come into contact with other things Ive had good experience.
44391789541_96b514df1c_b.jpg


All buttoned up like it never even happened.
42583178680_7e9e46f43f_b.jpg


CB in its resting place for now. Power works. More on that in just a minute.
42583178990_78aa24024d_b.jpg


The hinge on the armrest has enough clearance that the cord for the CB mic tucks in nicely. I can leave the mic attached at all times which is kind of nice.
29455030257_b1e3b72f3d_b.jpg


Now the real work begins. I found a writeup on Tacomaworld (Link) for the center console cigarette lighter to be powered on at all times. I like being able to use the CB if Im sitting in the truck and discussing travel plans with my buddies when the weather is crappy or for charging my phone without having the ignition on. Especially since the Smittybilt tent came with a super long USB port/cable that you can run up into the tent. I like to get away from electronics when camping but I also like to have them sometimes too. Have my cake and eat it too. The short of it is, pull the fuse panel out from under the drivers side dash, run a jumper on the circuit board for the 12v outlet in the center console, put the fuse panel back in, voila. Do this at your own risk. Follow the link I posted and read the post/some of the replies if youre interested. This is the cliffs notes. Do this at your own risk. There are some details left out of my post and some details left out of the writeup on TW. If you cant figure out what to do, you don't have any business doing this mod.

Pull the lower dash panel. I was able to leave the hood release attached. Some people were not. Apparently its a pain to reattach.
42606053440_6524b4bfd2_b.jpg


Its not as scary as it looks. The plugs are all unique. Be careful removing them however.
29477428177_95c734ba41_b.jpg


Wash your hands, use nice tools, nice tables dont hurt either! :LOL:
42606055940_cc7c528d5a_b.jpg


Burn in your jumper. Put it all back together. Power things with the ignition off.
44365671072_e7fd333c03_b.jpg


Interesting note. This plug was not attached to anything. I guess it goes to whatever accessory has a plug next to the auto-headlights button. Im not even sure what that is but the truck is wired for it.
42606060990_7d17e0ea39_b.jpg
 

s.e.charles

Well-known member
isn't this the kind of thing that gets people arrested in Bonneville?


or is there a special "yahoo" section set aside for such shennanigans?
 

Atl-atl

Adventurer
isn't this the kind of thing that gets people arrested in Bonneville?

or is there a special "yahoo" section set aside for such shennanigans?

I have no idea. I went there on a weekday in the winter when 90% of the place was under water. There were people doing all sorts of "questionable" things. My donut wouldnt even have been on the police's radar if they were around.
 

Forum statistics

Threads
186,480
Messages
2,886,547
Members
226,515
Latest member
clearwater
Top