austintaco
Explorer
I have been on this forum and other forums since about 1998. At the time, I had my first Tacoma, a 1995.5 SR5 ext cab with every option from the factory, and I found most of my information on tacomaterritory, before it became TTORA. I loved that truck, but in a dazed and confused moment, I traded it in on a 1999 Dodge Ram 1500 with blah blah blah blah. It was a dumb move, but I needed more space because my girlfriend at that time had two growing kids, and we all did not fit in the Tacoma. I traded it in at the Scottsdale Toyota around Memorial Weekend in 1999, and the last time I did a carfax, it was still in the area.
I sold the Dodge when I got in the Fire Academy and bought a 89 SR5 4runner. It was a great truck, but I really missed my Tacoma. When the doublecabs came out, I knew I wanted one, but I couldn't afford a new one, so I waited a few years and when I saw my opportunity, I went for it.
It was around Thanksgiving in 2003 and Toyota had rebates on several models. I started looking online to see what dealerships had left so I could see if I could work a deal. The pickings were slim, and most dealers were not budging that much, but as soon as I found a few that I could work with, I started a fax war from my credit union to see which dealer would give me the best price. If one dealer sent me over a good deal on their "buy" sheet, I would send it over to the other dealer until nobody could go lower. I think I ended up paying around $22,500 for a 2003 SR5 Doublecab with almost every option available. It was not, however, a TRD, but it did have the e locker. That is what allowed me to save a few thousand. The dealer added a sliding rear window and cruise control at cost and I had my first brand new Toyota!
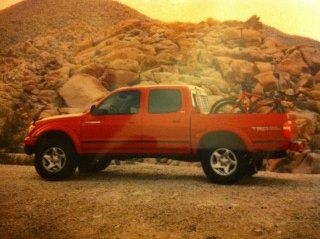
This picture was taken during the first year I owned it. I pulled over on a drive from Phoenix to San Diego and snapped the photo. At the time, I think I had only tinted the windows and added a bug shield.
I bought some westin nerf bars along the way, and I finally replaced those last week with the AP sliders. Yeah, the Westins are not real sliders, but they saved my truck when my girlfriend/now wife, rode the pole at a Taco Cabana drive in!
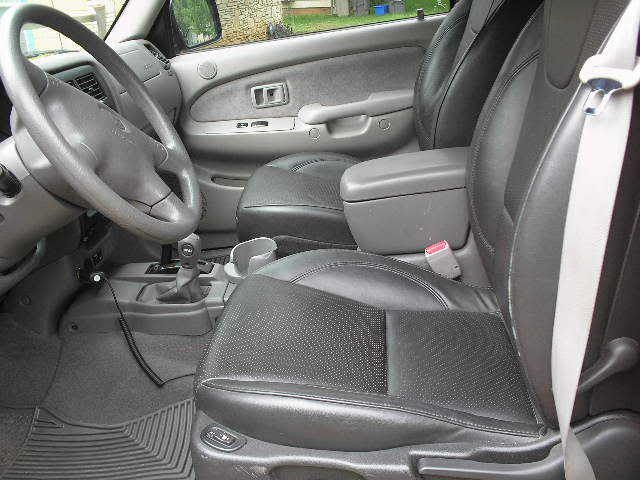
One of my first major mods was getting rid of the stock seats. I hated those things, and with chronic lower back pain, I needed some lumbar support, and power and heat would be nice. I looked on ebay for weeks and finally won a pair of leather heated seats from a Pontiac G6 for $175! I picked them up at a local LKQ and had an upholstery place do the install:
My next big step was suspension, and for that I started sourcing out the parts. I bought Jacques from TRDparts4u.com's old Tundra coil setup for the front and for the rear, I bought All Pro's 3" springs. I'm still running the same setup up front, but I just replaced the rear with AP expo springs.
Full writeup here:
http://www.yotatech.com/f2/my-doublecab-tundra-coil-swap-pics-118157/
before lift:
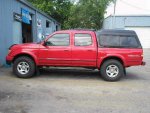
After lift:
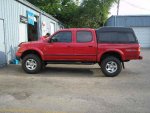
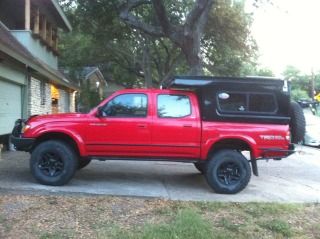
I almost forgot that by this time, I had picked up a campershell and went up to 265/75/16's in Nitto Terra Grapplers. I really liked those tires. The shell was a drunken ebay purchase. I bid on it, even though it was in VA and I was in TX. I didn't win, but the winner backed out, so I was able to get a 2nd chance offer. I think I paid $275 for the shell, and he threw in the bed rug! Road trip to VA and it was mine. It was on this trip were I fell in love with my wife. Good times.
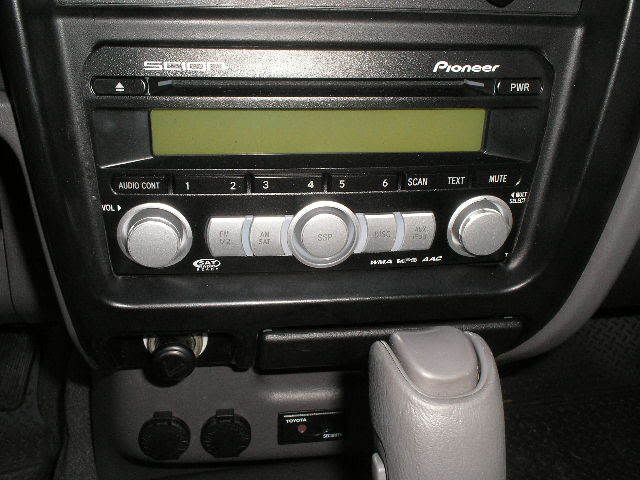
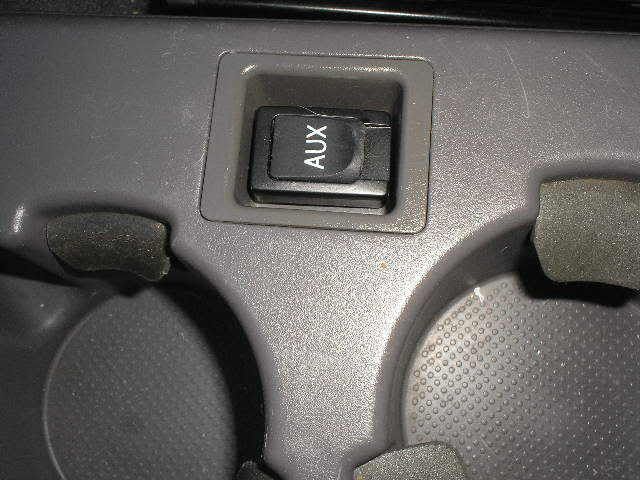
I put in a Scion stereo with AUX and Ipod hookups too:
My next big changes were the ARB front bumper, 4runner limited wheels, and the Cooper 255/85/16 tires. The ARB was bought used and repainted for about $300, the wheels were $175 on craigslist, and the tires were $425 or $475 shipped on ebay. I am putting the prices as I remember them to show that I did try to do this on a budget.
I stripped the wheels completely and then painted them with Dupont black wheel paint:
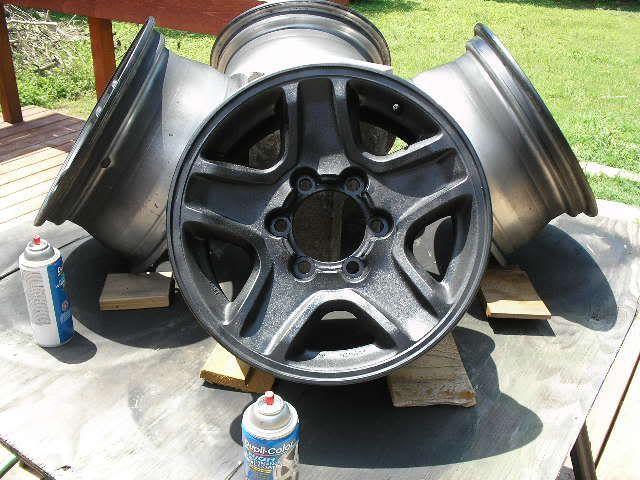
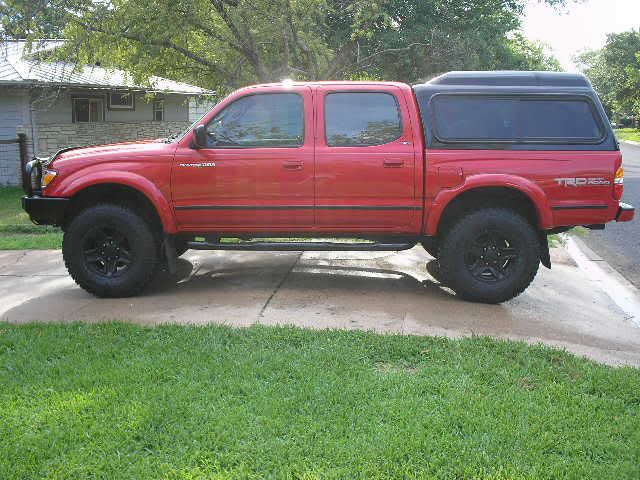
They have held up well, and if I scratch them or weights are added, I just hit them with a quick shot of paint. The ARB is going to need a new paint job soon, but that can wait. I put some Northern Tool lights on and they have held up well too.
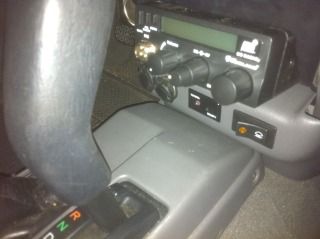
I don't have an interior shot, but I found a 4runner shifter and boot in black leather at the Pick and Pull, so I swapped out my grey ones for the black stuff and that helped tie in the interior. Speaking of interior mods, I added a Scan gauge as well. I pulled out the ashtray and installed a Midland CB last year too:
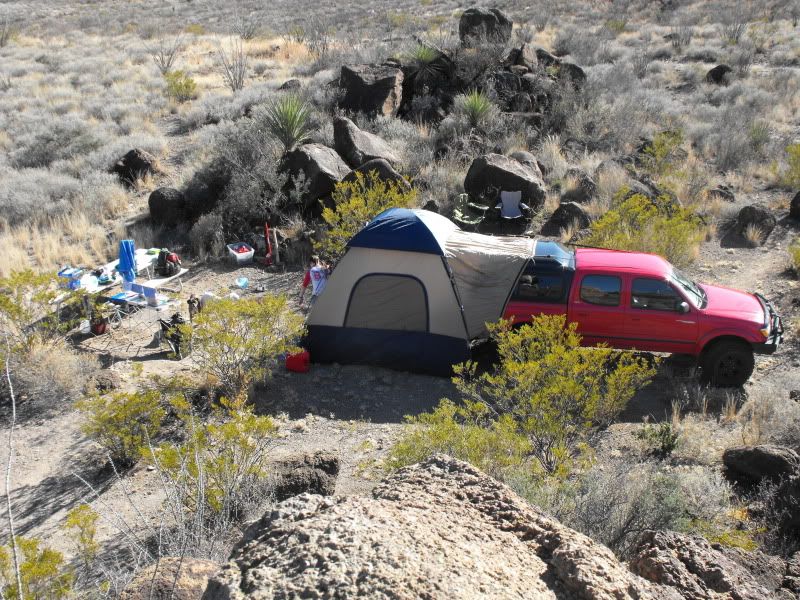
Things were good. My truck was finally coming together and I had a great camping setup:
All Pro improved their rear bumpers by adding the fill plates and offering the plates on their sliders too. When they offered free shipping last Summer, I jumped on the chance and bought both. I had to go back and buy their receiver hitch as well, but it all ties in together and looked good:
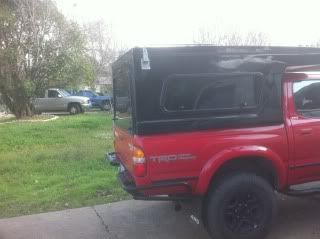
Though I bought the sliders and bumpers last Summer, they stayed in my garage until a few months ago and I finally painted them. During that time, my Flippac dreams came true thanks to some members on here and AT trailers in Prescott. Around New Year's eve 2011, we drove to Prescott and picked up the Flippac!
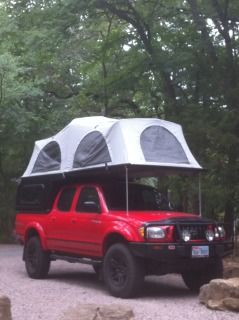
With the Summer CO trip approaching, I had started working a crap load of overtime to pay for some "goodies". This included:
ARB front locker
New 4.88 gears
Frame plates
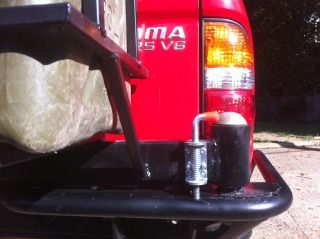
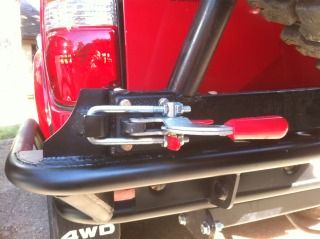
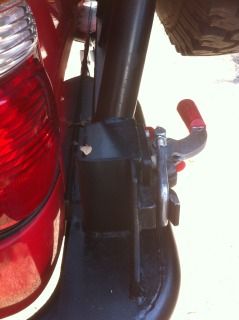
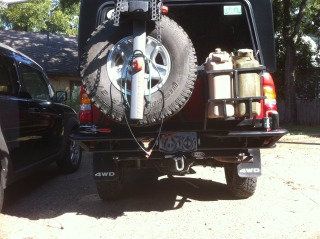
Having a Tire Carrier added to my bumper
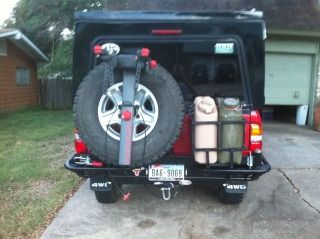
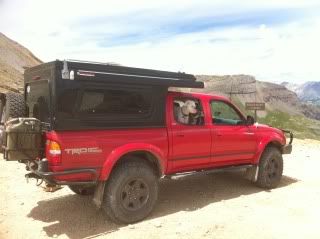
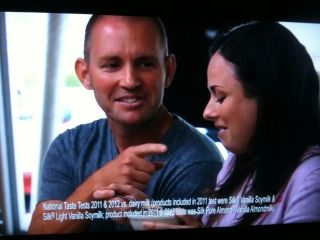
While working the overtime, my wife and I did a "market survey" that ended up being a national TV commercial with a hidden camera. The commercial is for Silk almond milk. We get paid everytime its on the air. Though I had paid for the extras with overtime money, this helped fill the savings account while waiting for the overtime checks to come in!
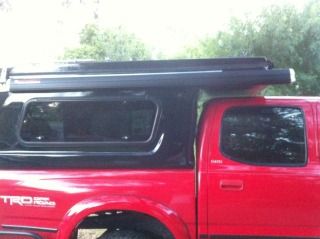
Oh yeah, I forgot that I found this old school Steel Horse SUV awning for about $50 on Craigslist. I searched all over for an awning and found this one in New Jersey for $25 or something ridiculously low like that. I offered to pay a fair shipping fee and a week later, I had it at my door. I may have paid $75 total, but I can't remember. It's called a Sidewinder and it rolls out and sets up very easily. This was my first try at riveting, and it came out great!
Before the trip, I decided to take out the rear seat and add a platform for our cooler and to give the dogs a place to sleep. I did a write up on here, but here's a photo of the finished product:
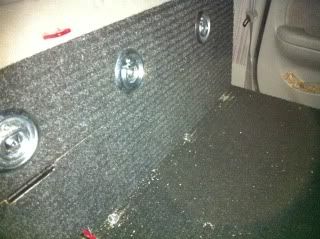
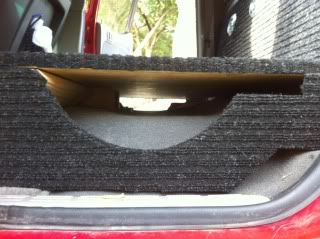
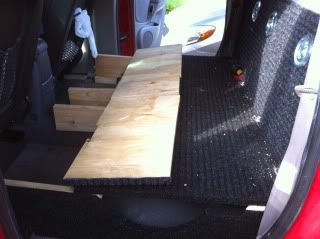
I added tundra calipers at some point, as well as doing the deck plate mod and adding a transmission cooler. That's all I can think of for now. If you have questions, please ask.
Before:

After:
I sold the Dodge when I got in the Fire Academy and bought a 89 SR5 4runner. It was a great truck, but I really missed my Tacoma. When the doublecabs came out, I knew I wanted one, but I couldn't afford a new one, so I waited a few years and when I saw my opportunity, I went for it.
It was around Thanksgiving in 2003 and Toyota had rebates on several models. I started looking online to see what dealerships had left so I could see if I could work a deal. The pickings were slim, and most dealers were not budging that much, but as soon as I found a few that I could work with, I started a fax war from my credit union to see which dealer would give me the best price. If one dealer sent me over a good deal on their "buy" sheet, I would send it over to the other dealer until nobody could go lower. I think I ended up paying around $22,500 for a 2003 SR5 Doublecab with almost every option available. It was not, however, a TRD, but it did have the e locker. That is what allowed me to save a few thousand. The dealer added a sliding rear window and cruise control at cost and I had my first brand new Toyota!

This picture was taken during the first year I owned it. I pulled over on a drive from Phoenix to San Diego and snapped the photo. At the time, I think I had only tinted the windows and added a bug shield.
I bought some westin nerf bars along the way, and I finally replaced those last week with the AP sliders. Yeah, the Westins are not real sliders, but they saved my truck when my girlfriend/now wife, rode the pole at a Taco Cabana drive in!
One of my first major mods was getting rid of the stock seats. I hated those things, and with chronic lower back pain, I needed some lumbar support, and power and heat would be nice. I looked on ebay for weeks and finally won a pair of leather heated seats from a Pontiac G6 for $175! I picked them up at a local LKQ and had an upholstery place do the install:

My next big step was suspension, and for that I started sourcing out the parts. I bought Jacques from TRDparts4u.com's old Tundra coil setup for the front and for the rear, I bought All Pro's 3" springs. I'm still running the same setup up front, but I just replaced the rear with AP expo springs.
Full writeup here:
http://www.yotatech.com/f2/my-doublecab-tundra-coil-swap-pics-118157/
before lift:

After lift:

I almost forgot that by this time, I had picked up a campershell and went up to 265/75/16's in Nitto Terra Grapplers. I really liked those tires. The shell was a drunken ebay purchase. I bid on it, even though it was in VA and I was in TX. I didn't win, but the winner backed out, so I was able to get a 2nd chance offer. I think I paid $275 for the shell, and he threw in the bed rug! Road trip to VA and it was mine. It was on this trip were I fell in love with my wife. Good times.
I put in a Scion stereo with AUX and Ipod hookups too:


My next big changes were the ARB front bumper, 4runner limited wheels, and the Cooper 255/85/16 tires. The ARB was bought used and repainted for about $300, the wheels were $175 on craigslist, and the tires were $425 or $475 shipped on ebay. I am putting the prices as I remember them to show that I did try to do this on a budget.
I stripped the wheels completely and then painted them with Dupont black wheel paint:


They have held up well, and if I scratch them or weights are added, I just hit them with a quick shot of paint. The ARB is going to need a new paint job soon, but that can wait. I put some Northern Tool lights on and they have held up well too.
I don't have an interior shot, but I found a 4runner shifter and boot in black leather at the Pick and Pull, so I swapped out my grey ones for the black stuff and that helped tie in the interior. Speaking of interior mods, I added a Scan gauge as well. I pulled out the ashtray and installed a Midland CB last year too:

Things were good. My truck was finally coming together and I had a great camping setup:

All Pro improved their rear bumpers by adding the fill plates and offering the plates on their sliders too. When they offered free shipping last Summer, I jumped on the chance and bought both. I had to go back and buy their receiver hitch as well, but it all ties in together and looked good:

Though I bought the sliders and bumpers last Summer, they stayed in my garage until a few months ago and I finally painted them. During that time, my Flippac dreams came true thanks to some members on here and AT trailers in Prescott. Around New Year's eve 2011, we drove to Prescott and picked up the Flippac!

With the Summer CO trip approaching, I had started working a crap load of overtime to pay for some "goodies". This included:
ARB front locker
New 4.88 gears
Frame plates
Having a Tire Carrier added to my bumper


While working the overtime, my wife and I did a "market survey" that ended up being a national TV commercial with a hidden camera. The commercial is for Silk almond milk. We get paid everytime its on the air. Though I had paid for the extras with overtime money, this helped fill the savings account while waiting for the overtime checks to come in!

Oh yeah, I forgot that I found this old school Steel Horse SUV awning for about $50 on Craigslist. I searched all over for an awning and found this one in New Jersey for $25 or something ridiculously low like that. I offered to pay a fair shipping fee and a week later, I had it at my door. I may have paid $75 total, but I can't remember. It's called a Sidewinder and it rolls out and sets up very easily. This was my first try at riveting, and it came out great!

Before the trip, I decided to take out the rear seat and add a platform for our cooler and to give the dogs a place to sleep. I did a write up on here, but here's a photo of the finished product:


I added tundra calipers at some point, as well as doing the deck plate mod and adding a transmission cooler. That's all I can think of for now. If you have questions, please ask.
Before:

After:


