Fergie
Expedition Leader
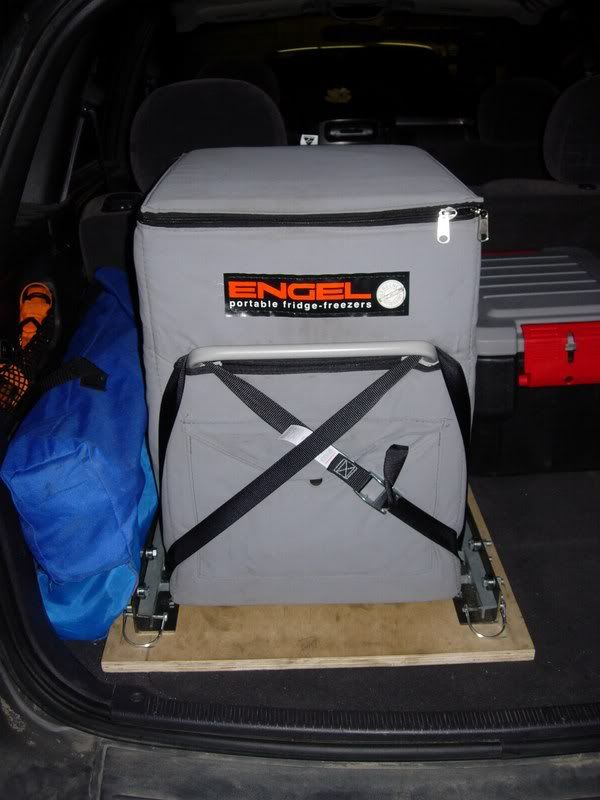
So....this project took me way too long...about three months or so, but in a short six hours this last friday, I've reached the denouement.
Some folks here have built their slides using drawer slides, but after an ill-fated month of using drawer slides on my drawer system, and a subsequent catastrophic failure of said slide, I decided that if I wanted a nice HD slide, I'd need something more solid, and while I thoroughly enjoy both EE and SE, I wasnt about to give them ~$250 for a fridge slide.
So I did what any good shadetree does...I copied.
My material list is pretty straight forward:
3/4" plywood base(to be anchored to the WJ cargo area at a later date)
16 pack of ABEC 5 bearings from Big 5
3" L-angle from work
3/4" L-angle from work
Hitch pins
Nuts, Bolts and washers
1/2" L-angle from work
Rubber stops.
And, as I am somewhat lazy right now, and don't feel like doing a step by step write-up, and as design and engineering is part of the fun for me, I will leave you with pictures.
Hope this help some other folks with their ideas, and feel free to give feedback!
Gavin
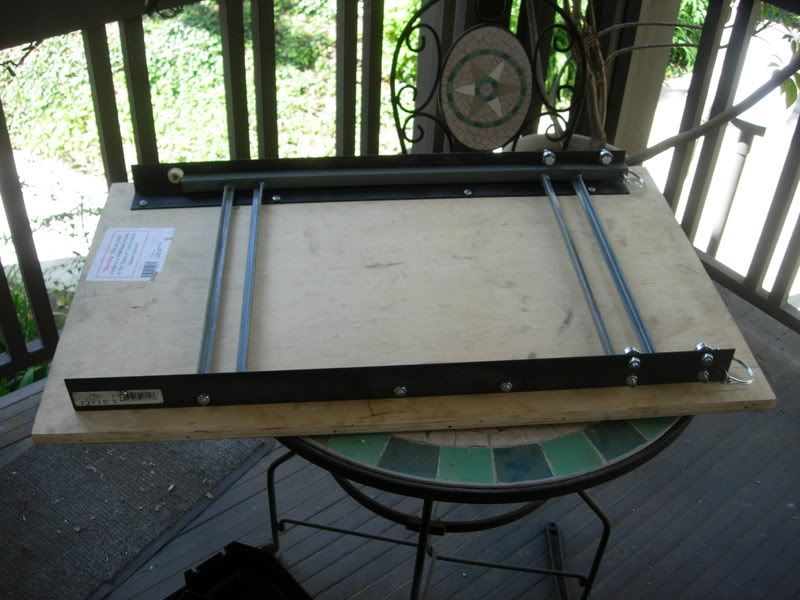
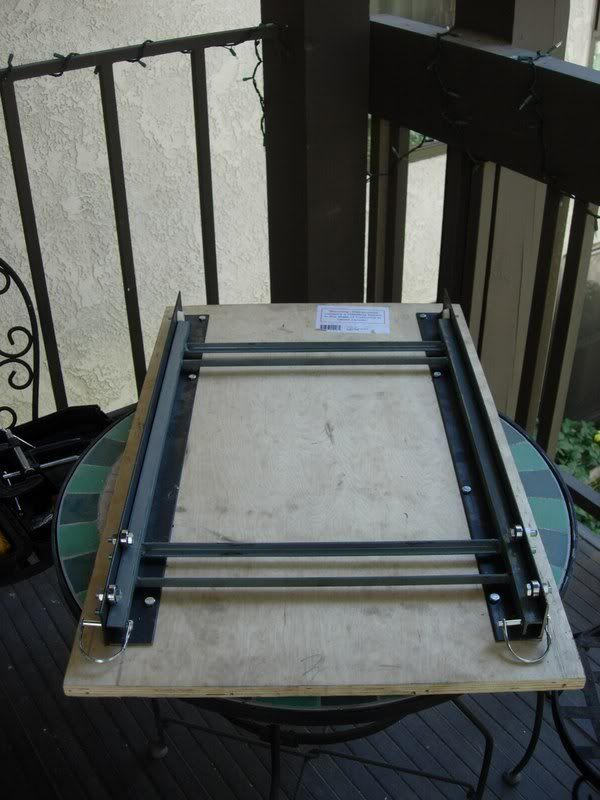
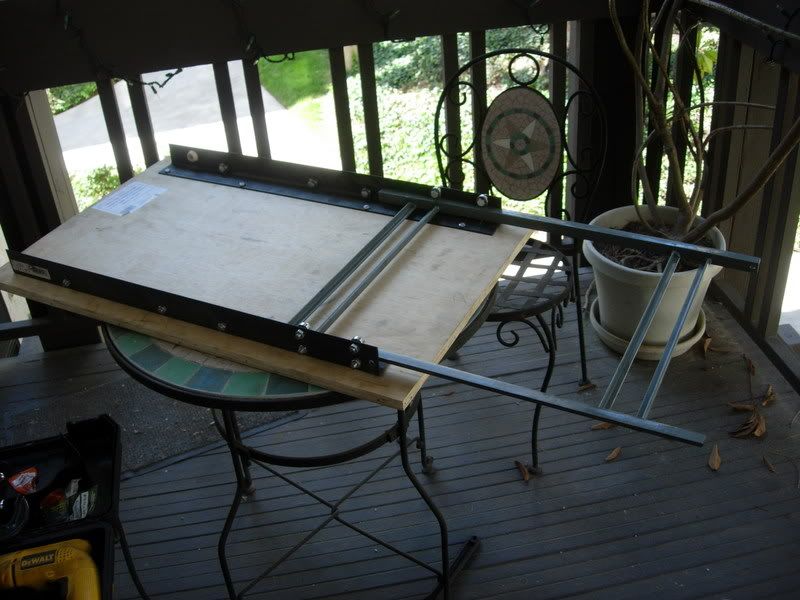
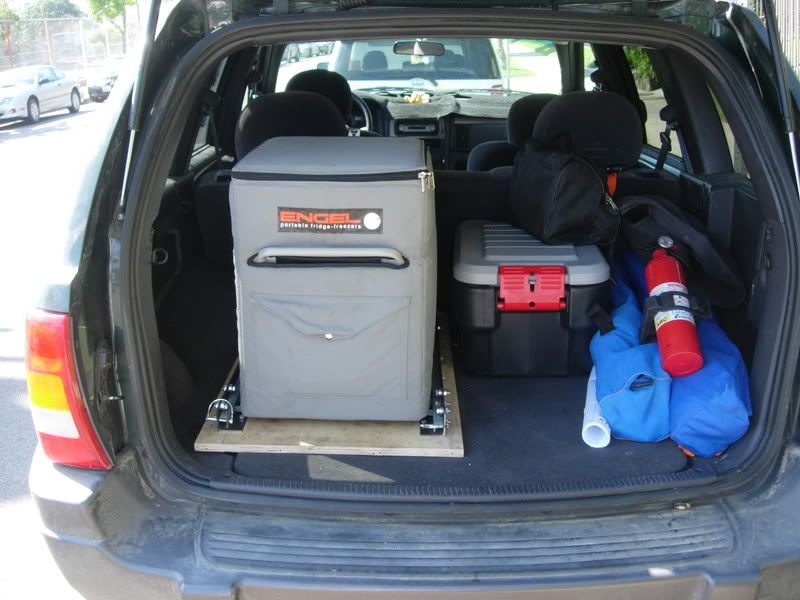
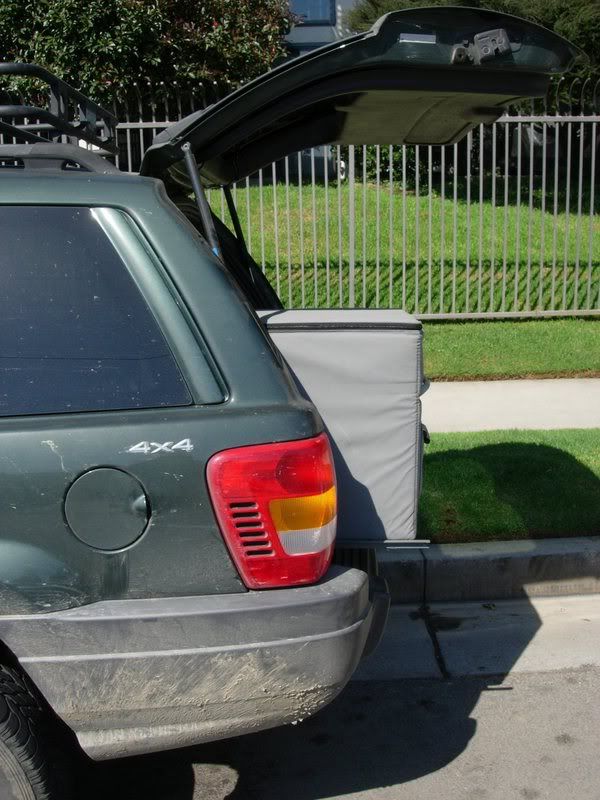
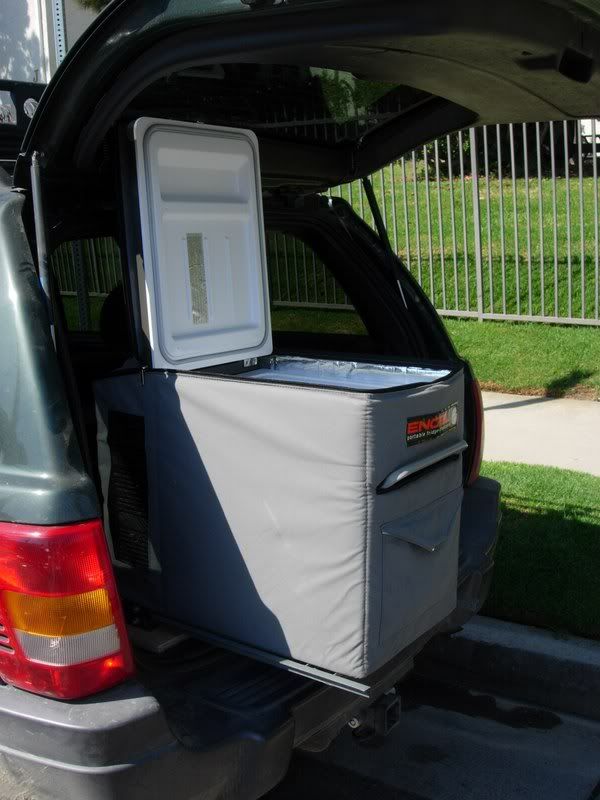
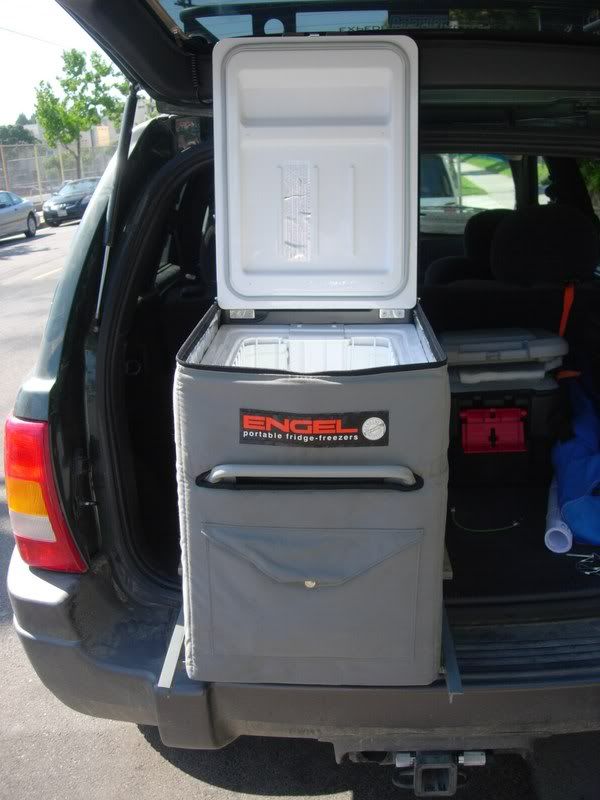
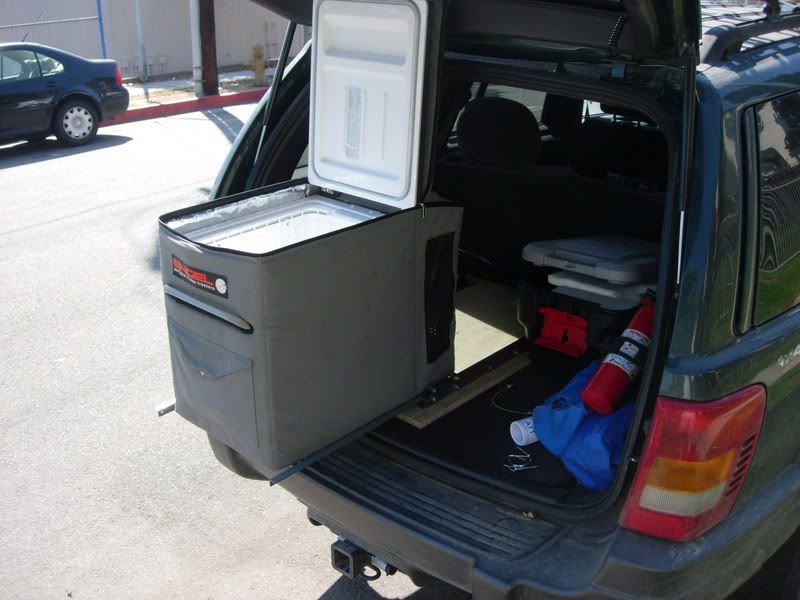
I need to add some slide stops to stop any type of overextension, but through blind luck, and sloppy layout, the slide wedges itself stopped at full extension. I'll add the other stops for safety sake, and will anchor the entire assembly to the rear cargo area at another time.
The fridge feet are a tight fit between the crossbars. I will be adding a small piece of plate, and will get some longer screws, and will attach the feet to the plate.
It sits about 90% complete right now, but is functional and that is what I need.
Some folks here have built their slides using drawer slides, but after an ill-fated month of using drawer slides on my drawer system, and a subsequent catastrophic failure of said slide, I decided that if I wanted a nice HD slide, I'd need something more solid, and while I thoroughly enjoy both EE and SE, I wasnt about to give them ~$250 for a fridge slide.
So I did what any good shadetree does...I copied.
My material list is pretty straight forward:
3/4" plywood base(to be anchored to the WJ cargo area at a later date)
16 pack of ABEC 5 bearings from Big 5
3" L-angle from work
3/4" L-angle from work
Hitch pins
Nuts, Bolts and washers
1/2" L-angle from work
Rubber stops.
And, as I am somewhat lazy right now, and don't feel like doing a step by step write-up, and as design and engineering is part of the fun for me, I will leave you with pictures.
Hope this help some other folks with their ideas, and feel free to give feedback!
Gavin


I need to add some slide stops to stop any type of overextension, but through blind luck, and sloppy layout, the slide wedges itself stopped at full extension. I'll add the other stops for safety sake, and will anchor the entire assembly to the rear cargo area at another time.
The fridge feet are a tight fit between the crossbars. I will be adding a small piece of plate, and will get some longer screws, and will attach the feet to the plate.
It sits about 90% complete right now, but is functional and that is what I need.

