Bivouac Bravo... Off Road Trailer for Motorcycles / Build Thread

Metal Twister

Highly Motivated
I'll give you one piece of advice... While the "silver coke" is OK for the ADVRider or Pirate crowd, you should probably stage some of that fancy, hoppy, I'm-better-than-you beer in a glass bottle when taking pictures for this crowd ;)

I'm open to all advice not just one piece, so keep it coming. :rolleyes: Ive been here long enough as a vendor and enthusiast to know where this forum is at. A glass of wine tops a silver bullet here almost every time. Not a problem... I will make the abilities of the trailer known honestly and in good taste and not in a "in your face" fashion. All the while insuring not to cheapen or demean the reputation of this forum. I'm way way past the ego stage in my life, nothing left to prove. Besides like you pointed out, if Shock Value and Outrageous Behavior while clutching a silver container was what I was after I would be on the Pirate forum already. Thanks for the solid advise and watching out for the demeanor of forum as well as its members. As a member It is appreciated! Personally I prefer Scotch on the rocks in Tupperware sipper cup. Cheers
 
Last edited:

Metal Twister

Highly Motivated
Why the lever operated shock setup? Looks like it doesn't reduce the travel and that you would have space to just mount it vertically with the same results?

You might want to re read the last third of the first post. Think it might help you understand?:26_7_2:
 
Last edited:

Metal Twister

Highly Motivated
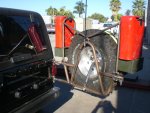
Bivouac's Lug nut free swing out tire carrier.


MARK HARLEY...


This is the same design that we developed years ago for the back of Jeeps. It has been field tested and proven off road tough. In fact this one on the trailer was a take off of one of our rigs and was replaced with a swing down tire carrier which would handle a 40" tire. This carrier will handle a tire up to 35" X12"

Originally we were trying to get the tire carrier up off the bumper so you could still hook up an Expo Trailer without interference with the hitch. We also found that messing with lug nuts in the sand and rocks in the middle of the freezing cold night was a major PITA. Seemed we always got a flat on the side of a mountain or in the worst possible place. Ever dropped a lug nut in the snow and had to go fish? Lug nuts and frozen hands just don't work together. So the goal was to be able to keep the tire high on the vehicle but not too high, cradle it and keep in secure, Swing out, and lockable. We have a rack that is added that holds 2 ammo cans and two 5 gallon Jerry cans as well.

Just throw the tire in the cradle and tighten the ratchet strap down, open the carrier and lock the covered chain through the wheel. Its a life saver in the dark in rough terrain. Throw it in and go. It latches with a bear claw style latch similar to what are in your car door which very solid and lockable.

Attached pic's are of one on the Jeep only because I had the pics loaded on the form from years ago. LOL
 

Attachments

  • CIMG0007.JPG
    CIMG0007.JPG
    290 KB · Views: 44
  • CIMG0004.jpg
    CIMG0004.jpg
    535 KB · Views: 43
Last edited:

CGuava

New member
Really liking the build. I'm just getting going on mine, and I'm building the tear drop's cab frame out of 1 inch square tube also. Just ordered my 1 inch square bender die.

Assuming you use aluminum to skin the trailer, are you going to screw it into the 1x1? I was thinking of glueing and screwing it, but I like the clean look of aluminum when glued to the plywood leaving no screws on the finish.

Also, did you just weld the box's frame to the trailer frame? I wasn't sure if my box should be bolted to the frame or if I should just weld it on.
 

Metal Twister

Highly Motivated
Really liking the build. I'm just getting going on mine, and I'm building the tear drop's cab frame out of 1 inch square tube also. Just ordered my 1 inch square bender die.

First of all congratulations on getting some new tools. That always puts a big smile on my face. A good die will last you a life time and you will look back in a few year and be amazed at what all you have built with it. You most likley have others that you are using now so you know what I mean. Be sure to take a lot of pics so you can go back and have a record of everything you fabricated with it. Then post them up so we can watch. I have a Hosfeld #2 and a Mitler Bros. Air over hydraulic top loader bender. Love um both.

Assuming you use aluminum to skin the trailer, are you going to screw it into the 1x1? I was thinking of glueing and screwing it, but I like the clean look of aluminum when glued to the plywood leaving no screws on the finish.

I have given some thought to fiberglass panels for the siding. If I go that way I will epoxy them on. But Fiberglass makes me itch so I will probably go with Aluminum. A buddy just bought an enclosed trailer that is all screwed together and it looks just fine to me. I will buy the white smooth siding that is .4062 thick aluminum. It comes in 4' X 10' lengths. Im an old school Air Craft guy so I naturally like a bunch of big Arss rivets... you know the industrial look. So I will most likely get the air riveter going for the skin and use some kind of glue or or calk under the rivet to keep the rattling to a minimum. Im open to suggestions? The skin will go directly to the 1x1's . Insulation will go on the inside of the aluminum and some type of vainer for the interior... Still undecided as to what to use inside.


Also, did you just weld the box's frame to the trailer frame? I wasn't sure if my box should be bolted to the frame or if I should just weld it on.

Yep I just welded everything together. You want to be sure to skip around when welding the box on so your heat from the welds don't warp the frame any. It should be pretty thick stuff on the frame and shouldn't be a problem but just encase, skip around. Negative dihedral looks goofy! LOL

Be sure to start a build thread so we can keep tabs on your progress...
 
Last edited:

Metal Twister

Highly Motivated
Some baby steps at lunch time today... I picked up some short 12v neon light fixtures for the interior today as well as ordering some exterior clearance lights. Had a minute to add rear entry light as well. It has the brow so almost all the light is shinning down, Im thinking is should work just fine.
Bengels Pack Mule.jpg
 
Last edited:

Metal Twister

Highly Motivated
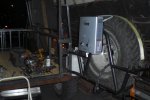
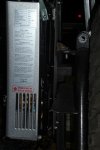
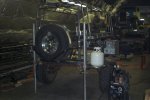
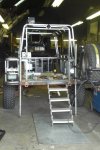
Bvouac's Hot water heater / shower / sink

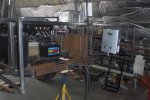
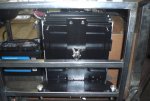
My thought was to keep the shower as far away as possible for the area where I would be cooking. My plan is to get one of those little privacy tents for the Port-A-Potty. I will build a portable water trap that will sit inside on the ground and capture the grey water that will be used in the same enclosure. So I needed a place to stow the hot water heater. I built a mount for the heater that would pin inside the front accessory area of the trailer. When it is going to be used it will hang on the back spare tire carrier or on a few other places that may be handy. Bengels Pack Mule 056.jpgBengels Pack Mule 054.jpgBengels Pack Mule 030.jpgBengels Pack Mule 035.jpg

Now I'm getting anxious to finish up the side boxes and the fire wood boxes under them.
 
Last edited:

Metal Twister

Highly Motivated
Tonight I had a chance to build a couple of mounts for the rear stabilizing jacks. I ended up using some manually operated old school camper jacks as I couldn't find anything else long enough when the trailer was aired all the way up. I made a removable mount that are attached to the box corner post with three 1/2" fine thread grade 8 bolts on each side.
Bengels Pack Mule 062.jpg
Bengels Pack Mule 058.jpg
 

Metal Twister

Highly Motivated
Ive learned a lot so far on this build and thanks to you all for posting up all the builds prior to this time. Ive spent countless hours roaming the forum and learning your techniques and design on building these unique trailers. As I have been building and buying components I have been sure to double up my efforts for the next build. I'm already thinking how to build the next trailer, The Bivouac Alpha trailer. Same suspension but much more conventional in size, function and appearance when compared to the EXPO / ADVENTURE style trailers. My son and buddy's are starting to drop some very serious hints that they would like something along these lines but sized down for the Jeeps and Toyota's... Im really looking forward to getting this project finished up enough to use it and get some good GoPro shots of it in action... I know slow and easy shots! :) But that is for another day I guess. Back to work!Bengels Pack Mule 006.jpg
 
Last edited:

Metal Twister

Highly Motivated
Thinking something like this Toyota 40? :) If we can build the rig to safely make through the most extreme terrain than Im sure we can build the trailer to follow. Glad to see you on the forum actually posting! Welcome friend. It's funny how pictures make it look a lot mellower than it really is? Please keep in mind that This is more of an expo style trailer and while it will be able to accomplish trek like this it is really being built for expedition style runs with a motorcycle, and Motorcycle recovery.
 

Attachments

  • IMG_0537.jpg
    IMG_0537.jpg
    55.5 KB · Views: 35
  • IMG_0576.jpg
    IMG_0576.jpg
    55.5 KB · Views: 37
Last edited:

Metal Twister

Highly Motivated
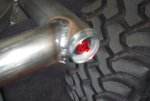
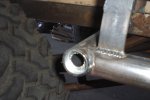
Capping off the raw slider tube...

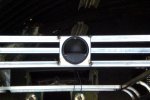
So in keeping in the theme of things with this trailer build and anticipating extreme abuse we thought hard about clearance lighting. We decided to go with the small LED button lights. They are easy to install and if for some reason one gets scrubbed off they wont brake the bank replacing them. With that said we still want to protect them the best we can. I sliced off a small piece of the 1 3/4" tubing that we are using for the rock sliders and off to the auto parts store I went. The counter help was good enough to find some steel freeze plugs that fit in the tube perfectly. A 3/4" hole saw was placed in the mill and drilled. Light bulb inserted with the rubber holder in place for a nice tight fit. The freeze plug is driven flush into the tube end for a nice looking relief and built in recess protection for the lights. After paint I will install them permanently.
 

Attachments

  • Bengels Pack Mule 010.jpg
    Bengels Pack Mule 010.jpg
    522.4 KB · Views: 36
  • Bengels Pack Mule 007.jpg
    Bengels Pack Mule 007.jpg
    523.2 KB · Views: 37
  • Bengels Pack Mule 008.jpg
    Bengels Pack Mule 008.jpg
    525.8 KB · Views: 36
  • Bengels Pack Mule 009.jpg
    Bengels Pack Mule 009.jpg
    516 KB · Views: 37
  • Bengels Pack Mule 021.jpg
    Bengels Pack Mule 021.jpg
    515 KB · Views: 26
Last edited:

Forum statistics

Threads
188,395
Messages
2,904,136
Members
230,274
Latest member
mbauerus1
Top