You are using an out of date browser. It may not display this or other websites correctly.
You should upgrade or use an alternative browser.
You should upgrade or use an alternative browser.
Bob the Campulance. E350 Crestline with Roof Raise. V3 in Progress.
- Thread starter iggi
- Start date
iggi
Ian
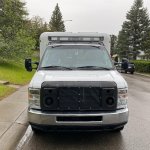
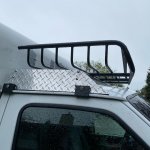
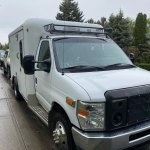
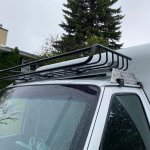
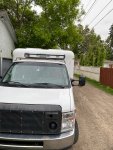
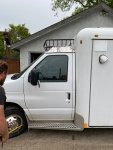
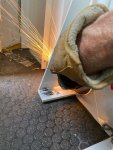
My buddy @cody c volunteered time, skill and supplies to help me build a roof rack. (more like I was helping him lol)
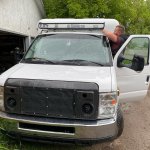
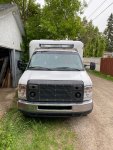
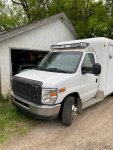
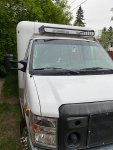
While I removed the old lightbar mount and cleaned up all the old silicone and adhesive he got the basic bits fabbed up. Here's pics from the test fit.
Still a bunch of work to finish it including widening the basket. (hence the offset pic as we're trying to decide how wide to make it)
I'm pretty stoked about having some extra storage. Especially for random stuff like firewood that I really don't want messing up the inside.
In retrospect it would have been easier to leave the light bar mount on, but I'd already attempted to remove it and caused a leak so it had to come off regardless.
PS.Yes, that is duct tape covering the holes in the front of the box. The rain was rolling in faster than planned so I had to take temporary measures to keep the water out.


Bikersmurf
Expedition Leader
Hey Bob!
Those latching switches are nice. On my first ambo I just used a couple solenoids, worked great but those are definitely nicer and more straight forward.
Ive got a couple of those solenoids... I guess I just found what I should replace them with.
iggi
Ian
Bit of a wiring lesson happened today.
My rear scene lights/backup lights hadn't worked in a couple months.
Spent about three hours on the weekend taking stuff apart and troubleshooting but to no avail.
I'd reset the breaker, hit the switch and the breaker would trip again.
Fortunatley @Bikersmurf was kind enough to share his copy of the wiring diagram with me and despite age difference in our rigs the wiring was essentially the same.
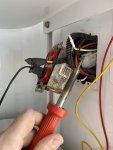
It only took about three minutes of reviewing it and I could see the likely problem.. and it was my own dumb fault. When I disabled my door switches (so the lights would not come on when I was camping with them open) I didn't do a good job of capping off the wires. Unbenownst to me the rear door switch is part of the rear scene light circuit. So with wiring harness in hand it only took me about 5 minutes to fix it.
Two quick lessons on ambulance conversions.
1. Always make sure you do a very solid job of capping off any wires that you terminate.
2. Having an original wiring diagram can save hours if not days of work. My backup/rear scene lights quit working and despite about three hours of testing and taking things apart I didn't have any better idea of why.
Lastly, it's pretty cool to be essentially your own self powered repair shop. Running the soldering iron to heat the shrink wrap. (upgrade from my crappy taping job)

Bikersmurf
Expedition Leader
I can’t remember who emailed me the wiring diagram anymore, but I’m glad it helped. Mine’s a ‘97... so I hope the 2001-04 diagram will be equally helpful for mine should I ever need it.
As you found, the wiring numbering doesn’t seem to have changed much... Thankfully
iggi
Ian
Been swamped lately. Working away on a variety of small projects.
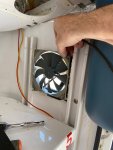
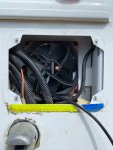
1. Removed the rear fan cabinet and added a high power industrial quality computer fan. https://noctua.at/en/nf-a14-industrialppc-3000-pwm/specification
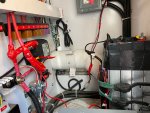
2. Finished my DIY Lithium Battery Pack. It's a 120 AH 4S 3.7V per cell pack. Bit of an experiment. Since I winter camp a bunch I've built a hybrid battery system that runs both a lead acid battery and the lithium. Mostly so that regardless of how cold it is, I still have accessories and lights that work. More details later.
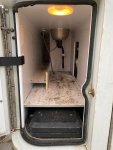
3. Wasted a bunch of time building a fresh water tank out of 4 inch PVC pipe to fit into the weird unused space of my rear cabinet, only to discover the cabinet had a false floor and with that ripped out my tank no longer fit and also that normal 10 gallon jugs were now a much better choice.
4. Built a grey water tank out of 4 inch PVC pipe and mounted that underneath. (summer use only)
5. Bought a wi-fi connector for my EPEVER Solar Charge Controller so I could setup a custom charge profile for my lithium pack.
6. Started replacing the original inefficient cabinet lights with stick on LED strip light, much brighter, much more efficient.
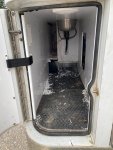
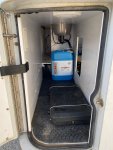


Abitibi
Explorer
Looks great! Don't you wish you had gutted it in the beginning? Lol
Good idea on the grey water tank
For your lithium, since you have a diesel heater why don't you just set it to kick on at +5°c? That way it's never freezing inside, your batteries stay safe and your water doesn't freeze either. That's what I did in my pervious ambo and worked great.
Sent from my SM-G973W using Tapatalk
iggi
Ian
One of the first modifications I did on Bob was to add solar. Honestly I didn’t give the location of the charge controller much thought. Just removed the cover for the empty bulkhead that was over the walk-through, replaced it with a piece of plywood, added switches and screwed the controller to it. Functional but kinda ugly and also now in the way of extra storage space.
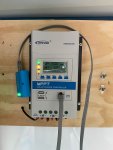
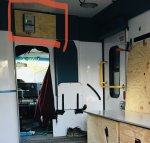
I finally quit procrastinating and moved it down to where the rest of the electrical controls are. Looks a lot less janky there and it's certainly nicer having all the rear controls in one area. Plus the wire runs are shorter so maybe I’ll get a fraction of a percentage more power from my solar panels. ?.
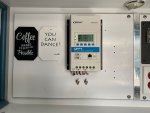
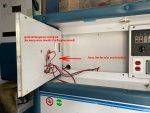
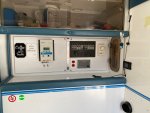
Now I just have to figure out what to do with the extra space and how to have it both functional and not fugly.
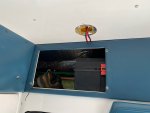
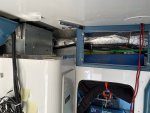


I finally quit procrastinating and moved it down to where the rest of the electrical controls are. Looks a lot less janky there and it's certainly nicer having all the rear controls in one area. Plus the wire runs are shorter so maybe I’ll get a fraction of a percentage more power from my solar panels. ?.


Now I just have to figure out what to do with the extra space and how to have it both functional and not fugly.


Last edited:
iggi
Ian
For your lithium, since you have a diesel heater why don't you just set it to kick on at +5°c? That way it's never freezing inside, your batteries stay safe and your water doesn't freeze either. That's what I did in my pervious ambo and worked great.
Thanks for the feedback David. For camping weekends that's certainly an option, there are plenty of situations where I could be without lights, fans, heat and power locks if I don't retain the lead acid battery and rely solely on the Lithium as my only auxiliary battery. I'm sure someone smarter than me could figure it out with a battery temp management system but I like redundancy.
Bikersmurf
Expedition Leader
I’ve installed mine on the other side of that same panel, mine is inside the electrical room/cabinet. It’s tidy and completely out of site. The downside is that I can’t look at it without going outside.One of the first modifications I did on Bob was to add solar. Honestly I didn’t give the location of the charge controller much thought. Just removed the cover for the empty bulkhead that was over the walk-through, replaced it with a piece of plywood, added switches and screwed the controller to it. Functional but kinda ugly and also now in the way of extra storage space.
View attachment 604759View attachment 604763
I finally quit procrastinating and moved it down to where the rest of the electrical controls are. Looks a lot less janky there and it's certainly nicer having all the rear controls in one area. Plus the wire runs are shorter so maybe I’ll get a fraction of a percentage more power from my solar panels. ?.
View attachment 604762View attachment 604764View attachment 604775
Now I just have to figure out what to do with the extra space and how to have it both functional and not fugly.
View attachment 604765View attachment 604774
iggi
Ian
I have the WIFI module so I could hide it all away now. I just like being able to glance at it and see what's going on. My choice in placing it out in the open is probably more to do with my slightly OCD nature than a real need. 
I’ve installed mine on the other side of that same panel, mine is inside the electrical room/cabinet. It’s tidy and completely out of site. The downside is that I can’t look at it without going outside.
Bikersmurf
Expedition Leader
Part of our advertising gimmick is that it looks like an ambulance... in keeping with that I’m trying minimize visible changes and limit them to what’s needed.I have the WIFI module so I could hide it all away now. I just like being able to glance at it and see what's going on. My choice in placing it out in the open is probably more to do with my slightly OCD nature than a real need.
iggi
Ian
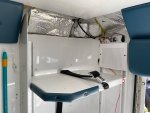
Good progress today. Got the divider wall taken out and swivel seat base test fitted. Hard to describe or show just how much roomier it feels. Of course I've created a bunch of work for myself now that I have to build new storage and walls to cover up the insulation, wiring and other stuff I exposed.
Some before and after pics.
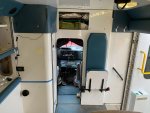
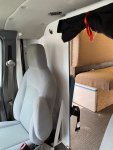
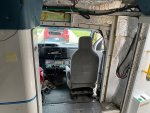
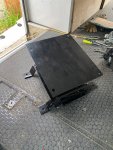
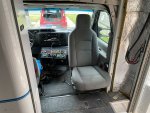

Some before and after pics.


Similar threads
- Replies
- 3
- Views
- 2K
- Replies
- 0
- Views
- 879
- Replies
- 1
- Views
- 295
- Replies
- 8
- Views
- 3K
Forum statistics
Members online
- Inspired Adventurist
- Jack Mac
- Phil Meredith
- shellb
- shouldaboughtahat
- Pacific Northwest yetti
- dstefan
- Manukoyote
- Teal Chevy
- ITTOG
- kjcummins
- Muddzy
- thatcabledude
- chad6000
- NCMODELA1
- Lukeg
- blackknight89
- PhyrraM
- rcintx
- godfather82
- gator70
- sancap
- BigOrca
- djm68
- mxdevon
- simple
- fattycharged
- Overlandtowater
- Jefe15
- 97heavyweight
- WG_moots
- dudeandadog
- fadagnes
- jbtradingco
- NOPEC
- ExpoMike
- YetiX
- welikecamping2
- Paul Hagar
- CORunner
- BlueLantern
Total: 3,663 (members: 46, guests: 3,617)

