You are using an out of date browser. It may not display this or other websites correctly.
You should upgrade or use an alternative browser.
You should upgrade or use an alternative browser.
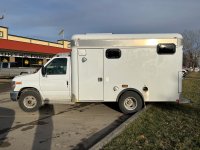
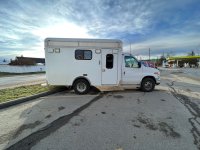
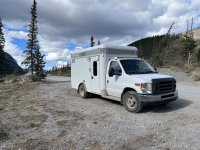
Bob the Campulance. E350 Crestline with Roof Raise. V3 in Progress.
- Thread starter iggi
- Start date
Bikersmurf
Expedition Leader
Great to see your making progress again. Life has been crazy busy the last few months so I've barely had time to do anything that wasn't necessary to keep mine rolling down the road.
While I'm here I should update my thread. Next up will be brakes. Do 16" dually wheels fit over the newer brakes?
While I'm here I should update my thread. Next up will be brakes. Do 16" dually wheels fit over the newer brakes?
iggi
Ian
Whelp, after many life interruptions and general procrastination I'm back to working on Bob the Adventure Ambo.
A couple years back after I did the roof raise I had to get it back together and mostly usable in a real hurry. Now I'm finally digging back into to correct all the corners I cut then.
The big upgrade is adding windows. My friend that runs ionicelectronics.ca brought some in for me along with his usual order of batteries and stuff. Also got a real RV sink to replace my $6.00 salad bowl sink. I've got an unboxing video of the windows with their built in curtain and bug screens here:
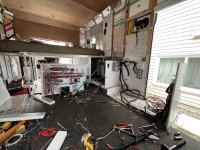
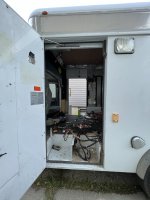
Of course all this required removing almost everything I've already installed which also gave me the opportunity to decommission the original electrical panel and get ready to build and install a much smaller panel that I've designed to suit my needs (not those of an ambulance). Getting rid of the rear electrical cabinet and the rear heater/ac unit will free up 14 cubic feet of space for me. Which will result in a much better kitchen plus give me room for a shower and toilet.
Getting the brake lights, turn signals and running lights reconnected was relatively easy. The backup lights and alarm plus the power locks was a bit more complex and I'll have to finish that later.
It's now at the shop getting the rear coolant and AC lines removed and the cat deleted. That will give me time to get started on the new electrical panel and order a few more parts.
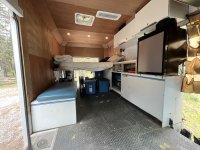
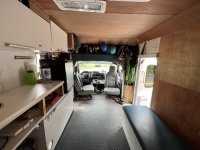
Some pics of the tear down.
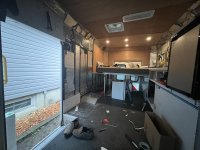
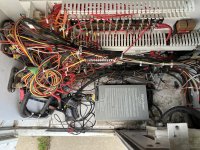


Bikersmurf
Expedition Leader
Good to see you're making more progress.
Can you let us know how the CAT Delete works out for you.
My '97 exhaust has a CAT in it, but I've got an '01 exhaust pipe that I've been debating about swapping in. It doesn't have a CAT and it looks like it would be a direct bolt in. I'm just not sure it would be worth the effort to loose the CAT. I find it odd that the newer ambulance with the same engine wouldn't have a CAT, and it makes me wonder if mine is worth having.
iggi
Ian
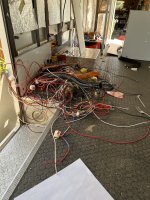
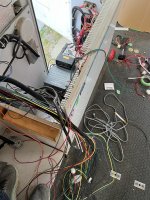
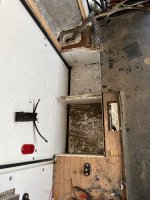
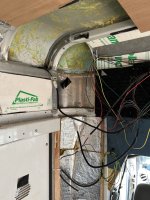
Large amounts of progress in the last couple days. I have vanquished the octopus of the original ambulance wiring harness. (well, almost vanquished)
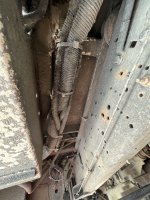
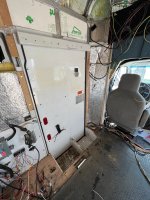
I've eliminated most of the wiring I don't need. Pulled it all from where it was routed through the floor into the electrical cabinet. Removed the rear heater and AC, pulled all those hoses and now have room to pull up the much smaller amount wiring harness up to where the heater used to be. That's where I'll be putting a mini-panel to run the operating lights, power locks, etc.
Some pics.


iggi
Ian
I recently had a brand new turbo installed on my 2009 6.0 Powerstroke and... it still kinda ran like crap. Color me disappointed!!
No more engine codes, the VGT readings on the turbo were normal, no chuffing sounds from the stuck turbo vanes but it just didn't run as good as I expected, seemed low on power and just sounded a bit wrong. Also, the fuel economy was about 20-25% lower than usual and... the cold performance was awful.
There's a couple well known facts on the 6.0 (besides their reputation for blowing up).
1. They don't like being babied
2. The injectors are very prone to stiction.
I'd been having to baby mine the last couple months while dealing with the failing turbo and I'd also been remiss with my maintenance and hadn't been adding any stiction treatment to my fuel.
So, here's what I did:
a) I added a double dose of Archoil 6500 to a full tank of diesel and
b) I took her out for a long rip over a combination of steady state highway and some aggressive backroads driving.
It took about 200 miles but things started sorting themselves out by the end of my 400 mile trip the performance felt normal, I was back to averaging 15MPG and the injector noise settled down. Even better, when it's cold it runs like it should.
Before I was having trouble holding 30mpg up the hill from my house and now it pulled hard without any issues.
I've always been highly suspicious of fuel or oil additives in the past but when it comes to diesels with the HEUI injectors (The Ford Powerstroke 7.3 and 6.0) running an antistiction treatment in both your oil and your fuel seems easily worth the investment.
When I first tested using the Archoil I was surprised that the difference was even noticeable with a sound meter. It's been like 3 years but as I recall there was roughly a 3dB difference in the sounds levels between idling with archoil in the tank and without.
Here's the Archoil kit I usually buy from Amazon. (been running Archoil since I got my ambo in 2019)
https://amzn.to/3LBd50p
I've heard that Hot Shots Secret is also a good product but at less $$. I can't personally vouch for it but here's a link to check it out:
https://amzn.to/466o4Hq
(Yep, they are amazon affiliate links - gotta make a couple bucks to support the ambocampers.com website and other resources I provide )

Bikersmurf
Expedition Leader
You’ll have to let us know if you notice a difference. I’ve never put much worth in additives for the 7.3… but perhaps I should reconsider that.I have been using the Hot Shot stuff in my GM 6.2L diesel but really haven't put many miles on it. It seems to have good reviews (outside of Amazon) so I figured I would try it and seems to be working fine.
iggi
Ian
Time for a quick update: Finally got my windows installed. With them and the electrical done it's time to start putting it all back together.
Installing the windows was trickier than I expected. Unfortunately the windows mistakenly shipped with the narrow adapter ring that wasn't big enough to span my 2"+ walls. After a lot of head scratching and test fitting I decided this was actually a good thing and that I'd inset the windows into the wall so that the blind/bug screen/cover wouldn't protrude so far into the interior.
The next big hassle was the placement as I wanted to use the existing light holes where possible while cutting as little of the frame work.
Sure makes a huge difference in the amount of light coming in. Kinda felt like a coffin before.
I'll post a couple pics here. If you want to see more then the easiest is to visit my instagram: https://www.instagram.com/bob.the.campulance/
Attachments
iggi
Ian
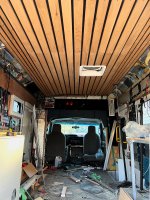
Well, life sure does get busy. Between work and elderly parents I've been swamped. The trifecta of time, energy and motivation finally intersected and I've was able to start getting an interior installed. My last build was done in a super rush so this has been my chance to go back and do things better.
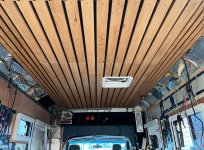
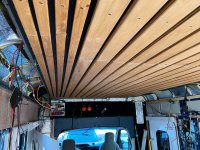
I was running R10 for insulation in the ceiling before but had minimal thermal barriers plus a lot of screws into the aluminum frame that were exposed to the interior. Not ideal. Now it's R15 overhead (maybe higher), I have half inch thick thermal barriers and almost no screws that go all the way into the aluminum frame. That's the practical side.
On the non-practical side, I was craving something a lot nicer looking than my previous attempts. Still have to add lights and do some final touch ups but here's my version of the ever popular slat ceiling.
Next step is finishing up the insulation, adding more furring strips and then installing the new interior walls.


iggi
Ian
Wow, it's been a minute since I've posted any updates. Between some health issues and my biz growing there hasn't been much time or energy for the project. I did get the interior back together and had some short trips over the summer. Things are looking up on the health front so I am optimistic that once I get through my busy season that I can start making some real progress.
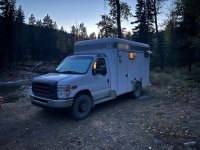
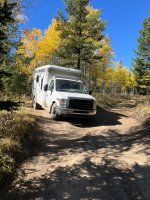
On the 4x4 planning side I've decided to also swap in the SRW rear axle from my 2005 F350 parts donor. That will save me having to worry about wheel adapters or anything like that. I had been worried about the complexity of trying to adapt the shifter for the NP273 and the Ford ESOF hubs but Michael from ExpoVans had included all that info with his kit, I'd just missed it or forgotten about it in the 5 years since I bought it.
Has anyone here built the EcoBox Underdrive? Strongly considering adding one to my build. Given the weight of this rig and where I want to go, a low crawl ratio seems worth the investment. https://northwestfab.com/products/ecobox-standard?variant=43531103305891
And what's an update without some pics? (plus an AI Render of what I'm aiming for)
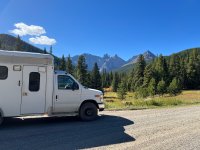
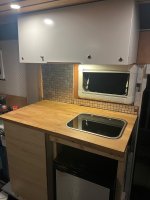
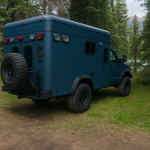


Bikersmurf
Expedition Leader
Now if only it were as easy to build it as AI makes it to look like it. 
CaptainBuilt
Well-known member
Looking good!
iggi
Ian
Progress update:
The donor truck has been parted out. Some mad respect to anyone doing a DIY 4x4 conversion in the backyard or driveway. I sure wouldn't want to wrestle those full size axles without a forklift or something.
After much consideration decided I'd also swap the rear dually axle for the single tire Sterling 10.5 from the F250. It is of course more work but I'd rather do a full switch to the 8x170 bolt pattern rather than run adapters or spend a bunch of money converting the front hubs to a Spyntech or similar.
Next stage is getting my pallet of parts home then prepping the axles and rebuilding the transfer case.
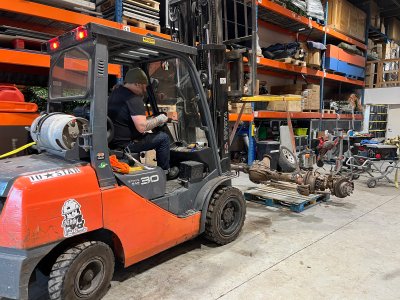


Attachments
Similar threads
- Replies
- 3
- Views
- 2K
- Replies
- 0
- Views
- 1K
- Replies
- 1
- Views
- 520
- Replies
- 8
- Views
- 3K
Forum statistics
Members online
- AZflyer
- shadow images
- littlecar
- AlpineBound
- JOAT
- Datsun Man2
- MEIronMan207
- sancap
- airdrumsolo
- AMMO461
- DVD
- bjorn240
- fatmab
- IdaSHO
- chewy2
- ravman
- vintageracer
- asespc13
- phuta
- roaming.nomads
- mark5280
- AKPacker
- lazybummm
- LivinAnAdvntr
- STREGA
- Savagenut
- calexander501
- hyak
- kirk1988
- OVRLNDFX4
- SDDiver5
- Rovertrader
- geovangelist
- nunyabizz
- granite7
- 85_Ranger4x4
- SwtS
- 14JKURX
Total: 4,411 (members: 40, guests: 4,371)

