Box#3.0

Shadewalker

Member
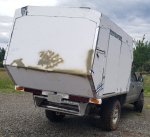
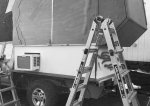
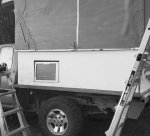
Ideas from Box#3 build.

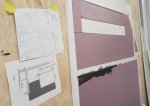
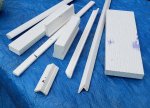
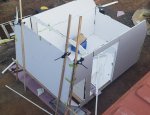
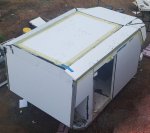
3mm PVC (Sintra) adhered w Black Geocel 4500 to XPS (Pink Panther), with various amounts of PVC lumber inserted within the panels as extra "sticking" points
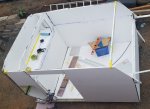
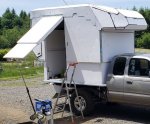
Duel wall enabling roof height expansion via linear actuators synced to a four unit controller.

Tested on back-ass washboard<<<:mad::mad::mad: roads w no speed limit. (Secure your loose items!) No asphalt queen here!

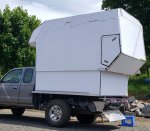
Cab over is NOT a sleep/person area. Its a Good area for storage of clothes& blankets.

Box is bolted to aluminum Z channel, which itself is attached to the truck frame via a couple aluminum box channels. Aluminum angle is used on all four outside corners as extra strength and 'brush beater' point of contact.
 

Attachments

  • CampBox3-0002.jpg
    CampBox3-0002.jpg
    62.2 KB · Views: 84
  • CampBox3-0003.jpg
    CampBox3-0003.jpg
    484.1 KB · Views: 87
  • CampBox3-0004.jpg
    CampBox3-0004.jpg
    709.9 KB · Views: 88
  • CampBox3-0005.jpg
    CampBox3-0005.jpg
    218.3 KB · Views: 103
  • CampBox3-0006.jpg
    CampBox3-0006.jpg
    339.3 KB · Views: 107
  • CampBox3-0017.jpg
    CampBox3-0017.jpg
    208.5 KB · Views: 102
Last edited:

Shadewalker

Member
PVC panel construction. Only a few pics as.....ADHESIVE,,everywhere!! Used a auto staple gun w stainless steel fasteners to keep the PVC components from sliding about until the adhesive set.
 

Attachments

  • CampBox3-0052.jpg
    CampBox3-0052.jpg
    277.8 KB · Views: 47
  • CampBox3-0054.jpg
    CampBox3-0054.jpg
    91.9 KB · Views: 46
  • CampBox3-0055.jpg
    CampBox3-0055.jpg
    235 KB · Views: 45
  • CampBox3-0056.jpg
    CampBox3-0056.jpg
    219.4 KB · Views: 44
  • CampBox3-0057.jpg
    CampBox3-0057.jpg
    271 KB · Views: 43
  • CampBox3-0066.jpg
    CampBox3-0066.jpg
    243.1 KB · Views: 42

Shadewalker

Member
Shell & rear corner details. (with lots of clamps/jigs on rear lower corner work)
 

Attachments

  • CampBox3-0046.jpg
    CampBox3-0046.jpg
    38.3 KB · Views: 53
  • CampBox3-0048.jpg
    CampBox3-0048.jpg
    364 KB · Views: 54
  • CampBox3-0049.jpg
    CampBox3-0049.jpg
    291.9 KB · Views: 53
  • CampBox3-0050.jpg
    CampBox3-0050.jpg
    316.6 KB · Views: 47
  • CampBox3-0051.jpg
    CampBox3-0051.jpg
    135.8 KB · Views: 47

Shadewalker

Member
Storage hatch construction.
 

Attachments

  • CampBox3-0037.jpg
    CampBox3-0037.jpg
    166.5 KB · Views: 29
  • CampBox3-0038.jpg
    CampBox3-0038.jpg
    335.8 KB · Views: 30
  • CampBox3-0039.jpg
    CampBox3-0039.jpg
    107.6 KB · Views: 30
  • CampBox3-0040.jpg
    CampBox3-0040.jpg
    98.5 KB · Views: 29
  • CampBox3-0041.jpg
    CampBox3-0041.jpg
    147.5 KB · Views: 29
  • CampBox3-0042.jpg
    CampBox3-0042.jpg
    141.4 KB · Views: 29
  • CampBox3-0065.jpg
    CampBox3-0065.jpg
    206.6 KB · Views: 29

Shadewalker

Member
Box-shell skinning (PVC skins on cab-over & roof are meant for cosmetic purposes only & to protect the fiberglass under layer from UV.
 

Attachments

  • CampBox3-0008.jpg
    CampBox3-0008.jpg
    732.1 KB · Views: 36
  • CampBox3-0032.jpg
    CampBox3-0032.jpg
    149.4 KB · Views: 35
  • CampBox3-0035.jpg
    CampBox3-0035.jpg
    297.8 KB · Views: 36
  • CampBox3-0045.jpg
    CampBox3-0045.jpg
    263.8 KB · Views: 36
  • CampBox3-0059.jpg
    CampBox3-0059.jpg
    261 KB · Views: 35

Shadewalker

Member
linear actuators interior view and results. (x4 actuators at 400lb each.) OVERKILL, much?!? ?

PS. the entry door insert that slides down to close doorway when camper is expanded needs work. Currently it is sitting in its slot via friction...a LOT of friction :rolleyes: Next version will use locking drawer slides or a linear slide mechanism of some sort.

Interior wire work is now covered using a wire run protection/"purdy it up" kit
 

Attachments

  • CampBox3-0007.jpg
    CampBox3-0007.jpg
    389.3 KB · Views: 49
  • CampBox3-0028.jpg
    CampBox3-0028.jpg
    500.1 KB · Views: 48
  • CampBox3-0029.jpg
    CampBox3-0029.jpg
    222.3 KB · Views: 48
  • CampBox3-0067.jpg
    CampBox3-0067.jpg
    91.2 KB · Views: 44

Shadewalker

Member
Interior design ideas-part 1 of 2 (10 attachment limit hit)


many, many clamps are your friend when gluing carpet to hard angles.
 

Attachments

  • CampBox3-0010.jpg
    CampBox3-0010.jpg
    129.3 KB · Views: 33
  • CampBox3-0012.jpg
    CampBox3-0012.jpg
    188.6 KB · Views: 34
  • CampBox3-0018.jpg
    CampBox3-0018.jpg
    109.4 KB · Views: 34
  • CampBox3-0019.jpg
    CampBox3-0019.jpg
    142.8 KB · Views: 36
  • CampBox3-0020.jpg
    CampBox3-0020.jpg
    69.5 KB · Views: 33
  • CampBox3-0021.jpg
    CampBox3-0021.jpg
    92.3 KB · Views: 33
  • CampBox3-0022.jpg
    CampBox3-0022.jpg
    97.2 KB · Views: 31
  • CampBox3-0023.jpg
    CampBox3-0023.jpg
    106.6 KB · Views: 31
  • CampBox3-0024.jpg
    CampBox3-0024.jpg
    71.4 KB · Views: 32

Shadewalker

Member
Interior design ideas-part 2 of 2 (10 attachment limit hit)
 

Attachments

  • CampBox3-0025.jpg
    CampBox3-0025.jpg
    76.5 KB · Views: 17
  • CampBox3-0026.jpg
    CampBox3-0026.jpg
    145.3 KB · Views: 18
  • CampBox3-0027.jpg
    CampBox3-0027.jpg
    97.6 KB · Views: 18

Shadewalker

Member
Porch concepts.

Yes, a folding table gave its legs for this. It will be missed.
 

Attachments

  • CampBox3-0011.jpg
    CampBox3-0011.jpg
    218.2 KB · Views: 39
  • CampBox3-0064.jpg
    CampBox3-0064.jpg
    265.1 KB · Views: 39

Shadewalker

Member
Hoorah! The ********er fits!!!
 

Attachments

  • CampBox3-0043.jpg
    CampBox3-0043.jpg
    55.8 KB · Views: 35
  • CampBox3-0044.jpg
    CampBox3-0044.jpg
    62.7 KB · Views: 37
  • CampBox3-0067.jpg
    CampBox3-0067.jpg
    388 KB · Views: 37

Shadewalker

Member
Installation of comforts of modern life in desert areas. (AC)
 

Attachments

  • CampBox3-0061.jpg
    CampBox3-0061.jpg
    232 KB · Views: 36
  • CampBox3-0062.jpg
    CampBox3-0062.jpg
    154.2 KB · Views: 36
  • CampBox3-0063.jpg
    CampBox3-0063.jpg
    123.2 KB · Views: 35

rruff

Explorer
NOTE!! PVC expands/contracts something fierce in sunlight. So bubble city. :cry:
She is water tight and holding like a drum. However, plans are in progress planning a updated build, with either more studs in the walls, or skip pvc entirely, for cosmetic and hardpoint reasons. One might have better luck w adhesion between the PVC & Foam if one has a vacuum table setup, however, this is only a theory in the mind of this non-engineer. ;)

I don't think expanded PVC would make a very good skin, for the reason you mentioned. Plus it should have a good paint if you want it to last. The gelcoated FRP skins would work better.

I've used expanded PVC as a core material with carbon laid on both sides, and that seems to work very well. The PVC needs to be sanded first. XPS should be prepped with sanding also... plus I like to perforate it with a wallpaper roller and work the adhesive (epoxy in my case) into the cavities. PLM Premuim would also work as an adhesive.

I've tried 3 different camper building methods now, and the one I think I like the best (easy and cheap) is using 1/8 luan skins over a XPS+ wood (1x every 1-2 ft) core, and then a hand-laid epoxy/fiberglass outer coating. It gives you a nice looking wood interior, and plenty of hard points for mounting internal stuff. You have to be very careful with exterior penetrations of course.
 

Shadewalker

Member
(1x every 1-2 ft)

Can you elaborate on what 1x pertains to?
Ie, is it a 1x1 stud every couple feet?

Might you have a link or a picture available showing a completed panel as mentioned above? It'd be handy to visualize it.

Thank-you ?
 

RoamIt

Well-known member
I like some of your concepts Shadewalker! I really want to do a lifting roof on my build, trying to keep it short overall, so only place to go is up.

I was looking at various actuators/truck box lifts. Do you mind sharing the ones you went with? Are you going to use any kind of track system to keep things aligned?
 

Forum statistics

Threads
188,303
Messages
2,905,198
Members
229,959
Latest member
bdpkauai
Top