Boxy off-road camper build thread

kzam

Observer
After a lot of reading and and stealing ideas, I’ve started on my own build.

Two of the companies that make trailers with simple shapes are Rover Trailers and Hiker Trailer.

289c71_78737a06cdf34c1ca2b093f1082bfc4d-mv2_d_2448_2448_s_4_2.jpg

2015-03-21 14.35.53.jpg


I’m making this trailer as a rolling, waterproof tent with a more comfortable mattress. I plan to use this trailer for camping primarily when it’s not nice enough outside to be backpacking and sleeping in a regular tent. This isn’t intended to be a micro RV with a flatscreen TV for watching DVDs in a crowded campground and I’m not going to try to pretend it’s luxurious. It’s a small, portable, and rustic basecamp when it’s too cold and too rainy for backpacking.


Trailer Frame:
I wanted something substantial to build on and I am less concerned about weight than I am with strength and off-road capability. Is this overkill? Probably.
  • 2x3 steel tubular frame, ¼”-thick walls.
  • 3500# Dexter axle with idler hubs
  • 16” wheels
  • 5’ x 8’ platform for a (nearly) queen size mattress

Begin.jpg


Design Decisions:
My design decisions are driven more by function than aesthetics so instead of the smooth, flowing lines of a traditional teardrop shape, my build is based on the following personal preferences:
  • I don’t like the idea of needing to reach forward (or bang my shins) to use the galley. I want the counter height to be taller than my kitchen counter at home and flush with the rear edge of the trailer.
  • Because I live in the rainy Northwest, I want access to the galley for food without exiting the trailer. This means there needs to be an open floorplan.
  • I want to maintain as much headroom as possible using a standard 4x8 sheet of plywood for the walls. This means my plywood won’t cover the trailer frame but will sit on top of it.
  • I would prefer to have a simple rear hatch, even if it means I have a boring rear profile.

IMG_3877.JPG


Other considerations:
  • I want large doors to make entry and exit as simple as possible.
  • I want a lot of windows for light and airflow.
  • I will have a stove for cooking but it may not be permanently attached to the trailer.
  • I will run wiring for LED lighting and electrical outlets for charging phones/laptops but I’m less concerned about finishing all those details right now. I may just stick with headlamps for now and charge the electronics in the tow-vehicle while we’re driving.
  • My primary goal is to get this thing waterproof and operational (safe to camp in) by August because we have a trip planned. I’ll work on more details like maybe a solar panel (next winter).
  • I will be using an outer aluminum skin with aluminum angles at the edges to keep it water-tight.


Building Process:
By avoiding the flowing curves of a conventional teardrop, I hope to simplify the build. I’m also hoping I can use thicker materials in my roof because I wont have to arch or flex my panels as much.

I am also planning to build my trailer sides in sections and then use carriage bolts to bolt the walls to each other and also to bolt the walls—straight through the floor—onto the frame. It sounds good in theory anyway. How am I going to do this?
  • Build the wood floor and epoxy it to the metal frame (for now).
  • Install the interior flooring material on my plywood floor.
  • Build wall frames for the front, rear, and sides and attach those to the inner wall skins.
  • Bolt the four walls together using carriage bolts in each corner.
  • Bolt the four walls through the floor (and through my flooring material) straight through the metal of the trailer frame.

By waiting to install the outer skin and insulation, I can have a finished floor and my interior finished walls in place relatively quickly and easily. I can then run my electrical wiring to each appropriate location before installing the wall insulation or the outer plywood walls.
 

AggieOE

Trying to escape the city
Looking to do this exact same thing here soon! Even down to constructing it from the inside out. I figure that with a boxy shape, it has the potential to add a roof rack for carrying firewood and supplies or add a RTT and have options for bedding. Plus, boxes are easier to construct. lol

I'll be following along.
 

workingonit71

Aspirantes ad Adventure
heavier than most (mine); heavier than all (yours)?

After a lot of reading and and stealing ideas, I’ve started on my own build.

Two of the companies that make trailers with simple shapes are Rover Trailers and Hiker Trailer.

View attachment 394827

View attachment 394828


I’m making this trailer as a rolling, waterproof tent with a more comfortable mattress. I plan to use this trailer for camping primarily when it’s not nice enough outside to be backpacking and sleeping in a regular tent. This isn’t intended to be a micro RV with a flatscreen TV for watching DVDs in a crowded campground and I’m not going to try to pretend it’s luxurious. It’s a small, portable, and rustic basecamp when it’s too cold and too rainy for backpacking.


Trailer Frame:
I wanted something substantial to build on and I am less concerned about weight than I am with strength and off-road capability. Is this overkill? Probably.
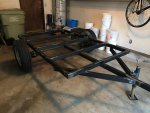
  • 2x3 steel tubular frame, ¼”-thick walls.
  • 3500# Dexter axle with idler hubs
  • 16” wheels
  • 5’ x 8’ platform for a (nearly) queen size mattress

View attachment 394825


Design Decisions:
My design decisions are driven more by function than aesthetics so instead of the smooth, flowing lines of a traditional teardrop shape, my build is based on the following personal preferences:
  • I don’t like the idea of needing to reach forward (or bang my shins) to use the galley. I want the counter height to be taller than my kitchen counter at home and flush with the rear edge of the trailer.
  • Because I live in the rainy Northwest, I want access to the galley for food without exiting the trailer. This means there needs to be an open floorplan.
  • I want to maintain as much headroom as possible using a standard 4x8 sheet of plywood for the walls. This means my plywood won’t cover the trailer frame but will sit on top of it.
  • I would prefer to have a simple rear hatch, even if it means I have a boring rear profile.

View attachment 394826


Other considerations:
  • I want large doors to make entry and exit as simple as possible.
  • I want a lot of windows for light and airflow.
  • I will have a stove for cooking but it may not be permanently attached to the trailer.
  • I will run wiring for LED lighting and electrical outlets for charging phones/laptops but I’m less concerned about finishing all those details right now. I may just stick with headlamps for now and charge the electronics in the tow-vehicle while we’re driving.
  • My primary goal is to get this thing waterproof and operational (safe to camp in) by August because we have a trip planned. I’ll work on more details like maybe a solar panel (next winter).
  • I will be using an outer aluminum skin with aluminum angles at the edges to keep it water-tight.


Building Process:
By avoiding the flowing curves of a conventional teardrop, I hope to simplify the build. I’m also hoping I can use thicker materials in my roof because I wont have to arch or flex my panels as much.

I am also planning to build my trailer sides in sections and then use carriage bolts to bolt the walls to each other and also to bolt the walls—straight through the floor—onto the frame. It sounds good in theory anyway. How am I going to do this?
  • Build the wood floor and epoxy it to the metal frame (for now).
  • Install the interior flooring material on my plywood floor.
  • Build wall frames for the front, rear, and sides and attach those to the inner wall skins.
  • Bolt the four walls together using carriage bolts in each corner.
  • Bolt the four walls through the floor (and through my flooring material) straight through the metal of the trailer frame.

By waiting to install the outer skin and insulation, I can have a finished floor and my interior finished walls in place relatively quickly and easily. I can then run my electrical wiring to each appropriate location before installing the wall insulation or the outer plywood walls.
kzam said:
Trailer Frame:
I wanted something substantial to build on and I am less concerned about weight than I am with strength and off-road capability. Is this overkill? Probably.
  • 2x3 steel tubular frame, ¼”-thick walls.
  • 3500# Dexter axle with idler hubs
  • 16” wheels
  • 5’ x 8’ platform for a (nearly) queen size mattress
I’m making this trailer as a rolling, waterproof tent with a more comfortable mattress
  • I only wanted a hardtop tent, with mattress and cooling/heating, since I'm done with tents. We had a similar intent, to begin. and strong was always the underlying principle.
  • 2"x3"x.250" for your frame is way overkill, at 7.11 lbs. per foot. And you're planning to do a floor on floor, and walls upon walls (and add an outer skin to that). On a 5x8 frame to boot. Work out the planned items and components bare weight (by the foot, by the sheet, per item, etc), and factor in a fudge factor of 20% for all the hardware you will probably use but not estimate in advance. You are planning a queen bed, wiring for LEDs and charging laptops et al; doors require extra bracing, as do windows, waterproofing requires seals here there and everywhere. As your build progresses, you'll make changes and improvements, adding weight, rarely subtracting it.
  • You value strength over all other aspects; I did , too, using 3/4" plywood, where 1/2" would've been sufficient. I used steel corner braces, and Simpson StrongTies gusseted angle braces, as well as 90% stainless carriage bolts, washers, nylocks, and acorn nuts (for show), gluing every seam (inside the joint, and on inside and outside surfaces) with PL Premium Adhesive. Latches, hinges, hasps, and draw-latches were the strongest I could find, and I double-upped their number, for extra strength. I used 4 coats of polyurethane as a base for three coats of industrial paint on the outside, two of each inside. Door(s), window(s), and A/C (mounted inside, thru the rear bulkhead), were all framed/braced with 1/2" oak lumber. Automotive seals, not adhesive D-seals, were used for the doors. Rubber-backed industrial matting serves as the flooring over my double-layered plywood base. Add in the internal generator w/external extended-run fuel supply, AGM battery, redundant LED lighting (three sets in the cabin), chargers(2), fuse & automatic breaker boxes, inverter, pipe-clamp stabilizers, and 7.5" of foam mattresses & bedding, and I have a strong , but heavy trailer.
  • It wasn't always a heavyweight. I started with a 175 lb, 50"x 60" frame, of 11 gauge steel, to which I added 1.5"x2.5" tubing (11 ga), to make it a 4'x8' frame. I changed hubs, stubs, and bearings switching from 8" wheels to 14" (lined fenders, too). The single drawbar was yanked, and replaced with 3"x3"x.1875 tubular steel, 6' long, welded to three crossmembers and to a central spine of 1.5"x2.5"(11 ga) running front to rear. The trailer frame and bare floor weigh 400 lbs now, plenty strong, too. But it gets better. I was using a spindly axle, until I knew I/ would go off-road. The spring hangers on one side tore loose, so I built the replacement spring hanger/spring assembly from 1/4" and 3/16" steel, welded and bolted together. Then bolted to the frame in place of the old parts. A Dexter 3500 lb axle w/brakes and Ezy-lube hubs was installed, and my wiring changed from 4 pin to 7 pin cable. I estimated that the axle/spring/frame reinforcement added 200 lbs. Then, I made a shock control device of my own design, to it, for another 15 lbs. Lastly, new AT tires, bigger, wider, heavier, and fender extensions to cover, with mudflaps, too. I'm still adding on...this week 25 more lbs. I estimate my trailer, planned to be under 1000 lbs (to pull with my HHR Panel, has now hit 1900+. I haven't estimated the extra gear I am considering, like an awning, and roof rack, so the sky's the limit. Did I mention that I might even add insulation?
  • Sort of a long-winded, and round-about description of my good design intentions, for eventual off-road (light duty) ventures, gone astray. I valued strength, and overbuilt a lot, but I used lighter components to start, and left things out (insulation), I felt I could do without. My plan was flawed, from the start; I could stay light, and meet my weight goal, or very strong, and pull the added weight with my truck (until I find my 4wd). It's very easy to let it get out of hand, even with detailed plans, as I had. It just grows on you.
  • completed 4x8 plywood trailer.jpg this trailer started out as
  • original frame, bent tongue, crossmember attachment.jpg this spindly frame
  • Make it a simple design, less cuts and angles to worry about, square it off. My trailer is square and simple in shape, with just enough clearance for the roads/dirt roads I'll travel. A Hiker clone would be easier to build, while a Rover clone would have more departure clearance. You choose. Good luck, and consider my overbuild. Do you really need it THAT strong (and heavy)?
 
Last edited:

Nd4SpdSe

Adventurer, eh?
kzam said:
[*]I will run wiring for LED lighting and electrical outlets for charging phones/laptops but I'm less concerned about finishing all those details right now. I may just stick with headlamps for now and charge the electronics in the tow-vehicle while we're driving.

One thing I will say is that integrated LED lighting is actually VERY handy. In a panic situation, you don't have to run looking for light, hoping it has a good battery, and working only in that little lighted area. On my first use of my awning, we had finished installing my LED lights the night before. On the first night, around 11pm, we got hit by a storm that had spawned tornados earlier (wasn't aware of it) and got hit with winds of unknown speeds because the closest weather station couldn't register it. I was holding down the awning the best I could as to now lose it, and I will say that I was glad that we could work I the dark, the pouring rain, and not have to worry about lighting, keeping our hands free to work. I also installed lights in my RTT, but I would say that having some integrated lights is very convenient.
 

ottsville

Observer
I'll be following your build as I'm looking to do something similar.

2x3x1/4" - yikes! that is going to be super strong! I've built much bigger trailers that didn't use tubing that heavy. Be careful, like workingonit71 said, it is quite easy to go "just a little bit stronger" and go overboard.
 

azscotts

Observer
Sounds like a fun build. A word to the wise, run the power/ground for your lights as soon as possible. It'll make life easy down the road.

I ran LED lighting in my build as well. I have two reading lights on the headboard side and LED light strips under the cabinets.

cabinet_lights_no_display.jpg

reading_light.jpg
 

Hummelator

Adventurer
X3 on the frame material being overkill.
I had originally thought about using 3/16" 2x3 tubing, but ended up going with the 1/8" wall. Once I actually put my hands on the material I knew right away that 1/8 was going to be plenty strong.
Keep the updates coming!
 

kzam

Observer
I was able to buy some more supplies yesterday so I should have a few more updates coming.

I'm using 1/2" CDX plywood for the outer walls. I'm not sure if the exterior glue in this stuff will make a difference but maybe it will help with future delamination. It did get soaked on the drive home.
IMG_3993.jpg

For the interior walls, I found some 1/4 subfloor laminate with exterior glue as well. It has a thin layer of wood on top like Lauan panels but hopefully it's a bit more durable.

The last thing I found was some thin, plastic sheets of FRP I'm going to use between the metal frame and the first sheet of plywood.
IMG_3994.jpg
IMG_3995.jpg

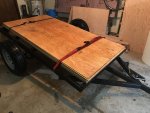
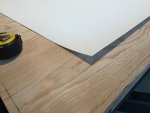
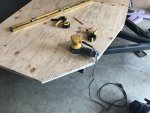
I used caulking tube of Loctite PL polyurethane adhesive to glue the white FPR sheets to the plywood floor. Once it dries, I'll flip it over and glue it to the trailer frame.

I have a set of plans for a traditional teardrop trailer and they recommend painting on an asphalt roof sealant on the bottom to keep the water out. I've also seen a lot of folks use bedliner which is probably even better than the roofing goo. The stuff I am using was only $20 a sheet and I'm pretty confident it will keep water out.

As I mentioned before, I'm building my walls separately and bolting them through my floor section and to the trailer frame. The polyurethane adhesive (directly on the frame) and the bolts around the edges of the frame should keep the plastic panels in place.

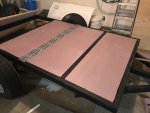
Because my frame is 5x8, I needed to use two pieces of 5x4 plywood and two pieces of 5x4 FRP. There's a seam in the middle that hits exactly on one of my 2-inch wide crossbars. To make sure water doesn't enter between the two sheets, I have a roll of flexible adhesive roofing material about 9" wide that was designed for use on skylights between the box frame of the skylight and the waterproof sheeting (or tar-paper) that is tacked down under the shingles. I'm going use this stuff to bridge the gap between my two panels where they meet on the underside of the trailer frame.

Once I get these two pieces in place on the frame, I'll install the flooring material to the top of the plywood and I'll be ready to start framing some walls.
 

kzam

Observer
Last night I added 2-inch insulation between my frame rails. The only seam between my two plywood/FRP floor panels is in the center so I used a strip of adhesive foam window flashing to span the gap. The insulation panels are tight against the frame so I don't think much water is going to make its way up this far but this is cheap peace of mind.
IMG_4001.jpg

Next I flipped the white plastic FRP and plywood pieces over and glued them to the frame with polyurethane glue. IMG_4002-FLIP.jpg

Here's a shot of the plywood glued and clamped to the trailer frame to let the glue dry.
IMG_4003.jpg

The next step is to install my flooring material to the top sheet of my plywood.

The wall panels will be built flat and then I will bolt the bottom edge through my flooring, straight through the trailer frame.
 

kzam

Observer
I glued down the flooring material to my plywood decking and I also (temporarily) attached the bottom rails of my walls. The flooring material kept trying to curl up on the edges so bolting down the frame rails helped everything dry flat.
IMG_4006.jpg

Next I cut out my four pieces that make up my side walls. I screwed them together and sanded the edges to make sure they were close to identical.
IMG_4009.jpg

Just to get an idea how things were going to look, I briefly screwed one of the exterior sides in place. I also drew an outline for a door with a blue sharpie to get a better sense of my profile and proportions.
IMG_4007.jpg

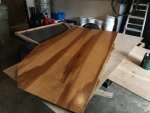
Then I started sealing my interior walls with a waterproofing Varithane. It's going to take three coats and this is just the first coat.
IMG_4010.jpg

As I mentioned before, these interior sheets are actually a floor underlayment made with exterior glue. They're not as "finished" looking as plywood sheets of Oak, Alder, Maple, Cherry, or really anything. But hopefully the exterior glue will help prevent delamination in a humid interior.
 

kzam

Observer
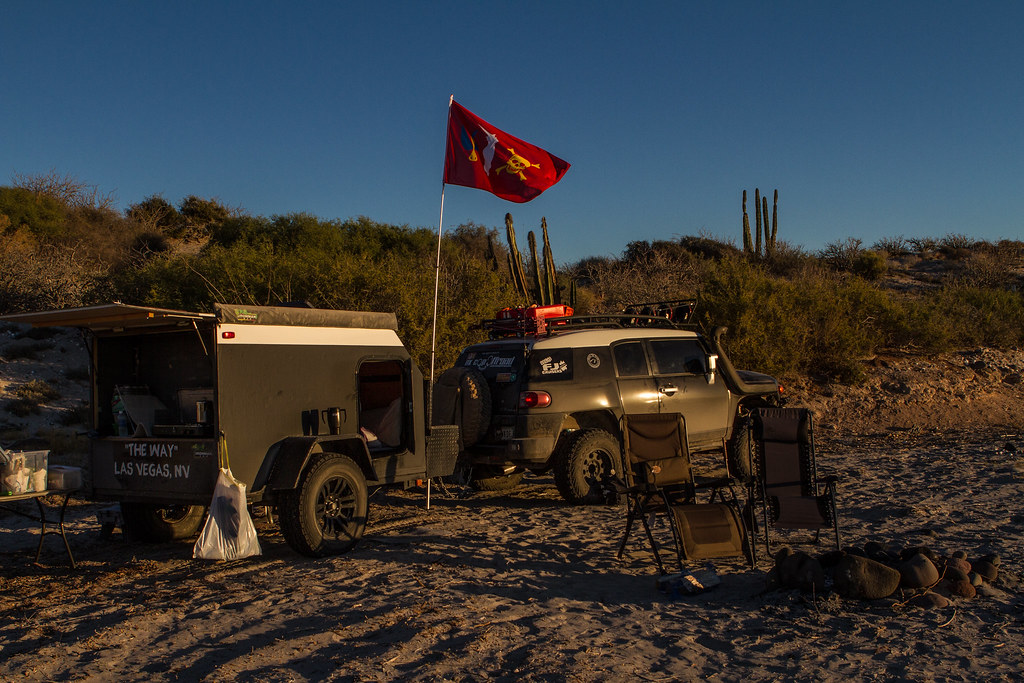
I was checking out Vegas Nick's build today.
25971411531_4d4aa52ffe_b.jpg


http://forum.expeditionportal.com/threads/140573-My-offroad-teardrop-build/page4

Someone there asked whether a 5x8 interior floor or a 5x9 interior floor would be better. I can't answer for Nick but I thought I would share my own thoughts.

I have a 5x8 frame with walls that are just over 2 inches thick. ( 0.5" exterior plywood + 1.5" insulation + 0.25" laminate interior.) This gives me an interior size of 91.5" by 54.5" open space (assuming I don't build a galley bulkhead wall). A queen size mattress is 60 x 80, making it making it 5.5" too wide to fit within my walls anyway. A full mattress is 6 inches shorter on each side (54 x 74) so it will fit within my walls and leave me with 17.5 inches for a galley floor.

I think 5x8 is sufficient for me and my wife because I'm only 5'10" and she's 5'6". But if I were more than 6-feet tall, I think I would prefer more leg room and go with a 5x9 frame instead.

To fit a queen mattress inside a 5x8 frame, I guess if would be possible to attach the walls to the outside of the frame rather than attaching them to the inside edge of the frame. But then the actual outer dimensions would be wider than 5 feet and may require adjustments to the axle width.
 

ottsville

Observer
Glad to hear your thoughts about trailer size. I already have a 5'x9' utility trailer and am looking at converting that. It won't be a true off-road rig, more of something for forest service roads and as a hard sided tent. And I think I will appreciate the extra storage since the trips I will be using it for will be some combination of climbing, mountain biking, and kayaking so there is often a good bit of gear on my trips.

How is the build coming?
 

kzam

Observer
How is the build coming?

My walls are framed up and I've ordered some doors. I'm out of things to work on until the doors arrive so I'm getting bored.

Here are a few pics of the way things look currently:

Exterior-May12.jpg

The side window isn't actually installed, it's just hanging on some screws for now. I want to install the doors first so I can make sure the window lines up. The doors will be 26x36 and will fit into the taller, black sharpie line. I'm also going to install a window in the front angled section. There are two pieces of plywood in the roof that aren't currently attached. Removing those gives me light inside to work and allows me to stand up.

Here's how the interior looks with the varnished 0.25" flooring panels. I would have just painted them but my wife wanted them to look like wood. Since I'd rather use this trailer with her than go by myself, I'm taking her advice.
Inside.jpg
 
Last edited:

Forum statistics

Threads
188,337
Messages
2,905,699
Members
229,959
Latest member
bdpkauai
Top