When we, two restless Estonians, travel we always think ahead what kind of adventure we will be doing next. We where taking a break from non-stop traveling over a year in SE Asia and sitting pretty in our rented house in Bali. That's when all this idea of building a “house on wheels” came to light. At that point we had still a year left for finishing SE Asia trip and there was plenty of time to plan how is the best way to make our next dream to come true. Next trip will be driving from Estonia to Argentina. First leg of the journey will be to Spain maybe. Then shipping our overland camper to Canada. From there to Alaska and then zic sacking all the way to Argentina. Darien cap excluded of course. From Argentina, who knows. Maybe then we will return home or ship the vehicle to Vladivostok and driving from there back to Estonia. Exact plan and route will be decided on the road.
First idea was that we definitely need 4wd vehicle. At the same time we had license issues, as we both hold only normal car license its almost impossible to find a vehicle what can accommodate all the luxuries what we enjoy home. There where some 2'nd hand vehicles but prices started 20thousand+ for just plain chassis . So it was only choice in our budget to buy a 2wd drive vehicle. Lots of research went into finding a cheap way to build a “living box” in the back of some vehicle before we even have bought one. Long story short was that building a polyurethane living box is idioticly expensive here in Estonia and that's how new idea was born of buying second hand vehicle what already had large box in the back.
About 2 months later we found a perfect car trough German website, but we where still in SE Asia and the car was in Germany. Luckily my brother had some free time from work and did fly to Germany and bought it for us. So our platform for “house on wheels” is now a Mercedes-Benz Sprinter 313.
Vehicle info as follows:
Cross weight of 3500kg
95kW emission class 5 diesel engine
6gear manual gearbox
67 000 km on the clock
3 seats
aircon
cruise control
box: (L) 4375mm (H) 2200mm (W) 2050mm
First the box had a two big metal doors at the back. Friend of ours helped us to find reasonable company who did not charged us trillion euros for removing doors and attaching polyurethane wall there. Some German online caravanstore is where we found entry door and in that state is how our soon to be home vehicle was parked for prox. 3 months. Work just did not let us continue the build.
As we mentioned before we had lots of time to plan that build. That's how all the floor plan and equipment list was ready long before we even came back to home from our last travel.
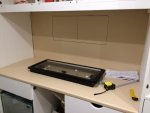
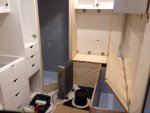
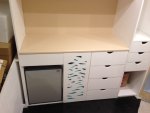
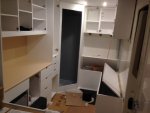
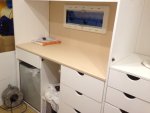
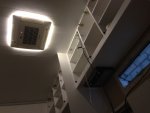
As today we now have most part of furniture attached inside and waiting for the last parts to arrive. Hopefully it will arrive next week.
All the electric and other stuff is mostly already waiting in our garage.
List of all the other stuff what we will have in finalized build:
4 pics. of Victron Energy telecom AGM 165ampH batteries
65A MPPT solar charge controller from EP Solar
6 pics. of “back contact” up to 22% efficient 100W solarpanels (semi flexible,
2,6kg each)
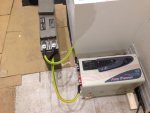
1500W (4500W peak) inverter/charger from Zodore
Dometic FreshJet 1100 aircon unit 230V (that's what Zodore inverter is for)
Dometic MDC65 refrigerator 12V
Surflo “Whisper King” waterpump 12V
Surflo accumulation tank
Webasto ceramic cooker plate X100 (runs on diesel)
Webasto Dual Top Evo 6 hot water/air heater (11L boiler, runs only on diesel)
126L clean water tank
71L gray water tank
LED lights
Dometic Seitz S4 hinged windows
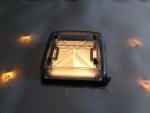
Dometic AirQuad mini Heki roof lights
Dometic portable toilet 976
Finallysed project will have all the bells and whistles what we would like to find in perfect overland camper. Queen sized bed (1600mmX2000mm), kitchen, shower, hot/cold water, refrigerator, aircon and separate seating area.
We have tested our solarpanels under Estonian sun, and data given to us from Dometic, we should have enough power generated each day to be able to run aircon every day at least 6-8 hours. Aircon usage will be planned mainly for night time and if needed we still have enough space on the roof to install additional 100W solarpanel. Boondocking is how we are planning to spend 90+% of our camping time on the next trip and that's how our overland camper is planned from the start.
DefinitelyI forgot some important things to write about our build but will keep posting updates with pictures as the project goes along.
If anybody has any questions then we would be happy to answer them or maybe somebody has some great advice how to make our overland camper eaven better, then all the ideas are more than welcome.
Sorry if my English is little bit weird but its my 3'rd language ☺


Last edited:


