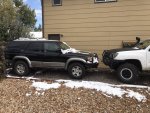
Calypso the Poptop 3rd Gen 4Runner Build

Bhodgin

Member
I've not written a build thread before, though I've owned many a 4Runner and Tacoma and have built them all out in various ways.

This rig I picked up in October of 19' and have been building it out since. Anyone that I've talked to about it has been curious about the build process. I figured id take a stab at writing something up about it, though I don't have the best photos to help.
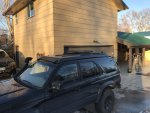
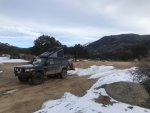
IMG_1547 copy.jpgIMG_2541 copy.jpg
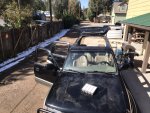
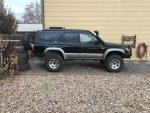
I bought the 4Runner Limited with 290,000 miles on it, and it had a misfire on 3. I bought it because it was cheap, black, rear locked, multi-mode, and forgive my vanity, it had heated mirrors. It is Colorado after all.

I limped it home, did valve cover gaskets, injectors, coil packs, plugs and wires. It ran like champ. At that point, I made the jump. I cut the roof out!
 

Bhodgin

Member
6AA33F53-E2D4-4542-9D79-C5B3BAB40B67.jpeg333630D6-AC37-4F23-A672-790007E922B9.jpeg
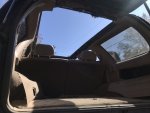
This is the point of no return. I made a cut, the width of the sunroof, and the length of the top. I stopped 3.5” before the rear door crossmember. At this point I built a frame for the roof, to reinforce it.This is the bit of the build I didn’t do a great job documenting. I cut a piece of 3/16” 2x2” angle to fit the roof cut length, and then cut notches in it, and bent it to the lengthwise roof profile. I did this, once piece for each side, and welded another piece of 3/16” 2x2 to theface of it, to reinforce the notched part. It basically made a z shape that sat in the roof opening. I attached this together with a piece of unistrut welded across the back. That basically made the interior frame for the pop top to lift from/mount to. I bolted that through the side of the roof with 3/8” hardware.
 

Bhodgin

Member
IMG_3301.JPG
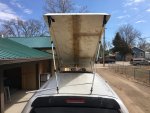
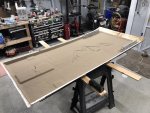
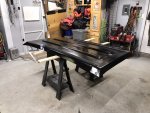
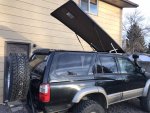
I came up with this idea a few years ago, and had a different 3rd Gen at that point. So using that truck as a template, I cut and fit a top to it. The top was the raised portion of a 8' camper shell that came off of a 90's chevy pickup. I cut the top out of it, cut it lengthwise, and glassed it back together. Then I scribe it to fit the roof of the 4Runner. The hinge that you see there, I made from 1/4" aluminum flat stock and 1/8" 1x1 aluminum angle. Its super easy to replicate. 2 18" flat bolted in the middle, with 4" legs on the rear of it. I got too scared to cut the top out of that truck, so the top sat behind the house for a couple years until I decided I was just going to cut one up and bought Calypso.
 
Last edited:

Bhodgin

Member
At this point, I sanded, and prepped the topper for paint. Before paint, I cut a 1/4” plywood shape of some generic mountains, glued that into the top of the topper, pulled wire for the overhead light, glued an interior pvc ring in around the interior to screw to later, and put some 3/4” plywood in the rear, to mount the light to. Then, I carpeted it with trunk liner and good quality spray adhesive


Once that was done, the top was flipped over, and painted Toyota black. The bulb seal and factory roof rack were installed, and then the top was attached to the vehicle. Now I messed around with various weights of gas strut, before 80 pound, 36” gas struts were installed, as was the light fixture.


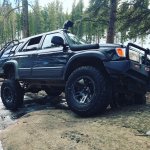
I also scored some 255 85 16 wheels and tires for it from the local Toyota 4x4 club. At the same time, I replace the suspension with a complete Toytec 3” lift, all new ball joints, inner and outer tie rod ends, and cv axles. I also fitted a 167 snorkel and deck plate mod at the same time

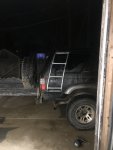
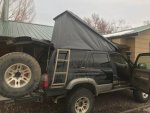
Using an emt bender and 1” emt, I built a ladder to access the interior of the tent, from outside. I used a friends rivnut gun to install the ladder.

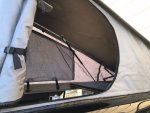
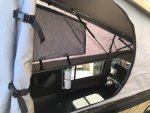
I then purchased several yards of cordura to install. I took time to lay it out, trim it, and then removed it. I dropped it off with a friend who sewed a window, a door, and some well placed velcro in, in exchange for a few bucks and all of my beer.


0D63DBC1-7292-48B2-99B9-953B516A6E27.jpegCB2E171F-91C7-49AC-B9E4-6E24DAA6B0E1.jpeg768F98A1-D588-46C1-A5E9-E5DB71A9885F.jpeg13880060-784B-49A5-B4DE-9E13431DEFB3.jpeg882782DA-53DF-42D6-8092-305B966E5073.jpeg0B8CEF11-5432-493E-8296-F1B42895E16C.jpeg458CCA06-FA48-4C95-972D-12A94AFF1F44.jpeg
 
Last edited:

Bhodgin

Member
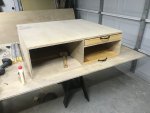
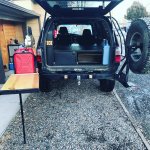
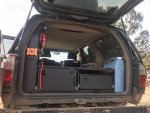
D261BC7D-B836-4BFE-BCC1-F6CEA998906B.jpeg5E800887-F7B8-4426-956C-1B6B0B3614F9.jpeg6BCDE23F-3B16-426C-88DD-AC4CD554F84F.jpegBB902718-F34A-4340-9A0A-F1E96C51495F.jpegF317F178-8F1C-4A78-B103-7125545207BF.jpegNow I can start doing some drawers, and get a little wiring going while Pete has the canvas and is sewing it up. I cut up a pretty standard set of drawers, but built a closet over the driver rear window, and blacked the interior out with vinyl.
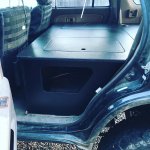
Then I deleted the rear seat to make a longer sleeping platform for the “downstairs” configuration. Inside the cubby area where the rear passenger seat would have been, I mounted the second battery, fuse block, and isolator.
I then coated the whole thing with black raptor liner, and reassembled.
I’ll post more about it later, and I’ll do a better job of taking photos next time I build something fun.
 

Bhodgin

Member
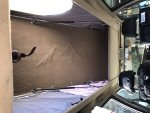
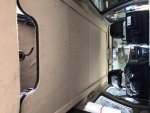
64B351F2-1BD6-4027-8B97-C6D14299FD34.jpeg4ECD3EA0-B41A-4841-BFB2-B96B4E3FCC13.jpeg26C06AFF-97A3-49B0-A97C-9DA8A762E653.jpeg36A92756-F551-41B8-B791-302F59E1A120.jpeg8EB7BA2C-C4E3-4567-A100-5BD6C68113BC.jpeg68656592-B150-430C-AE00-DA9FBF7E1D94.jpeg4C59C5B5-2CB2-4727-B264-E242710CF8F1.jpeg54FE77A9-9A94-4E55-B408-4558053CFDB2.jpegNow that the drawers were done, I was able to get them installed and attach the second battery and get things wired up. I cut the factory headliner to fit in the opening, and reinstalled it, while tucking all of the “upstairs” wiring in there. 4 3/4” plywood bed panels were cut, routed with a slot cutter and carpeted. The one over the seats was screwed down and isn’t removable. The 3 others are removable.

I was then able to install the tent/canvas. I screwed up into the roof over 1/2” wide, by 1/8” thick aluminum flat stock. The pvc rail that was installed during prep for the top, is what the screws sunk into.
On the roof, I screwed through the 3/16” angle to attach down, and sealed with lap sealant to the roof.

This makes it so that my dog and I could sleep upstairs without shuffling gear downstairs. We could also sleep downstairs on the drawer system, with the bed panels removed, and have lots of room to move around. When we did this, 2 bed panels could be left installed, and we could have the dogs sleep upstairs while we were down.
The top fit a 2” mattress, a sleeping bag, and a king size pillow when it is closed. The top was roughly 40”x86” interior. I can’t remember exactly.

There are probably a million little things that I’m forgetting, and I’ve since sold the 4Runner and it’s headed off for its next adventure with its new owner.
Thanks for reading.
 

Bhodgin

Member
@Bhodgin this thing is rad!! Out of curiosity why did you get rid of it? How did the cordura work out as canvas material?
I got rid of it because I likely won’t be working much longer due to Covid 19, and it turns out I don’t need so many well built Toyotas in the driveway. The Cordura worked well as a canvas. A large circular zipper was a bit difficult to get to lay flat in it, but other than that, it worked well. I sold it to a guy in California that is using it as a surf rig. Thought you’d like that.
 

Forum statistics

Threads
188,020
Messages
2,901,228
Members
229,411
Latest member
IvaBru
Top