Casper & Outono - 2x 1998 Discovery 1 Builds

Outono

Well-known member
This is my 1998 Discovery LE. It's my second Rover, my 6th build, and the first vehicle I bought at auction. I call it Casper.

So why the Copart auction? Prices for these vehicles have become crazy and since I knew i'd be restoring the truck either way, I figured i'd be better off buying at the lowest possible price than something inflated in roughly the same condition. But i've got to admit, this whole process has not been easy and its full of fees. Despite winning the auction for just $1,200, I paid another $1,200 in fees and waited almost 7 weeks to get the paperwork from my broker: A Better Bid.

In the state of California, only dealers, wreckers, or other authorized parties get an actual clean / salvage title from Copart upon winning an auction. Everyone else gets a Reg 262, also known as a Bill of Acquisition. That form can be converted into a Salvage Title once you go through smog, a brake & light inspection, and a CHP road-worthiness inspection; doesn't matter if it had a clean title at auction or not. It's a scam, but if you're looking to save a buck, it's worth it. Or at least that's what I tell myself...

The truck is rather unique. The Carfax shows just a single owner its whole life and it was dealer serviced for nearly 25 years. To me, that's worth the risk.

If you're curious, here are the photos from the auction. Who wouldn't take a crack at winning it?

Discovery 1 Copart 2.png

When the vehicle arrived, the only thing wrong with it was a busted front driveshaft so it was replaced with a Tom Woods shaft. Of course, with such an old vehicle (and one that had been sitting a couple years), there was bound to be problems: the steering was crap, the brakes were shot, the tires have dry rot, and the list goes on...

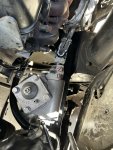
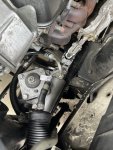
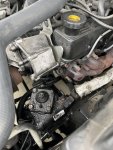
For the first order of business, I decided to address the leaking steering gear. There was so much muck in the area it was hard to tell what was leaking and what wasn't. So erring on the side of caution, I pulled the entire power steering setup all together - pump, lines, gear, and reservoir. While this is a one-person job, it was knocked out in no time with the help of my good friend.

Mmmmm, greasy...
IMG_0628.jpg

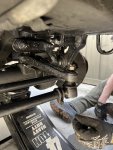
Fluids of all sorts had been dripping for a long time. This was after I mopped up a good amount on the ball joint and track rods. This is so much easier with 2 people.
IMG_0666.jpg

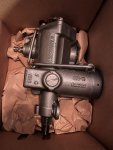
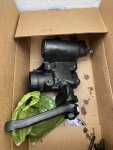
After pulling the gear, I rented an Autozone heavy duty pitman puller to knock the pitman arm off. Made short work of it with my impact gun. After a good drain, I boxed it up and sent it off to Straight Line Steering in San Jose for a rebuild. I initially asked Red-Head Steering to do it (they're well known in the Land Cruiser world), but they pointed me to SLS instead. I figure it'd probably be a better option than going with a rebuilt import.
IMG_0677.jpg

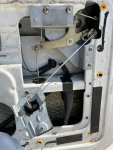
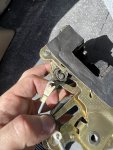
That same day, I decided to tackle the tailgate, which couldn't be opened due to something going on with the lock.

The mechanism looked intimidating at first, but it really wasn't hard to tear apart and reinstall. The FSM is of little use though so make sure you take photos along the way to recall where each rod goes.
IMG_0655.jpg

Turns out a tiny little spring in the locking mechanism was all that it took to get it back to normal. The spring set I used was from Ebay and worked perfectly.
IMG_0659.jpg

Next step will be the brakes, wheel bearings, and ball joints - then onto inspection to get a proper title. The truck blows a noticeable amount of white smoke while idling, but my coolant and oil look just fine. The exhaust doesn't smell sweet and my ScanGauge shows no codes, but there is definitely lifter noise so we'll see how many miles ill get on the engine before a rebuild.
 
Last edited:

Outono

Well-known member
Well, the steering gear is taking a lot longer than I anticipated. $410 all said and done. A bit more expensive than a rebuilt import unit, but to me it's worth the assurance it was done right. Plus, it's supporting a small business. I expect to get the gear back early next week, but until then I figured it might be best to prep the next stage, especially the suspension.

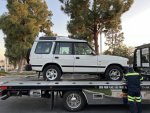
Here's one of the last photos I have of the truck before it was towed to its current resting place. Really wish it was red, but im starting to think I ought to paint it Aegean Blue once the build is complete.

OnTowTruck.jpg

Suspension was a real pain to settle on. My other vehicle is an HDJ81 so the choices for suspension are seemingly endless, but i've found a lot fewer options for Discos and a whole lot less information about their performance. I knew this build wasn't going to be a monster off-roader, but I also didn't want it to be a road queen either...I was aiming to make this vehicle a tourer.

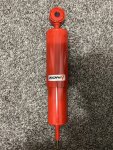
In my search, I ran across Red90's fairly old Land Rover Shock Reference Guide. What a killer collection of information! With this, I dug into each brand and eventually settled on the Koni RAID shocks (90-5374SP1, 90-5401), primarily due to their performance in touring setups and their adjust-ability. I really wish I knew about more Discos running these, but i've only mostly found a handful of Defenders and G-Wagens - everyone seems to rave about them though.

These things are just huge. They might not be the best for flex, but they will never wear out over prolonged travel on washboard roads. And i'll be able to adjust their rebound as I add more weight to the vehicle over time.

Koni.JPEG

Next up was springs. I really don't know a lot about matching shocks to springs so this was a real challenge. To make matters worse, there was even less information available on them than the shocks so I again went to Red90 for his excellent Spring Reference Guide. Except, this time, I took his information, cleaned it up, added my own info from Kings and Lovells, and turned it into a Google Sheet. I hope it helps those of you looking for a suspension upgrade.

Land Rover Coil Spring Reference

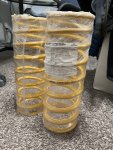
At least on paper, the Kings stood out to me as being the most comfortable and adaptable to whatever I eventually do to this truck. In North America, our options are OME, Terrafirma, RTE, Bearmach, or Land Rover OEM. I suppose KYB or Rancho count, but there is really very little info out there on them. I was intrigued by the Kings, the few reviews on Aulro, and the fact that they are tapered wire progressives, which were, as far as I can tell, the only of their kind for Discos. So I went ahead and imported them from Superior Engineering in Australia after weeks of back and forth with just about every authorized dealer in Aus. They weren't cheap so I sure hope they live up to the hype i've created for them in my head. The models were: KRFR-03T, KRRR-04T.

You can read more about these specific springs here.

Springs.JPEG

I also went down the rabbit hole with brakes, but again, lots of opinions and very little performance data to demonstrate one brand or type being superior to another. I got a great deal on EBC USR slotted rotors (USR195 & USR416) and Akebono ceramic pads (EUR518 & EUR520) so that's where I ended up.

And to round out the lot, I also picked up an OME steering damper. I had the Koni on order, but being more than 2 months away from delivery, I figured the OME was good enough.

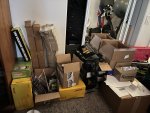
Can't wait to get this thing back on the road and this pile of parts on the truck. Lot's of Gwyn Lewis hiding in there...

Somuchgear.jpg
 
Last edited:

Outono

Well-known member
The steering gear finally came back and boy it looks good. Really happy with Straight Line Steering.

IMG_0864.jpeg

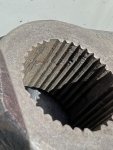
I started prepping the parts for install and noticed my drop / pitman arm splines are beginning to fall apart. Anyone know if this is too much corrosion to use anymore? I'd really prefer not buying a new one, but since im replacing the entire power steering system I figure I shouldn't cut corners at the very end...

IMG_0854.JPEG
 
Last edited:

Rovertrader

Supporting Sponsor
I've seen worse- though that one is pretty buggered, but why skimp now- new pitman not all that pricey? And it's steering of all things- plenty of other areas to skimp without consequence....
 

Outono

Well-known member
I've seen worse- though that one is pretty buggered, but why skimp now- new pitman not all that pricey? And it's steering of all things- plenty of other areas to skimp without consequence....

I ended up ordering a new arm from RoverParts late last night. It was $188 all in, which isn't exactly pricey, but more expensive than I was hoping. As you said, why skimp now, esp. on steering?

Hope to get this all back on the Rover this weekend.
 

Outono

Well-known member
Had a few hours to tackle the steering today and was able to knock out most of it. Thankfully, it was mostly uneventful.

IMG_0893.JPEG

It didn't take long to fit the gear with my buddy Martin. 2 hands really helps installing this heavy thing. The U-joint didn't want to slip on easily, but after a bit of grunting and a smidge of silicon spray, we got it on. My pinch bolt didn't have a nut, but i've seen others use one so ill need to keep an eye on that.

The pump was a bit more of a pain, but mostly because of the irritating order of operations.

Getting some of those bolts in and out of the metal shroud is a real pain in the ass. I didn't feel like pulling the fan so it made matters even worse. After a bit of trial an error, we found there is an easier way to do it.

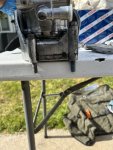
First, we got the pump installed in the metal shroud. Pretty straight forward, but make sure you keep the 2 adapter bolts loose so you can move the pump out of the way for the next step...

IMG_0896.JPEG

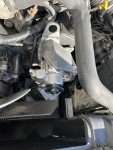
Next, fit the bottom 2 bolts (shown here). You'll need to scoot the pump up a bit while doing so. Pretty easy, but if you don't do this now, it's basically impossible to fit the bolts afterward.

IMG_0899.JPEG

Snug up the bolts with a ratchet box wrench and you're on your way.

IMG_0903.JPEG

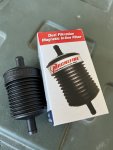
At this point, we ran out of time so later this week i'll jump back in to fit the rest, including the hoses and a filter. I know these vehicles didn't come with a filter, but after having found metal shavings in the original pump, im not going to take my chances.

IMG_0908.JPEG

EDIT: I spoke with Magnefine this morning and there is no difference between their transmission and power steering filters (the one I purchased appeared to be transmission only).
 
Last edited:

Outono

Well-known member
Just when I thought things were coming together, a few wrenches got thrown into the mix.

Yesterday, I tried wrapping up the steering gear only to find out the hex bolt doesn’t fit on the drop arm shaft. At first I thought it was a bad bolt, but after trying a second OEM bolt, I noticed the bottom threads had been damaged - most likely during shipment.

F266A18A-D96D-4CAA-9EF4-5CAEBDE185D9.jpeg

I’ve never used a die set before and it’s not clear what size thread / pitch this thing is. I’ve posted in several forums, but no responses yet. From what I can tell on Google, the hex nut that goes with this is listed as either 3/4” UNF or 7/8” UNF (depends on the site you reference). So I bought a bunch of dies in both sizes and with various TPIs. My guess is that this is a 7/8”, but we’ll find out tomorrow when some of the parts come in. I also bought a thread chaser, which I’m hoping will make this easy. If all else fails, I’m pulling the gear and taking it to a machine shop to have it done correctly. What a headache.

EDIT: almost positive it’s an 7/8”-14.

But that isn’t all that drove me up a wall yesterday. For whatever reason, the OEM return hose (gear to reservoir) is a real pain to fit on the 12mm reservoir inlet. I can get the hose over the hump, but cannot fit it all the way up even with plenty of ATF for lube. I don’t have this problem on the 16mm outlet line.

AC277476-9418-42AF-8A09-F0118D1C0355.jpeg

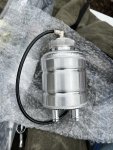
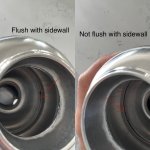
So I splurged on a Allisport reservoir I found on Ebay, but it came in a Bearmach box. Had no idea Bearmach was whitelabeling these. Really unnecessary for the vehicle, but why the hell not? It’s a quality bit of kit, but the internal baffle is not flush with the sidewalls, which is a bit irritating given the price. No effect on operation, of course.

4DC7A1EA-1F83-446E-A4F8-C1EF97EEDF2C.jpeg

Anyway, as for the 12mm inlet on this thing, I’m going to pull the line and try again with a separate hose. I also tried fitting the Magnefine filter, but there really isn’t a lot of room in the engine bay for it so the hose ends up getting pretty kinked when its all hooked up. I may just bail on the filter, but will give it another go this afternoon.
 
Last edited:

Outono

Well-known member
Well, I never said I was a good mechanic. Got back in there today and, at first, things were looking pretty good.

D538AA93-16CD-4FA6-B2B2-0803B04BD38A.jpeg

We finally got everything hooked up, including the filter. Turns out, the OEM hose is fortified and extremely stiff, while my extra 12mm hose is much more pliable. I swapped in some of the extra hosing and everything came together with the reservoir / filter very nicely. I abandoned the Allisport reservoir as I didn’t like the way it mounted in the vehicle. Luckily, I had a spare OEM reservoir laying around.

It was around this point that my luck ran out.

When we began torquing the gear-to-reservoir hose, we used long extensions connected to the torque wrench (set at 20nm, per the FSM). What we didn’t consider was the change in leverage when using multiple extensions. So after way too much time trying to tighten the nut up, we knew something was amiss. We backed it out and saw this…

A08254DF-F795-497B-9CA8-F2292B032088.jpeg

Disaster.

We must have over-torqued the thing without noticing. Now I have 2 threads on this newly rebuilt gear that need to be re-threaded, with this one being the most challenging seeing as how I have a very high chance of getting metal into the damn box during a tap (if not already).

So the plan from here on out is:
  • Re-trace the sector shaft threads. I’ve finally confirmed it takes a 7/8” UNF. This should be pretty easy.
  • Re-tap the gear-to-reservoir threads with a 5/8”-14. I got this number from the plug that was in the gear when it was shipped back to me so I’m 99% sure this is the correct threading. I’ll need some rubber to plug the hole into the gear + a magnet to clean up any metal that comes off during the tap.
  • Get a smaller torque wrench so I can get closer to the nuts and avoid extensions.
  • Replace both pressure hoses since I botched the high pressure one in another stupid accident. This is an easy fix though.
Seemingly simple tasks can spiral into full blown messes so quickly. I’m not a total noob when it comes to wrenching, but boy do I feel pretty dumb today. I sure hope the next round of work goes better than this…
 
Last edited:

Outono

Well-known member
Quick update: after spending entirely too much time trying to repair my existing rebuilt steering gear, I decided to put it aside and pick up another one. Tapping the stripped port has been more challenging than anticipated and, for whatever reason, the sector shaft still will not accept the pitman arm bolt despite tracing the threads with a quality tool. I really don’t know what im missing here, but im over it - will fix it later and use it as a back up.

I ordered a rebuilt unit from BuyAutoParts and picked up a cheap junker from car-part to use as a core (not using my current one!). I expect it to come in next week.

Next weekend will be a long one. I need to throw the new steering gear, suspension and brakes on, along with a new master cylinder. Oh and some new tires, which im going back and forth on…

The engine has what sounds like lifter tick, along with constant light grey smoke out the tailpipe. I’m not losing coolant so im wondering if its worn rings or something else? A project for another day…
 

2.ooohhh

Active member
The factory plastic PS reservoir can have an internal screen filter no magnet needed as any particles large enough to damage the pump will be caught by the screen while still allowing the high flow needed for the system when steering.

attachment.php


On the white smoke check all your crankcase vent/PCV and associated hoses. When functioning properly it keeps the crankcase under vacuum which in some cases helps significantly with the oil burning.

On the PS hoses keep in mind that the O-ring does the sealing the bolt just holds it in place, if you must torque to spec I've found a crows foot on a torque wrench can typically get into similar tight spots.
 
Last edited:

Outono

Well-known member
The factory plastic PS reservoir can have an internal screen filter no magnet needed as any particles large enough to damage the pump will be caught by the screen while still allowing the high flow needed for the system when steering.

attachment.php


On the white smoke check all your crankcase vent/PCV and associated hoses. When functioning properly it keeps the crankcase under vacuum which in some cases helps significantly with the oil burning.

On the PS hoses keep in mind that the O-ring does the sealing the bolt just holds it in place, if you must torque to spec I've found a crows foot on a torque wrench can typically get into similar tight spots.

Thanks for the input!

Are the filters removable? Mine doesn’t appear to have one unless it sits below what appears to be a disk at the bottom (hard to imagine since it’s so shallow looking). When I pulled my original gear, there were plenty of small metal particles in the fluid :(

Will check out the PCV / crankcase hoses!

I did use a crows foot on those hose bolts. My guess is that I just moved too quickly and didn’t seat the screw properly. Stupid mistake.
 

Outono

Well-known member
Only minor progress this week as I am still waiting on a replacement steering gear. Without steering, I can’t move the vehicle around for better access to the right side. Seems there is always some sort of hang up...

So what was accomplished?
  • New rear left caliper installed and brakes bled. I need new rotors, pads, and calipers around the vehicle, but there is just too little space to do it right now. Pulling those caliper bolts was a challenge, but brake clean + a long breaker bar did the trick.
  • Cleaned the master cylinder, which is disgusting and about ready to fail. I’ve got a replacement, but im saving that installation for the day I can do all the brakes in one go.
  • Removed track rod and ball joints. I’ve got a nice stainless Gwyn Lewis rod and greasable ball joints ready.
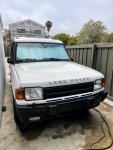
  • Cleaned the truck - first time since I‘ve had it.
83B826F1-76E0-486A-B9E6-7E33A42277E2.jpeg

For a $1200 auction vehicle with seemingly endless amount of future mechanical repairs, she looks great and the body is nearly perfect.

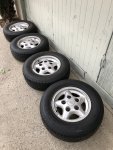
I picked up a set of ANR5307 wheels (AKA “Tornado“ or “Freestyle“), which have always been a favorite of mine. Reminds me of the Discoverys I used to see growing up. I didn’t realize that there is another OEM model of the same wheel design, but with slightly more triangular spacing between the spokes - ANR1689. Admittedly, I do like the 1689 ever so slightly more, but its really the last thing I need to worry about.

026903EC-84C1-4B8B-8682-A6040D90944B.jpeg

Hope to get some 235/85/r16 tires on the new wheels in a couple weeks. Probably Toyo MTs or BFG KO2s. Really leaning toward the former, but I know the latter is more practical for its planned use…

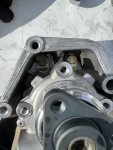
Oh, we also found this bulging hose and rusting hard line in the engine today. I’m not really sure what’s going on here so before I just start pulling things apart, I’d love some input.

Left side shows the problem at the bottom of the photo. Right side is up close near where the line enters the block. Maybe this is what’s causing all the exhaust smoke?

39CEF3E5-763A-4DA7-8DC6-589059A83AE4.jpeg0CDAEAA8-826B-4711-BA07-F13DC5813FDD.jpeg
 
Last edited:

2.ooohhh

Active member
Thanks for the input!

Are the filters removable? Mine doesn’t appear to have one unless it sits below what appears to be a disk at the bottom (hard to imagine since it’s so shallow looking). When I pulled my original gear, there were plenty of small metal particles in the fluid :(

Will check out the PCV / crankcase hoses!

I did use a crows foot on those hose bolts. My guess is that I just moved too quickly and didn’t seat the screw properly. Stupid mistake.
So if in the bottom of the PS reservoir you see white plastic that's the screen. If you can see through both hose barbs your unit doesn't have a screen and I recommend grabbing one that does off an older BMW or Jag at the junkyard.(pay close attention to the line sizes.

The hose that's swelling is your heater core line. I replaced them as a set back to the firewall, with the tubes I media blasted them and gave them a simple coat of black paint. It is unlikely they have anything to do with the smoke.
 

Forum statistics

Threads
187,899
Messages
2,899,725
Members
229,072
Latest member
fireofficer001

Members online

Top