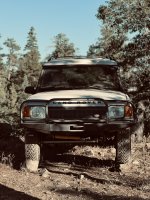
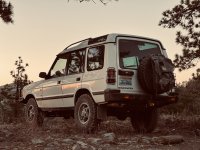
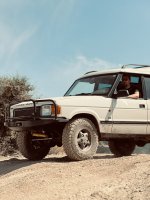
Casper & Outono - 2x 1998 Discovery 1 Builds

michaelcurran

New member
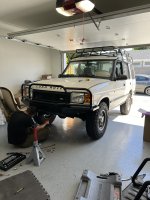
Spent the day finally catching up with some long-needed work on the truck.

Began by readjusting the tie rod ends to straighten the steering wheel. This was surprisingly easy. The hardest part was keeping the bar from moving while tightening the lock nut. While I was there, I relocated the steering damper so that it wouldn't drag along the ground while wheeling.

View attachment 771562View attachment 771563

Since today was a steering day, I also swapped my rotting steering wheel for a much nicer one. The whole disassembly process was a breeze, but I was a bit concerned about accidentally triggering the airbag.

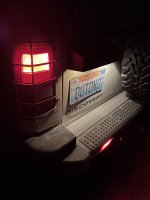
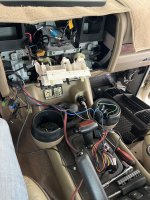
With the steering removed, it was easy to remove the gauge cluster for swapping back to standard bulbs from the terrible LEDs I put in a couple months ago.

View attachment 771564View attachment 771565View attachment 771568

Topped the day off by routing my ScanGauge cable up the driver side kick panel. So much better now that the cable isn't strewn about the front of the vehicle.

View attachment 771569

I've got some major upgrades coming this month, including a re-gear, TrueTracs, diff guards, and an upgraded rear sway bar with quick disconnects. The sway bar was just done a few weeks back, but it's becoming clear that it's simply not up to the job for a lifted Disco. I haven't even wheeled it since I installed the new bushings and it's already falling apart. Simple fix, but im over trying to make the stock bar work so im picking up an X-DeFlex, which looks pretty cool.

View attachment 771574

How did this happen? I just ordered the same exact rear sway bar items from Gwyn Lewis. I have been wheeling my 98 Disco 1 and haven't damaged the stock setup at all (it doesnt look like); I just had a heavy duty panhard rod, track road, ball joints & steering damper installed on the front & now the rear feels loose by comparison so Im updating the bushings, end links, & trailing arms (Gwyn Lewis)
 

Outono

Well-known member
How did this happen? I just ordered the same exact rear sway bar items from Gwyn Lewis. I have been wheeling my 98 Disco 1 and haven't damaged the stock setup at all (it doesnt look like); I just had a heavy duty panhard rod, track road, ball joints & steering damper installed on the front & now the rear feels loose by comparison so Im updating the bushings, end links, & trailing arms (Gwyn Lewis)

Hey man, been a minute!

To me, it looks like the stock sway bar isn't adequate to support a lifted Disco. This happened with it only being driven to work and, as you've seen, all of the parts were new and the torque values precisely set to what is in the RAVE manual. This is now the second time its happened to me. I don't have a photo of it, but the larger bushing that mates up with the chassis has the sway bar pushed deeply into it, which allowed the ball joint at the axle to rotate more than it should have, squishing out the smaller bushings.

The X-Deflex sway bar arrived yesterday and man its a nice bit of kit. Super heavy duty. Shipping was a total joke so unless you're still in a "cost doesn't matter" mindset like me, it's the right way to go. What's better is that it allows you to quickly disconnect the bar when you're wheeling.

This thread talks about the links binding up and the solution being to get longer ones.

If you've still got my number, shoot me a text and ill get some more photos of the damage for ya.
 
Last edited:

michaelcurran

New member
Hey man, been a minute!

To me, it looks like the stock sway bar isn't adequate to support a lifted Disco. This happened with it only being driven to work and, as you've seen, all of the parts were new and the torque values precisely set to what is in the RAVE manual. This is now the second time its happened to me. I don't have a photo of it, but the larger bushing that mates up with the chassis has the sway bar pushed deeply into it, which allowed the ball joint at the axle to rotate more than it should have, squishing out the smaller bushings.

The X-Deflex sway bar arrived yesterday and man its a nice bit of kit. Super heavy duty. Shipping was a total joke so unless you're still in a "cost doesn't matter" mindset like me, it's the right way to go. What's better is that it allows you to quickly disconnect the bar when you're wheeling.

If you've still got my number, shoot me a text and ill get some more photos of the damage for ya.

That X-Delfex looks awesome, I love the hand made drawing for spacer measurement; Gwyn Lewis literally shipped my parts today so i'll get them installed and see how that holds up; I'll keep that X-Delfex idea in my back pocket, i'll shoot you a text about that sway bar, i was planning to text you once I got the trailing arms for install advice
 

Outono

Well-known member
That X-Delfex looks awesome, I love the hand made drawing for spacer measurement; Gwyn Lewis literally shipped my parts today so i'll get them installed and see how that holds up; I'll keep that X-Delfex idea in my back pocket, i'll shoot you a text about that sway bar, i was planning to text you once I got the trailing arms for install advice
I did a bit more research and it looks like the solution is to add spacers to the chassis mount so the bar drops. If you keep it at the stock mount you put the bar under too much stress with a lifted truck. This will cause the bar to bind and will bust the ball joints, like you see in my photo.

So basically you'd want this, except it'd need to be 2-hole for the Disco.
 

Outono

Well-known member
Been a while. Between work and getting married / going on a honeymoon, i've had no time to work on the truck. But the summer is here and that means I need to get moving to get this truck ready for some camping trips.

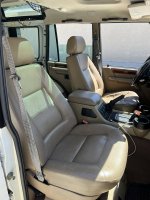
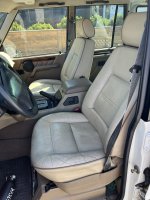
Today I spent some time at the local LKQ and snagged some really nice seats, as well as a center console lid. These things are about as mint as you can get from a junkyard vehicle and far better than their equivalents in my truck.

Before
IMG_4188.JPEG

After
IMG_4192.JPEG

They need a good cleaning, but no rips, no tears, and the motors work great. I also like the styling.

I pulled the rear seats as well, but they were totally molded over so I didn't feel it was worth the $$$.

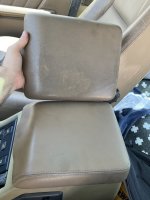
Center Console Lid
IMG_4184.JPEG

New one on the bottom. I didn't know the LSE models had a proper leather topper, whereas the other models came with colored plastic.

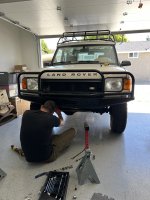
I also threw the new Safari Gard bumper on the truck this weekend.

IMG_4163.JPEG
IMG_4165.JPEG
IMG_4166.JPEG

I've always been a huge fan of Safari Gard. Growing up fairly close to Murrieta, I remember seeing the coolest Discos outfitted with their gear fairly often. And when I finally got my Disco, I knew I had to track down some of the old armor to throw on the truck. Of course, SG had gone out of business long ago so it was really exciting to see that someone had brought it back to life and was even selling some of the old designs for the D1 and D2.

A couple months back, SG posted on Insta that they had a customer return 2 brand new bumpers, which were now for sale. I didn't waste any time and snagged myself one. I don't think the new model is built to the same level of quality as the old models were, but I still love it.

Next up to install, some GBR diffs with TrueTracs front and rear...
 

Outono

Well-known member
It was a hell of a weekend throwing the new GBR 3.9 differentials with TrueTracs on. It's not that it's a difficult job, but it's time consuming, messy, and without a second person you'd need something to help you with the heavy equipment...or maybe you just have to be in shape.

I went with GBR (Great Basin Rovers) because Bill is well known for his quality gears (made in Europe) and the guy is a wealth of knowledge. He's definitely more expensive than an Ashcroft setup from Lucky8, but i've gone this far down the road with the truck so no point in skimping now. Bill convinced me to go with TrueTracs over Ashcroft ATBs largely because of build quality. How true this is, I don't know, but the biasing is a bit stronger on the TTs and its made in the USA, which counts in my book (ATBs are made in E. Asia, which doesn't denote lesser quality, but I prefer local).

For the regear, both Ashcroft and Bill recommended 4.11 for the truck, despite the 235/85r16 tires. This would make it run at a pretty high RPM on the freeway, but would be nicer on the trails. Since the truck is mostly driven on the street right now, 4.11 was going to get annoying. Most threads on this topic suggest 4.11 for larger tire sizes so I was a bit hesitant to go this route... Luckily, Bill had a pair of lightly use 3.9s on the shelf that were ready to go. This ratio brings my truck right up to stock gearing, which should be a good compromise between highway driving and a little extra oomph offroad.

We started with the front axle since that was the most difficult. Prep was easy and honestly, it takes maybe 30 minutes to pull the tires, the calipers, swivel pins, track rod, and loosen the hub-to-axle nuts. The more time consuming bits involve detaching the prop shaft, pulling the pumpkin nuts, and gently taking the axle stubs out (which are heavy!). As someone on Discoweb mentioned, clean the underside of your truck really well before you do this - it'll save you time and a big mess.
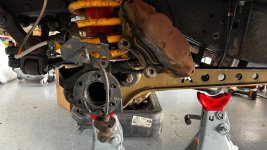
photo_2023-07-03_08-59-41.jpg

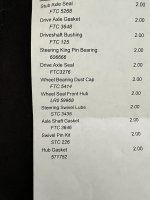
So everything was going fairly well until we pulled the passenger axle stub and oil poured out of the seal. Not good... The whole front end was redone less than a year ago so this shouldn't have happened - what went wrong? Well, we peeped into the swivel pin housing and noticed the passenger hub had no grease in it. Oh, and the ABS thrust washers and bearing had exploded, leaving metal throughout the inside of the hub. We ran over to the driver side hub thinking it was probably OK since it wasn't leaking...nope! The ABS washers and bearing had also exploded in that hub, leaving metal throughout. At least the driver side still had grease in it.

photo_2023-07-03_20-34-47.jpg

My guess is that these items are a pretty neglected bit on the truck and seeing as how my vehicle now has about 260,000 on the body, I bet they've never been touched. It would also explain why the ABS sucked so much front the get go.

While we were in there, we threw on a new starter because why the hell not? It's a Classic British starter, which is just a modified Denso model made for Japanese vehicles. It's high torque and it sounds awesome compared to the stock Bosch unit. Easy to install, better with heat than OEM, and it just rips when you crank the truck. The install wasn't bad either, but those two hex bolts are a real pain to reach. I dont know how someone would do it without detaching all the crap that we did to do the diff.


After the starter, we spent a good couple hours cleaning and going back and forth on how to get the diff into the pumpkin. This thing is HEAVY. We opted to gasket the pumpkin instead of the unit since there was no way we could lift it up without gripping the outside. We eventually figured it out, but it required two of us and lots of swearing.
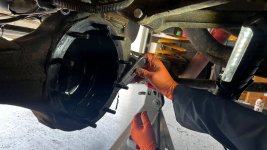
photo_2023-07-03_08-59-23.jpg
We buttoned everything up and threw the busted hubs back on. Im sending the truck off to WCR to get them rebuilt as I just don't have the time right now to take that project on and I definitely can't hog the garage for weeks at a time.

The rear was far easier than the front since you don't have to pull the whole hub out. The oil in the rear was clean as a whistle and the whole thing went without a hitch. We also ripped off my busted rear sway bar while we were in there - new one to be installed in a couple weeks!
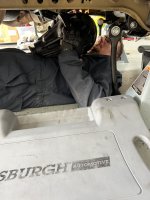
IMG_4211.jpeg

I test drove the truck briefly and it already feels noticeably more peppy. We did notice an exhaust leak due to some bad rust (literally a hole in the system) so I picked up an NRP cat back exhaust from Rovers North. That, along with the sway bar and some Second Skin is coming up later in July.

All in all, definitely a job anyone can do, especially if you have a buddy to help you lift the third member onto the axle. If you're willing to rebuild your own hubs, this project is the perfect time to do it since everything is out.
 
Last edited:

Outono

Well-known member
Finally took the truck on a proper trip and it performed just as well as I had hoped. The new diffs helped out a lot going up steep hills and the TrueTracs were absolutely awesome on the loose gravel slopes. Not a single issue popped up, which surprised me, but given the amount of work that Martin and I have done on this truck, I suppose we should expect nothing less than perfection!

IMG_4289.JPEG

And since WCR took care of the front hubs right before we left, I knew I wouldn't have to worry about my front end falling apart.

IMG_4320.jpeg

3.9 vs 4.11 gears
I went back and forth on which ratio to put into my truck. There's really only Ashcroft and GBR in the game, though KAM has a few ratios too. Most people will look at the 3.75 (KAM 3.8) or the 4.11 for 33" and below, but when I found out GBR could do a 3.9, it got me thinking that it would probably be the best middle ground.

IMG_4252.JPEG

With 235/85R16 tires (31.7"), a 3.9 ratio will take the truck to nearly stock gearing. For most people, this would be ideal, but perhaps a little less ideal if you heavily wheel your truck or carry heavy loads. Since my vehicle drives on pavement most of the time, I opted to go for the 3.9 since it would give me the best road experience, while making a noticeable difference on inclines and off-road. The 4.11 would have given the D1 a similar experience to a stock D90, but it'd be close to 2,700 RPMs at 70, which (to me) is a bit annoying and not great for gas mileage (compare that to 2,550 RPMs for the 3.9). If I ever thought i'd get bigger tires or if I was planning on putting in a drawer system, a rooftop tent, or carrying multiple passengers regularly, then 4.11 would have been my choice. But honestly, the difference would be small and gears really aren't a replacement for a lack of power from the engine so if money really was no option, spend it on upgrading or swapping the motor.

As for climbing slopes, the 3.9s made a real difference. The truck still hunts for gears, but I could hold 40mph on the way up to Big Bear without my temps topping 198 F. On the original gears, I would have to floor it to maintain any decent speed and even then, it would be a losing battle.

IMG_4309.JPEG

The TrueTracs are a nice bit of kit. You really don't notice them until you need them, though the truck does like to pull back to center when turning more than it did previously. I've been told this is an effect of having a TT on the front. On the trip, even when they were working, I heard no noise and the whole experience felt seamless. Really happy with them.

Still much to do. The T-Case is whining quite a bit so im prepping for a rebuilt Ashcroft with ATB inside. I'm also going to chase down a bad fuel smell when the tank is full. My guess is that's it's just a broken vent line, but it's never as simple as it seems...

IMG_4310.JPEG
 

Outono

Well-known member
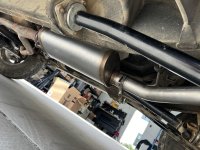
We did the exhaust today! Check out the compilation of sounds below: stock exhaust, no exhaust, NRP exhaust.


This was a really easy install, but you do need a sawsall if you want to get the stock exhaust out quickly. The only issue we had was sealing the Y pipe flange to the new muffler / silencer. My Y pipe flange is severely rusted and bent on one end, which prevents a proper seal so we used Peramatex silicone sealant to see if we could get it to close up. No luck, but its a lot better than without. Im hoping the carbon build up over time will seal the remaining leak.

I did find an AllMakes4x4 gasket for this area so let's see how it fits... (CRC4579L)

IMG_4367.jpg

While I prefer the "no exhaust" sound, this NRP is a close second. Really beautiful kit and fantastic sound to boot. Now to get headers or not...

IMG_4366.jpg

I also got some time to flex the TrueTracs at a local spot. While they do work great, i've found they're at their best when you're in 4xLo and have the Center Diff locked. Maybe it's just me, but mine are particularly noisy both on and off road all of a sudden. Im using mineral oil (no synthetic for these) so perhaps they need a little break in? Truth be told, this is the least of my worries since my T-Case made some really odious sounds on the trail. Lot's of bonking, clanking, and at one point, a loud PLINK as I went over a larger mound of dirt.

You know what that means; time for a new T-Case! So today I bought a rebuilt Ashcroft LT230 with ATB - that should do the trick.

IMG_4356.jpeg

Martin giving the Rover a good run.
 
Last edited:

Outono

Well-known member
So why not a rear locker? Seems the popular build for these trucks is air locker in the rear, LSD in the front.

I've already got another vehicle with factory lockers front and rear, and while they're awesome, I really only ever use them once a year, if that. For this build, I was looking to create a vehicle that had the best performance characteristics without the driver having to manually intervene for obstacles. My Rover was only ever going to be a light to medium off-roader, while my Cruiser was meant to tackle much more challenging routes.

The great thing about an LSD is that you never have to think about turning it off or on - it just works.

From a performance perspective, the lockers have some clear drawbacks:
  • The axles need to be upgraded, which means extra $$$
  • You'll need a compressor for an air locker = more $$$
  • Airline hoses can and do fail on the trail
Will lockers do what an LSD can't? Absolutely. Though with competent traction control (Disco 2 and onward), an LSD can get through most obstacles.

And what about drawbacks for LSDs?
  • Can be loud and can make themselves felt when you don't want them operating
  • Can't help you in certain situations where a locker is required
  • When they fail, they usually fail spectacularly (looking at you, TrueTrac)
ATB vs TrueTrac
I went with TrueTrac mostly because Bill @ GBR convinced me they were manufactured with higher quality than Ashcroft's ATB. I have no idea if this is true, but the TTs are made in America, which I think is cool. The only real difference I can see on paper is that there is a higher bias in the rear on the TT than on the ATB. Whether that makes a noticeable difference or not on the trail, I can't tell ya.

For some interesting reading on lockers and LSDs, check out this page.
 
Last edited:

_ExpeditionMan

Adventurer
Did you end up determining the cause of your driver floorboard water leaks? I had a similar issue the following two items were the cause:

-sunroof drain crack
-old/failed seam sealer between wing and A pillar (hidden behind front fender)

May be worth adding to the list!
 

Outono

Well-known member
This truck really does get on my nerves sometimes. Take, for example, the seemingly random, unidentifiable clunk, clunk, clunk I now get whenever I make small turns or go over small bumps in the road. I spent hours over the weekend with a GoPro trying to track it down, but the closest I got was maybe identifying the transfer case as the culprit. At first I thought it was maybe the TrueTrac causing the noise, but it appears to be coming more toward the middle of the vehicle. Good thing my Ashcroft transfer case just arrived today - it's even got an ATB in it!


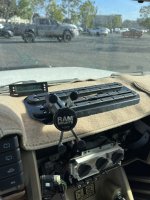
But the noise wasn't the only annoyance. In an effort to install the new FarCorners4x4 RAM mount, I ended up cracking my dash and shattering a small bulb, sending glass throughout the interior of the truck. And did I mention I managed to seize 2 stainless bolts too? Had to Dremel one off and use a bolt cutter on the second. I am done with nylock nuts. Those things only cause problems.

IMG_4473.JPG

But, was it worth it? Well, the RAM mount is killer. FarCorners is not the best outfit. The first time I ordered, they never shipped the product so I had go through my CC company to get a refund. I decided to roll the dice a second time a month later and, well, I got lucky and got the product. It didn't come with installation directions and the bolt / nut count was wrong, but it turned out to be a nice bit of kit. With this, im pulling the Sony head unit in favor of a single DIN Kenwood. The plan is to also pick up a Garmin Tread unit, which will mount to the new dash accessory. The Garmin can be moved between my Rover and Cruiser so im killing two birds with one stone.

IMG_4517.JPEG

What's next? New transfer case goes in this week and then onto fixing the dash and installing the new head unit + amp. Will need to figure out how to mount 6.5" speakers in the rear, but I think I can probably just bolt them down to the paneling after I drill out the bracket rivets for the stock speakers. I also need to get cracking on that fancy rear sway bar.
 
Last edited:

Outono

Well-known member
Did you end up determining the cause of your driver floorboard water leaks? I had a similar issue the following two items were the cause:

-sunroof drain crack
-old/failed seam sealer between wing and A pillar (hidden behind front fender)

May be worth adding to the list!
I did find the leak! It was a combination of the door (water was getting into the middle of it via the misaligned glass) and the rubber gaskets up against the A pillar kick panel. Previous owner put what looks like instant gasket around them, but that didn't work so well.
 

Outono

Well-known member
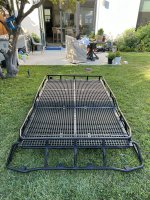
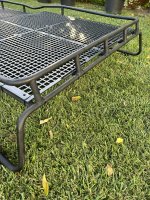
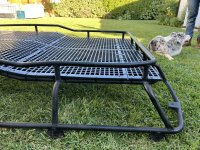
Truck is still in the shop for the new transfer case so I thought i'd work on something that has been sitting around for a while: the chicken coup flooring for my SD rack!

IMG_4563.JPEG

All in all, this project isn't hard, just a little time consuming if you want it to look clean.

  1. Purchase 4x NON-OVERLAPPING Farmtek Polymax Poultry / Kennel Flooring mats (24" x 48") - $177 shipped
  2. Buy a 100 pack of 60 pound tensile zip ties. You're going to want 2 packs just in case. Is this strong enough? I think so, but others have used 250lb tensile strength. It doesn't take much to keep these things connected to your rack so its really personal choice on how heavy duty you want to go. When mine begin to fail over time, I will probably swap for something stronger. - $6/ea
  3. 1" hole saw - ~$8
  4. Have a Sawsall and/or Dremel handy

Start from the back. Line up 3 of the 4 panels horizontally on top of your SD rack (so the tops of the vertical ends are facing the sides of your rack). Here you can choose to cut holes in the rear most panel so that the ends over lap the end of your rack. For me, I opted not to since it was A) more work, B) looks rougher, and C) I like to have that extra little space to run wiring.

IMG_4567.JPEG

Zip tie everything down, everywhere. We went through maybe 120 - 140 zip ties. This thing is going nowhere. For the curved part of the rack, just have a buddy stand on top of it while you cinch down the ties.

IMG_4565.JPEG

The hardest part is cutting the 4th piece to fit the front. We measured about 7 inches in and cut the panel in half. From there we bored out holes for the sides and front so that it sits nice and flush. The Sawsall will make short work of the big cut, the Dremel and hole saw will make quick work of the smaller adjustments.

IMG_4541.JPEG
We do not endorse using a Dremel this way.

I've got to say, it looks awesome and its incredibly sturdy as well. I weigh around 160 and it barely flexes when I walk over areas unsupported by the metal beams. You'll probably have to replace the ties over time, but its really not a big deal to do even when the rack is mounted to the truck.

IMG_4566.JPEG

I took inspiration for this project from here. I would not recommend butchering your panels as much as this guy did, especially since they're so damn expensive!
 
Last edited:

YetiX

Active member
So I bought a roof rack for my Disco that has two of those panels on the rear half. What it the purpose of the mats? I don't have any on the rack on my truck and haven't felt the need to have them. Maybe I just don't know what I'm missing?
 

Forum statistics

Threads
188,020
Messages
2,901,226
Members
229,411
Latest member
IvaBru
Top