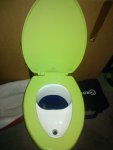
Composting Toilet Tips and Tricks

DiploStrat

Expedition Leader
Things we like about the C-Head:

-- The stirring handle is much easier to use than the crank on the Nature's Head. And the round paddle in a round bucket means no dead corners, an issue with the Nature's Head.

-- No tools/thumb screws needed to dump. The Nature's Head was too wide for the door on either of our baths; so it had to be wrapped in a bag and turned sideways. The C-Head bucket simply lifts out. The ease of dumping more than makes up for the slightly smaller capacity. We dump once a week or whenever things get damp. And a bucket is easier to dump than a square box.

-- Once you get used to the position, the C-Head almost never needs a clean up; a perfect crap shoot every time.

-- The urine bucket (called a P-Tank) is smaller, but does not reveal its contents, handy when you have to do the walk of shame in a public place. We will eventually develop a yellow tank system, but for the moment, we simply dump every other day, at least. (Missed it one time and the clean up was a bit of a pain!)

We bought the full toilet, as we needed the base. See photos here. Not really a how-to, but you will get the picture. The hardest part was the nose to keep the toilet level in a shower designed for a cassette and adjustments to the teak shower base: https://diplostrat.org/2019/06/16/why-we-love-the-loneliest-road-or-back-on-route-50-again/
 

RJ Howell

Active member
Artisan, I may just be running down your path and building my own. I've been able to re-figure my axle's position, yet still in the wet-bath. My containment cabinet may just have to be custom for it to work well. We'll be a talking 'crap' for some time to come!
 

The Artisan

Adventurer
Artisan, I may just be running down your path and building my own. I've been able to re-figure my axle's position, yet still in the wet-bath. My containment cabinet may just have to be custom for it to work well. We'll be a talking 'crap' for some time to come!
will show more as I start to build. Building a thermoformer in the coming months to do auto door panels and will make a redesigned mold for a separating seat out of full abs plastic
Kevin
 

RJ Howell

Active member
Time has arrived that I must do something about a pee toilet/emergency poo toilet. In experimenting with this foam build I'm doing for a sleeper cap (coming out pretty well) I have reached the point of figuring this out. I am limited to usable space, basically 11" wide x 24" in depth. Not good..

I found a grass seed bucket I have around and fits the size parameters for width. using some of my extra foam material, made the basic seat. She will sit on it! Win!!
If I cut-out the opening on an angle, I have a sealable top. Wrap it, seal it, and I have something water-proof. So far so good you'd think..

It's light and easily tipped. Not so good.. I could just place a trash bag in it with media, weight. Yet that leads to weirdness in disposal. Ya, ya ,ya, drop it in a trash can somewhere, it's fine. I get that, yet so is the urine disposed anywhere if urine alone. Container within this container is optimal. Yet to find one that will work. Also allows for some sort of weight to be placed within the primary pail.

Onward I go towards a simple solution..

faT00oOm.jpg


Ny6nbxCm.jpg
 

RJ Howell

Active member
Next step, if so interested. I cut-out the hole (15° bevel) and went a bit further on the pee windward end.

uoYFgMEm.jpg


Foam is weak so something has to happen to stiffen it up. Since I'm PMF'in my camper top, I'd figured to try it here. PMF is difficult to say the least on such curves.. I just went for TB2 (water 25%) and give it a few coats. Rough it up a bit first! Working fairly well. I have some epoxy paint around here, as well as a few other exterior choices to final coat with. So far so good.

8gh8N8nm.jpg


TEHkkBLm.jpg


Seal looks decent and just need to add a knob (or something) to remove the cover. Painted up, should look good!

VgzUEZ8m.jpg


Thought right now is use a trash bag with some cat litter in it. I'll probably do some sort of casting in the pail for weight, thinking 1". That should stabilize the pee toilet. Doing the trash bag (WagBag) is easy enough to keep the bucket clean.

As far as I have proceeded so far.. Pee test coming!
 

DzlToy

Explorer
I have a DIY composter in the basement and will post pics if I can find them. The urine bottle is just a gallon milk jug with a funnel feeding it. If you are properly hydrated, your pee is about 90 percent water and should not smell like Golden Grain. Distilled vinegar can be added after each pee, if desired. It is cheap and plentiful.

For the poop bucket, I like the C-head design for the reasons the OP does not like a square box for poop. Here is a video detailing the parts and functions of the C-Head. An enterprising member could easily build one from the video alone.


As I understand it, drying out the poop and/or covering it up, eliminates the smell. I have spoken to dozens of people at overland shows and boat shows over the years using composting toilets and they all basically have the same positive opinion. Cow patties do not smell and are used as fuel in many third world countries.

Keep the tissue and other "products" out of the waste stream. Poop in the bucket, pee in the jug, everything else in the trash can or recycle bin.

I talked to one man a few years ago who took 2-3 week trips in a camper, came home to re-stock, clean everything out and stay for a few weeks, then hit the road again. When he emptied the composting toilet after each trip, he dumped it into a large wooden compost bin filled with earthworms, food scraps and yard clippings. Some say not to do this, but a proper compost pile will hit 150-160*F, which is plenty to kill bacteria. He said it was nice not having to dump the bucket or empty tanks on the road.
 

Ramdough

Adventurer
At risk of being known as "that toilet guy". I thought I might share some of the pointers I've learned using the composting toilet for many years.

My original review on the portal is here but the pictures are missing for some reason. You can see the whole story with pictures on my blog here.

This is the material you want to use. I bought this at home depot. I think it was 12 dollars for 3 cubic feet. This bag will last one person two years or more depending on usage.
View attachment 488502
Some folks have had luck with the coconut fiber but there was no comparison in my opinion. The coconut is difficult to break up, and caused the toilet to smell. I only carry one brick with me as a backup because it's so compact.
View attachment 488503

My biggest complaint with these toilets is how they don't mix all of the material. It's a round agitator path in a square compartment.
View attachment 488504
This reduces the efficiency and takes up valuable composting real estate. I spoke with the owner of Natures Head and he said it needs to be there for the toilet to work properly. When asked why there weren't any fingers or spikes on the agitator he said it was just because of liability. Those of you that use one of these know that when it starts getting full it becomes difficult to get the agitator bar into the material. In other words you can no longer crank the handle. I'm currently trying an experiment. I put these hose clamps on the agitator to see if it breaks up the material better.
View attachment 488505
Always leave the agitator in the vertical position. If it's horizontal and you drive the compost compacts and it's much more difficult to turn. When dumping the toilet, always break up the material in the bottom of the toilet and circulate it with the new compost. If you don't do this moisture can stay in the unused part making it more difficult to mix and rotate. If you need to extend the toilets use before dumping you can mix in the bottom. This can extend the time before dumping up to a week for one person.

When it does start getting full and more difficult to turn I found the set screw on the handle wants to come loose or just doesn't hold. I pulled my allen key out and hit the end with the grinder so now the part on the agitator axle is flat and flush rather than rounded.
View attachment 488506
And now the worst part. That darned pee tank. It's disgusting and not fun to deal with. I experimented with removing the dump tank in my FirstRoamer. It worked out so well that I've expanded that model in the latest camper. Notice in this shot the black hose comes out the bottom replacing the pee tank.
View attachment 488507
That hose goes to an 8 gallon "yellow" tank underneath. Ignore the powered step wiring in process....
View attachment 488508
This tank is drained using an electric ball valve.
View attachment 488509
At the end of that hose is a regular garden hose adapter. You can then choose how to get rid of your yellow tank contents.
View attachment 488510
Hope this helps someone. Composting toilets are amazing. For those of you who are on the fence between the standard black tank system vs this one read up on it. Far as I know most folks who installed composting toilets would never go back.

Nice report..... just a few questions....

Is there a “P trap” (Not Pee trap) between the toilet and the yellow tank? Just curious if one would be necessary to keep smells down.

Looks like you have a tank vent or overflow..... is that what it is for?

I was thinking of building my own toilet with a different design. My thought was to have the sink drain outlet go to the urine funnel to wash the sides a little each time you wash your hands. Any down side to this anyone can see?

Also, I was planning on having one tank that collects from the kitchen sink, shower, urine, and bathroom sink. Any down side to not keeping urine completely separate?


Sent from my iPad using Tapatalk
 

The Artisan

Adventurer
I thought about making one with tiller blades think blender. After talking to my buddy dzl from above I think the c head with sawdust is a great design but I want to modify to turn from below using a 90 deg drill attachment and have a trigger up top to turn it till the smell goes away. I will be experimenting. Another thought is use a dryflush with my diverting toilet but the bags are so expensive. Also I found a funnel that I can stick in the diverter and it acts like a urinal. Not sure if I can coat with rainx it or not.Here is my toilet parts.
KevinWP_004352.jpg
 

Ramdough

Adventurer
I thought about making one with tiller blades think blender. After talking to my buddy dzl from above I think the c head with sawdust is a great design but I want to modify to turn from below using a 90 deg drill attachment and have a trigger up top to turn it till the smell goes away. I will be experimenting. Another thought is use a dryflush with my diverting toilet but the bags are so expensive. Also I found a funnel that I can stick in the diverter and it acts like a urinal. Not sure if I can coat with rainx it or not.Here is my toilet parts.
KevinView attachment 547642

This is a drill design I found and considered copying. It sounds similar to what you describe. Hope this is useful to you.


Sent from my iPhone using Tapatalk
 

Ramdough

Adventurer
Is a churn necessary? Pros, cons?

Seams like it would be nice not to have a dirty blade to have to handle.


Sent from my iPhone using Tapatalk
 

The Artisan

Adventurer
This is a drill design I found and considered copying. It sounds similar to what you describe. Hope this is useful to you.


Sent from my iPhone using Tapatalk
Thanks, similar concept.
Looking at it that is how the loveo dry flush works with some sort of vacuum system. Gives me ideas ?
Kevin
 
Last edited:

DzlToy

Explorer
As I have told Kevin many times, read the Humanure Handbook. It has everything that you need to know about composting toilets. There is nothing to "figure out". All of your questions are answered in there. To answer your question, no, there is no requirement for drills, fans, blades or anything else. A bucket and saw dust, coconut coir or peat moss works very well, according to thousands of off grid users, permies and tiny house builders.
 

The Artisan

Adventurer
As I have told Kevin many times, read the Humanure Handbook. It has everything that you need to know about composting toilets. There is nothing to "figure out". All of your questions are answered in there. To answer your question, no, there is no requirement for drills, fans, blades or anything else. A bucket and saw dust, coconut coir or peat moss works very well, according to thousands of off grid users, permies and tiny house builders.
Yep just not as cool ?
Kevin
 

The Artisan

Adventurer
Is a churn necessary? Pros, cons?

Seams like it would be nice not to have a dirty blade to have to handle.


Sent from my iPhone using Tapatalk
I would think it is necessary to bury the feces to the bottom. That is how the C head design works. It is not an agitator it is actually undercutting the bottom foundation and it goes to the bottom. Did you see the video with ping pong balls
Kevin
 

shade

Well-known member
As I have told Kevin many times, read the Humanure Handbook. It has everything that you need to know about composting toilets. There is nothing to "figure out". All of your questions are answered in there. To answer your question, no, there is no requirement for drills, fans, blades or anything else. A bucket and saw dust, coconut coir or peat moss works very well, according to thousands of off grid users, permies and tiny house builders.
That has worked well at the backcountry privies I've used.
 

Forum statistics

Threads
188,249
Messages
2,904,493
Members
229,805
Latest member
Chonker LMTV

Members online

Top