Philosophy of Use - Or - What are ditch lights and why should I bother?
The idea of "ditch lights" is to provide yourself with some peripheral lighting to cover ditches and roadsides, as well as wider trail lighting and more area lighting. Personally, I live in an area with a very high deer population so being able to get more peripheral lighting to look for their glowing eyes on back-roads is instrumental in avoiding deer-related collisions. Secondary to this, I have the very bad habit of ending up getting into campgrounds and state forests late at night (in the midwest, it's several hours of driving to any park worth seeing, so late night arrivals are the norm). Some extra area lighting for reading signs, looking for hard-to-see roads, and area lighting for setting up camp would be outstanding.
If you're an owner of a Jeep Wrangler, you buy some reasonably-priced windshield light brackets and you're in business. Just about everyone else is on their own and in need of a custom solution. I figured I'd share my solution with you in case this is something you could use.
The Hardware and the Install
I noticed there is a small opening in the plastic upper grill under the windshield by the hinge of the hood of my 2011 F-150 V-8 XLT 4x4 Crew Cab. It seemed reasonable to me that I could make a bracket that shared the bolts of the hinge and popped up through these holes. Disclaimer: I am not a master welder, I'm new to it, and I know just enough to be dangerous. This is only my second or third project, so I have a lot to learn yet. That said, I'm generally happy with how they came out. I used 1/8" thick, 1" wide bar stock for everything. After hours of welding, grinding, and test fitting, I generated these: (see thumbnails).
I primed them with self-etching primer, painted them flat black and installed them. For lights, I purchased a pair of Auxbeam 18W Flood Pattern Lights from Amazon. I'd had these in the past and for $20, they're hard to beat. Yes, they're Made in China, but you know what, they're good enough for me. I know a lot of people love their Rigid industries, but that's a lot of money for someone like me. I'm not traveling through the Sahara, I'm not sponsored, and honestly, my real world experience with them has been excellent. The last pair I purchased served as backup lights, and I beat the living tar out of them, and they still work great! I'm a big fan.
Note: I had to buy different mounting hardware...I needed shorter stainless-steel bolts because of the low clearance of the lights over plastic windshield grill. A quick trip to a local hardware store solved this small problem.
Wiring
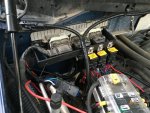
I made a custom wiring harness for it...turns out you can buy wire loom super cheap on amazon. I used 1/4" loom and 14awg wire. The connections were sealed with proper Delphi Weatherpack Connectors. I want to be able have all the connections watertight and still be able to easily remove them if I ever want to repair or replace the lights. I purchased the connectors from http://www.performanceplusconnection.com/ They're super affordable and their shipping is super cheap. The connectors shipped with instructions with how to install them with the proper tool and also with a standard wire crimper. Their directions are excellent, adn they ship quick. I used Hella Waterproof Relays with the Waterproof Pigtail attached to a custom relay bracket. I've got another post about that fuseblock if you're interested.
Switches
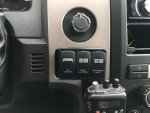
Of course, you need a switch to turn your lights on and off. Turns out, if you swing over to OTRATTW.com and purchase their switches and a three switch panel, it'll fit perfectly in the cut outs where the factory break controller fit (if you don't have a factory brake controller). No cutting or modifying, just remove the trim and unscrew the little cubby. It's not a perfect fit, but it looks good, doesn't fall out, I didn't have to hack up my dash, and I can remove it if I need to change switches, etc. Frankly, it works for me! I really like the OTRATTW switches...they're a little pricey, but well made and they have all the hardware to do clean custom installs. Plus they do custom text for free!
Conclusion\Final Thoughts
So far, I really like this upgrade. I'll try to get some good night shots on my next adventure, but it definitely gives me good ditch illumination and excellent area illumination. At highway speeds there is no wind noise or noticeable drag. They're not intrusive, don't block my view at all, and the brackets seem plenty strong. You could totally mounts different lights, run forward facing spotlights...there are a lot of possibilities. There's also ways to save money...you don't NEED to run Contura V switches or weatherpack connectors. You could buy a generic wiring harness from amazon and use that and save a lot of time...but I wanted to do something specific for my rig, and frankly it was a lot of fun. I'll post an update after I've been on a few trips and have tested them out. Frankly, I've been sick for a few days, so I decided to write all this up.
Thanks for taking a look!


Last edited:


