DIY Power Box like a home made Goal Zero Yeti

Skinny

Active member
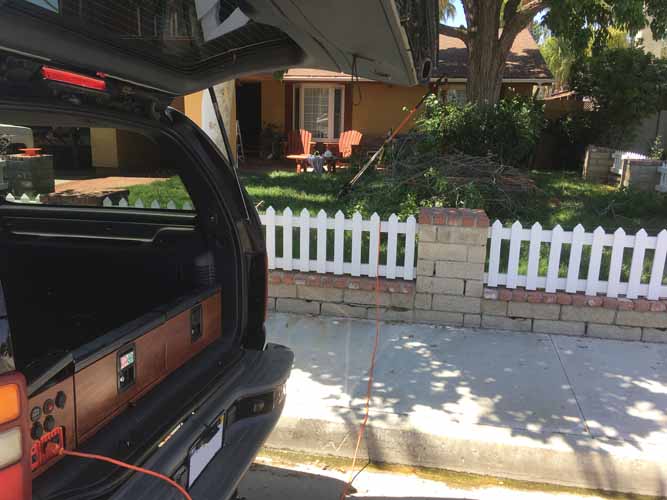
So I've been working on some side projects and one of them is a home made power box like an off the shelf Goal Zero but at a fraction of the price. This isn't a kit that I will be offering, just wanted to build one for work and personal use. I can't justify spending $500 to a grand on something that doesn't have exactly what I want. Plus everything has to have multiple purposes and built modular so my power box has to also run on a car, jump start a car, run off my DC Generator, power another inverter, and run from another battery bank.

This will go in my work truck when I have to charge cordless tools on the job, power items in my home when the grid goes down and I don't want to bust out a generator, and go camping to charge the phone and power the portable fridge. At the end of the day it has to keep my tunes going and the beer cold.

Things I wanted:
-lights
-USB
-aux 12v inputs and outputs
-radio with speakers
-2 DC quick connects

Part 1 in the video is really about getting the components mounted and the overall functionality. Part 2 will focus on the guts: wiring and battery connections


Photobug

Well-known member
My only complaint with your post is, its incomplete, you left us hanging. I wish I could see the completed project right now.

I too would like to see a parts list. Where did you get your waterproof switches? One suggestion would be is to attach the power strip with velcro strips so you could remove it and velcro it to the outside to plug things into. It would be cleaner than having many a.c. cables snaking into the power box. How about mounting an a.c. outlet on the outside of the box?

I look forward to seeing the completed build.
 

Skinny

Active member
Hey guys

I'm sorry for leaving you hanging. It isn't 100% complete yet. I have the wiring to finish up which all my parts are almost on hand to do. I have a camping trip at the end of August planned which will be my deadline for a full functional test. This will be charging with my Affordable DC Generator sporting the Sterling Power voltage regualyor. All of this powering my tunes and keeping the DC fridge going with cold beer and ice cream. Just the essentials for camping :)

I will do a write-up on the parts, prices, etc. when I'm done. Maybe put it in a PDF format and host it on my website.

I did just get an ammeter which will display my voltage, battery state of charge, and time remaining. So all of the data you need to know. It was a cheap $30 piece instead of a high-end one. It uses a shunt and is claimed to be pretty accurate so it should work in this budget. I also am going to mount the AC power strip with some hook and loop instead of 3M 5200.

Stay tuned!

Sent from my Moto G (5) Plus using Tapatalk
 

Photobug

Well-known member
I also am going to mount the AC power strip with some hook and loop instead of 3M 5200.

Stay tuned!

Sent from my Moto G (5) Plus using Tapatalk

Great idea. You might want to 5200 the velcro to the case though. I have some sticky backed velcro that holds well to itself but my 12v power distributor falls off.

Not only am I following, i have already ordered the same tool box to make my own but different. I like the lights and stereo, very nice touch.

Here are some suggestions. I don't have a heavy duty inverter like yours but my cheap 350W one has two fans to keep it cool. I imagine your 1500W inverters will produce some significant heat if used to capacity. Do you plan to put a fan in the case or just open it when needed? I have some of these sitting around and will likely put one in the side of whichever box I put an inverter in. I think it would be nice to be able to plug just one item into the inverter without opening the box. You could also plug the power strip into this outlet so the inverter could be powering multiple items through it with the lid closed.

This looks like a really good power box in the works. Here is what I will likely keep.
Stereo
Lights
Switches

Here is what I will likely change.

Install a 35AH battery might go with Lithium maybe just an AGM.
Probably not put anything in the lid. I would be concerned on what it will do to the hinge unless the lid is supported when opened and I know I am not going to do that regularly.
Put my MPPT controller inside.
Leave space for a fan if needed.
 

rayra

Expedition Leader
I run my built-in box with the lid open, when using the 1000W inverter. Have to open the lid anyway to get to the phat rotary switch on the feed to the inverter. My PWM solar charge controller is mounted inside the lid and it sits closed up, operating, usually.

subinverterelecchainsaw01.jpg


Mostly because its design draws are in the plug end and exhausts INTO the box. But it is well out of warranty now and I've given some thought to the idea of flipping the fans and have it blow OUT. I have a 40mm fan already mounted in the opposing (forward facing) end of the box and have been intending to wire that so it is energized whenever the inverter has power to it. It could likewise be reverse to pull fresh air into the power box while the inverter is running. Right now the fan, it does nothing. Whole thing is still a work in progress. Still want to add some compact 10A SLA batts and diodes to it, so they'll (also) charge when the vehicle is running and from the rooftop solar, but be isolated during discharge to only serve the power ports on the box.
 

Photobug

Well-known member
Hey guys

I will do a write-up on the parts, prices, etc. when I'm done. Maybe put it in a PDF format and host it on my website.

Can you tell me where you got the switch panel? I have yet to find one with both circuit breakers and 12v outlet holes. I am ready to start my build and this switch panel would make the build cleaner than the other ones I am seeing.

Having received this box I see the way the hinge works not flopping over 180 degrees makes it safer to add things to the lid as you are doing. I am looking forward to seeing more of your build.
 

Skinny

Active member
Can you tell me where you got the switch panel? I have yet to find one with both circuit breakers and 12v outlet holes. I am ready to start my build and this switch panel would make the build cleaner than the other ones I am seeing.

Having received this box I see the way the hinge works not flopping over 180 degrees makes it safer to add things to the lid as you are doing. I am looking forward to seeing more of your build.
I found the switch panel on Amazon, pretty universal RV and Marine version. I'll dig up all my part numbers when I write up the build cost and components.

Sent from my Moto G (5) Plus using Tapatalk
 

Skinny

Active member
Just wanted to check in...I have the box assembled and I'm heading out to go camping this weekend. I'll give in a good shake down run. Just a tease for now till I don't full video on the final assembly and operation. Stay tuned..

I'll post them to my YouTube channel. It's under Affordable DC Generators.
4ac5520a89f150850aceadb143fd9130.jpg
05225e74ebb26f9e832de71f0083349d.jpg
a6891e39b3436345f6b843a1c5d1a99b.jpg
3d7daa39497e6085febb2a8ddc063f7f.jpg


Sent from my Moto G (5) Plus using Tapatalk
 

Photobug

Well-known member
I found the switch panel on Amazon, pretty universal RV and Marine version. I'll dig up all my part numbers when I write up the build cost and components.

Sent from my Moto G (5) Plus using Tapatalk

Thanks I found it and ordered it. I saw many other switch panels but that unit had things others did not. push button CBs and 12V outlet and gauges. I was tempted to use a 4 switch model but wanted the 3 places of 12V outlets.

I am skipping the stereo because I don't want to make it more prone to stealing. I am considering installing a lithium battery with all the money I will save. I really like how yours is coming along and will check out your youtube channel to follow the build.
 

EscapeTheHeat

New member
Very curious to hear what the final overall cost and how that stacked up to the Goal Zero cost.

You mentioned sharing a parts list on your webpage; can you share a link to that site?
 

Skinny

Active member
Hey Photobug, let me now what lithium you go with. Just curious the capacity and pricing.

Escape, I'm putting a small writeup together and will have it on my website shortly. Stay tuned, I'll put a link up when its done.

One major thing...if you go with a battery meter use shielded wire going from the shunt to the little screen. It works on such low voltage for the signal that I was getting massive interference. I used 22-2 shielded alarm wire from Home Depot and grounded the shield to the bus bar (only on one end, don't do both ends). Solved the problem and my battery gauge is working awesome considering it was $20.
 

Photobug

Well-known member
Hey Photobug, let me now what lithium you go with. Just curious the capacity and pricing.

I could likely fit a 100 AH battery in the box, but might go less. A 50 amp one or 60.

Just scratching the surface now looking at Battleborn and Bioenno. The Battleborn claims 3-5000 cycles.
The Bioenno says 2000+. The Bioenno has a large selection of battery sizes in terms of AH and shape, each sized battery is paired with an optional charger.
 

Skinny

Active member
A smaller battery would certainly lighten the weight up a bit but its not too bad with a big lead acid. I would think that 3-5000 cycles at 50Ah is pretty useful.
 

Forum statistics

Threads
188,496
Messages
2,905,753
Members
230,501
Latest member
Sophia Lopez
Top