Drawer system build

Caleb Long

Go for the adventure!
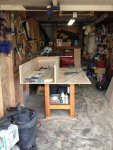
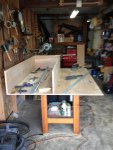
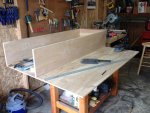
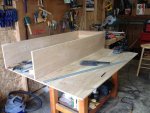
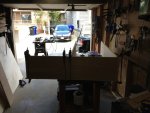
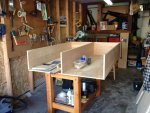
Hello my name is Caleb, new to the portal but wanted to start a thread on my drawer system build. The set up I had in the truck bed worked well but I saw ways to make improvements. I took everything out, tool box (hand made-side mounted), water tank (20gal), spare tire (side mounted @rear of truck bed) etc. and started fresh with a 41 gal auxiliary fuel tank and from that point back will be the drawer system. Today will be a garage day and will post pictures soon.IMG_1718.jpgIMG_1722.jpgIMG_1723.jpg
 

Attachments

  • IMG_1716.jpg
    IMG_1716.jpg
    537.7 KB · Views: 74
  • IMG_1717.jpg
    IMG_1717.jpg
    538.4 KB · Views: 59
  • IMG_1719.jpg
    IMG_1719.jpg
    547.4 KB · Views: 58
  • IMG_1720.jpg
    IMG_1720.jpg
    554.4 KB · Views: 62
  • IMG_1721.jpg
    IMG_1721.jpg
    528 KB · Views: 54
  • IMG_1724.jpg
    IMG_1724.jpg
    562 KB · Views: 67
Last edited:
Looks good so far. I'm planning to build one this spring for my trailer. Keep posting pictures and progress. Looking forward to it.

Robert
 

Caleb Long

Go for the adventure!
Thanks Robert! Just finished the glue up of pieces posted and have a few more mock up pictures I will put up now.
Caleb-
Looks good so far. I'm planning to build one this spring for my trailer. Keep posting pictures and progress. Looking forward to it.

Robert
 

Caleb Long

Go for the adventure!
IMG_1725.jpgView attachment 144028IMG_1731.jpgJust wrapped up for tonight, mocked up the frame in the truck with fridge to check for clearances. Went ahead and glued everything besides the top. Was thinking of using screws for the top instead of the biscuit joinery I have used so far. I will also cut out lightening hole's in the bottom (an idea I just picked up from another post on the portal!..thank you)
 
Last edited:

Caleb Long

Go for the adventure!
I used 23/32 Baltic Birch plywood for the vertical pieces and the bottom piece is 15/32 Baltic Birch plywood as well. The top piece will be the 23/32 thickness and the drawers when I start them tomorrow will be a mix of both thicknesses as well
 
Last edited:

Caleb Long

Go for the adventure!
I finished the glue up of the base of the shell and decided to cover with quality exterior paint. IMG_1733.jpgIMG_1734.jpg Figured it would be best to protect all of the exposed wood with something so I went with a latex primer/paint from Home Depot. Paint will be applied to all the internals and going to coat the outside when fully assembled with Smooth Durabak.
 
It is coming a long nicely. These look very close to what I'm planning on building. Do you have any idea what the weight is or will be when they are done? Are you going to use slinders or just slide them in and out. I have thought about doing both. Without the slinders you make the fit tight so that dust would be less of a proublem, but expansion may come in to play. Well keep up the great work and keep the pictures coming.

Robert
 

Caleb Long

Go for the adventure!
Thank you. The weight....good question. Lets just say not light. I would estimate approx. 80-100 lbs. I am going to use 500 lb drawer slides (zinc plated, ball bearing). Debated wether to use the drawer slides or teflon sliding strips. My gut wanted to use the ball bearing drawer slides because I thought it would be pretty slick so thats the route I went (yes a more expensive way to go as everyone else says but once I had my mind set on it I can't change it.

One thing I have considered was cutting lightening holes in the bottom of the shell but the idea of dust, gunk, and grime buildup will eventually find its way inside. So.....going to put one more coat of paint on while the sun is out and start on the drawer's today, I will post an update w/ pictures tonight. Have a good day.

Caleb-
 

Caleb Long

Go for the adventure!
Today's progress.

- 3rd coat in drawer shell
-Painted under side of top (2 coats)
-Cut pieces for drawer's
-biscuit joined pieces cut

Still have to make the ends of each drawer which I will do first thing tomorrow. IMG_1737.JPGIMG_1740.jpg
 

4RunAmok

Explorer
What a great looking start you have!! I wish I was working with that kind of depth. I made some special purpose boxes for a law enforcement agency that were full bed length

sniper box.jpg

And I would love to have that kind of space in the 4Runner for sure.

As for holes in the bottom for weight reduction, in my thread you can see I removed a LOT of bottom material. If you're worried about it getting messy in there, you can use some material like Reflectix (http://www.reflectixinc.com/basepage.asp?Page=DIY+Attic&pageIndex=530), practically weightless, to seal the spaces you open if you're worried about dirt/debris. I plan on using some to reduce dust from entering my drawers, as well as keeping noise down.

Anyway, looking great so far!!
 

soonenough

Explorer
Another option would be plexiglass / Lexan...lightweight, strong, shouldn't shatter or crack with rough use, and really easy to cut with a jig saw. You could cut portions of the floor away and replace them with Lexan and seam sealer to reduce weight and still maintain a sealed environment (at least as much as the wood would've been sealed).
 

Caleb Long

Go for the adventure!
Mitch-


Thanks for the compliments!... and I mean wow! what a fantastic looking set of drawers, super clean lines! Thank you for the advice on the lightening holes. Still debating on if I will go forward with this idea.
 
Last edited:

Caleb Long

Go for the adventure!
Ryan

thanks for the idea on using plexiglass/lexan
Another option would be plexiglass / Lexan...lightweight, strong, shouldn't shatter or crack with rough use, and really easy to cut with a jig saw. You could cut portions of the floor away and replace them with Lexan and seam sealer to reduce weight and still maintain a sealed environment (at least as much as the wood would've been sealed).
 

Caleb Long

Go for the adventure!
Okay...So got back in the garage today after taking yesterday off. Today was a day of squaring up the drawers with front and back faces. On one drawer I have the front face to put on but completed one drawer %100 and was able to put wood filler in the screw holes. I biscuit joined as much as I could but countersunk, glued and screwed the faces.
Tomorrow I will complete the second drawer, fill screw holes, sand and paint the inside and out with the same paint I used in the last pictures. I will post a run of pictures at end of the day! Take care-
 

Forum statistics

Threads
190,466
Messages
2,927,854
Members
234,008
Latest member
zhukoveli
Top