Dreadlocks outfitting of InTech Discover

dreadlocks

Well-known member
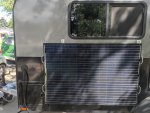
some final touches to the portable solar panel install, put VibraTite VC3 on all the bolts and got some stainless steel wingnuts for the bottom bracket.

Also got 2 spares for everything in the camper spare box incase I lose any out in the field.. this threadlocker is pretty nice, reusable, can pre-treat bolts, and definitely not shaking loose with it.. think I found a new favorite.

IMG_20200720_185948.jpg
IMG_20200720_190102.jpg
 

dreadlocks

Well-known member
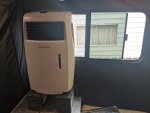
Wife reminded me we had a portable swamp cooler in storage from when our house swamp cooler bit the dust.. popped its wheels off and tossed it in the camper for testing, its running off a single solar panel and doing a pretty good job at making the inside far more tolerable.. Gonna make a shelf I can set it up w/out so much rube goldberg going on.. will probably run an AC outlet over here so I dont have cords running across the inside.

IMG_20200722_145657.jpg
IMG_20200722_145518.jpg
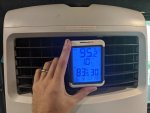
Note that when I started this up, the best the Power Vent could get the inside was 100F.. 83 degree powerful wind in a 100 degree trailer feels pretty amazing.. its not anywhere near as good as my home swamp cooler that can keep me 68F when its >100F outside, but it takes 2ft thick media to pull that off.. it has a try on the top for ice to add to the effect, and I do have an Ice maker.. if both panels are in the sun mebe I can get better than a ~12 degree drop (17 degrees if you add the +5 I started at) feeding this thing ice.. Using the sun to fight the sun..

I think it will perform better with the sides deployed and more routes for air to flow.. but I cant test that where I'm currently parked.

BMV was at 0.00A when I took this screenshot, so it was all solar.
Screenshot_20200722-145742.png
 
Last edited:

dreadlocks

Well-known member
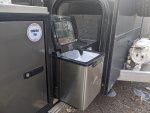
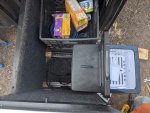
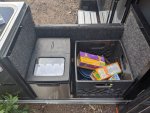
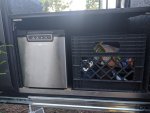
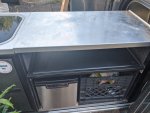
Starting work on kitchen, first up sliding ice maker.. You can see the plastic cover for ice maker is all scratched up from something riding on top of it.. whoops, well now to make a countertop so things can sit on top of it while traveling.. it'll clean up really well, so it looks worse than it is.

IMG_20200723_185710.jpg
there is a cut out into the kitchen cabinet for power passthrough that aligns with that intake vent nicely..

IMG_20200723_185717.jpg

the bolts on the front with a washer were just a hair too tall to keep the whole ice maker from sliding out, but if you lift on the ice maker a little bit, it clears the bolt and slides out nice and smooth.. so that kinda acts as a latch, it wont slide out unless you also lift.. I limited travel so it only slides out as much as needed.


IMG_20200723_185759.jpg

Ive got a 18x24in black plastic cutting board coming that fits over that ledge in the back and overhangs the front and back a little (16in deep, 24in wide), gonna cut up some angle to make front support brackets.. this will make a countertop that the sink will rest on.. any water spillage can go off front or back depending on the tilt without getting anything under it wet.. The Milk crate is our pantry that holds dry goods, since its not solid the fan on the side of the ice maker can blow its exhaust through it with it retracted.

Then in the top right I'll mount a faucet on a piece of square aluminum tube, and I'll hold a portable wash basin in place ontop of the counter top under it with some strong magnets.. with plans for a LP on demand water heater/shower down the road.. cold filtered drinking water will also be available inside if I open the "trap" door on the counter top, nice for getting something to drink in the middle of the night..

There's about 5in of room between the slideout and the front of the trailer, enough room to fit a water pump, water filter, and run a bulkhead fitting through the front for a hose that will go into my water jugs. They simply sit on the ground under the front table/counter and with the onboard filter can be filed from a river/lake if needed.
 
Last edited:

dreadlocks

Well-known member
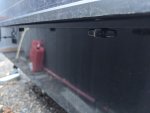
Upgraded Propex HS2800 w/rigid Stainless Steel 1.125" (26mm ID) intake and exhaust, not the easiest size to find.. still gotta button up some loose ends with all stainless clamps and bug screens but I like this much better than that flexible crap I had dangling out before.. trying to decide to leave it raw or paint it.

IMG_20200724_175412.jpg
IMG_20200724_191645.jpg

The gap is needed so small lil bits of gravel/sand kicked up while in tow can pass through.
 
Last edited:

dreadlocks

Well-known member
Its all relative, I browse these forums and think the same thing myself.. We got dudes here building everything from scratch, making their own mini-split air conditioners, battery banks, full blown tiny homes on military trucks.. while I'm sad I dont have the tools or skills needed to weld stainless steel perfectly so I gotta resort to flexible hoses and silicone couplers when I coulda had it all rigid with seamless mandrel bends if not for large gaps in my fabrication capabilities.

There aint no skill I got that you cant learn, almost everything I can do I figured out on my own the hard way or someone on the internet guided me through my learning curve.. Thats why I make threads like this, its not to show off my skills its to inspire others to start building, I know everyone else's threads inspire me.. My trick is to get really stoned and stare at it for a while letting my imagination run wild, takes bloody forever to get anything done but by the time I pick up a wrench I've already built it in my head several times.. any time I get stuck, I get more stoned and stare at it blankly until a solution is found.. really thats the whole secret to my engineering, taking my time and thinking everything out so I only have to do it once, and I'm confident its the best way w/my capabilities.. It took ton of fuckups to get to this point, lots of lessons from the school of hard knocks that I rarely post about unless I'm dropping some wisdom in someone else's thread trying to convince em to learn from my mistakes.

The ice maker on slides has far more hours than I'd like to admit on it, I was gonna use 80/20 and build some cabinets with side supports and all sorts of other plans that were expensive and over-engineered, until I realized that that sliding rails can be installed horizontally instead of vertically, and all the support I needed to make it slide was already there.. probably took me a half ounce of weed and a week to come up with that very simple solution, otherwise cost $10 to make my ice maker sliding and about half an hour of physical work..
 
Last edited:

Buddha.

Finally in expo white.
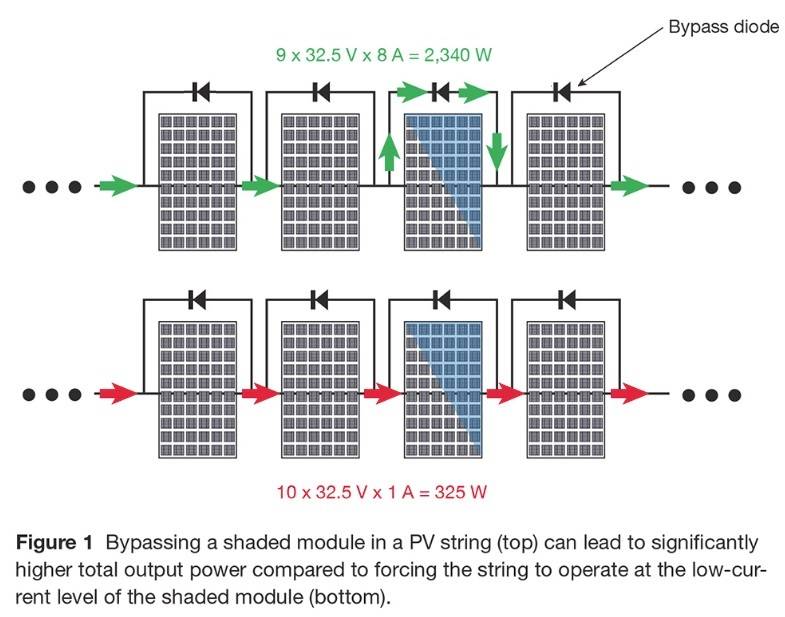
Bypass-Diode-Diagram-Shaded.jpg

Are the bypass diodes pictured the ones that come installed on the back of the panel or are they added in addition to those on the connecting wires?
 

dreadlocks

Well-known member
they are already installed (usually), very small 12v panels might not have any.. my HIT's have 4 of em for each series of cells it uses to make ~65v, they are potted into the little box on the back of em, if they are not potted usually you can pop the cover open and service/count em.. most house panels have 3, smaller 12v panels just the one.. the higher the voltage output the more series they gotta run, more diodes your likely to find.

If you look at the photo below, you see there's 8 rows going horizontally.. 2 of those rows = 1 series of cells in this configuration, If the panel is fully in the sun and outputting full power I can take the shadow of my arm and slowly move it across the panel on that plane and watch its output drop by ~25% as any shade hits those 4 series and causes em to get bypassed... 4 100w 12v panels wired in a series would behave the same way with a single bypass diode in each.

IMG_20200630_154058 (1).jpg
The bus bars on the right (bottom end normally) reveal its wiring.
 
Last edited:

dreadlocks

Well-known member
Since there's a Webasto Article today up top, I figured I'd post up some of the photos of my OEM Webasto Conversion:

The whole shebang that I put together my self, heater imported from the netherlands off a newer vehicle than mine w/less mileage than mine.
IMG_20200514_173259 (1).jpg

My Fuel Tank already had provisioning for parking heater, didnt have to crack it open:
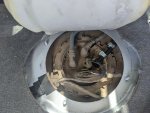
IMG_20200519_120011 (1).jpg

Fuel Dosing Pump goes in the driveshaft tunnel
IMG_20200515_150438 (1).jpg

None of the OEM Wiring Harness was harmed, this photo is tapping into the CAN bus:
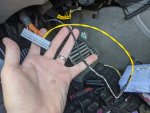
IMG_20200518_160408 (1).jpg
Getting the wiring through the rain tray was the worst part of the job:
IMG_20200516_174849 (1).jpg


Here's the Webasto with pump, and magnetic valve getting ready to go in:
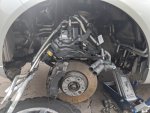
IMG_20200519_183023.jpg

and here it is all installed and fit inside the fender like a glove, its got alot of pipes for the multi-zone climatronic system since it has two heater cores and two ac evaps.
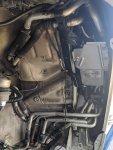
IMG_20200520_154052 (1).jpg

Finally here's the exhaust output under the vehicle:
IMG_20200515_175859 (1).jpg

Once all setup and done, I had new options in my Infotainment screen to turn on the Aux Heater and setup daily timers to have the car warmed up for.. I can also add a remote keyfob for firing it up, I'll get that before this winter..
Screen_7_100608_1905_0034.pngScreen_8_100608_1905_0034.png
Timers are set for what time you want to leave, not what time you want the heater to start.. it monitors the temps outside and fires up the heater however long it figures it needs to before this time so when you get in the cabin is warm, windows are defrosted, and engine is warm.. Its got a magnetic valve on it that isolates the two (front & back) heater cores so it pumps out hot cabin air within ~10mins even on the coldest days.. once the cabin reaches the set point the valve opens and starts flowing coolant through the engine block to warm it up afterwards.

Parking heater comes on automatically below 41F if you do nothing to help the engine reach operating temps quicker, then shuts off once engine is warm.
 
Last edited:

dreadlocks

Well-known member
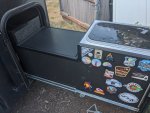
So back to our regularly scheduled program, expanded the counter top in the kitchen today... I'm loving it, so simple yet effective..
IMG_20200729_191545.jpg

Enough room under the counter top for a silverware drawer down the line..
IMG_20200729_191521.jpg

In travel mode with the upper counter installed, plenty of room between em for a collapsible sink, faucet and other crap.
IMG_20200729_191446.jpg

I did a bit more work to the Propex Heater Exhaust, mostly just replacing components with stainless steel variants.. here's a pic of the original galvanized plumbers tape I installed just last year to secure the pipe to the frame, illustrating why I'm trying to keep everything either Aluminum or Stainless.. This is a 20y build so crap like this is not acceptable.

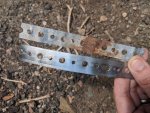
Stainless Steel Plumbers tape is one of my new favorite things, I didnt know they made it but I'm glad they do.. bit of a ********** to cut tho heh.
IMG_20200729_142705.jpg
 

Alloy

Well-known member
So back to our regularly scheduled program, expanded the counter top in the kitchen today... I'm loving it, so simple yet effective..
View attachment 601990

Enough room under the counter top for a silverware drawer down the line..
View attachment 601991

In travel mode with the upper counter installed, plenty of room between em for a collapsible sink, faucet and other crap.
View attachment 601992

I did a bit more work to the Propex Heater Exhaust, mostly just replacing components with stainless steel variants.. here's a pic of the original galvanized plumbers tape I installed just last year to secure the pipe to the frame, illustrating why I'm trying to keep everything either Aluminum or Stainless.. This is a 20y build so crap like this is not acceptable.

Stainless Steel Plumbers tape is one of my new favorite things, I didnt know they made it but I'm glad they do.. bit of a ********** to cut tho heh.
View attachment 601993
Put the stainless in a glass of saltwater and make sure it doesn't rust. Some of the stuff is really low grade.

Copper is another option.
 

Forum statistics

Threads
188,036
Messages
2,901,461
Members
229,411
Latest member
IvaBru
Top